The sensor controls the temperature in your dryer and will turn off once your clothes have reached the desired dryness level. If you notice that your dryer is not giving off enough heat to dry the clothes or is taking too long to dry, this may indicate that a repair to the senor is required. To access this part, you will need to remove the front bulk head. To remove this, you will need to remove the screws securing the top. Uninstall the screws that support the control panel and lift. Remove screws holding the support bracket in place so you can detach this piece. Detach the wire harness and remove the wire, then set the bracket aside. You will now open the dryer door and release it by taking out the bottom two screws. Disconnect the wire harness and moisture sensor wire harness, remove screws from front bulk head, and remove screws that secure the duct housing. You should be able to completely remove the bulk head. You will find the sensor underneath the lint filter grill, which will also need to be removed.
How Buying OEM Parts Can Save You Time and Money
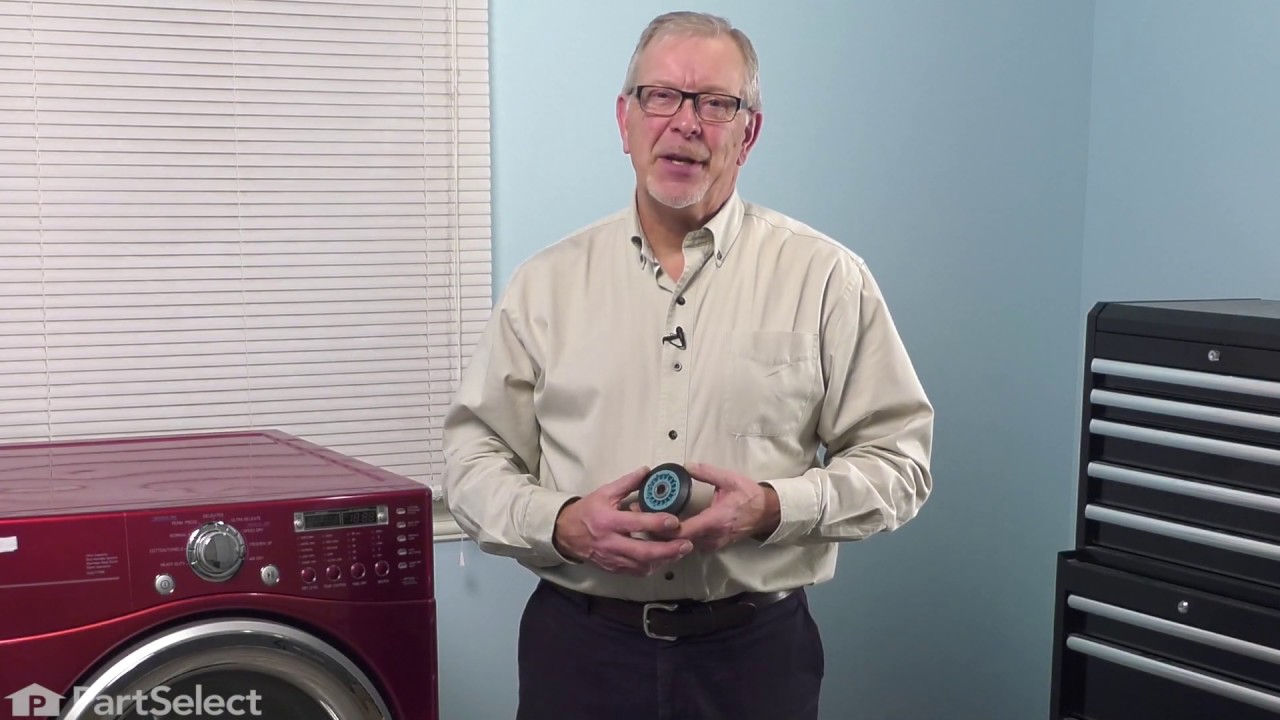
Troubleshooting
This part works with the following products:
Dryer, Washer Dryer Combo, Washer.
This part works with the following products:
LG, Kenmore, General Electric.
Part# 6500EL3001A replaces these:
AP4445128, 6500EL3001A
Customer Reviews
Average Rating:
★★★★★
★★★★★
6 Reviews
4.5
Filter By Rating:
5 Stars
5
4 Stars
0
3 Stars
0
2 Stars
1
1 Star
0
Sort by:
< Prev
1
Next >
Search filter:
Clear Filter
Your search term must have 3 or more characters.
Keep searches simple. Use keywords, e.g. "leaking", "pump", "broken" or "fit".
Sorry, we couldn't find any existing reviews that matched. Try using some different or simpler keywords.
★★★★★
★★★★★
Michelle G - June 3, 2020
Verified Purchase
Easy repair definitely DIY
The part arrived swiftly
★★★★★
★★★★★
John L - April 20, 2019
Verified Purchase
Easy to install
the part was in new condition. I installed the part but did not fix the problem. The dryer turns off prematurely before the clothes are dry. The timer part of the drying cycle works great. I thought by replacing the sensor would solve the problem. Thanks for the fast shipping. John Larson
★★★★★
★★★★★
Vivian T - April 1, 2019
Verified Purchase
Easy Repair
The part came quickly and in great condtion at excellent price. Ordered 3 parts that was the wrong part but it was fine we replace the old parts anyway..Happy Customer
★★★★★
★★★★★
MARTIN P - March 18, 2019
Verified Purchase
Empty part bag
I was unable to install this part they sent me an empty bag. So I have no way to know if it worked well.
March 19, 2019
Hello Martin, thank you for your review. We have emailed you in regards to this issue. We look forward to hearing from you.
★★★★★
★★★★★
Stanley A - June 26, 2018
Verified Purchase
My grandson replaced the thermistor & thermostat
He followed your video instructions exactly. It looked very complicated to me, (lotsa screws removed), but it worked out OK for him. The dryer now seems to wok fine. Much cheaper than buying a new dryer!
★★★★★
★★★★★
Ron A - May 18, 2018
Verified Purchase
Part worked great, but only after I ordered an second one.
I ordered a sensor to control the temperature in my dryer, along with some other parts. My surprise came when I took the dryer apart to install the new sensor. There are TWO sensors side by side. The parts list did not note the two sensors, maybe it was only on my particular model, I don't know. I did not install the sensors just other parts and the dryer worked, but not 100% efficiently because of not replacing the sensors. I had to order a second one to install the two sensors and now it works great.
< Prev
1
Next >
Customer Repair Stories
Average Repair Rating: 2.4 / 5.0, 5 reviews.
What's this?
Sort by:
< Prev
1
Next >
Search filter:
Clear Filter
Your search term must have 3 or more characters.
Keep searches simple. Use keywords, e.g. "leaking", "pump", "broken" or "fit".
Sorry, we couldn't find any existing installation instruction that matched.
HST code given by dryer
Called LG on the phone and they gave the button presses for diagnostics, which then gave the HST code, saying the Humidity sensor was bad. The part was described as the Humidity sensor module. Actually it's just the wire leads for the sensor which must be electronic and only accessible by disassembling the dryer. There were descr
... Read moreiptions about cleaning the wires, perhaps because some people use dryer sheets which cause a buildup on the wires and prevent them from doing their job. I use wool balls and have no buildup on my wires and replacing them did not fix the sensor, because the module accessible inside the dryer is not the moisture sensor, but only the wire leads.
Read less
marty from NEOSHO, MO
Difficulty Level:
Easy
Total Repair Time:
15 - 30 mins
Tools:
Screw drivers
1 personfound this instruction helpful.
Was this instruction helpful to you?
Thank you for voting!
Persistent smell of propane despite multiple duct cleanings.
Despite the young age of this dryer, and failure of all the other trials to fix the problem, I figured maybe the igniter is the problem. Ordered one. Followed a U tube video to take the unit apart. Noticed immediately that there was lots of lint pretty much everywhere inside the cabinet. Come to find that the blower and the vent had never
... Read more been connected, with about two inches gap. So, some of the exhaust was going out the vent hose, but lots was not. In fact, lint had coated the propane jet and the air mixer assembly. Replacing the igniter was not particularly difficult, once the dryer was in lots of pieces. I did not test the igniter before replacing it. I did connect the vent outlet to the blower and secured it. End result was a perfectly functioning unit and a happy wife. I don't recall reading about this as a possible cause of propane odor and failure of the unit to heat up.
Following the reference video, step by step and taking progress photos along the way, organizing screws and hardware as they were removed.
The discrepancy I found was the new rollers that I received were complete with the shaft. The video with the older rollers instruct removing the rollers from the shaft.
To use th
... Read moree new rollers with the new shaft, requires removing an additional panel at both the front 2 and also the full back panel for the rear 2, to get a wrench on both ends of the shaft, and then attach the new roller bearing shaft assembly and re-install the panel.
Other than that, it went very smoothly and the result was a quiet rotating drum. No more thumping!
My dryer actually required 2 moisture sensors, but had only ordered one pack, which only came with 1 sensor. For whatever reason, I thought the pack would have had the 2 pieces.
Another reviewer made note to wear work gloves as some of the hardwares metal edges are quite sharp. Following that advice I completed the repair in 3 hours without a scratch. Thanks for the detailed video Partselect team and good luck to all attempting repairs.
I'm not for reading instructions. So I just dove right in and took the dryer apart to get down to the motor. I gave the dryer a thorough cleaning and replaced the 3 parts I ordered from the online recommendation. Wish I would have ordered 2 sensors and the 2 thermostats that are near the burner. Just so replace beings I was in there. Repl
... Read moreacing the parts was easy, found them just by looking for matches to the new parts. Reassembled the dryer, dont think I put a single screw back where I got it lol. And still haven't put the top lid back on due to difficulty. Not sure if I even needed any parts, found a nest in my outside vent completely plugging it. But after a good cleaning and replacing the parts the dryer dries the best it has since we've owned it. The dryer came with our house which we bought 3 years ago and it was 2 years old when we purchased the house, so it is now 5 years old.
I followed video instruction in disassembling and set screws from each section into diferent small bowls in the order they were removed. Hardest part was some of the screws were really hard to get loose without stripping them and my control panel did not match video but I figured it out. Replacing the parts were easy and putting it back
... Read more together. While it was apart I cleaned everything including fan blower wheel. Thanks for the right parts and your online video. With your help and a prayer this 62 year old woman fixed the problem and dryer runs like new.
Ask our experts a question about this part and we'll get back to you as soon as possible!
25 questions answered by our experts.
Sort by:
< Prev
1
2
3
Next >
Search filter:
Clear Filter
Your search term must have 3 or more characters.
Keep searches simple. Use keywords, e.g. "leaking", "pump", "broken" or "fit".
Sorry, we couldn't find any existing answers that matched.Try using some different or simpler keywords, or submit your new question by using the "Ask a Question" button above!
Dave
January 24, 2018
Dryer runs, no heat. Replaced thermostat and thermistor,ntc still no heat.
For model number DLE5977W
Hi Dave,
Thank you for your question. So you have multiple thermostats and thermal fuses in your appliance. I would suggest testing all of those parts with a multi meter to see if they are working correctly. You can test them all with a multi meter, they should all read close to 0 ohms to be working correctly. You may also want to test your heating element itself as well. I hope that helps. Good luck with your repair.
19 people found this helpful.
Was this helpful?
Thank you for voting!
Ken
January 4, 2018
My dryer cooling light always on and have no heating at all
For model number 796.80021900
Hi Ken,
Thank you for your question. If the light is always on and there is no heat, then you may have an issue with the moisture sensing circuit. If this is the issue, you will need to test the dryer to see if it will heat and work properly in a time dry cycle. If the dryer is working properly, then you will need to check the sensor bars to see if there is any lint on them. If there is lint on them they will not detect any moisture. The bars are located on the lint screen. If they are clean, then you will need to check the control board and the wiring connected to it. I hope this helps. Thank you and have a great day!
9 people found this helpful.
Was this helpful?
Thank you for voting!
Tony Soldano
August 5, 2018
This dryer has 2 sensors, do you replace them both?
For model number dle5977s
Hello Tony, thank you for your question. Yes, we would recommend replacing both of the sensors at the same time. The part number is 6500EL3001A. Please enter the part number into the site for current price and availability. Good luck with your repair!
4 people found this helpful.
Was this helpful?
Thank you for voting!
Gary
January 13, 2018
My dryer start to work and 1-2 min shooting down. Looks like there is a shortage.I check control panel there is a light blinking flow sensor.
For model number DLG5966W
Hi Gary,
Thank you for your question. If your dryer is shutting down too soon, the sensor does fix the issue the majority of the time. There are some other parts that you will need to check as well. You will need to check the thermostat, the lint filter and thermistor. I hope this helps. Thank you and have a great day!
3 people found this helpful.
Was this helpful?
Thank you for voting!
Jennifer
February 15, 2019
Getting code d80 and h5. I cleaned all the air exhaust hose, wall ducts and vent outside. Still getting the code. I take the exhaust hose off the wall ducts and ran a test, the same code come up. When the dry is on the air coming out of the hose wasn’t warm, but the dryer is warm. What else can i do? I had a load of clothes in the dryer but they never got dry. What do you recommend?
For model number DLE1501W
Hi Jennifer, thank you for your question. The d80 error means the dryer is 80% clogged either in the air exhaust hose, wall ducts, or the vent outside. So if you have checked your entire system and your are still getting that error, you may have to start checking all of your thermostats. The first parts to check in this case would be all of your thermostats and thermal fuses. You can test those parts with a multi meter and they should be reading 0 ohms to be working correctly. If those parts are fine, you should then go on to testing your heating element as well. You can also test that with a multi meter and it should be reading between 0 - 50 ohms.I hope that helps. Good luck with your repair.
3 people found this helpful.
Was this helpful?
Thank you for voting!
Susan
April 16, 2019
Hi, my dryer is not putting out any heat. "check filter" msg is on. I made sure the lint trap is clean and i vacuumed out under the lint filter. Check filter sign still on. Dryer repeatedly shuts off after about 5 minutes of running, but not heat at all during the 5 minutes it runs.Thank you for any guidance.
For model number DLEX3370V
Hello Susan, thank you for your question. First try unplugging the unit and letting it set for about 5 minutes, then plugging it back in to see if it will reset that light. We would recommend testing the thermostats in the unit, as most heat/non heating issues are cause by one or more thermostats. Here is some information on testing them. Set your multimeter to the R X 1 setting. Take each of your meter's probes and touch one to each terminal. You are testing for continuity, and you should receive a reading of either zero or infinity. At room temperature, testing the thermostat should produce a reading of zero. But if a thermostat is tested when it is heated to its limit, a reading of infinity should be produced. We strongly recommend that you test your thermostat at room temperature. If the test you conduct with your thermostat does not produce these results, then you should replace the component. If the thermostats are fine, check the moisture sensors to be sure they are not corroded or rusted and if they are replace them. I hope this helps!
2 people found this helpful.
Was this helpful?
Thank you for voting!
Rob
January 27, 2020
Why are there two moister sensors?
For model number DLG2015W
Hi Rob, thank you for your question. The moisture sensors detect moisture in your appliance and will warn the appliance if there is too much. Good luck with your repair.
2 people found this helpful.
Was this helpful?
Thank you for voting!
Bill
March 19, 2023
The video covering the replacement of the moisture sensor is for an older model, which requires the removal of some wire connectors. On this model, two of the connectors that require removing the control panel are fixed (sealed) in place, which prevents lifting the panel out of the way.
For model number dlg2051w
Hi Bill, thank you for reaching out. We found a relevant video for your assistance. In the first five minutes of the video, the method of removing the control panel can be found. We hope this helps!
2 people found this helpful.
Was this helpful?
Thank you for voting!
Maryann
October 3, 2019
Dryer is not shutting off. Removed heat sensor before and cleaned it. But same thing is happening again. Should sensors be replaced? If so do you sell the whole sensor unit or only parts for it?
For model number DLG2702V
Hello Maryann, thank you for your question. The sensor bars are sold separately, and there are two in this unit. We would recommend replacing the bars to see if this will fix the issue, as cleaning them before, fixed the issue. We would recommend replacing both of them in the unit. If the issue persists, we would recommend testing the thermostats and the thermistor. I hope this helps!
1 person found this helpful.
Was this helpful?
Thank you for voting!
Jose
January 17, 2019
My dryer wont start,power light,etc,on and display filter clean,i clean everything,but steal not working.Thanks.
For model number DLE2301W
Hello Jose, thank you for your question. If the unit won't start there are a few parts we would recommend checking the Part Number: 6931EL3003D Thermal Fuse, door switch PartSelect Number PS3529308, and the drive motor PartSelect Number PS3523290. I hope this helps!
1 person found this helpful.
Was this helpful?
Thank you for voting!
< Prev
1
2
3
Next >
✖
Ask a Question
Ask our experts a question on this part and we'll respond as soon as we can.