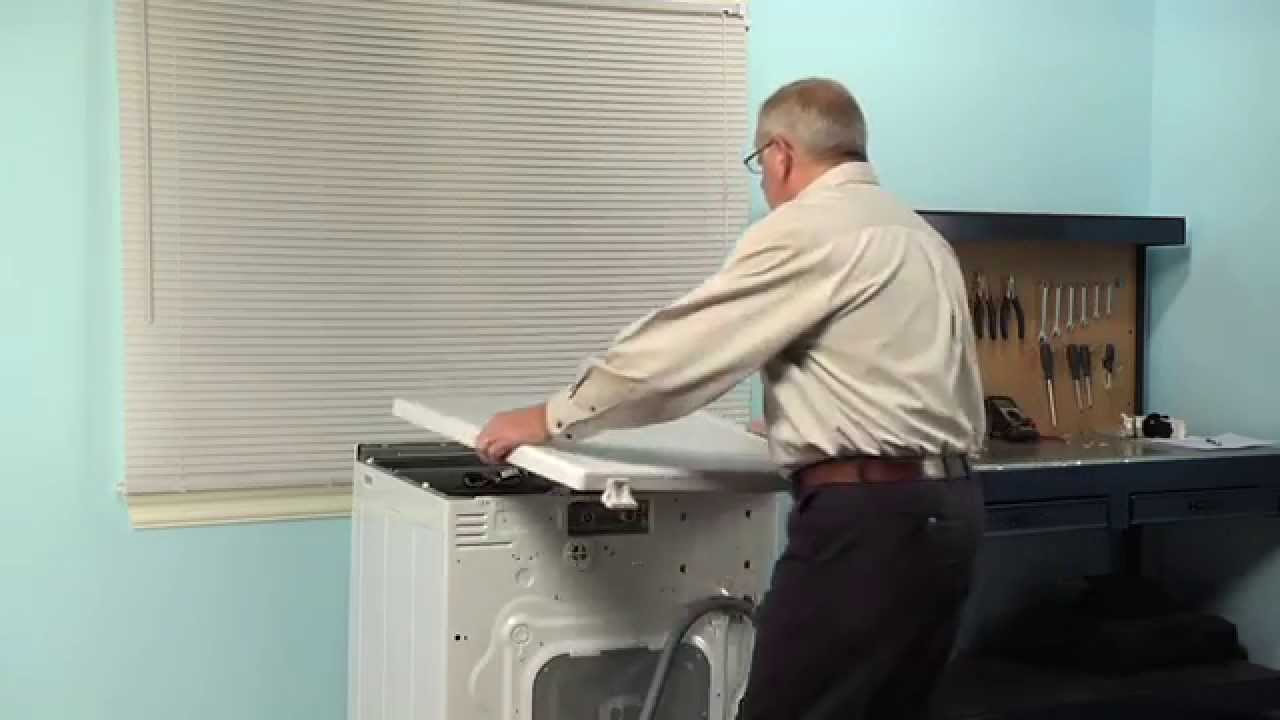
This is an authentic LG water inlet valve for a top-load washer. It is designed to control the flow of water into the washer. If your washer is filling slowly, making loud noises, overflowing, or stopping in the middle of a cycle, you may need to replace the water inlet valve. Be sure to disconnect the power and water supply before you begin this repair.
How Buying OEM Parts Can Save You Time and Money
Troubleshooting
This part fixes the following symptoms:
Leaking
This part works with the following products:
Washer, Washer Dryer Combo.
This part works with the following products:
LG, Kenmore.
Part# 5221EA1008F replaces these:
AP5244606, 5221EA1008N, TAW35618287
Customer Reviews
Average Rating:
★★★★★
★★★★★
22 Reviews
5.0
Filter By Rating:
5 Stars
21
4 Stars
1
3 Stars
0
2 Stars
0
1 Star
0
Sort by:
< Prev
1
2
3
Next >
Search filter:
Clear Filter
Your search term must have 3 or more characters.
Keep searches simple. Use keywords, e.g. "leaking", "pump", "broken" or "fit".
Sorry, we couldn't find any existing reviews that matched. Try using some different or simpler keywords.
★★★★★
★★★★★
Dennis R - August 19, 2022
Verified Purchase
Arrived next day. Went in fast and easy.
Spot on perfect.
★★★★★
★★★★★
Scott R - March 15, 2022
Verified Purchase
VERY FAST shipping, SMOOTH transaction!
The part was an exact replacement for what was needed. Website navigation was no problem and part selection was very easy. Standard shipping was incredibly fast to Southeastern U.S., and the part was packaged well. I was unsure about ordering from PartSelect until I read through what seemed like hundreds of positive reviews. With VERY FAST shipping and an overall SMOOTH TRANSACTION I highly recommend PartSelect.
★★★★★
★★★★★
David T - July 7, 2021
Verified Purchase
Easy
Part fit perfectly and very easy to install. Always in the past I would have just purchased a new washer. Not anymore, I will use PartSelect in the future. Save money.
★★★★★
★★★★★
Trish A - May 24, 2021
Verified Purchase
easy repair
fast service thank you.
★★★★★
★★★★★
DINH V - May 13, 2021
Verified Purchase
Part for LG wt1701cw washer
Part came fast. I am able to install it. My washer back to work as normal. I saved over $260. I am very happy. Thank you.
★★★★★
★★★★★
Richard F - January 15, 2021
Verified Purchase
easy repair part worked just great. only problem was hooked water lines up wrong
part fixed problem
★★★★★
★★★★★
Jason H - January 7, 2021
Verified Purchase
Great Part, Fixed My Problem
Got the right part the first time, thanks to PartSelect's thorough documentation and FAQs. The part was easy to install and now my washer is in tip-top shape again.
★★★★★
★★★★★
Leeann H - August 13, 2020
Verified Purchase
Part was correct, shipping delayed
The part was correct but it took longer than expected to get here even though we paid for expedited shipping.
★★★★★
★★★★★
Thomas W S - July 29, 2020
Verified Purchase
Perfect fit and easy to install
This was one of the easiest repairs I have ever done. The part was a perfect replacement for the original and start to finish the repair took 10 min. About half of that time was moving the washer so I could access the back.
★★★★★
★★★★★
Byron H - July 24, 2020
Verified Purchase
Easy Repair
My part arrived on time and in good condition. Repair time was about 20 minutes. Very pleased.
< Prev
1
2
3
Next >
Customer Repair Stories
Average Repair Rating: 4.1 / 5.0, 3 reviews.
What's this?
Sort by:
< Prev
1
Next >
Search filter:
Clear Filter
Your search term must have 3 or more characters.
Keep searches simple. Use keywords, e.g. "leaking", "pump", "broken" or "fit".
Sorry, we couldn't find any existing installation instruction that matched.
Water inlet was leaking
I noticed that my washer was leaking water into the tub. It was dripping, very slowly, but it was dripping. I noticed first, because it was starting to smell, and I didn’t understand why. Once I noticed that it was dripping, I checked online and noticed that the solenoid water inlet is most likely the problem. I found the part on parts, s
... Read moreelect, and confirmed with my model. The pictures were very close and similar, so I was pretty sure I was getting the cracked part. Once I received the part, it was time to fix it. You just have to turn the water supply off, remove the inlet lines with a adjustable wrench, if necessary, and then get to the washer. Make sure you also unplug the washer. There are only two Phillips head screws to remove to get the vanity cover off of the back. For whatever reason my removal was a little bit difficult for this. There are some plastic clips that hold the front portion on of the vanity plate. These were very tight, and I was afraid I would break them, but eventually they came loose with gentle upward pulling. Once this was off, it was super easy to identify the part that needed replacement. There are two hose clamps that you just need a pair of pliers to squeeze in slide off the hose. Then you remove three additional Phillips head screws, and the other connections pop out on their own. The solenoid plugs are very simple to slide off, and it is really difficult to put them on any other way. If you need to, you can take a few photos of the installation. Once you have the old one out, hook up the hoses first, and slide the hose clamps back to their original position. Once you have the two black hoses back on, reposition the new valve body, and slide the additional three prongs into the inlet soap dispenser. Make sure that the fit is snug. Don’t over push, the parts are plastic. Once this is done, reinsert, the three Phillips screws into their holes. Then you can reconnect the solenoids. At this point the replacement is done, and all you have to do is replace the vanity cover. Take time to ensure that you’ve done this correctly. I left the vanity cover off and ran a test load of dirty clothes to make sure that there were no leaks. Once I assure, there were no leaks, I put the vanity cover back on and put the two screws on. This was a very easy fix. Again, just go slow removing the vanity plate so you do not crack or break the tines in the front.
Read less
Philip from CHULA VISTA, CA
Difficulty Level:
Really Easy
Total Repair Time:
30 - 60 mins
Tools:
Screw drivers, Wrench (Adjustable)
1 personfound this instruction helpful.
Was this instruction helpful to you?
Thank you for voting!
Water leaking into drum
Figured out how to remove the top door and the top panel that covered the solenoid bank. That was the hardest part. Swapping out the solenoid bank and the connector was easy. No more water leaking.
The old water assembly valve split on the bottom and started leaking.
After unplugging the washer I cut the water off. I took the water hoses off, then the back top panel using a phillips head screw driver. I then used a pair of pliers to take off the two hoses and clamps. I unplugged the electric connection on each solenoid, took out 5 screws replaced the part and did everything in reverse order. Problem s
... Read moreolved. Thanks for the fast service on my order.
Read less
Jerry from CARYVILLE, TN
Difficulty Level:
Very Easy
Total Repair Time:
15 - 30 mins
Tools:
Pliers, Screw drivers
3 of 5 peoplefound this instruction helpful.
Was this instruction helpful to you?
Thank you for voting!
< Prev
1
Next >
Questions and Answers
Ask our experts a question about this part and we'll get back to you as soon as possible!
23 questions answered by our experts.
Sort by:
< Prev
1
2
3
Next >
Search filter:
Clear Filter
Your search term must have 3 or more characters.
Keep searches simple. Use keywords, e.g. "leaking", "pump", "broken" or "fit".
Sorry, we couldn't find any existing answers that matched.Try using some different or simpler keywords, or submit your new question by using the "Ask a Question" button above!
Billy
November 19, 2017
There is water leaking into the tub and in the floor. The washer is not in use. Could the be the valves. Part 180 on the diagram i looked at? Thanks for your help.
For model number WT1701CW
Hi Billy,
Thank you for your inquiry. If the washer is leaking when it is not in use, then you will need to to check the water inlet valve. I hope this helps. Thank you and have a great day!
7 people found this helpful.
Was this helpful?
Thank you for voting!
Les
February 6, 2018
Dear sirs, when the tub begins the fill cycle there is a leak at the connection between the fill hose(cold) and inlet valve. The hose and washer are in good condition. Could the inlet valve be causing the leak? Thank you in lodi, ca
For model number WT1101CW
Hello Les, thank you for your question. Yes, it is possible the valve is the issue. I would recommend replacing the inlet valve. I hope this helps!
3 people found this helpful.
Was this helpful?
Thank you for voting!
Dessie
February 22, 2018
I need help trying to figure out what part I need for my washer. It continues to fill up with water and not stop. It flooded my wash room. I have to turn off the water to the washer to make it stop but only the cold water. Can you please help me? Thank you.
For model number WT1101CW
Hi Dessie, Thank you for the question. I suggest changing the valve assembly. Sounds like the cold port is stuck open and the valve will need to be replaced. Hope this helps!
2 people found this helpful.
Was this helpful?
Thank you for voting!
Dan
February 25, 2020
My washing machine overflowed. The water is going into the tub even when the washer is off. I checked the solenoids on the water inlet valve, and all showed continuity. Could the inlet valve still be bad even if all solenoids showed continuity?
For model number WT1101cw
Hello Dan, thank you for your question. If the water is coming into the tub when the washer is off the valve would be the issue. It is possible that the valve testing is off. We would recommend starting the unit and unplugging it from the wall while it fills. If the water continues to come in, the valve needs to be replaced. I hope this helps.
2 people found this helpful.
Was this helpful?
Thank you for voting!
Rick
October 29, 2019
Water will not shut off in the rinse cycle, even if I hit pause it still fills. Even with washer off water still fills. FYI I just replaced the water inlet valve assembly and it still does this. If you can help thanks
For model number WT1001CW
Hello Rick, Thank you for the question. If the new valve did not fix the issue, this could be a Pressure Switch Assembly Sensor issue. I looked up the part and it is listed as No Longer Available/Discontinued sorry. There are no part substitutions listed. My suggestion here would be to call the manufacturer and see if they can provide you with a substitution for these part numbers. Hope this helps!
1 person found this helpful.
Was this helpful?
Thank you for voting!
Sonny
April 14, 2023
My washer is leaking Water from the rear of the machine water appears to be leaking near the water intake valve more to the right near the power source
For model number Wt7300cv
Hi Sonny, thank you for reaching out. The issue is probably due to the water inlet valve, part number PS12580369. We hope this helps!
i have leaking coming from the rear at the top from the plastic does this mean that this part is going bad
For model number wt5270cw
Hi Japeth, thank you for reaching out. Based on the description that you have provided, we would recommend checking the water inlet valve assembly, part number PS3527446, as it is the most likely cause of this issue. If it is faulty, you may need to replace it. We hope this solves your problem!
1 person found this helpful.
Was this helpful?
Thank you for voting!
John
June 7, 2023
Need to replace inlet valve but can’t remove top back panel to access the valve. I removed two screws but still won’t move. How do you remove this panel?
For model number WT1501CW
Hello John, thank you for your inquiry. We have found some relevant instructions for you to replace the inlet valve, part number PS3527446. They may not be of the exact same model, but they will help you with the installation. You may follow the following steps: unplug the power cord and shut off the water supply. Now use a Phillips-head screwdriver to unthread the screws securing the rear control panel. Lift the panel up to remove it. Next, detach the control housing and remove the hot and cold water supply lines from the inlet valve. Note the orientation of the wires connected to the valve, and then disconnect them. Next, release the retaining clamps securing the hoses to the valve and pull the hoses off. Remove the mounting screws securing the valve to the control base. Lift the old valve and pull it free of the dispenser assembly. We hope this information helps!
Was this helpful?
Thank you for voting!
Joe
April 4, 2018
How do you repair water inlet value
For model number WT1101CW
Hello Joe, thank you for your question. unfortunately, we do not currently have installation instructions for this particular part. However, I was able to find another video on our site that shows how to replace a similar valve. The appliance and valve may look different in the video to what you have but the installation should be very similar. I hope this helps!
https://www.youtube.com/watch?v=MMq7jHIAKZo
Was this helpful?
Thank you for voting!
Mike
January 11, 2018
Water is leaking from rear of washer while in use. I removed the back cover. It appears that there were 2 small clear water/tube lines that come out from the back of the tub - lower/middle area. One of the tubes is still attached (this tube travels up to the upper portion of the back of the unit), however the other tube is missing - appears to have broken off. Water is flowing out of this hole when the water turns on. I can not locate the other tube if there was one and cannot find where this tube may go. Any help would be appreciated.
For model number WT1201CW
Hi Mike, Thank you for the question. There is one tube that would lead up to the water lever/pressure switch and another tube that leads to the dispenser at the corner of the tub. Hope this helps!
Was this helpful?
Thank you for voting!
< Prev
1
2
3
Next >
✖
Ask a Question
Ask our experts a question on this part and we'll respond as soon as we can.