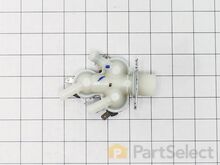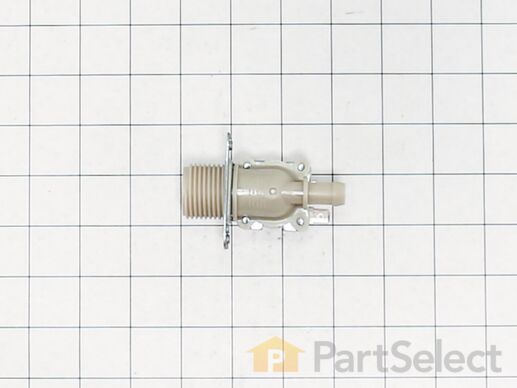
Water Inlet Valve - Hot 5220FR2006H
Rated by 27 customers
Really Easy
15 - 30 mins
Ratings submitted by customers like you who bought this part.
Get this part fast! Average delivery time for in-stock parts via standard shipping: 1.8 days.
Water Inlet Valve - Hot Specifications

How Buying OEM Parts Can Save You Time and Money
Replacing your LG Washer Water Inlet Valve - Hot

-
5 Stars 76
-
4 Stars 6
-
3 Stars 0
-
2 Stars 0
-
1 Star 0
- < Prev
- 1
- 2
- 3
- Next >
- < Prev
- 1
- 2
- 3
- Next >
- < Prev
- 1
- 2
- 3
- Next >
Unscrewed 4 screws at back top of machine (holding plastic bracket to cover). Pulled out trays from front where detergent is poured, and removed small screws under trays.
Slid cover back and up. This was the only tric ... Read more ky part. There are pegs that must line up with large holes in cover before you can easily lift cover up. Helps to look from underneath and find pegs on each side.
Using pliers, fully open clamps holding hoses to the inlet valves, and carefully pull off hoses while keeping clamps open with pliers… making sure to keep track of which hose goes to each motor. Take a picture of electrical connectors noting color and sequence of connectors on each inlet valve motor. Pull all connectors off.
Unscrew screws holding each inlet valve to machine. Put new inlet valves in place of old, and screw in place. Reconnect hoses (using pliers to hold open clamps, then slide clamps over tubing and inlet valve connector). Reconnect electrical connectors carefulljng lining up colors of wires and sequence using picture taken in previous step.
Replace cover. Screw all screws back to secure cover. Replace trays.
-
Jeffery from NORTHFIELD, IL
-
Difficulty Level:Easy
-
Total Repair Time:30 - 60 mins
-
Tools:Pliers, Screw drivers
-
jaime from Las Vegas, NV
-
Difficulty Level:Easy
-
Total Repair Time:15 - 30 mins
-
Tools:Screw drivers, Wrench (Adjustable)
-
Randall from RAYNHAM, MA
-
Difficulty Level:Really Easy
-
Total Repair Time:30 - 60 mins
-
Tools:Pliers, Screw drivers
Thank you again for an amazing experience.
-
christen from HUMBLE, TX
-
Difficulty Level:Very Easy
-
Total Repair Time:Less than 15 mins
-
Tools:Pliers, Wrench (Adjustable)
-
Keith from ROCKAWAY, NJ
-
Difficulty Level:Easy
-
Total Repair Time:30 - 60 mins
-
Tools:Screw drivers, Socket set, Wrench (Adjustable)
-
Tiffany from PUYALLUP, WA
-
Difficulty Level:Very Easy
-
Total Repair Time:15 - 30 mins
-
Tools:Screw drivers
-
Scott from NEW WASHINGTN, OH
-
Difficulty Level:Really Easy
-
Total Repair Time:30 - 60 mins
-
Tools:Pliers, Screw drivers
-
Brian from CLEVELAND, TN
-
Difficulty Level:Really Easy
-
Total Repair Time:Less than 15 mins
-
Tools:Pliers, Screw drivers
-
Rick from KERRVILLE, TX
-
Difficulty Level:Really Easy
-
Total Repair Time:15 - 30 mins
-
Tools:Pliers, Screw drivers
-
Philip from WASHINGTON, DC
-
Difficulty Level:Very Easy
-
Total Repair Time:15 - 30 mins
-
Tools:Pliers, Screw drivers, Wrench (Adjustable)
- < Prev
- 1
- 2
- 3
- Next >
Ask our experts a question about this part and we'll get back to you as soon as possible!
- < Prev
- 1
- 2
- Next >

21 people found this helpful.

15 people found this helpful.

13 people found this helpful.

8 people found this helpful.

8 people found this helpful.


5 people found this helpful.

3 people found this helpful.

3 people found this helpful.

3 people found this helpful.

3 people found this helpful.
- < Prev
- 1
- 2
- Next >

Manufacturer Part Number: 5220FR2006H

Item is in stock and will ship today if your order is placed before 4:00 PM Eastern Standard Time.
If your order is placed after 4:00 PM EST, the in stock items will ship on the next business day.
Item is not in stock and usually ships 3-5 business days from the time you place your order.
Item is not in stock and usually ships 10-15 business days from the time you place your order.
This item is no longer being made by the manufacturer, and cannot be added to your shopping cart.


