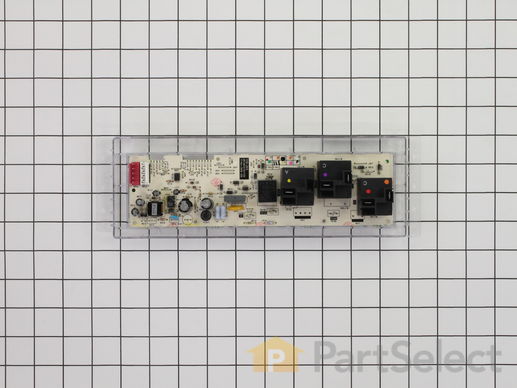
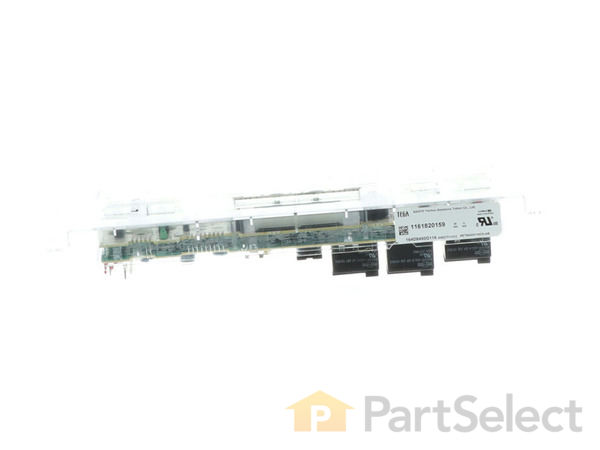
Part Location Diagram of WB27T11312 GE Oven Clock Control
See part 16 in the diagram
( Grid squares measure 1x1 inch )
Customer Service Representative

Get in touch, we're here to help!

Daily 8am - 9pm EST

customerservice@partselect.com

Oven Clock Control WB27T11312

★★★★★
★★★★★
7 Reviews

Rated by 4 customers 

Really Easy 

15 - 30 mins 

Ratings submitted by customers like you who bought this part.

$ 182.98
  Special Order
Get FREE EconoShip on orders over $100! T&C apply
PartSelect Number PS3493488
Manufacturer Part Number WB27T11312
Manufactured by GE
Product Description

Oven Clock Control Specifications

NOTE: This part has been updated by the manufacturer. The wiring could be different than the original and should be installed by an appliance repair person.
How Buying OEM Parts Can Save You Time and Money

How Buying OEM Parts Can Save You Time and Money

Troubleshooting
This part fixes the following symptoms:
Touchpad does not respond | Will Not Start
This part works with the following products:
Range.
This part works with the following products:
General Electric, Kenmore.
Part# WB27T11312 replaces these:
AP5177950, WB27T10468, WB27T10817, WB27T11274
Back to Top
Customer Reviews
Average Rating:
★★★★★
★★★★★
7 Reviews
4.3
Filter By Rating:
  • 5 Stars
    5
  • 4 Stars
    1
  • 3 Stars
    0
  • 2 Stars
    0
  • 1 Star
    1
Sort by:
  • 1
Sorry, we couldn't find any existing reviews that matched. Try using some different or simpler keywords.
  • 1
Customer Repair Stories
 Average Repair Rating: 4.3 / 5.0, 4 reviews. What's this?
Sort by:
  • 1
Sorry, we couldn't find any existing installation instruction that matched.
OVEN CLOCK CONTROL MALFUNCTIONED
I turned off the circuit breaker and unplugged the stove. I removed the back panel and marked the location of the wires on the new oven clock control. I detached the wires and removed the old card. I installed the new one and reconnected the wires. I plugged the stove and turned on the circuit breaker. All the lights came on and the oven worked fine. I reinstalled the back panel and it took me less than thirty minutes to complete the job.
  • Gregoire from N CHESTERFLD, VA
  • Difficulty Level:
    Really Easy
  • Total Repair Time:
    15 - 30 mins
  • Tools:
    Pliers, Screw drivers, Wrench set
1 person found this instruction helpful.
Was this instruction helpful to you?
Thank you for voting!
No clock, oven control buttons don't work, stove top work ok, tested power was ok to the control board.
Removed back panel screws, removed back panel, removed screws of the control board, remove control board, heated glue and tore off plastic face plate, placed face plate on new control board, installed new control board, moved wires from old control board to new control board, test out oven, reinstalled back panel
  • David from SANTA CLARA, CA
  • Difficulty Level:
    Really Easy
  • Total Repair Time:
    15 - 30 mins
  • Tools:
    Nutdriver, Pliers
9 of 10 people found this instruction helpful.
Was this instruction helpful to you?
Thank you for voting!
fried oven control using raid
replaced oven clock control ref maintenance manual, 4 screws and 8 wires. plugged in new control and op checks good.
  • Kerry from Loveland, CO
  • Difficulty Level:
    Really Easy
  • Total Repair Time:
    15 - 30 mins
  • Tools:
    Nutdriver, Screw drivers
4 of 13 people found this instruction helpful.
Was this instruction helpful to you?
Thank you for voting!
Cooktop oil fire melted plastic parts; control defaced
Some of the original TO-9 switches were fused by the heat. I made them functional again with a cutter on a rotary tool, but to make the repair properly, I ordered the new control unit and the faceplate graphics. Note the guide tabs at the bottom and right edges when replacing the graphics. Don't plan on reusing your old graphics (unless you are a wizard at removing the very strong adhesive).
To gain access to the part, remove the 2 screws (part 715) in the bottom of the control assembly with a stubby screwdriver. Using a nut driver, remove the two screws (part 1000) on the back at the corners, being careful not to drop them behind the oven. Pull out at the bottom, then move the whole unit toward you. Note the position of the wires. A digital photo can help here. Remove the wiring and 4 screws holding the clear plastic TO-9. Put the screws in the new unit in the same holes and rewire. Put the assembly in place top-first and align the screw holes. Finding the same thread placement for the lower screws can be tricky, so start them gently.
  • John from Gaston, OR
  • Difficulty Level:
    Easy
  • Total Repair Time:
    15 - 30 mins
  • Tools:
    Nutdriver, Screw drivers
12 of 22 people found this instruction helpful.
Was this instruction helpful to you?
Thank you for voting!
  • 1
Questions and Answers

Ask our experts a question about this part and we'll get back to you as soon as possible!

12 questions answered by our experts.
Sort by:
  • 1
  • 2
Sorry, we couldn't find any existing answers that matched.Try using some different or simpler keywords, or submit your new question by using the "Ask a Question" button above!
Joyce
January 3, 2018
The timer on my range no longer works (i.E. I input 1:20 for 1 hour 20 minutes and it registers 1:30) will this part correct this problem?
For model number JB620DR4WW
PartSelect logo
Hi Joyce, Thank you for your question. Yes, if the timer on your range is no longer working, this part will fix the issue. I hope this helps. Thank you and have a great day!

3 people found this helpful.

Was this helpful?
Thank you for voting!
Bob
December 13, 2018
Oven temp 100 degrees below desired setting. F2 warning comes on when turned off on broil setting. Will this part solve those issues?
For model number Jbp24w0h3ww
PartSelect logo
Hello Bob, thank you for your question. The first part we would recommend testing is the sensor. If the oven is heating but not getting up to temperature its usually a sensor issue. The sensor is PartSelect Number: PS10059162. To test the sensor, use an ohm meter to check for resistance. The sensor should read between 1000 and 1100. If the sensor is working properly, and tests within those ranges the sensor is not faulty and the board should be replaced. I hope this helps!

3 people found this helpful.

Was this helpful?
Thank you for voting!
Dennis
June 25, 2019
The up arrow no longer works. Down arrow is ok. Will this part fix that problem.
For model number JB620DR3WW
PartSelect logo
Hello Dennis, Thank you for the question. Yes, the PartSelect Number PS3493488 is the correct Oven Clock Control for the model number provided. Hope this helps!

2 people found this helpful.

Was this helpful?
Thank you for voting!
Patricia
November 21, 2019
The display says the oven is at temp. The oven is more than 100 degrees less. We replaced the oven thermostat. No change. If we replace the array will that fix our issue? Currently i'm using an oven thermometer and have to wait 20-30 min for the oven to reach temp. Also, i have to set the temp 25 degrees higher than desired temp. Help!
For model number JBP23SR3SS
PartSelect logo
Hi Patricia, thank you for your question. There are a few parts that could cause this issue in your appliance. First I would say test your elements with a multi meter to see if they are working correctly or not. They should be reading between 0 - 50 ohms to be working correctly. The other part you should check would be your oven temperature sensor. That can also be tested with a multi meter and should be reading between 1000 - 1100 ohms. If those three parts are fine however, then the issue may be in your control board. I hope that helps. Good luck with your repair.

2 people found this helpful.

Was this helpful?
Thank you for voting!
Keith
January 31, 2020
Controls for oven don't go to heat after preheat.
For model number JBP23D-R2WW
PartSelect logo
Hi Keith. I would test the temperature sensor first. But it could very well be a bad control board. Thank you for your question and good luck with your repair.

2 people found this helpful.

Was this helpful?
Thank you for voting!
David
February 8, 2020
The display on my stove it reading bad line. I was cleaning the back and cleaning solution may have gotten on the board i have tried unplugging, resetting the breakers but it still continues. Could this fix it?
For model number JBP23DR2WW
PartSelect logo
Good Day David. Thank you for your question in regards to your unit (Model Number JBP23DR2WW). Based on our research, the Oven Clock Control could have been damaged and needs to be replaced. The PartSelect Number for the part that is compatible with your unit is PS3493488. You can order this part either online at our website www.PartSelect.com or by calling us by phone at 888-260-4310. The wiring for this part could be different than the original one you currently have, therefore we recommend this be installed by an appliance repair person. We hope this helps! Best Regards.

1 person found this helpful.

Was this helpful?
Thank you for voting!
Michell
July 11, 2019
My oven does not control temperature. It continue heating up. I already checked the sensor,. This part will solve the problem?
For model number WB27T11312
PartSelect logo
Hello Michell, thank you for your question. Without the exact model of the unit we are unable to check to see if there are thermostats that could affect the oven temperature. However, on most electric units, the oven is controlled only by the sensor and board. So If the oven sensor was tested and is fine the issue is probably the board, yes. Good luck with your repair!

1 person found this helpful.

Was this helpful?
Thank you for voting!
Michele
October 24, 2019
The control panel lights will not go off, but the panel seems to operate the oven ok
PartSelect logo
Hi Michele, thank you for your question. If your control board is no longer lighting up, you would have to replace that part. I hope that helps. Good luck with your repair.

1 person found this helpful.

Was this helpful?
Thank you for voting!
Shanna
March 26, 2023
The up arrow doesn’t work on the control panel. Part number for this model?
For model number JBP24BH2WH
PartSelect logo
Hello Shanna, thank you for contacting us. You may need to replace the control board, part number, PS3493488, as buttons are interfaced on the control board. We hope that helps!

1 person found this helpful.

Was this helpful?
Thank you for voting!
Dave
September 18, 2023
The oven will not come on. The repair guy said that it was the motherboard for this Kenmore Range. Is this the part I need?
For model number 92619
PartSelect logo
Hi Dave, thank you for reaching out. First, you may need to make sure that there is power coming to the unit. If the oven has power but still does not turn on, then you may need to check the electronic control board, part number PS1528269, as it is most likely faulty and may need to be replaced. Glad to be of assistance!

Was this helpful?
Thank you for voting!
Related Parts:
  • 1
  • 2
Model Cross Reference
This part works with the following models:
PartSelect Number: PS3493488
Manufacturer Part Number: WB27T11312
Brand
Model Number
Description
Kenmore
91192090300
Range
Kenmore
91192090301
Range
Kenmore
91192091300
Range
Kenmore
91192091301
Range
Kenmore
91192812300
Range
Kenmore
91192812301
Range
Kenmore
91192814300
Range
Kenmore
91192814301
Range
Kenmore
91193090300
Range
Kenmore
91193090301
Range
Kenmore
91193091300
Range
Kenmore
91193091301
Range
Kenmore
91193490300
Range
Kenmore
91193812300
Range
Kenmore
91193812301
Range
Kenmore
91193814300
Range
Kenmore
91193814301
Range
Kenmore
91194400300
Range
Kenmore
91194400301
Range
Kenmore
91194401300
Range
Kenmore
91194401301
Range
Kenmore
91194401993
Range
Kenmore
91194402300
Range
Kenmore
91194402301
Range
Kenmore
91194404300
Range
Kenmore
91194404301
Range
Kenmore
91194410300
Range
Kenmore
91194411300
Range
Kenmore
91194490300
Range
Kenmore
91194490301
Range
Customer Service Representative

Get in touch, we're here to help!

Daily 8am - 9pm EST

Contact Customer Service