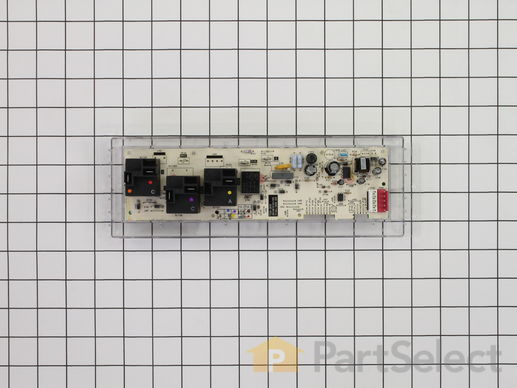
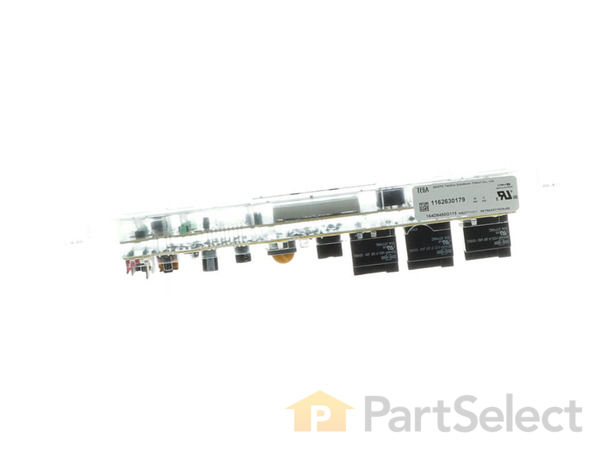
Part Location Diagram of WB27T11311 GE Electronic Control Board
See part 16 in the diagram
( Grid squares measure 1x1 inch )
Customer Service Representative

Get in touch, we're here to help!

Daily 8am - 9pm EST

customerservice@partselect.com

Electronic Control Board WB27T11311

★★★★★
★★★★★
17 Reviews

Rated by 10 customers 

Really Easy 

30 - 60 mins 

Ratings submitted by customers like you who bought this part.

$ 182.98
  In Stock
Get FREE EconoShip on orders over $100! T&C apply

Get this part fast! Average delivery time for in-stock parts via standard shipping: 1.8 days.

PartSelect Number PS3493487
Manufacturer Part Number WB27T11311
Manufactured by GE
Product Description

Electronic Control Board Specifications

This part is also known as the "brains" of the appliance. ***NOTE: The wiring could be different than the original control. This part may need to be installed by an appliance repair person.
How Buying OEM Parts Can Save You Time and Money

How Buying OEM Parts Can Save You Time and Money

Troubleshooting
This part fixes the following symptoms:
Touchpad does not respond | Will Not Start | Little to no heat when baking | Element will not heat
This part works with the following products:
Range.
This part works with the following products:
General Electric.
Part# WB27T11311 replaces these:
AP5177949, 1974156, WB27T10467, WB27T10816, WB27T11273
Back to Top
Customer Reviews
Average Rating:
★★★★★
★★★★★
17 Reviews
4.6
Filter By Rating:
  • 5 Stars
    12
  • 4 Stars
    4
  • 3 Stars
    1
  • 2 Stars
    0
  • 1 Star
    0
Sort by:
  • 1
  • 2
Sorry, we couldn't find any existing reviews that matched. Try using some different or simpler keywords.
  • 1
  • 2
Customer Repair Stories
 Average Repair Rating: 3.9 / 5.0, 10 reviews. What's this?
Sort by:
  • 1
Sorry, we couldn't find any existing installation instruction that matched.
Controls would not work properly, faceplate cracked.
Installed the faceplate to the front of control board (you might wait until you remove the old board first). Removed 3 screws with a nutdriver holding the top stove black plate and 4 screws holding the control board in place. Disconnected the wiring harness from the 4 pin jack at end of the board and the 4 color coded wires from the color coded pins on several components on the board. Connected the color coded wires and replaced the board into the stove with the 4 screws and replaced the top plate to the back of the stove. My faceplate came in a long envelope and was not bent.
Other Parts Used:
Electronic Control Board FACEPLATE GRAPHICS (White)
  • Phillip from SHELBYVILLE, TN
  • Difficulty Level:
    Very Easy
  • Total Repair Time:
    Less than 15 mins
  • Tools:
    Nutdriver
2 of 2 people found this instruction helpful.
Was this instruction helpful to you?
Thank you for voting!
THE FACE PLATE IS HARD TO GET OFF THE OLD CONTROL BOARD. USE A THIN KNIFE
THE INSTRUCTIONS THAT COME IN THE EMAIL ARE VERY GOOD. BE SURE TO TAKE A PICTURE OF THE WIRING.
  • Melvin from WEBSTER, TX
  • Difficulty Level:
    Really Easy
  • Total Repair Time:
    15 - 30 mins
  • Tools:
    Nutdriver, Pliers
1 person found this instruction helpful.
Was this instruction helpful to you?
Thank you for voting!
Oven board went out
One wire at at time then used my razor blade to get front off stuck right back on
  • Jackie from TICKFAW, LA
  • Difficulty Level:
    Very Easy
  • Total Repair Time:
    15 - 30 mins
  • Tools:
    Pliers
1 person found this instruction helpful.
Was this instruction helpful to you?
Thank you for voting!
Oven would shut down while baking. Stove top would work.
Replaced Electronic Control Board. Very easy to do with a nut driver and a screw driver to remove the old one. You may need a pair of needle nose pliers to remove Connector TB100 and TB101. Just squeeze the bottom of tabs to release connector. I also found that in the process of removing the Control Board label that it may rip in certain areas even while using a razor blade, so be prepared to purchase a craft paint brush and craft white paint to touch up the back of the label. It took 2 coats but looks like new..

The replacement Control Board works as advertised and I now have my oven working again. Save yourself the cost of a Service Company coming into your home just be prepared to do a bit of painting on the old label because it is really glued down and the new control board does not come with a new label.
  • Tom from ELIZABETHTON, TN
  • Difficulty Level:
    Really Easy
  • Total Repair Time:
    30 - 60 mins
  • Tools:
    Nutdriver, Pliers, Screw drivers
2 of 2 people found this instruction helpful.
Was this instruction helpful to you?
Thank you for voting!
Oven temp wouldn't regulate.
Followed the directions!
  • Ronald from Crumpler, NC
  • Difficulty Level:
    Very Easy
  • Total Repair Time:
    15 - 30 mins
  • Tools:
    Nutdriver, Pliers, Screw drivers
2 of 2 people found this instruction helpful.
Was this instruction helpful to you?
Thank you for voting!
oven would not heat
I removed the 4 hex head screws holding the control panel , then the other 4 slotted screws. Disconnected all wires being careful to keep track of the color coding. Had a little trouble with the adhesive holding the face plate( I don't know why they even used it). Put the new panel in and reconnected it. Re set circuit breaker and tried the oven. It still wouldn't heat. it wasn't the control panel, but a burned out wire connecting the element in the back of the oven. Well, anyway I learned how to do the job and the the new panel activates better, so all was not lost.
  • Jim from Williamsburg, VA
  • Difficulty Level:
    Easy
  • Total Repair Time:
    1- 2 hours
  • Tools:
    Nutdriver, Pliers, Screw drivers
5 of 8 people found this instruction helpful.
Was this instruction helpful to you?
Thank you for voting!
Oven would not heat, buttons not working, beeping
Turned power off, removed back cover, removed four screws for control board and replaced. The control board shorted out due to accidentally lifting the bottom heating coil while energized. This caused it to short out on the terminals in the back (did not trip breaker for some reason). Removing those connectors to clean them up a little is the only reason I needed the pliers. All the wires are color coded to put them back where they came from on new board. Because of other stories on this web site, I knew to order the $12 faceplate graphics so I didn't have to try to peel off the old one. Unfortunately, the graphic was damaged in shipping. However, I am getting a replacement free of charge, but I have to take it all apart again to stick it on. 1/4" nut driver is really all a person needs to do this job. Pliers could help pull wires off terminals if they are really tight, and the back panel might be secured with one phillips head screw also. Mine wasn't, but it looked like it should have been so it is now. I also put a little electrical tape on the inside of the rear panel behind those connectors for the bottom heating coil, so if it is ever lifted up again, it won't short out and fry the control board again.
Other Parts Used:
Electronic Control Board FACEPLATE GRAPHICS (BK)
  • Richard from Littleton, CO
  • Difficulty Level:
    Really Easy
  • Total Repair Time:
    30 - 60 mins
  • Tools:
    Nutdriver, Pliers
12 of 17 people found this instruction helpful.
Was this instruction helpful to you?
Thank you for voting!
Blown Oven Control Board
After removing the back of the range the oven control board was visible and accessible by removing four nuts. There was some resistance removing the leads from the oven coils and light-bulb mechanisms but with some leverage and pliers they came loose. The only challenge was the face plate of the unit is attached using adhesive and needed to be carefully peeled off and added to the new oven control board. Getting this right was just a matter of taking time and lining up the components correctly. After applying the face, the new control board went right in. I reattached the back, plugged the unit back in, and the over has worked great for the past week. Part select being able to identify the part numbers listed from the component likely saved me at least $100 of having a GE certified repair technician come in.
  • Julien from Barnhart, MO
  • Difficulty Level:
    A Bit Difficult
  • Total Repair Time:
    15 - 30 mins
  • Tools:
    Nutdriver, Screw drivers
52 of 58 people found this instruction helpful.
Was this instruction helpful to you?
Thank you for voting!
Oven wouldn't heat
Remove upper rear cover (4 hex screws), then I removed the 4 phillips screws that mount the control panel, I memorized the wire positions (easy since they are color coded) unplug the wires and remove the old control panel. The face plate of the control panel did not come off easily and the adhesive pulled off some of the white paint, leaving an unsightly clear edge. So I used white-out, and painted the areas where the finish had pulled off. It worked beautifully, and the color match is perfect. Then I reapplied the face plate, put the new control panel in position, connected wires, screwed screws, repositioned rear cover, screwed screws, plugged it in and it was done. The longest pare of the job was waiting for the white-out to dry.
  • Jeffrey from Hilton Head, SC
  • Difficulty Level:
    Really Easy
  • Total Repair Time:
    1- 2 hours
  • Tools:
    Nutdriver, Screw drivers
17 of 19 people found this instruction helpful.
Was this instruction helpful to you?
Thank you for voting!
Oven Wouldn't Heat
Replaced
  • Russell from Yuma, AZ
  • Difficulty Level:
    Really Easy
  • Total Repair Time:
    30 - 60 mins
  • Tools:
    Pliers, Screw drivers, Socket set
7 of 13 people found this instruction helpful.
Was this instruction helpful to you?
Thank you for voting!
  • 1
Questions and Answers

Ask our experts a question about this part and we'll get back to you as soon as possible!

28 questions answered by our experts.
Sort by:
  • 1
  • 2
  • 3
Sorry, we couldn't find any existing answers that matched.Try using some different or simpler keywords, or submit your new question by using the "Ask a Question" button above!
Jerri
January 10, 2018
I need to replace the touch panel on my range, but the only model number replacement I can find is for model # jbp66wh2ww - is that close enough?
For model number JBP66W0H2WW
PartSelect logo
Hi Jerri, Thank you for the question. Yes, the model number JBP66W0H2WW and JBP66WH2WW are the same model number. The 0 just takes place of a space in the manufactures system and is not needed. Hope this helps!

12 people found this helpful.

Was this helpful?
Thank you for voting!
Jerri
January 26, 2018
With a glass top stove is it possible to replace a single burner or does the whole top need to be replaced?
For model number JBP66WH2WW
PartSelect logo
Hello Jerri, Thanks for your question. Yes, the burners can be replaced individually. The 6-inch burner is part number PS243905, while the 8-inch burner is part number PS243903. I hope this helps.

3 people found this helpful.

Was this helpful?
Thank you for voting!
Related Parts:
Al
October 22, 2019
The oven temperature fluctuates quite a bit and does not maintain even heat. No problem when cooking meals but baking cakes/pastries the results are very poor. No error codes on the touch pad.
For model number JCBP65SOM2SS
PartSelect logo
Hello Al, thank you for writing. This would be due to either a faulty Temperature Sensor or Oven Clock Control. You can test the Temperature Sensor with a multi-meter. It should read between 900 and 1200 ohms of resistance to be functioning correctly. The compatible replacement Oven Clock Control for your model range is part number PS3493488, but unfortunately the Temperature Sensor for it is discontinued. You will need to reach out to GE directly for a substitution part number if it needs to be replaced. Good luck with your repair!

2 people found this helpful.

Was this helpful?
Thank you for voting!
Daniel
September 27, 2017
The red power on light and the red hot stove top light right underneath it are flickering.
For model number JBP69SH2SS
PartSelect logo
Hi Daniel, Thank you for your question. You may want to try disconnecting the power from your appliance for about one minute. If you plug it back in and it is still giving you problems. There is a chance that you will need to replace your board. You could double check with a technician first though. I hope this helps. Good luck with your repair.

2 people found this helpful.

Was this helpful?
Thank you for voting!
William
February 10, 2020
The control board flashes loc and unlock. It will not reset after unplugging. The burners electric work find and clock works, but the oven will not come on or heat up...
For model number JPB350M1WW
PartSelect logo
Hello and thank you for writing. We suggest to try a hard reset: Go to your breaker box and shut the breakers for your unit off, wait 5 minutes and then turn the breaker to on again. That should hopefully clear this problem. How do you clear a LOC on a GE oven? Press the Clean pad, wait 10 seconds. When the cycle initiates, press the clear/off or cancel pad immediately to cancel it. Wait 10 seconds for the display to clear. ... Press the Clean pad. Close the door. Slide the latch to lock the door. Hit the cancel button immediately. Unlock the door. If this does not fix this problem then your oven sensor PS10059162 might be faulty and possibly needs to be replaced. We hope this helps. Please contact us anytime.

2 people found this helpful.

Was this helpful?
Thank you for voting!
Related Parts:
Lori
July 27, 2021
I need to replace the control board, do i also need the front overlay control panel? Or will my old attach to the new? I believe i need wb27t11311.
For model number JBP68H0K1WW
PartSelect logo
Hello Lori, Thank you for contacting us. Yes, this would be the correct electronic control board for your mode. The faceplate graphics are part number PS1017040. You should be able to peel it off the old control board and attach it to the new one, but if it becomes damaged in any way, you should replace it. Good luck with your repair.

1 person found this helpful.

Was this helpful?
Thank you for voting!
Related Parts:
Larry
January 7, 2018
When any buttons are pushed on the control panel or the timer times out there is no audible beeping as there used to be. Is there a way to turn it off accidentally maybe?
For model number jbp67
PartSelect logo
Hello Larry, Thank you for your inquiry. I would try resetting the control board by unplugging the stove or turning it off at the circuit breaker for 2 minutes, then plugging it back in and resetting the clock, if it still does not beep, you may have to replace the control board. Hope this helps!

1 person found this helpful.

Was this helpful?
Thank you for voting!
Thomas
March 1, 2018
The top until get to hot f2code come up
For model number jbp35wok4ww
PartSelect logo
Hello Thomas, thank you for your question. When you get an F2 code on a GE range it usually means that the oven temperature has exceeded the recommended temperature. This code usually means that the oven sensor needs to be replaced. I would recommend testing the temperature sensor part number WB21X22134. The resistance of the sensor should read approximately 1080 – 1090 ohms at room temperature-if it does not, then replace it. I hope this helps!

1 person found this helpful.

Was this helpful?
Thank you for voting!
Bill
April 25, 2018
Is your replacement control panel color coded for easy installation. Also what is your return policy?
For model number JBP80WH2WW
PartSelect logo
Hi Bill, Thank you for the question. Judging by the picture of the part it is color coded. Here is a link to our return policy. Hope this helps! https://www.partselect.com/Thirty-Day-Returns.htm

1 person found this helpful.

Was this helpful?
Thank you for voting!
John
February 11, 2018
My burners and oven will not work. Would this be the control board or something else?
For model number Jbp35dm1bb
PartSelect logo
Hello John, Thanks for your question. You may want to test the temperature sensor first with a multimeter, as that can cause both issues at once. Replace it if it has no continuity. If that part is valid, it is likely your control board causing the problems. I hope this helps.

1 person found this helpful.

Was this helpful?
Thank you for voting!
Related Parts:
  • 1
  • 2
  • 3
Model Cross Reference
This part works with the following models:
PartSelect Number: PS3493487
Manufacturer Part Number: WB27T11311
Brand
Model Number
Description
General Electric
ECBP70SK1SS
Range - Electric
General Electric
ECBP70SK2SS
Range - Electric
General Electric
ECBP70SK3SS
Range - Electric
General Electric
ECBP70SK4SS
Range - Electric
General Electric
ECBP70WK1WW
Range - Electric
General Electric
ECBP70WK2WW
Range - Electric
General Electric
ECBP70WK3WW
Range - Electric
General Electric
ECBP70WK4WW
Range - Electric
General Electric
ECBP82SK1SS
Range - Electric
General Electric
ECBP82SK2SS
Range - Electric
General Electric
ECBP82WK1WW
Range - Electric
General Electric
ECBP82WK2WW
Range - Electric
General Electric
EER3000H01BB
Range - Electric
General Electric
EER3000H01KC
Range - Electric
General Electric
EER3000H01TW
Range - Electric
General Electric
EER3000H02BB
Range - Electric
General Electric
EER3000H02KC
Range - Electric
General Electric
EER3000H02TW
Range - Electric
General Electric
EER3000K01BB
Range - Electric
General Electric
EER3000K01KC
Range - Electric
General Electric
EER3000K01TW
Range - Electric
General Electric
EER3000K02BB
Range - Electric
General Electric
EER3000K02KC
Range - Electric
General Electric
EER3000K02TW
Range - Electric
General Electric
EER3001H00SS
Range - Electric
General Electric
EER3001H01SS
Range - Electric
General Electric
EER3001H02SS
Range - Electric
General Electric
EER3001K01SS
Range - Electric
General Electric
EER3001K02SS
Range - Electric
General Electric
EER3002H00CC
Range - Electric
Customer Service Representative

Get in touch, we're here to help!

Daily 8am - 9pm EST

Contact Customer Service