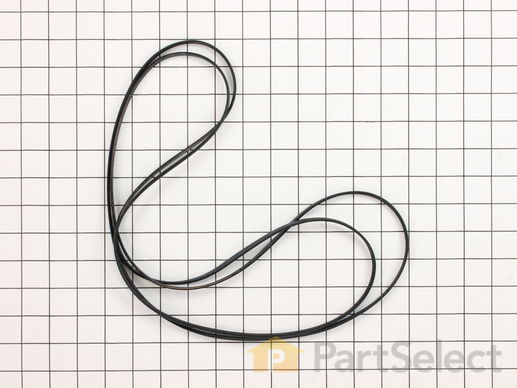
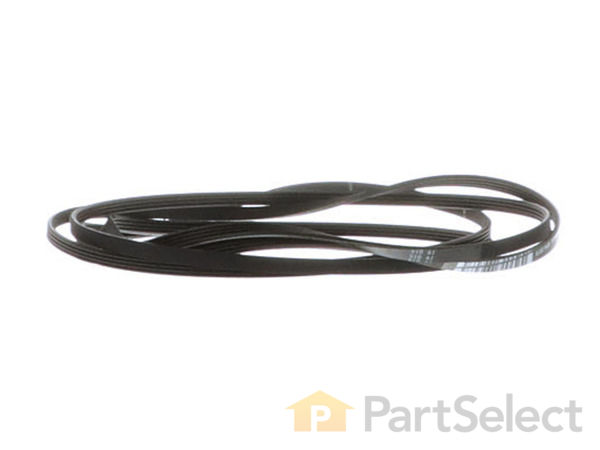
Part Location Diagram of 137292700 Frigidaire Multi-Rib Drum Belt
See part F25 in the diagram
( Grid squares measure 1x1 inch )
Customer Service Representative

Get in touch, we're here to help!

Daily 8am - 9pm EST

customerservice@partselect.com

Multi-Rib Drum Belt 137292700

 Fits your GES831AS2!
★★★★★
★★★★★
12 Reviews

Rated by 25 customers 

Easy 

1- 2 hours 

Ratings submitted by customers like you who bought this part.

$ 17.23
  In Stock
Get FREE EconoShip on orders over $100! T&C apply

Get this part fast! Average delivery time for in-stock parts via standard shipping: 1.8 days.

 Fits your GES831AS2!
PartSelect Number PS3408299
Manufacturer Part Number 137292700
Manufactured by Frigidaire
Product Description

Multi-Rib Drum Belt Specifications

The multi-rib drum belt is also known as a drive belt and is a part for your dryer. The function of the drum belt is to attach to the motor pulley. It will then spin the drum as the motor rotates. Over time this part will naturally dry out. If your drum belt begins to crack or break, the dryer will not be able to continue to turn. If your dryer is running but your belt will not rotate, that likely means that it has been damaged and needs replacing. The tools you will need for this repair are a putty knife and a screwdriver set.
How Buying OEM Parts Can Save You Time and Money

How Buying OEM Parts Can Save You Time and Money

Troubleshooting
This part fixes the following symptoms:
Noisy | Drum Not Spinning
This part works with the following products:
Washer Dryer Combo.
This part works with the following products:
Frigidaire, Kenmore, Westinghouse, Crosley.
Part# 137292700 replaces these:
AP4565702, 1615170, 134163500, 134503900, 5303283287
Back to Top
Customer Reviews
Average Rating:
★★★★★
★★★★★
12 Reviews
4.5
Filter By Rating:
  • 5 Stars
    9
  • 4 Stars
    1
  • 3 Stars
    1
  • 2 Stars
    1
  • 1 Star
    0
Sort by:
  • 1
  • 2
Sorry, we couldn't find any existing reviews that matched. Try using some different or simpler keywords.
  • 1
  • 2
Customer Repair Stories
 Average Repair Rating: 2.5 / 5.0, 25 reviews. What's this?
Sort by:
  • 1
  • 2
  • 3
Sorry, we couldn't find any existing installation instruction that matched.
Drum belt broken
purchased part (drum belt) didn't fit the drum it was larger,, i select the size according to model number and serial number but unfortunately it was wasting of time and money and i still don't have dryer.
  • Reymoun from MILLIS, MA
  • Difficulty Level:
    Difficult
  • Total Repair Time:
    1- 2 hours
  • Tools:
    Screw drivers
1 person found this instruction helpful.
Was this instruction helpful to you?
Thank you for voting!
Dryer Drum not turning
I found a you tube video that walked me thru the steps. Only problem encountered was 2 screws which were different and a little difficult, but became obvious as the control panel wouldn't loosen as video suggested. Otherwise the repair was fairly easy, and VERY SATISFYING.
  • John from MOUNTAIN CITY, TN
  • Difficulty Level:
    A Bit Difficult
  • Total Repair Time:
    30 - 60 mins
  • Tools:
    Screw drivers
1 person found this instruction helpful.
Was this instruction helpful to you?
Thank you for voting!
High pitched squeal from dryer during use...
Followed directions of another website...had to replace ball and socket joint that attached the drum to the back frame of the dryer...removed top outside metal cover of dryer to facilitate attaching ball/socket kit to the drum...this allowed us to secure the ball/socket kit to the drum without cross threading the screws...with the top of dryer removed this allows you to lift the drum to fit into the plastic bracket...dryer had been in use for over ten years before repair...extreme amount of lint debris throughout internal area of dryer...lint was everywhere...spent a large amount of time vacuuming lint...duct connection from lint trap to lint fan/impeller was very loose and over the years lint seeped out from connection...suggest using duct tape or wood/composite shims to hold the lint duct to the fan/impeller...make sure you remove lint from the back of drum crevice and around the area of the heating element for electric dryers...for sanity's sake this should be a two person job...for this repair we replaced the upper and lower drum felt strip, installed a complete and new ball/socket kit, replaced drum belt, and vacuumed and damp wiped the entire interior of the dryer...
Other Parts Used:
Multi-Rib Drum Belt Lower Front Felt Seal with Adhesive Front Upper Felt Seal with Adhesive
  • Robert from OCEAN SPRINGS, MS
  • Difficulty Level:
    A Bit Difficult
  • Total Repair Time:
    More than 2 hours
  • Tools:
    Screw drivers, Socket set
2 of 3 people found this instruction helpful.
Was this instruction helpful to you?
Thank you for voting!
Broken Belt
As instructed by a Frigidaire Video for a Laundry Center: FIRST disconnect the power I then removed the access panel, Safety Shield was missing (previous Serviceman never replaced), Entire door assembly and the top cover. Doing this exposed the entire Drum and made installation VERY easy. Always research your job as there are many reliable videos instructions available, it takes the fear and guess work out and leaves only confidence ahead. I am 63 yrs old and if I can attempt this anyone can!
  • Patricia from FARMINGDALE, NJ
  • Difficulty Level:
    Very Easy
  • Total Repair Time:
    30 - 60 mins
  • Tools:
    Screw drivers, Socket set
1 person found this instruction helpful.
Was this instruction helpful to you?
Thank you for voting!
The drive belt snapped due to age
Removed front and back panels as well as the dryer front, placed belt on drum and drive motor. I found that taking the door off the dryer front made the reassembly much easer.
  • Thomas from MAYODAN, NC
  • Difficulty Level:
    A Bit Difficult
  • Total Repair Time:
    More than 2 hours
  • Tools:
    Pliers, Screw drivers, Socket set
1 person found this instruction helpful.
Was this instruction helpful to you?
Thank you for voting!
Loud squealing when dryer was turning. At first it was just when it started and eventually it was constant.
Be carful when unpacking, the grounding bearing is in loose with the bolts. I had to chase it. Follow the video instructions for the stacked washer/dryer combo and you will not have a problem. Recommend you have two people working to lift the drum out and to install the new bearing.
Other Parts Used:
Drum Glide - White Multi-Rib Drum Belt Rear Drum Bearing Kit
  • Eric from GRANBURY, TX
  • Difficulty Level:
    A Bit Difficult
  • Total Repair Time:
    1- 2 hours
  • Tools:
    Nutdriver, Socket set
1 person found this instruction helpful.
Was this instruction helpful to you?
Thank you for voting!
Very loud high pitch squeal while using the dryer
The loud noise was present only while using the dryer of my washer/dryer combo unit. I traced the noise down to the rear center of the dryer and I noticed that the noise would stop or be quieter if I pushed on this area with my hand while the dryer was running. I realized there must be some type of bearing supporting the weight of the dryer drum while allowing it to rotate. I did a Google search for parts on my model # and found Parts Select. I used the parts diagrams to figure out what parts were the likely problem. I found the rear bearing part# and watched the very helpful video showing how to replace it.

I removed the drum on my dryer and found the bearing and socket to be completely dry (no grease) and showing a lot of wear. The dryer heat element surrounds the bearing so I think 10 years of use had dried up all the grease. I purchased the bearing kit so I swapped out the old parts for everything in the kit. I also noticed the drum belt was split in places and little black dots all over the inside of the drum area were small pieces of the belt. I replaced the belt and took the opportunity to vacuum the drum area because it was covered with 10 years of lint. The bearing replacement video was extremely helpful and I was able to replace parts easily even though I had a different dryer than in the video. My dryer is much quieter now and I didn't have any screws left over!! I will definitely shop Parts Select again!!
Other Parts Used:
Multi-Rib Drum Belt Rear Drum Bearing Kit
  • Danny from WENTWORTH, SD
  • Difficulty Level:
    Really Easy
  • Total Repair Time:
    30 - 60 mins
  • Tools:
    Nutdriver, Screw drivers
2 of 2 people found this instruction helpful.
Was this instruction helpful to you?
Thank you for voting!
Dryer belt broke
This is a washer/ dryer combo unit. Start at the top of the unit. Remove top plate then remove cover between dryer and washer. Remove control panel. Now remove front panel with dryer door. Unplug harness connector. With area now open put on new belt around drum and motor. Be sure you put belt around idler pulley correct way so there is tension on belt. Put back together in reverse order. Took me about 40 minutes since I cleaned and vacuumed out appliance.
  • Michall from KEYESPORT, IL
  • Difficulty Level:
    Easy
  • Total Repair Time:
    30 - 60 mins
  • Tools:
    Screw drivers
2 of 2 people found this instruction helpful.
Was this instruction helpful to you?
Thank you for voting!
Drum belt and bearing needed to be replaced.
Unplugged dryer, removed access panel on the back of dryer. Removed access panel on the front of the dryer. Removed the front panel of the dryer. Inside the drum, removed the three screws on the center bearings. Slide the bearing out of the bearing support. Replaced the bearing support. Then reassembled the drum. Replaced the belt an reassembled the dryer. Two people would be recommended for reassembly.
Other Parts Used:
Multi-Rib Drum Belt Drum Support Bearing
  • Troy from GOTHENBURG, NE
  • Difficulty Level:
    A Bit Difficult
  • Total Repair Time:
    1- 2 hours
  • Tools:
    Screw drivers
1 person found this instruction helpful.
Was this instruction helpful to you?
Thank you for voting!
The drum was squeaking and running slow
Removed drum replaced bearing with kit, replaced both front drum seals and drive belt. The only problem was when replacing the rear drum ball the three screw holes were poorly tapped and took several tries to get them in. The manufacturers could easily fix this problem. They could provide self tapping hex head screws instead of the Phillips head screws. Everything else went very smoothly.
Other Parts Used:
Multi-Rib Drum Belt Upper Drum Glide Front Lower Drum Seal Rear Drum Bearing Kit
  • Terry from TENINO, WA
  • Difficulty Level:
    Really Easy
  • Total Repair Time:
    1- 2 hours
  • Tools:
    Nutdriver, Screw drivers
3 of 3 people found this instruction helpful.
Was this instruction helpful to you?
Thank you for voting!
  • 1
  • 2
  • 3
Questions and Answers

Ask our experts a question about this part and we'll get back to you as soon as possible!

7 questions answered by our experts.
Sort by:
  • 1
Sorry, we couldn't find any existing answers that matched.Try using some different or simpler keywords, or submit your new question by using the "Ask a Question" button above!
JERRY
February 24, 2018
What is the length of this belt?
For model number FFLE1011MW2
PartSelect logo
Hello Jerry, Thank you for your inquiry. We are showing it is approximately 89 inches long. Hope this helps!

16 people found this helpful.

Was this helpful?
Thank you for voting!
Phillip
February 27, 2018
The broken belt that came off is 90 x 1/4 4 rib. I keep seeing belts at 89 i just want the right belt so i can get my wet clothes dry what is the right belt for me????
For model number FLSG72GCSA
PartSelect logo
Hello Phillip, thank you for your question. The part number for the belt is 137292700. This part is the OEM part recommended for your appliance. The original belt is measuring a bit larger because it has been stretched over time. Please enter the part number into the site for current price and availability. Good luck with your repair!

9 people found this helpful.

Was this helpful?
Thank you for voting!
Ted
October 11, 2019
How to change the belts on the dryer.This is a combo unit.
For model number 41793802200
PartSelect logo
Hi Ted, thank you for your question. We actually have a customer that wrote in with a comprehensive installation for this part: "Well, i started at the top and worked my way down. by taking the top off, it gave me more room to get the dryer tub out. took the two screw`s out of the vented plate on the back of the machine to undo the belt. this is a stackable washer-dryer combo, so next i took off the white plate on front between washer & dryer. took off the control panel, unpluged it, then took dryer door front off. then removed the two screw`s that hold that bracket on ,in the back of dryer, pulled the drum out & replaced the belt, but before replacing anything i took the shopvac to it , there was alot of lint in there.when replacing the Grounding Ball Clip & Grounding Ball, i took a one inch by two inch magnet and used it to hold the Grounding Ball & Clip in place so i could get the two screws started in the Drum Support Bearing & Bearing Bracket. after installing that i put the shaft in place & lined the dryer tub up with the 3 screw hole`s ,and boom, bang, pow...nothing to it" . I hope that helps. Good luck with your repair.

4 people found this helpful.

Was this helpful?
Thank you for voting!
Joe
April 13, 2023
Length of dryer belt
For model number FLXE52RBS8
PartSelect logo
Hi Joe, Thank you for your question. The belt measures 89-1/2 inches long. We hope this helps!

1 person found this helpful.

Was this helpful?
Thank you for voting!
Don
February 9, 2022
New dryer belt is so tight drum does not rotate. Is there more than one belt for this model dryer?
For model number FEX83ICS0
PartSelect logo
Hello Don, Thank you for contacting us. We have researched the model you have provided and have found the part you are looking for is PartSelect Number: PS3408299. We suggest checking the Pulley to make sure it does not need to be adjusted. We hope this helps, good luck with this repair!

Was this helpful?
Thank you for voting!
Earl
January 5, 2023
I need to order a specific part for my dryer. But I don’t know what it’s called. I know what it looks like and where it’s located I even have a picture of it. On the very back of the dryer inside, there are two sensors mounted to the upper left-hand corner on the inside the dryer behind the drum. I know that the top left sensor is a Thermal limit sensor. But I don’t know what the other one is called and it is the one I need.
For model number Fex831cs0
PartSelect logo
Hi Earl, thank you for contacting us. The two mounted sensors on the upper left-hand corner inside the dryer are Thermal Limiter, part number PS419402, and the High Limit Thermostat, part number PS446428. We hope this information helps! If you need help placing an order, customer service is open 7 days a week. Thanks again for your great question.

Was this helpful?
Thank you for voting!
Related Parts:
Ernest
August 13, 2019
Re: Multi ribbed belt (partselect no.:ps3408299):what is the length of the belt?
For model number frigidaire Model: fflg4033qt1
PartSelect logo
Hello Ernest, thank you for your question. This replacement Multi-Rib Drum Belt for your model is approximately 89.5" long. Good luck with your repair!

Was this helpful?
Thank you for voting!
  • 1
You May Also Need ?
Model Cross Reference
This part works with the following models:
PartSelect Number: PS3408299
Manufacturer Part Number: 137292700
Brand
Model Number
Description
Kenmore
41761722511
Washer Dryer Combo - Laundry Center
Kenmore
41761723511
Washer Dryer Combo - Laundry Center
Kenmore
41761732810
Washer Dryer Combo - Laundry Center
Kenmore
41761732811
Washer Dryer Combo - Laundry Center
Kenmore
41761733810
Washer Dryer Combo - Laundry Center
Kenmore
41771712512
Washer Dryer Combo - Laundry Center
Kenmore
41771722512
Washer Dryer Combo - Laundry Center
Kenmore
41771723512
Washer Dryer Combo - Laundry Center
Kenmore
41771732810
Washer Dryer Combo - Laundry Center
Kenmore
41771733810
Washer Dryer Combo - Laundry Center
Kenmore
41771733811
Washer Dryer Combo - Laundry Center
Kenmore
41790802990
Washer Dryer Combo
Kenmore
41790802991
Washer Dryer Combo
Kenmore
41790802992
Washer Dryer Combo
Kenmore
41790807990
Washer Dryer Combo
Kenmore
41790812990
Washer Dryer Combo
Kenmore
41790812991
Washer Dryer Combo
Kenmore
41790812992
Washer Dryer Combo
Kenmore
41790814000
Washer Dryer Combo
Kenmore
41790814001
Washer Dryer Combo
Kenmore
41790814002
Washer Dryer Combo
Kenmore
41790817990
Washer Dryer Combo
Kenmore
41790862990
Washer Dryer Combo
Kenmore
41790862991
Washer Dryer Combo
Kenmore
41790862992
Washer Dryer Combo
Kenmore
41790872990
Washer Dryer Combo
Kenmore
41790872991
Washer Dryer Combo
Kenmore
41790872992
Washer Dryer Combo
Kenmore
41791702000
Washer Dryer Combo
Kenmore
41791702001
Washer Dryer Combo
Customer Service Representative

Get in touch, we're here to help!

Daily 8am - 9pm EST

Contact Customer Service