Part Location Diagram of 279408 Whirlpool Rear Drum Seal Kit
See part 66 in the diagram
( Grid squares measure 1x1 inch )
Customer Service Representative

Get in touch, we're here to help!

Daily 8am - 9pm EST

customerservice@partselect.com

Rear Drum Seal Kit 279408

★★★★★
★★★★★
10 Reviews

Rated by 26 customers 

Easy 

1- 2 hours 

Ratings submitted by customers like you who bought this part.

$ 71.92
  In Stock
Get FREE EconoShip on orders over $100! T&C apply

Get this part fast! Average delivery time for in-stock parts via standard shipping: 1.8 days.

PartSelect Number PS334194
Manufacturer Part Number 279408
Manufactured by Whirlpool
Product Description

Rear Drum Seal Kit Specifications

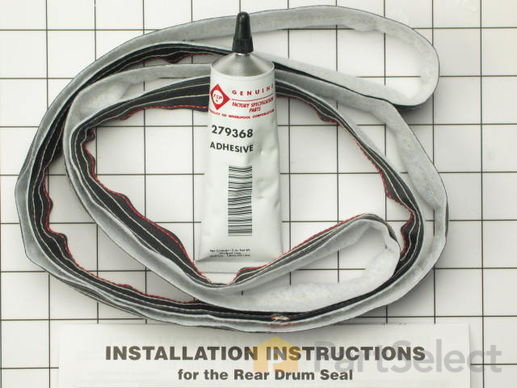
This seal kit for large capacity gas and electric clothes dryers includes a seal, an adhesive, and an instructions sheet. This felt seal for the back of the drum is sewn with red thread.
How Buying OEM Parts Can Save You Time and Money

How Buying OEM Parts Can Save You Time and Money

Troubleshooting
This part fixes the following symptoms:
Noisy | Marks left on clothes
This part works with the following products:
Dryer.
This part works with the following products:
Kenmore, Whirlpool, KitchenAid, Roper.
Part# 279408 replaces these:
AP3094149, 3028, 2018, 279408, 279408VP, 347885
Back to Top
Customer Reviews
Average Rating:
★★★★★
★★★★★
10 Reviews
4.9
Filter By Rating:
  • 5 Stars
    9
  • 4 Stars
    1
  • 3 Stars
    0
  • 2 Stars
    0
  • 1 Star
    0
Sort by:
  • 1
Sorry, we couldn't find any existing reviews that matched. Try using some different or simpler keywords.
  • 1
Customer Repair Stories
 Average Repair Rating: 2.9 / 5.0, 26 reviews. What's this?
Sort by:
  • 1
  • 2
  • 3
Sorry, we couldn't find any existing installation instruction that matched.
My old dryer drum had become noisy and loose and prone to getting stuck while running.
I replaced the front seal and bearing, split ring bearing and rear seal. It was technically pretty easy. The thing to do is watch the videos provided by PartsSelect AND go to Youtube and watch a couple of others. Once you see several guys do the job and look over your own machine, it all becomes obvious. Some tips: Work cleanly, you will be dealing with dryer dust and shredded gasket material. Use a vacuum and put down newspaper or a drop cloth. While you have it apart, clean the inside of the machine, and check the other moving parts (eg, rear bearing and drive belt). The glue for the rear drum seal is runny and dries fast so work reasonably quickly. I held the seal on with clothes pins and binder clips and glued about a foot of seal at a time. Everything else goes on easily. They dryer is like a new machine-good for another 30 years.
Other Parts Used:
Seal and Bearing Two-Piece Split Ring Bearing Rear Drum Seal Kit
  • Ed from SEBEKA, MN
  • Difficulty Level:
    Easy
  • Total Repair Time:
    1- 2 hours
  • Tools:
    Nutdriver, Screw drivers
3 of 3 people found this instruction helpful.
Was this instruction helpful to you?
Thank you for voting!
the drum was moving back and forth and taking longer to dry chloths.
I just watched all your how to videos before I ordered the parts and after I saw how easy it was I just ordered and followed the instructions.
Other Parts Used:
Seal and Bearing Maintenance Kit Rear Drum Seal Kit
  • ludwig from EDISON, NJ
  • Difficulty Level:
    Easy
  • Total Repair Time:
    1- 2 hours
  • Tools:
    Nutdriver, Pliers, Screw drivers
1 person found this instruction helpful.
Was this instruction helpful to you?
Thank you for voting!
worn dryer drum rear felt
followed instruction on your website. It took more than 2 hours, but the active working time was ~20 minutes, plus ~ half hour to clean the inside of the dryer ( amazing amount of lint/dust/coins-still wondering how the coins got out of the rotating drum). The rest of the time was waiting for he glue to set.
  • s. from WALNUT CREEK, CA
  • Difficulty Level:
    Really Easy
  • Total Repair Time:
    1- 2 hours
  • Tools:
    Screw drivers, Socket set
1 of 2 people found this instruction helpful.
Was this instruction helpful to you?
Thank you for voting!
black streaking on white clothing
the repair was straight forward. I am a machine shop owner so I have a little knowledge about mechanics.the repair took 2 and 1/2 hours due to cleaning lint from everything that I could reach and removing all of the excellent factory adhesive. If someone could do this repair in less than one hour properly. .
Other Parts Used:
Seal and Bearing Rear Drum Seal Kit
  • Walter from Memphis, TN
  • Difficulty Level:
    Easy
  • Total Repair Time:
    More than 2 hours
  • Tools:
    Nutdriver, Screw drivers, Socket set, Wrench set
1 of 2 people found this instruction helpful.
Was this instruction helpful to you?
Thank you for voting!
Tumbler in dryer was not tumbling
We discovered that the front of the dryer popped off after removing screws at the bottom of the front panel.
The tumbler seal had rotted away, the drum support rollers were frozen and the belt had broken. My husband did most of the work. I assisted, this was a 2 man job. We removed the old seal glue with Goo Gone, we put the new seal on with both of us working on it using clothes pins. Then we glued the new seal with one of us holding the seal up while the other put the glue under it. My husband replaced the drum support rollers, got the idler pulley ready and put the belt around the drum. He lifted and I guided the tumbler (drum) into position. I held the drum while he installed the idler pulley assembly. I kept holding the drum while he got the front panel, put it in position and re-connected the electrical wires on it. Once we had that done he was able to install the front panel. Then came the moment for the test drive, and what do you know but it worked!! We didn't have to spend $$ for a new dryer, it cost us some time (probably around 5 hours total, taking apart, ordering parts and putting together), and a little over $100!! We were happy!
Other Parts Used:
Idler Pulley Assembly Rear Drum Support Roller Kit Multi Rib Belt - 92-1/4" Rear Drum Seal Kit
  • Vicki from Santa Maria, CA
  • Difficulty Level:
    Easy
  • Total Repair Time:
    More than 2 hours
  • Tools:
    Nutdriver, Screw drivers, Socket set
46 of 1298 people found this instruction helpful.
Was this instruction helpful to you?
Thank you for voting!
Belt had slipped off idler pulley.
Opened top panel in order to remove the front panel. Removed belt and removed drum seal. Replaced drum seal and belt.
Other Parts Used:
Multi Rib Belt - 92-1/4" SEAL-DOOR Rear Drum Seal Kit
  • John from East Rockway, NY
  • Difficulty Level:
    Easy
  • Total Repair Time:
    30 - 60 mins
  • Tools:
    Nutdriver
1 of 5 people found this instruction helpful.
Was this instruction helpful to you?
Thank you for voting!
Brown Lines on Clean Clothes coming out of Dryer
Removed the top and front panel, removed the dryer drum. Removed the worn out rear drum seal. I scraped and sanded the old glue residue from the rear of the drum. I used "0000" steel wool to clean the "brown seal residue" from the rear panel where the new seal on the drum would rub/seal against the rear panel. I used spring clamps to hold the seal in place prior to appling the glue. The glue was applied to the drum/seal and allowed to dry 30-45 min. I replaced the front drum seal (some of the other discussions in your forum had good hints on replacing this seal, better than the printed instructions), also replaced the belt and applied a light amout of lubrication (3 in 1 oil) to the idler pulley and the drum rollers. The dryer runs smoothly and quietly and most importantly no more brown streaks on clean clothes.
Other Parts Used:
Multi Rib Belt - 92-1/4" Seal and Bearing Rear Drum Seal Kit
  • John from Semmes, AL
  • Difficulty Level:
    Really Easy
  • Total Repair Time:
    30 - 60 mins
  • Tools:
    Nutdriver, Screw drivers
5 of 6 people found this instruction helpful.
Was this instruction helpful to you?
Thank you for voting!
Loud, rhythmic squealing when dryer was running
Opened up machine per instructions.
After examining drum slides and rear drum bearing, determined that all should be replaced due to excessive wear. Drum slides were the chief cause of the squealing, and they were as simple to replace as removing 4 nut drive screws, pulling off the old parts, and replacing with new. The drum bearing had to be coaxed out by tapping with a screwdriver, but the old was just able to be pushed in. All parts came with instructions, so the repair was easy. And no more squealing!
Other Parts Used:
Rear Drum Seal Kit Rear Drum Bearing Front Drum Slide Kit
  • Jeanne from Doylestown, PA
  • Difficulty Level:
    Easy
  • Total Repair Time:
    15 - 30 mins
  • Tools:
    Nutdriver, Screw drivers
29 of 32 people found this instruction helpful.
Was this instruction helpful to you?
Thank you for voting!
Broken Drum Roller Support
After reading about repairs to the drum rollers, it was suggested to change the rear drum seal at the same time. The drum rollers were very easy to change and took no time at all. The rear seal was a different story. The instructions in the packet could have been more explicit. The seal has to be streched around the drum at first. Then and only then can you install the seal on the drum edge. You should also have several clamps available to hold the seal in place as you glue the outside flap. Leave the clamps in place until the glue dries, then re-install the drum.
Other Parts Used:
Rear Drum Support Roller Kit Rear Drum Seal Kit
  • Lawrence from Cedar Grove, NJ
  • Difficulty Level:
    A Bit Difficult
  • Total Repair Time:
    30 - 60 mins
  • Tools:
    Nutdriver, Screw drivers
3 of 4 people found this instruction helpful.
Was this instruction helpful to you?
Thank you for voting!
Dryer old and worn out
Dryer started making noises years ago. Finally it was intermittently starting, then...didn't start at all. It made a buzzing noise, like the motor was in over-torque. Then it over heated and wouldn't do anything until it cooled down. Then the cycle started all over again. I thought it best to change out all the worn parts. Found the belt, the rear seal, the rollers and motor all needed to be replaced. All were very simple to do. Followed the instructions and videos from others located on this site.
Other Parts Used:
Rear Drum Support Roller Kit Multi Rib Belt - 92-1/4" Rear Drum Seal Kit Single Heating Element Support Clip
  • Harald from Port Washington, NY
  • Difficulty Level:
    Easy
  • Total Repair Time:
    30 - 60 mins
  • Tools:
    Pliers, Screw drivers, Socket set, Wrench (Adjustable)
8 of 13 people found this instruction helpful.
Was this instruction helpful to you?
Thank you for voting!
  • 1
  • 2
  • 3
Questions and Answers

Ask our experts a question about this part and we'll get back to you as soon as possible!

4 questions answered by our experts.
Sort by:
  • 1
Sorry, we couldn't find any existing answers that matched.Try using some different or simpler keywords, or submit your new question by using the "Ask a Question" button above!
Barbie
November 25, 2019
The rear roller drum is broke and i can replace that just fine. However i need to know if the roller support has to be replaced? At least on the one that the broken roller was on. The center of the roller has a bigger hole so it would have been dealing with a lot of weight and the drum hitting it. Should the rear bearing glide and seal also be replaced?
For model number 11086874100
PartSelect logo
Hello Barbie, thank you for your question. We would recommend replacing both of the rear rollers and supports for this unit. If the drum seal is worn and causing noise and friction, it should be replaced as well.

2 people found this helpful.

Was this helpful?
Thank you for voting!
Kurtland
November 11, 2019
I have an old Whirlpool dryer. Will this rear drum seal kit fit on my dryer?
For model number LZE7500W0
PartSelect logo
Hello Kurtland, thank you for your question. The rear drum seal for this unit is actually PartSelect Number: PS333333. Good luck with your repair!

1 person found this helpful.

Was this helpful?
Thank you for voting!
Phil
October 14, 2022
Looking for a Kenmore rear felt seal
For model number 110.86670100
PartSelect logo
Hello Phil,, thank you for writing. The Rear Drum Seal Kit is part PS334194 and we sell it here on our website. We hope this helps.

Was this helpful?
Thank you for voting!
Christian
December 3, 2023
Is the perimeter 79 inches? Would it fit my Kenmore dryer model number 110.C65902500 ser MS2701256
For model number 110.C65902500
PartSelect logo
Hello Christian, thank you for asking. We cannot confirm that this seal will fit your model. The length is 78.5" Fits drum which are 25" in diameter. We hope this helps.

Was this helpful?
Thank you for voting!
  • 1
You May Also Need ?
Model Cross Reference
This part works with the following models:
PartSelect Number: PS334194
Manufacturer Part Number: 279408
Brand
Model Number
Description
Kenmore
10686294140
Dryer
Kenmore
10686294340
Dryer
Kenmore
10686294540
Dryer
Kenmore
10686294740
Dryer
Kenmore
10686294840
Dryer
Kenmore
11066702690
Dryer
Kenmore
11066722690
Dryer
Kenmore
11066801690
Dryer
Kenmore
11066808690
Dryer
Kenmore
11066812690
Dryer
Kenmore
11066814690
Dryer
Kenmore
11076420100
Dryer
Kenmore
11076420110
Dryer
Kenmore
11076450100
Dryer
Kenmore
11076450110
Dryer
Kenmore
11076450120
Dryer
Kenmore
11076450200
Dryer
Kenmore
11076450210
Dryer
Kenmore
11076450220
Dryer
Kenmore
11076450400
Dryer
Kenmore
11076450410
Dryer
Kenmore
11076450420
Dryer
Kenmore
11076450600
Dryer
Kenmore
11076450610
Dryer
Kenmore
11076450620
Dryer
Kenmore
11076460100
Dryer
Kenmore
11076460110
Dryer
Kenmore
11076460130
Dryer
Kenmore
11076460200
Dryer
Kenmore
11076460210
Dryer
Customer Service Representative

Get in touch, we're here to help!

Daily 8am - 9pm EST

Contact Customer Service