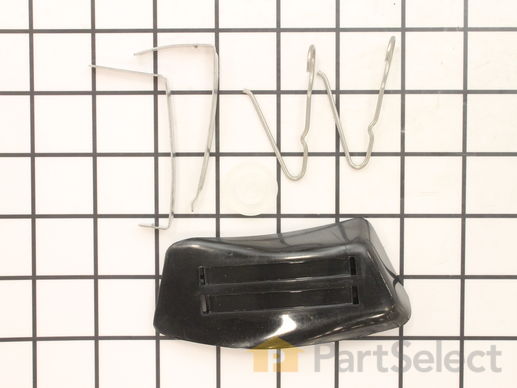
Electrode/Sensor 279366
Rated by 4 customers
Easy
1- 2 hours
Ratings submitted by customers like you who bought this part.
Get this part fast! Average delivery time for in-stock parts via standard shipping: 1.8 days.
Electrode/Sensor Specifications

How Buying OEM Parts Can Save You Time and Money
-
5 Stars 1
-
4 Stars 0
-
3 Stars 0
-
2 Stars 0
-
1 Star 0
- < Prev
- 1
- Next >
- < Prev
- 1
- Next >
- < Prev
- 1
- Next >
-
Alejandro from HOLLIS, NY
-
Difficulty Level:Really Easy
-
Total Repair Time:30 - 60 mins
-
Tools:Screw drivers, Socket set, Wrench (Adjustable)
-
J from Trabuco Canyon, CA
-
Difficulty Level:Really Easy
-
Total Repair Time:15 - 30 mins
-
Tools:Nutdriver, Screw drivers
-
wpeter from boca raton, FL
-
Difficulty Level:A Bit Difficult
-
Total Repair Time:1- 2 hours
-
Tools:Nutdriver, Pliers
I thought the problem would turn out to be the motor, but instead it was the front seal for the drum. It is felt and had broken. It folded under itself and was jamming the drum to the point that the motor couldn't turn it.
I replaced the felt seal, which attaches to the front cover with three clips and also replaced the plastic guides, which clip to the drum. Both were easy to do. I had replaced the rear drum seal a few years ago and so it was ok, otherwise I would recommend doing that too.
While I had it apart, I opened up the back and cleaned out all the lint in the fan housing. I had replaced the heater element, thermal switch and fuse a few years ago, so they were fine.
I also replaced the mosture sensor, just because it only cost $11. I bought a new lint filter, because it had holes in it after 20 years. I replaced the belt, because it was only $10. I replaced the lint filter cover and front door handle, because they had yellowed. I will warn you about the front door handle. It was a bear. I finally had to take the door apart to get the little plastic clip to seat correctly.
Then I put it all back together, which again is easier with 3 hands. Holding up the drum and putting the front cover on the lower clips can be a bit tricky alone. Also, be sure to rotate the drum to make sure the rear seal is not folded under and the front seal is seated correclty.
I fired it up and it ran great, except for the constant whistling. I had wondered what the little clear plastic box in the back did. Turns out it is the lint filter is full whistle warning thing. I took the back off again and found a wire was resting on the flapper door of the box and holding it in the wrong postion. By the way, it is a really irritating sound after the first few minutes. I moved the wire and it works great.
I worked slowly and it went well and was not hard.
-
Chris from Worcester, MA
-
Difficulty Level:Easy
-
Total Repair Time:1- 2 hours
-
Tools:Nutdriver, Screw drivers
- < Prev
- 1
- Next >
Ask our experts a question about this part and we'll get back to you as soon as possible!
- < Prev
- 1
- Next >

4 people found this helpful.


- < Prev
- 1
- Next >
Manufacturer Part Number: 279366

Item is in stock and will ship today if your order is placed before 4:00 PM Eastern Standard Time.
If your order is placed after 4:00 PM EST, the in stock items will ship on the next business day.
Item is not in stock and usually ships 3-5 business days from the time you place your order.
Item is not in stock and usually ships 10-15 business days from the time you place your order.
This item is no longer being made by the manufacturer, and cannot be added to your shopping cart.


