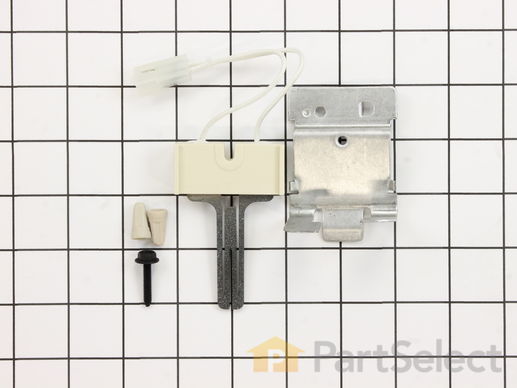
Part Location Diagram of 279311 Whirlpool Igniter Kit
See part 4 in the diagram
Replacing your Whirlpool Dryer Igniter Kit
( Grid squares measure 1x1 inch )
Customer Service Representative

Get in touch, we're here to help!

Daily 8am - 9pm EST

customerservice@partselect.com

Igniter Kit 279311

 Fits your RGX3514RQ1!
★★★★★
★★★★★
33 Reviews

Rated by 27 customers 

Easy 

30 - 60 mins 

Ratings submitted by customers like you who bought this part.

$ 40.54
  In Stock
Get FREE EconoShip on orders over $100! T&C apply

Get this part fast! Average delivery time for in-stock parts via standard shipping: 1.8 days.

 Fits your RGX3514RQ1!
PartSelect Number PS334180
Manufacturer Part Number 279311
Manufactured by Whirlpool
Product Description

Igniter Kit Specifications

If your dryer will not heat, takes too long to dry, or does not provide enough heat, you might want to replace your igniter kit. This silicone carbide igniter with ceramic holder kit includes the 3-inch flat igniter, bracket, 4-inch wire leads, and the plug. The kit can replace both round and flat igniters and is used for many gas clothes dryers. Be sure to disconnect the power source from your dryer before you do this repair. The igniter is located within the burner assembly, so you will require tools to complete the repair. You will need a putty knife, a small flat blade screwdriver, a 5/16 nut driver, and a 5/16 socket with a ratchet.
How Buying OEM Parts Can Save You Time and Money

How Buying OEM Parts Can Save You Time and Money

Part Videos

Replacing your Whirlpool Dryer Igniter Kit

Replacing your Whirlpool Dryer Igniter Kit
Troubleshooting
This part fixes the following symptoms:
Not Heating
This part works with the following products:
Dryer, Washer Dryer Combo.
This part works with the following products:
Whirlpool, Kenmore, Maytag, KitchenAid.
Part# 279311 replaces these:
AP3094138, 3415, 279311, 239233, 239300, 239302, 26000279311, 279185, 279311, 279311VP, 338899, 338900, 3389895, 340607, 343128, 41-311, 6-85211, 660991, 685211, 686590 , 687399, 691039, 8113, 99912719, DE351, DE363, K35-166 Show less
Back to Top
Customer Reviews
Average Rating:
★★★★★
★★★★★
33 Reviews
4.6
Filter By Rating:
  • 5 Stars
    26
  • 4 Stars
    4
  • 3 Stars
    2
  • 2 Stars
    0
  • 1 Star
    1
Sort by:
  • 1
  • 2
  • 3
Sorry, we couldn't find any existing reviews that matched. Try using some different or simpler keywords.
  • 1
  • 2
  • 3
Customer Repair Stories
 Average Repair Rating: 3.4 / 5.0, 27 reviews. What's this?
Sort by:
  • 1
  • 2
  • 3
Sorry, we couldn't find any existing installation instruction that matched.
Got heat only on start of cycle and no repeat of flame. Suspected coils on gas valve.
I used a multi meter to find coils failed in warmed temperature condition.
I tested main switch for different cycle operation. Main switch was worn out inside and not making good contact for soft cycles.
This dryer is 25 years old. I chose to replace all the sensors, fuses, ignitor, gas valve coils, cycle switch and thermostat.
This was cost effective for me, because now, I actually have a good dryer that might just last another 25 years. I might replace the drive belt soon. I'll order from Parts Select. This was easy and fun. Thanks!
Other Parts Used:
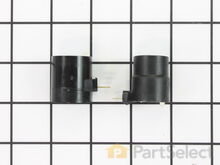
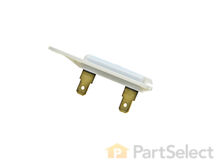
Thermal Cut-Off Fuse Kit Dryer Thermal Fuse Dryer Radiant Flame Sensor Dryer Cycling Thermostat M Series New Style Coil Kit Igniter Kit
  • John T Lundy from Pittsburgh, PA
  • Difficulty Level:
    Really Easy
  • Total Repair Time:
    1- 2 hours
  • Tools:
    Nutdriver, Screw drivers, Wrench set
7 of 9 people found this instruction helpful.
Was this instruction helpful to you?
Thank you for voting!
would only heat for about 7 minutes.
I replaced the thermos fuse, thermostat, igniter kit, and the M series
new style coil kit. The problem was the M series coil kit. I replaced
the other parts because this dryer is over 10 years old. I also brought
the radiant flame sensor. I spent $126.19 in parts plus shipping. If I just
just replaced the coil kit it would have 18.61 plus shipping. A new gas dryer like I have would cost about $459.00. I hope to get many more years out of this dryer. The hardest part of this repair for me was getting the front panel back on. I saved the parts that were good for futher repairs. I replaced the drum belt several years ago, still looks in good shape. I think this is a great DIY site. Just follow their instrutions. Somtimes I'll take a picture of the part before I remove it, just to be sure I replace it right.
Other Parts Used:
M Series New Style Coil Kit Igniter Kit
  • Craig from ARMA, KS
  • Difficulty Level:
    Easy
  • Total Repair Time:
    30 - 60 mins
  • Tools:
    Nutdriver, Pliers, Screw drivers, Wrench (Adjustable)
1 person found this instruction helpful.
Was this instruction helpful to you?
Thank you for voting!
Dryer won't ignite.
Took all the advise on the diagnose. Replaced all the parts. My dryers fuse was not at the back. It was located on the blower box.
Other Parts Used:
Thermostat, Internal-Bias Disposable Thermal Fuse - Two Terminal M Series New Style Coil Kit Igniter Kit
  • Poh Kuan from WICKLIFFE, OH
  • Difficulty Level:
    Easy
  • Total Repair Time:
    More than 2 hours
  • Tools:
    Screw drivers, Socket set
1 of 4 people found this instruction helpful.
Was this instruction helpful to you?
Thank you for voting!
Dryer wasn't getting hot enough
I ordered the three parts which were the most recommended to fix the problem. Watched the videos for the repairs and saw that the igniter replacement was much more complex than replacing the fuse and thermostat. I replaced the Fuse and thermostat first which are right next to each other and required just removing the back panel of dryer. Ran the dryer and those two parts fixed it so I didn't need to replace the igniter unit.
Other Parts Used:
Dryer Thermal Fuse Dryer Cycling Thermostat Igniter Kit
  • Michael from LAKE FOREST, CA
  • Difficulty Level:
    Very Easy
  • Total Repair Time:
    15 - 30 mins
  • Tools:
    Nutdriver
1 person found this instruction helpful.
Was this instruction helpful to you?
Thank you for voting!
dryer would not work .
Took the old parts out and installed the new parts in , everything that you sent fit perfect!!!!!
Other Parts Used:
Burner Tube Dryer Radiant Flame Sensor Igniter Kit
  • Tom from MEARS, MI
  • Difficulty Level:
    Really Easy
  • Total Repair Time:
    15 - 30 mins
  • Tools:
    Socket set
3 of 3 people found this instruction helpful.
Was this instruction helpful to you?
Thank you for voting!
Dryer would not dry clothes no heat
Followed video you give on your web site very use full used putty knife to undo clips holding on the top lifted top unplugged wire for door switch undid two bolts with socket set lifted off front panel of dryer first changed heat sensor 1 screw unclip wire put on new sensor re clip wire bottom part of sensor goes into a slot line up hole on top put screw back and tighten for the igniter kit unplug wire clip remove on screw with socket set have to put new igniter on bracket with new screw included with kit be careful no to bang igniter when replacing it replace it with screw re clip wire replace front of dryer with two bolts replug wire for door switch close top for thermal fuse and thermostat internal- bias remove nine screws on back of dryer take off panel disconnect vent on my gas dryer had to shut off gas supply and undo gas line thermostat internal -bias and thermal fuse are easy to do thermal internal bias has four wires and one screw just replace wires the way they came off replace screw same with thermal fuse two wires one screw just reverse process be sure not to mix up wires replace dryer back with screws hook up gas line check for any leaks turn on gas supply hook up vent and you should be good to go test dryer hope this help someone like others helped me.
Other Parts Used:
Dryer Thermal Fuse Dryer Radiant Flame Sensor Dryer Cycling Thermostat Igniter Kit
  • John M from BROWNS MILLS, NJ
  • Difficulty Level:
    Really Easy
  • Total Repair Time:
    1- 2 hours
  • Tools:
    Pliers, Screw drivers, Socket set
4 of 4 people found this instruction helpful.
Was this instruction helpful to you?
Thank you for voting!
Dryer had no heat at all. This is an older gas dryer.
Cleaned out years of fuzz behind lower access panel and noticed where the igniter sits there is a metal tube about 1 inch in diameter. It had rust on the end and was starting to flake away. Found some helpful hints about how to test the igniter. Very easy, just used an ohmeter. Unplugged the 2 pin wire connector and checked for continuity. 1 lead on 1 pin and the other on the other pin., igniter side not the harness side from the dryer. A good igniter should read less than 5 ohms. I don't know the spec. exacttly, but it should not read open or infinite resistance. My meter read an open circuit. Removed the tube and igniter assembly, mine only 2 small bolts. I found the igniter element cracked. Ordered and installed igniter and tube assembly. This was a very easy install. 20 year old dryer works great and it's better than spending $500.00+ on a new one.
Other Parts Used:
Burner Tube Igniter Kit
  • todd from MILFORD, PA
  • Difficulty Level:
    Really Easy
  • Total Repair Time:
    Less than 15 mins
  • Tools:
    Wrench set
4 of 4 people found this instruction helpful.
Was this instruction helpful to you?
Thank you for voting!
Dryer running and no heat
Checked fuse with Volmeter, had continuity (acted as a short) not the problem. Disconnected Hot Surface Igniter 2 Position connector to check resistance for a range of 50-300 Ohms of resistance with Voltohm Meter. Meter read open (High Resistance). Removed Igniter by unscrewing 5/16" hex nut on igniter plate assembly and noticed silicon carbide element was cracked in the middle. Ordered a new igniter and noticed assembly was required. Be careful here as igniter element is fragile, also do not touch it with your bare hands. You have to lay down on floor to reinstall igniter assembly and you might want to practice anchoring the defective igniter to gain confidence. Finally with slow movements anchored new igniter assembly and turned on dryer. Watched igniter glow heating gas valve and heating gas flame returned. Dryer fixed for a few hours of study online and cost only $24, plus learned how the gas dryer works.
  • Ken from ROCHESTER, NY
  • Difficulty Level:
    A Bit Difficult
  • Total Repair Time:
    30 - 60 mins
  • Tools:
    Nutdriver
1 person found this instruction helpful.
Was this instruction helpful to you?
Thank you for voting!
My Dryer Would Heat Initally But Then Lose Heat
We followed the on-line video which was very helpful but it took longer for us. But the part didn't fix the problem, so we had to go back on line and research it some more only to find that the more common cure for our problem was the gas coils which were even easier to replace and that did fix the problem.
  • Michelle from Chicago Heights, IL
  • Difficulty Level:
    Really Easy
  • Total Repair Time:
    30 - 60 mins
  • Tools:
    Nutdriver, Screw drivers
0 of 5 people found this instruction helpful.
Was this instruction helpful to you?
Thank you for voting!
No Heat
Thermal fuse was blown so I replaced it. Still no heat. Hi-Limit thermostat and Cycling Thermo. had continuity as did flame sensor. Igniter tested 66ohms. I placed a wire jumper across the Hi-Limit and the igniter glowed, solenoids opened and gas came on. I orderd the Hi-Limit and since both "overheating" limiters were defective I decided to order the cycling thermo just in case. The Hi-Limit was received in 2 days but the Cycling Thermo was backordered. In the meantime my wife got antsy so I went ahead and installed the Hi-Limit and put her back in service... ...for one load. I wasn't certain if I had fried the "limiters" again but since they had continuity and I could measure continuity all the way to the Igniter I decided that it HAD to be the cause. I ignored the flame sensor since it never came into play without the igniter glowing... The igniter arrived and measured 56ohms. Hmmm... After installing the problem was solved. Word of advice: If the thermal fuse is blown and even if all else in the circuit SEEMS ok, go ahead and order the Fuse, Hi-Limit and Cycling Thermos, and the Igniter. It will take you about 30 minutes to install and you'll reduce your out-of-service time! Good luck!
  • Ken from Bixby, OK
  • Difficulty Level:
    Easy
  • Total Repair Time:
    More than 2 hours
  • Tools:
    Nutdriver, Screw drivers, Socket set
6 of 8 people found this instruction helpful.
Was this instruction helpful to you?
Thank you for voting!
  • 1
  • 2
  • 3
Questions and Answers

Ask our experts a question about this part and we'll get back to you as soon as possible!

36 questions answered by our experts.
Sort by:
  • 1
  • 2
  • 3
Sorry, we couldn't find any existing answers that matched.Try using some different or simpler keywords, or submit your new question by using the "Ask a Question" button above!
Veronica
November 15, 2017
My dryer just went out. It still spins and blows cold air out but will not heat. Is the igniter kit what i need?
For model number AGD4475TQ1
PartSelect logo
Hi Veronica, Thank you for your question. I would suggest doing a couple tests on some of the main parts that usually go out in a situation like this. You can use a multi meter. I would say first test your M series coils, then your thermostats, and then your igniter, and radiant flame sensor. Those are the most common parts to go out. All of them should read 0 ohms when testing them. The igniter however should test anywhere between 50 and 400 ohms of resistance. I hope that helps. Good luck with your repair.

53 people found this helpful.

Was this helpful?
Thank you for voting!
Warren
November 9, 2017
How do you test a ignitor
For model number WGD4800XQ0
PartSelect logo
Hi Warren, Thank you for the question. If you test the igniter with a Multi Meter it should read between 50-400 Ohms. If is is less then 50 the igniter is defective. Hope this helps!

26 people found this helpful.

Was this helpful?
Thank you for voting!
Pete
November 7, 2017
The dryer starts, igniter glows, starts the gas, gas goes on and stays on and burns for only about 30-40 seconds and the gas shuts off. Have already replaced the coils with new ones. Suggestions. Thanks
For model number LGQ7030KQ0
PartSelect logo
Hi Pete, Thank you for your question. I would suggest checking your thermotsats, your thermal fuse, and your radiant flame sensor. It sounds like it is going to be one of those parts that is the issue. You can test all of those parts with a multi meter. I hope that helps. Good luck with your repair.

18 people found this helpful.

Was this helpful?
Thank you for voting!
Anlo
April 13, 2018
I changed my dryer's igniter when the dryer would not heat. The dryer then worked, but after 2 loads of laundry, the dryer has the same problem as before - it turns, but does not heat. A multimeter test confirmed the new igniter was burned out again. What could be causing the igniter to burn out again? Thank you for your advice.
For model number 110.74952300
PartSelect logo
Hello Anlo, Thanks for your question. The thermal fuse could also be going bad and that could cause the igniter to burn out. You may wish to test the thermal fuse with your multimeter for electrical continuity and replace it if it shows no continuity. I hope this helps.

11 people found this helpful.

Was this helpful?
Thank you for voting!
Related Parts:
Hal
November 7, 2017
My dryer has had the ignition coils replaced in the past when the gas Flame would stay lit, this fixed that problem. Now a couple years later when i turn the dryer on i don't even get a Flame at all, what part or parts might be suspect ? Thanks
For model number MGD5570TQ0
PartSelect logo
Hi Hal, Thank you for your inquiry. There are some parts that you will need to check to see which one is causing the issue. You will need to check the coils, the internal bias thermostat, The igniter kit, the radiant flame sensor, the high limit thermostat, and the thermal cut-off. I hope this helps. Thank you and have a great day!

7 people found this helpful.

Was this helpful?
Thank you for voting!
Ray
August 24, 2017
I turn my dryer on and there is a Flame. In a short period of time the Flame goes out, lets say 5 to 6 minutes.
For model number lgr3624jq1
PartSelect logo
Hello Ray, thank you for contacting us. It sounds like it may be the coil kit. When the igniter reaches a high enough temperature, these coils work together to let the gas enter the dryer. The coils may test within specifications when cold but when they get hot from the current to open them, they become too weak to open the gas valve. Hope this helps!

7 people found this helpful.

Was this helpful?
Thank you for voting!
Related Parts:
Dennis
November 2, 2017
No heat on 'permanent press' but heats up properly on 'heavy duty'. What part(s) do you recommend to replace?
For model number LG5801XMW0
PartSelect logo
Hi Dennis, Thank you for the question. I suggest replacing the Dryer Timer Switch. This switch controls the cycles and when to send power to the igniters during the cycle letting it know when to heat up. Hope this helps!

6 people found this helpful.

Was this helpful?
Thank you for voting!
Guy
August 14, 2017
Dryer will start fist time when turned on then will not light after in opperation in cycle.
For model number Whirlpool / #GGW9200LW0
PartSelect logo
Hi Guy, Thank you for your inquiry. Where the dryer is shutting off too soon there are a few parts that you will need to check to see if they are causing the problem. You will need to check the internal bias thermostat, the door catch, the electrode sensor, the M series new style coil kit, the radiant flame sensor and the disposable thermal fuse. I hope this helps. Thank you and have a great day!

5 people found this helpful.

Was this helpful?
Thank you for voting!
Paul
December 11, 2019
I replaced the igniter switch that i ordered and worked fine when i tested it again i’m not getting the gas to go on could another part gone bad should i check with with the multimeter?
For model number LGN2000PWO
PartSelect logo
Hello Paul, thank you for writing. It is likely a faulty Thermal Fuse, part number PS11741460 for your model dryer. You can test the continuity with a multimeter. You should receive a reading of zero or infinity for it to be functioning properly. Good luck with your repair!

4 people found this helpful.

Was this helpful?
Thank you for voting!
Gerri
March 14, 2019
I checked to make sure there was good air flow. Replaced the coil valves. And it still does not heat. When you start it it has the normal click but does not ignite. What part do i need?
For model number WDG9200SQ0
PartSelect logo
Hi Gerri, Thank you for your question. If it is not igniting the igniter will likely need to be replaced. I hope this helps. Thank you and have a great day!

4 people found this helpful.

Was this helpful?
Thank you for voting!
  • 1
  • 2
  • 3
You May Also Need ?
Model Cross Reference
This part works with the following models:
PartSelect Number: PS334180
Manufacturer Part Number: 279311
Brand
Model Number
Description
Kenmore
10687884100
Dryer
Kenmore
10687884300
Dryer
Kenmore
10687884600
Dryer
Kenmore
110279119
Dryer
Kenmore
110279121
Dryer
Kenmore
1103387617
Dryer
Kenmore
1103397617
Dryer
Kenmore
1103398423
Dryer
Kenmore
1103401771
Dryer - Kenmore Dryer Model 110.3401771 (1103401771, 110 3401771) Parts
Kenmore
1103401772
Dryer
Kenmore
1103401795
Dryer
Kenmore
1103401796
Dryer
Kenmore
1103401797
Dryer
Kenmore
1103401798
Dryer
Kenmore
1103401799
Dryer
Kenmore
1103402243
Dryer
Kenmore
1103402844
Dryer
Kenmore
1103402851
Dryer
Kenmore
1103402855
Dryer
Kenmore
1103402856
Dryer
Kenmore
110341566
Dryer
Kenmore
110343114
Dryer
Kenmore
110344612
Dryer
Kenmore
110344613
Dryer
Kenmore
110349621
Dryer
Kenmore
110349797
Dryer
Kenmore
110349798
Dryer
Kenmore
110349799
Dryer
Kenmore
110349832
Dryer
Kenmore
110349833
Dryer
Customer Service Representative

Get in touch, we're here to help!

Daily 8am - 9pm EST

Contact Customer Service