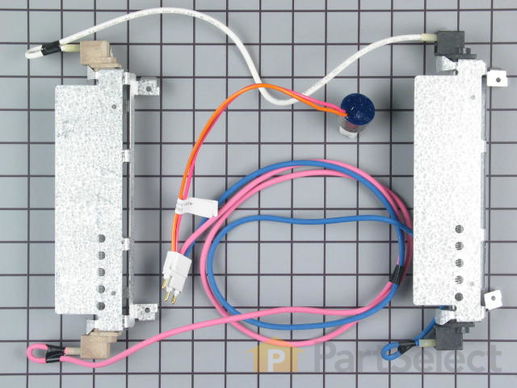
Part Location Diagram of WR51X442 GE Defrost Heater with Thermostat
See part 230 in the diagram
Replacing your General Electric Refrigerator Defrost Heater with Thermostat
( Grid squares measure 1x1 inch )
Customer Service Representative

Get in touch, we're here to help!

Daily 8am - 9pm EST

customerservice@partselect.com

Defrost Heater with Thermostat WR51X442

 Fits your CSX22GAZBWW!
★★★★★
★★★★★
16 Reviews

Rated by 37 customers 

Easy 

30 - 60 mins 

Ratings submitted by customers like you who bought this part.

$ 126.91
  In Stock
Get FREE EconoShip on orders over $100! T&C apply

Get this part fast! Average delivery time for in-stock parts via standard shipping: 1.8 days.

 Fits your CSX22GAZBWW!
PartSelect Number PS303933
Manufacturer Part Number WR51X442
Manufactured by GE
Product Description

Defrost Heater with Thermostat Specifications

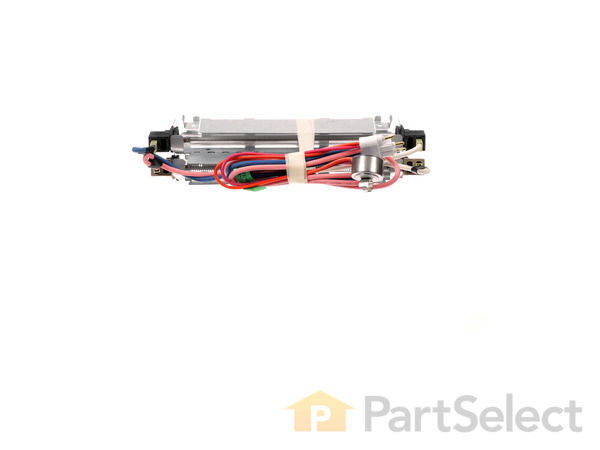
This part assembly has 2 functions: The defrost heater keeps the cooling coils from frosting over and the thermostat senses that the heat near the cooling coils has reached the desired temperature. Used with side by side models.
How Buying OEM Parts Can Save You Time and Money

How Buying OEM Parts Can Save You Time and Money

Part Videos

Replacing your General Electric Refrigerator Defrost Heater with Thermostat

Replacing your General Electric Refrigerator Defrost Heater with Thermostat
Troubleshooting
This part fixes the following symptoms:
Fridge too warm | Freezer not defrosting | Freezer section too warm | Frost buildup
This part works with the following products:
Refrigerator.
This part works with the following products:
General Electric, Kenmore, Hotpoint.
Part# WR51X442 replaces these:
AP2071464, 1972, WR51X442, WR51X0342, WR51X0371, WR51X0442, WR51X0463, WR51X342, WR51X371, WR51X463
Back to Top
Customer Reviews
Average Rating:
★★★★★
★★★★★
16 Reviews
5.0
Filter By Rating:
  • 5 Stars
    16
  • 4 Stars
    0
  • 3 Stars
    0
  • 2 Stars
    0
  • 1 Star
    0
Sort by:
  • 1
  • 2
Sorry, we couldn't find any existing reviews that matched. Try using some different or simpler keywords.
  • 1
  • 2
Customer Repair Stories
 Average Repair Rating: 3.8 / 5.0, 37 reviews. What's this?
Sort by:
  • 1
  • 2
  • 3
Sorry, we couldn't find any existing installation instruction that matched.
Unit failing to defrost
Executed the repair just as outlined in the video provided encountered no surprises and the job went very smoothly. Thanks
  • Charles from POWELL, TN
  • Difficulty Level:
    Very Easy
  • Total Repair Time:
    30 - 60 mins
  • Tools:
    Nutdriver, Screw drivers
1 person found this instruction helpful.
Was this instruction helpful to you?
Thank you for voting!
evaperator section encased with ice
being a side by side unit, removed back cover in freezer section, allowed built up ice to melt off, exposing evaporater coils and deforst heaters, removed screws holding upper and lower heater and remove thermostat cliped to coil, unplugged wire connector and reversed insulation of unit. it was vary easy and only tools used was a 1/4 inch nut driver and phillipshead screw driver.
Other Parts Used:
Light Bulb - 40W Defrost Heater with Thermostat
  • Alex from Sun City West, AZ
  • Difficulty Level:
    Really Easy
  • Total Repair Time:
    15 - 30 mins
  • Tools:
    Nutdriver, Screw drivers
2 of 3 people found this instruction helpful.
Was this instruction helpful to you?
Thank you for voting!
Refrigerator not cooling enough
I first googled the problem, then narrowed down the parts that could cause the problem (if failed), then took out the parts and determined that they had indeed failed. I then ordered said parts and installed them. It was easy because they are "plug and play" parts. The hardest part was removing (and then replacing) the back panel inside the freezer just because it was awkward to reach the screws.
Other Parts Used:
Defrost Timer Defrost Heater with Thermostat
  • Naren from Brevard, NC
  • Difficulty Level:
    Easy
  • Total Repair Time:
    15 - 30 mins
  • Tools:
    Screw drivers, Socket set
1 of 2 people found this instruction helpful.
Was this instruction helpful to you?
Thank you for voting!
coils frozen freezer 18 degrees refrigerator at 68 degrees
Checked continuity of defrost timer and marked to make sure was cycling. When checked continuity of top defrost tube-it was fine but, soon as looked at bottom tube could see problem. Tube was black, no continuity, and left side of tube was separated from the rubber connector, thought obviously water entered tube during defrost and shorted unit and since wired in series with bottom unit not working would not allow power to reach top unit. New replacement kit simple to install-4 phillips screws hold the 2 units in place- thermostat clips to top coil and wiring runs along the coils to top with thermostat- connect 3 prong plug to existing hook up and put on cover plate with 2 cap screws and 2 phillips the job was completed, IMMEDIATE RESULTS. Suggestion- even though tubes are available separately the time to rewire into the existing harness to save couple $$ is not worth it- the other unit will have lost some continuity in comparison to new install so will have tendency to go bad quickly-spring for the difference and have piece of mind for many years to come for replacement of this part. 2 day standard shipping by ground right to door and the little woman thought I was superman of repairs. Since this model was built by GE for Sears- check on Sears was double and inquire in tech repair was double again-Part Select is quality,speed in processing and makes tight budget go the distance.
  • JAY from EVERETT, PA
  • Difficulty Level:
    Really Easy
  • Total Repair Time:
    15 - 30 mins
  • Tools:
    Nutdriver, Screw drivers
2 of 2 people found this instruction helpful.
Was this instruction helpful to you?
Thank you for voting!
No cold air to fresh food side- freezer cold. coils freezing up.
PartSelect was excellent to deal with! Forum related to my problem, helped me diagnose what part needed to be replaced, based on other shoppers experiences. Diagram of part/schematic in thier online library gave me a visual of what I was looking for as well as how to go about getting to it to make the repair. Shipping notes suggested I would recieve my part in 5-7 days but it was delivered in two days. Over all experiance with this company A+ Book marked thier website for future reference. Thanks PartSelect!!!
  • Patrick from Lewisville, TX
  • Difficulty Level:
    Easy
  • Total Repair Time:
    15 - 30 mins
  • Tools:
    Nutdriver, Screw drivers, Socket set
0 of 1 people found this instruction helpful.
Was this instruction helpful to you?
Thank you for voting!
Freezer and Refrig warmer than should be, with thick layer of frost build up on back wall of freezer compartment
From reading other customer reviews I initially suspected the defrost timer located inside the refrig compartment behind the upper back panel where the light bulb is located. Was able to order, remove shelving, remove cover panel, locate, and do a simple remove and replace. However, after I had manually defrosted the freezer (by unplugging and leaving door open all night), the original problem reoccured within a few days. Next step was to suspect the heater coils located inside the freezer compartment behind the back wall panel. Sure enough one of the two coils was burt, by having a black color to the coil. Was able to order this ready to install kit, that includes both new coils, and thermostat as one assemply, and again do a pretty simple remove, then install with new, exactly as the original. No more frost build up, and both compartments are nice and cold. These are simple and basic part replacemts, and PartSelect makes it even easier. There was no reason to replace this side by side that is now 15+ years old and counting.

Note: If a heavy build up of frost has occured, defrosting will most likely create more water than the tray on the bottom of the refrig can hold. Will need to plug or tape over the drain hole on the inside bottom of the freezer compartment. Large bath towels can be placed on the bottom of the compartment to absorb water, and prevent over flow onto the floor. Will take several hours to completely defrost. Foods can be stored in ice chest or seperate freezer if available. Others have used heated blow driers to reduce thaw time.
  • Daniel from Everett, WA
  • Difficulty Level:
    Easy
  • Total Repair Time:
    15 - 30 mins
  • Tools:
    Nutdriver, Screw drivers
0 of 1 people found this instruction helpful.
Was this instruction helpful to you?
Thank you for voting!
icemaker stopped working,warm fridge,
first i entered the symptoms into your site and the culprit was gonna be the defrost timer or defrost heater-thermostat. I ordered the parts and they arrived the next day even though I didn't pay for next day. Defrosting the freezer was what took the time.After it was thawed it only took about 15 minutes to install the heater and timer. Am happy to say I have all the ice I need and your diagnosis was right on.
Other Parts Used:
Defrost Timer Defrost Heater with Thermostat
  • mike from bear, DE
  • Difficulty Level:
    Easy
  • Total Repair Time:
    1- 2 hours
  • Tools:
    Nutdriver
1 of 2 people found this instruction helpful.
Was this instruction helpful to you?
Thank you for voting!
Refrigerator Not Cooling
Removed freezed inside back cover, defosted coils with a hair dryer and replaced the defrost heater.
  • Douglas from Greeley, CO
  • Difficulty Level:
    Easy
  • Total Repair Time:
    15 - 30 mins
  • Tools:
    Nutdriver, Screw drivers
1 of 2 people found this instruction helpful.
Was this instruction helpful to you?
Thank you for voting!
Freezer was cold but refrigerator was hot
After diagnosis though Part Select I determined it must be the defrost heater. I took the panel off on the inside of the back wall of the freezer and used a hair dryer to thaw the ice buildup. I found the bottom element was burned out. I ordered the defrost heater kit and the defrost timer in case that was faulty too. Parts arrived next day. I installed the heater kit and replaced the panel. Then took off the plastic cover inside the refrigerator. One screw near the top of the metal box allows you to remove it to get to the defrost timer.
Other Parts Used:
Defrost Timer Defrost Heater with Thermostat
  • James from Austin, TX
  • Difficulty Level:
    Easy
  • Total Repair Time:
    15 - 30 mins
  • Tools:
    Nutdriver, Screw drivers
9 of 9 people found this instruction helpful.
Was this instruction helpful to you?
Thank you for voting!
The refrigerator section of my side by side was not getting as cold as it should have been.
It was easy after finding PartSelect online. It wasn't obvious at first that my evaporator core(in back of freezer side) was frosting over, (since I have a flat white panel that is about 8 x 30 inches covering it), until I reached inside and ran my fingers over the cover and noticed a thin layer of frost on it. At this point I told my buddies to go get ice for our beer cuz I was fixin to do a lock out/tag out on the Fridge. Seriously, Do disconnect the electrical power before taking it apart. After taking the 9 screws (6-1/4" hex heads & 3-#2 phillips)out and removing the panel, I saw that the evaporator core was completely frosted over. I then put a large towel in the bottom and let it thaw for a day. Next day after getting the old Defrost Heater Kit with Thermostat out (4-#2 phillips, plug-in electrical connection, thermostat snap on clip) , I noticed it was burnt inside the filaments and did not pass the continuity test. I then ordered my part from PartSelect and took the oppurtunity to clean my fridge spotless. 3 business days later, I received my part, installed it, and now have a "like new" refrigertor. Actual repair time - 30 minutes, Overall down time - 4 days, Saving the cost of a new Fridge - a heck of lot more beer!
  • Wayne from Magnolia, TX
  • Difficulty Level:
    Really Easy
  • Total Repair Time:
    15 - 30 mins
  • Tools:
    Nutdriver, Screw drivers
10 of 10 people found this instruction helpful.
Was this instruction helpful to you?
Thank you for voting!
  • 1
  • 2
  • 3
Questions and Answers

Ask our experts a question about this part and we'll get back to you as soon as possible!

2 questions answered by our experts.
Sort by:
  • 1
Sorry, we couldn't find any existing answers that matched.Try using some different or simpler keywords, or submit your new question by using the "Ask a Question" button above!
Jamie
January 4, 2018
Is there anyway to test the defrost heater assembly through the pigtail? My defrost timer seems to work correctly but when the defrost cycle "clicks", the heaters do not activate.
For model number TFX22ZRXFWW
PartSelect logo
Hi Jamie, Thank you for the question. You should be able to tell by looking at the heater if it is defective. The glass will be clouded or have burn type of marks. The thermostat you can test. The best way to do this is to remove the thermostat from the refrigerator so you can control the temperature of the sensor. You can let the sensor warm up to room temperature. With the sensor warmed up to room temperature the sensor should read approximately 6.2K Ohms at 68°F. With the thermistor submerged is a glass full of ice water, the sensor should be very close to 32°F which should read approximately 16.3K Ohms. If the values that you are getting are far off from these readings, then the sensor is bad and should be replaced. Hope this helps!

15 people found this helpful.

Was this helpful?
Thank you for voting!
MIKE
January 27, 2018
Freezer side gets cold then it gets warm would this part fix the problem or is there another part that would work better thank you
For model number TFX20JRBCWW
PartSelect logo
Hello Mike, Thank you for your inquiry. We would recommend checking the defrost heater, timer and thermostat together. You can test the parts with a multimeter. If you are unfamiliar with how a multimeter functions, there are YouTube videos available to assist you. Hope this helps!

10 people found this helpful.

Was this helpful?
Thank you for voting!
  • 1
You May Also Need ?
Model Cross Reference
This part works with the following models:
PartSelect Number: PS303933
Manufacturer Part Number: WR51X442
Brand
Model Number
Description
Kenmore
36348042890
Refrigerator
Kenmore
36348042891
Refrigerator
Kenmore
36348042892
Refrigerator
Kenmore
36348042893
Refrigerator
Kenmore
36348047890
Refrigerator
Kenmore
36348047891
Refrigerator
Kenmore
36348047892
Refrigerator
Kenmore
36348047893
Refrigerator
Kenmore
36348252890
Refrigerator
Kenmore
36348252891
Refrigerator
Kenmore
36348252892
Refrigerator
Kenmore
36348252893
Refrigerator
Kenmore
36348257890
Refrigerator
Kenmore
36348257891
Refrigerator
Kenmore
36348257892
Refrigerator
Kenmore
36348257893
Refrigerator
Kenmore
36358042890
Refrigerator
Kenmore
36358042891
Refrigerator
Kenmore
36358042892
Refrigerator
Kenmore
36358042893
Refrigerator
Kenmore
36358047890
Refrigerator
Kenmore
36358047891
Refrigerator
Kenmore
36358047892
Refrigerator
Kenmore
36358047893
Refrigerator
Kenmore
36358062890
Refrigerator
Kenmore
36358062891
Refrigerator
Kenmore
36358062892
Refrigerator
Kenmore
36358062893
Refrigerator
Kenmore
36358067890
Refrigerator
Kenmore
36358067891
Refrigerator
Customer Service Representative

Get in touch, we're here to help!

Daily 8am - 9pm EST

Contact Customer Service