This white fresh food door gasket used to seal the refrigerator door when closed.
How Buying OEM Parts Can Save You Time and Money
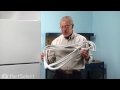
Part Videos
Replacing your General Electric Refrigerator Fresh Food Door Gasket
Troubleshooting
This part fixes the following symptoms:
Door Sweating | Fridge too warm | Leaking | Fridge runs too long
This part works with the following products:
Refrigerator.
This part works with the following products:
General Electric, Kenmore, Hotpoint, RCA.
Part# WR24X446 replaces these:
AP2067919, 1227, WR24X446, WR24X0446
Customer Reviews
Average Rating:
★★★★★
★★★★★
3 Reviews
5.0
Filter By Rating:
5 Stars
3
4 Stars
0
3 Stars
0
2 Stars
0
1 Star
0
Sort by:
< Prev
1
Next >
Search filter:
Clear Filter
Your search term must have 3 or more characters.
Keep searches simple. Use keywords, e.g. "leaking", "pump", "broken" or "fit".
Sorry, we couldn't find any existing reviews that matched. Try using some different or simpler keywords.
★★★★★
★★★★★
Martin O - July 9, 2021
Verified Purchase
the part worked. The replacement was done without removing the door as suggested in the video
The part cam earlier than indicated. My door was difficult to removes suggested. I replaced the seal while the door was in place. It was maybe more difficult, but the seal posed right in and work. The refrigerator is running much less and I am saving a lot.
★★★★★
★★★★★
Danny G - April 12, 2020
Verified Purchase
Perfect Fit
My refrigerator is quite old but still works fine. The fresh door gasket needed to be replaced. Looking at several sites including the OEM I could not find a gasket to replace the existing one until I looked at PartSelect.
I ordered the gasket and installed it using the helpful info provided by PartSelect. It was easy as described and fit perfectly.
★★★★★
★★★★★
Michael B - October 18, 2018
Verified Purchase
Great product quality and price and fast shipping!
Fit and look and appeared to be factory original product!
< Prev
1
Next >
Customer Repair Stories
Average Repair Rating: 3.7 / 5.0, 16 reviews.
What's this?
Sort by:
< Prev
1
2
Next >
Search filter:
Clear Filter
Your search term must have 3 or more characters.
Keep searches simple. Use keywords, e.g. "leaking", "pump", "broken" or "fit".
Sorry, we couldn't find any existing installation instruction that matched.
Fresh food door gasket was torn and no longer sealing in cold air and warm air out
Removed old gasket and installed new gasket, per the video instructions on the PartSelect website. Instructions were clear and accurate. I wondered if the new seal would fit snuggly and securely, but no problems. The seal holds the door closed more firmly than the old seal did. So far, so good!
Francois from BAINBRIDGE IS, WA
Difficulty Level:
Really Easy
Total Repair Time:
30 - 60 mins
Tools:
Screw drivers, Socket set
1 personfound this instruction helpful.
Was this instruction helpful to you?
Thank you for voting!
water build up in bottom of refrigerator
Allow 24 hours for new gasket to flatten out from packaging. Gently peel off existing gasket. Clean dirt and mold from mount area. Mount gasket beginning at a corner. Press gasket into place every inch around perimeter. Done! Water is no longer in bottom of refrigerator and it is running more efficiently (less time running) due
... Read moreto the fact that it can maintain the temperature for longer periods of time.
Read less
Joy from BELMONT, NH
Difficulty Level:
Very Easy
Total Repair Time:
15 - 30 mins
1 personfound this instruction helpful.
Was this instruction helpful to you?
Thank you for voting!
Door gasket torn & needed replacement
I took all of the creases out of the new gasket with hot water as described on the delivery box. I laid the gasket on the floor and let it cool while I took the refrigerator door off, laid it on a table, and removed the old gasket. I started the new gasket into the groove at one corner and pressed it into place by sliding my thumb along
... Read more the gasket and seating it as I went. It was an extremely simple task which took about 2 minutes. The most time is consumed in removing and replacing the door
Read less
Ray from Hamilton, MT
Difficulty Level:
Really Easy
Total Repair Time:
15 - 30 mins
Tools:
Screw drivers, Wrench set
0 of 1 peoplefound this instruction helpful.
Was this instruction helpful to you?
Thank you for voting!
Seal was worn and torn and in need of repair...
Wasn't sure what I would find underneath the old gasket, so I went slowly at first, but once the first side was off, the rest of the gasket came off quickly....and the metal track under it was clean and in good condition. After cleaning the areas where the gasket would seal, my daughter and I each started at a corner and placed the gaske
... Read moret into the track. Entire thing done in less than 10 mins. Piece of cake...only issue was a crease in the outer cushion area....I couldn't seem to smooth it with the warm water bath....it may uncrinkle with time...right now it is leaving a very small space when the door shuts. Saved me the expense of a new unit right now...hoping this takes care of the cooling issue I have with the unit keeping fresh veggies fresh.
Read less
Janice from Sammamish, WA
Difficulty Level:
Really Easy
Total Repair Time:
Less than 15 mins
0 of 1 peoplefound this instruction helpful.
Was this instruction helpful to you?
Thank you for voting!
sweating / leaking water
it was so easy I need to put an ad online to replace gaskets got the right part on time get fit
John from Bryan, TX
Difficulty Level:
Really Easy
Total Repair Time:
Less than 15 mins
2 of 4 peoplefound this instruction helpful.
Was this instruction helpful to you?
Thank you for voting!
Gaskets didn't seal well, were moldy
Would have been an easy job but the bottom channel of the refrigerator door that the gasket snaps into was rusty and had to be cleaned out with a screw driver. Took some working with it to figure out why it wasn't snapping in hence the long time to fix it.
The freezer door gasket went much better. It had been folded for shippin
... Read moreg and had to be heated per the instruction to ensure a seal. That was easier than I expected it to be.
The seal seems fine now. No moisture. I wish I had done this sooner!
I had to figure out how to remove the old gasket and install the new one on my own since there were NO INSTRUCTIONS. The old gasket had to be cut off; the new one had to be warmed in hot water to make it flexible enough to flatten out. Once that was done, I had to trim excess plastic from the inside corners before the gasket would press i
... Read morento place at the corners.
Read less
Dale from Hutchinson, KS
Difficulty Level:
Difficult
Total Repair Time:
30 - 60 mins
6 of 7 peoplefound this instruction helpful.
Was this instruction helpful to you?
Thank you for voting!
replace torn gasket
The part arrived It said to warm it to take out wrinkles but not even a picture of how to take off the old or put on the new. Everything on the internet in general about gaskets explained about unscrewing the old gasket but I couldn't find any screws. The user feedback mentioned no tools and that was our only clue and the only reason we
... Read morefinally succeeded. We looked at it repeatedly over 5 days. Pulled and pushed and could not figure out how it was attached or how to unattach without breaking things. I finally got out a screw driver and tried to pry it off. An hour later I got a corner piece started to come off. We pulled all the way around and got it off easily once started. We again struggled to put the new one on. Couldn't really tell what area of the gasket fit back into the crease. It kept falling off. Finally we pushed the correct edge of the gasket into the crease. VERY difficult. Fat edge fits into skinny crease. Took a lot more strength than expected so it didn't seem right but it was. Took a while and a lot of strength to work the corners and sides in. Eventually got the whole thing on. A picture and 4 sentences would have been a big help. Wouldn't try it again. To anyone else...No screws. Use a lot of strength. I hope someone publishes a picture for you.
Read less
Dawn from Waldorf, MD
Difficulty Level:
Difficult
Total Repair Time:
More than 2 hours
Tools:
Screw drivers
4 of 5 peoplefound this instruction helpful.
Was this instruction helpful to you?
Thank you for voting!
Moisture Build Up Inside Refridgerator
I removed the gasket starting in one of the corners, until the gasket was completely removed. I then replaced the gasket with a new one by starting in one of the corners and pressing it on to the track around the door.
Reginald from Bowie, MD
Difficulty Level:
Really Easy
Total Repair Time:
Less than 15 mins
0 of 1 peoplefound this instruction helpful.
Was this instruction helpful to you?
Thank you for voting!
bottom of gasket deteriorated and let in warm air
i pulled the old gasket off, and placed the new one in place, starting at the corners. then i lined up the insert in the gasket with the gap where it is to go and ran my fingers along the gasket, pressing in with my thumb.
Lawrence from O'Fallon, IL
Difficulty Level:
Really Easy
Total Repair Time:
30 - 60 mins
2 of 3 peoplefound this instruction helpful.
Was this instruction helpful to you?
Thank you for voting!
< Prev
1
2
Next >
Questions and Answers
Ask our experts a question about this part and we'll get back to you as soon as possible!
2 questions answered by our experts.
Sort by:
< Prev
1
Next >
Search filter:
Clear Filter
Your search term must have 3 or more characters.
Keep searches simple. Use keywords, e.g. "leaking", "pump", "broken" or "fit".
Sorry, we couldn't find any existing answers that matched.Try using some different or simpler keywords, or submit your new question by using the "Ask a Question" button above!
MAKIS
February 21, 2020
I am looking for GE door gasket for tbg21jaxerww. Can you help me to find it? I send you from greece.Thanks in advance
For model number TBG21JAXERWW
Hello Makis, thank you for your question.The fridge door gasket is PartSelect Number: PS296969
and the freezer door gasket is PartSelect Number: PS296968. We are unable to ship outside the continental US. I hope this helps.
5 people found this helpful.
Was this helpful?
Thank you for voting!
Ed
February 9, 2020
After following the instructions on how to get the kinks/wrinkles out of the gaskets, there are still a multitude of "ripples" on 2 opposite sides of the gasket. The almost boiling water had virtually no effect on them. Please advise. Thanks.
For model number TBX21JARJRAA
Hi Ed,
Thank you for your question. If there are still ripples in the gasket, try soaking it again for 10 minutes and rub it with petroleum jelly to see if this helps. The jelly will moisturize the gasket. If this does not help, you may need to have the gasket replaced. We hope this helps. Thank you and have a great day.
Was this helpful?
Thank you for voting!
< Prev
1
Next >
✖
Ask a Question
Ask our experts a question on this part and we'll respond as soon as we can.