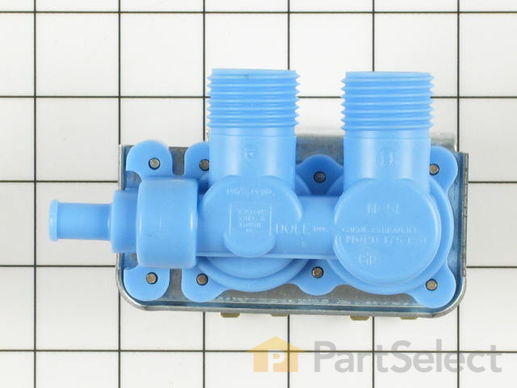
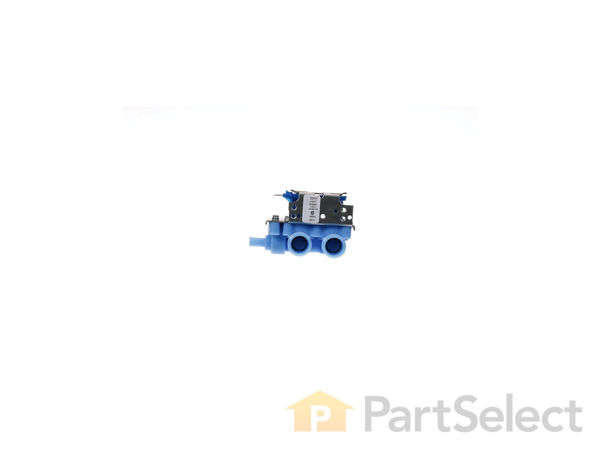
Part Location Diagram of WH13X81 GE Water Inlet Valve with Outlet Insert
See part 805 in the diagram
( Grid squares measure 1x1 inch )
Customer Service Representative

Get in touch, we're here to help!

Daily 8am - 9pm EST

customerservice@partselect.com

Water Inlet Valve with Outlet Insert WH13X81

 Fits your 54190117!
★★★★★
★★★★★
6 Reviews

Rated by 23 customers 

Really Easy 

15 - 30 mins 

Ratings submitted by customers like you who bought this part.

$ 123.88
  In Stock
Get FREE EconoShip on orders over $100! T&C apply

Get this part fast! Average delivery time for in-stock parts via standard shipping: 1.8 days.

 Fits your 54190117!
PartSelect Number PS270305
Manufacturer Part Number WH13X81
Manufactured by GE
Product Description

Water Inlet Valve with Outlet Insert Specifications

This washing machine water inlet valve has two ports for water to enter.
How Buying OEM Parts Can Save You Time and Money

How Buying OEM Parts Can Save You Time and Money

Troubleshooting
This part fixes the following symptoms:
No hot or cold water | Leaking
This part works with the following products:
Washer.
This part works with the following products:
General Electric, Hotpoint.
Part# WH13X81 replaces these:
AP2618763, 3465, WH13X0058, WH13X0059, WH13X0062, WH13X0081, WH13X58, WH13X59, WH13X62
Back to Top
Customer Reviews
Average Rating:
★★★★★
★★★★★
6 Reviews
5.0
Filter By Rating:
  • 5 Stars
    6
  • 4 Stars
    0
  • 3 Stars
    0
  • 2 Stars
    0
  • 1 Star
    0
Sort by:
  • 1
Sorry, we couldn't find any existing reviews that matched. Try using some different or simpler keywords.
  • 1
Customer Repair Stories
 Average Repair Rating: 4.2 / 5.0, 23 reviews. What's this?
Sort by:
  • 1
  • 2
  • 3
Sorry, we couldn't find any existing installation instruction that matched.
Washer not filling with cold water
I emptied the washer and unplugged it from the wall. Then i pulled it out so I could get behind it. Next unscrewed the water hoses from the washer. Removed the plate holding the water inlet valve by unscrewing 2 screws holding it to the machine (I used Vise Grip/pliers). Note which side of plate goes up/outward so you can put it back on! Removed 2 more screws that hold the valve to the plate. Remove clamp from valve end to disconnect valve from tubing with a screwdriver. I was able to remove the tubing with a twisting motion even though my washer is way over 10 years old. Remove 4 electrical clips from the valve by pulling them out, (REMEMBER the order of the electrical wires!!). Install new valve by doing this in reverse. Then run test cycle, success and saved hundreds of dollars!
  • Laura from AURORA, CO
  • Difficulty Level:
    Really Easy
  • Total Repair Time:
    15 - 30 mins
  • Tools:
    Pliers, Screw drivers
1 person found this instruction helpful.
Was this instruction helpful to you?
Thank you for voting!
Cold water was not coming in very quickly in fact fill time went to about an hour
turn off water outlets, unplugged unit then removed water hoses, then removed the screws from the plate on the washer then removed the valve from the plate then unscrewed the clamp for the water inlet to the washer then removed the hose. then carefully removed the wire clips putting each one on the same connector on the new valve, then put everything back like I did when I took it apart and it works great.
  • Bob from CEDAR PARK, TX
  • Difficulty Level:
    Really Easy
  • Total Repair Time:
    15 - 30 mins
  • Tools:
    Nutdriver, Pliers, Wrench (Adjustable)
1 person found this instruction helpful.
Was this instruction helpful to you?
Thank you for voting!
Hot water would not pour out at normal rate.
This was a very easy repair. First I unpluged the 120VAC power cord. Then I turned the water off. Next I opened the hose connections. Then I removed 3 screws from the back which exposed the Inlet Valve. I removed the old valve taking note of where the wires went. Then I installed the new one. It took less than 10 minutes!
  • Barbara from Delray Beach, FL
  • Difficulty Level:
    Really Easy
  • Total Repair Time:
    Less than 15 mins
  • Tools:
    Screw drivers
0 of 1 people found this instruction helpful.
Was this instruction helpful to you?
Thank you for voting!
The valve the controls hot water coming into the washer no longer passed hot water through.
I looked up the part on line, ordered it and installed. Veru easy since the part that needed repair was right out in the open.
  • JAMES from LOUISVILLE, KY
  • Difficulty Level:
    Easy
  • Total Repair Time:
    Less than 15 mins
  • Tools:
    Nutdriver, Screw drivers
1 of 2 people found this instruction helpful.
Was this instruction helpful to you?
Thank you for voting!
no/very little hot water coming into the washer
Took the back cover off 6 screws, took the inlet valve off the mounting plate 2 screws, the vater valve off the mounting plate 2 screws, and disconnected the inlet valve clamp from the inlet hose to the washer. In reassembling reversed the process. Best part; G.E. was going to charge me $59.00 for the valve, and I got it for $16.10 shipped in one day.
  • Valdis A. from Louisville, KY
  • Difficulty Level:
    Really Easy
  • Total Repair Time:
    Less than 15 mins
  • Tools:
    Pliers, Socket set
2 of 2 people found this instruction helpful.
Was this instruction helpful to you?
Thank you for voting!
Washing machine tub would not fill up on rinse cycle.
Replaced the water control valve (the thing the washer hoses connect to on the back of the washer) There were 3 bolts that had to be removed and once the part was loose, there were four wires attached, I disconnect each wire from the old part and reconnected to the new part at the same time to keep from getting the wires mixed up. Then I bolted the new part back in place...worked perfect. Total cost of repair was less than 30 bucks...
  • David from Norfolk, VA
  • Difficulty Level:
    Easy
  • Total Repair Time:
    15 - 30 mins
  • Tools:
    Pliers, Screw drivers, Socket set
1 of 2 people found this instruction helpful.
Was this instruction helpful to you?
Thank you for voting!
The valve wouldn't let the cold water in.
I changed the Water Inlet Valve in less than 15 minutes. The valve fit exactly, and the water hoses fit right on. I turned on the water and the washer filled without hesitation. The cost was 15.00, this beat the 62.00 price I was given by GE for the part alone.
  • Dawn from East Leroy, MI
  • Difficulty Level:
    Really Easy
  • Total Repair Time:
    Less than 15 mins
  • Tools:
    Nutdriver, Screw drivers, Wrench (Adjustable)
2 of 3 people found this instruction helpful.
Was this instruction helpful to you?
Thank you for voting!
valve was stuck open
This is the second time I have replaced this part. This time, I knew exactly what to do...the first time took longer. We have hard water here and also sediment in the water. Over time, the valve will not shut off the water.

Shutting off the water and unplugging the machine, and opening the back of the washer (every screw was the same size, thankfully. I didn't have to change socket sized) First I removed the two screws that hold the element in place. I then pulled the element out about 3 inches and then I unscrewed the hose clamp and I then pulled the element out about 3 inches and disconnected the two wires one at a time. I reconnected each one as I disconnected it from the old one. That way I knew I had it attached to the correct post. Reconnected the hose and reclamped it. Then I reattached the unit back into the washer and rescrewed everything back in place. The washers, I put in the end of the hoses before reattaching to the faucets. Attached the hoses to the machine and plugged it in the outlet.
It has been working ever since! (of course, I knew it would!) This machine is 25 years old and still going strong!
Other Parts Used:
FILT&WASHER Water Inlet Valve with Outlet Insert
  • Robert from Falling Waters, WV
  • Difficulty Level:
    Really Easy
  • Total Repair Time:
    30 - 60 mins
  • Tools:
    Wrench set
2 of 4 people found this instruction helpful.
Was this instruction helpful to you?
Thank you for voting!
Water leak
I took the back cover off of the washer, studied my next move and jumped in.Easy Lou-eezee!
  • Leigh J. from Aurora, IL
  • Difficulty Level:
    Easy
  • Total Repair Time:
    15 - 30 mins
  • Tools:
    Pliers, Socket set
0 of 1 people found this instruction helpful.
Was this instruction helpful to you?
Thank you for voting!
Washer would not fill.
removed 3 screws from the back. Then removed the little water line clamp. unplugged the 4 wires. took the new part. plugged it in. put on the water line clamp. put the 3 screws back on. put the hoses on the back again. turned on the water supply. and started washer.
  • Melissa from Karns City, PA
  • Difficulty Level:
    Really Easy
  • Total Repair Time:
    Less than 15 mins
  • Tools:
    Pliers, Screw drivers, Socket set
0 of 1 people found this instruction helpful.
Was this instruction helpful to you?
Thank you for voting!
  • 1
  • 2
  • 3
Questions and Answers

Ask our experts a question about this part and we'll get back to you as soon as possible!

2 questions answered by our experts.
Sort by:
  • 1
Sorry, we couldn't find any existing answers that matched.Try using some different or simpler keywords, or submit your new question by using the "Ask a Question" button above!
Roger
October 10, 2019
Water fills completely up. Will this part solve my problem? It will not stop on low or med.
For model number PS270305
PartSelect logo
Hi Roger, Thank you for your question. If the washer will not stop filling with water, then the water inlet valve should resolve this issue. You should also check the water level and pressure switch to see which part is causing the issue. You will need to test the parts with a multimeter. Here is a link to one of our videos on YouTube that you may use as a general reference on how to use one, https://www.youtube.com/watch?v=bWC44fHn0As. There is also information on our website under free repair help that you may reference for information on how to test these parts. I hope this helps. Thank you and have a great day!

4 people found this helpful.

Was this helpful?
Thank you for voting!
Roger
October 10, 2019
Will the manufacturer part number WH113X81 solve the problem on my GE washer?
For model number WWA5600RBLWH
PartSelect logo
Hi Roger, Thank you for your question. If the washer is leaking, then this would be one of the parts that you will need to check to see which one is causing the issue. Here is a link from our website that you may reference on what other parts to check, https://www.partselect.com/AdvancedModelSymptoms.aspx?ModelNum=WWA5600RBL&mfgModelNum=&fkMfgID=2&SourceCode=11&ModelMasterID=191844&PID=13. I hope this helps. Thank you and have a great day!

1 person found this helpful.

Was this helpful?
Thank you for voting!
  • 1
Model Cross Reference
This part works with the following models:
PartSelect Number: PS270305
Manufacturer Part Number: WH13X81
Brand
Model Number
Description
General Electric
52050119
Washer
General Electric
52150119
Washer
General Electric
52170119
Washer
General Electric
52170128
Washer
General Electric
52170129
Washer
General Electric
52178128
Washer
General Electric
52190116
Washer
General Electric
52190117
Washer
General Electric
52190118
Washer
General Electric
52190119
Washer
General Electric
52190129
Washer
General Electric
52198116
Washer
General Electric
52198118
Washer
General Electric
52198119
Washer
General Electric
52198129
Washer
General Electric
53040116
Washer
General Electric
53040117
Washer
General Electric
53040118
Washer
General Electric
53040119
Washer
General Electric
53040129
Washer
General Electric
53048116
Washer
General Electric
53048118
Washer
General Electric
53048119
Washer
General Electric
53048129
Washer
General Electric
53050119
Washer
General Electric
53150119
Washer
General Electric
53170119
Washer
General Electric
53180119
Washer
General Electric
53180128
Washer
General Electric
53180129
Washer
Customer Service Representative

Get in touch, we're here to help!

Daily 8am - 9pm EST

Contact Customer Service