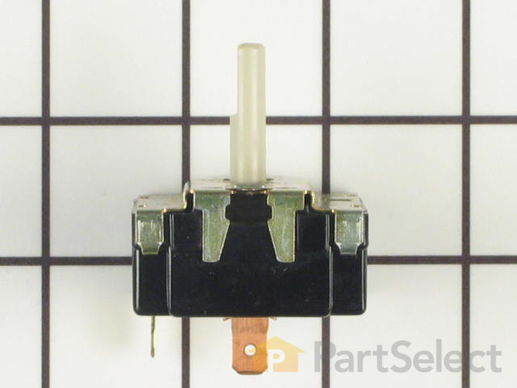
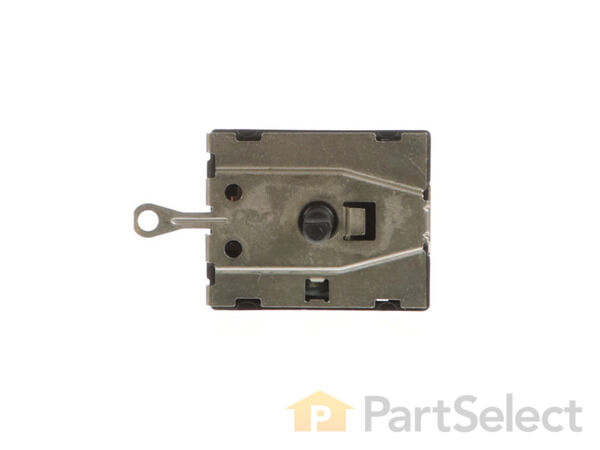
Part Location Diagram of WE4X782 GE Rotary Start Switch
See part 89 in the diagram
( Grid squares measure 1x1 inch )
Customer Service Representative

Get in touch, we're here to help!

Daily 8am - 9pm EST

customerservice@partselect.com

Rotary Start Switch WE4X782

★★★★★
★★★★★
7 Reviews

Rated by 15 customers 

Really Easy 

15 - 30 mins 

Ratings submitted by customers like you who bought this part.

$ 48.94
  In Stock
Get FREE EconoShip on orders over $100! T&C apply

Get this part fast! Average delivery time for in-stock parts via standard shipping: 1.8 days.

PartSelect Number PS268227
Manufacturer Part Number WE4X782
Manufactured by GE
Product Description

Rotary Start Switch Specifications

This is the replacement rotary start switch for your dryer. It is silver and black in color, with a white D-shaped shaft. The rotary start switch is found inside the dryer control panel, and when actuated, it starts the dryer. Over time, the contacts inside the switch can short out, and when this happens, the dryer will not start. As you will be working around electricity, be sure to disconnect the dryer from the power source before you begin this repair. This part is sold individually and is an authentic OEM part sourced directly from the manufacturer.
How Buying OEM Parts Can Save You Time and Money

How Buying OEM Parts Can Save You Time and Money

Troubleshooting
This part works with the following products:
Dryer.
This part works with the following products:
General Electric, Hotpoint.
Part# WE4X782 replaces these:
AP2042824, 2334, WE04X0782
Back to Top
Customer Reviews
Average Rating:
★★★★★
★★★★★
7 Reviews
4.3
Filter By Rating:
  • 5 Stars
    5
  • 4 Stars
    1
  • 3 Stars
    0
  • 2 Stars
    0
  • 1 Star
    1
Sort by:
  • 1
Sorry, we couldn't find any existing reviews that matched. Try using some different or simpler keywords.
  • 1
Customer Repair Stories
 Average Repair Rating: 4.2 / 5.0, 15 reviews. What's this?
Sort by:
  • 1
  • 2
Sorry, we couldn't find any existing installation instruction that matched.
The peg attached to the starter switch broke off.
* Please note, if only the starter switch peg is broken you do not need to replace the starter knob if it isn't damaged. The peg is not attached to the starter knob. You must replace the entire starter unit because the peg isn't detachable.

Remove the starter knob by gently pulling it towards you.

Remove the two screws on the bottom left and right sides of the front panel using an Allen Wrench.

On the rear panel of the dryer remove bolts using pliers or an adjustable wrench. Remove the back panel and place it to the side.

** Important ** Before disconnecting the wires from the starter unit take a digital photo (I used my cell phone) of the starter so you will know how and where to reconnect the blue and brown wires to the unit. Now, remove the wires.

Unscrew the bolt attaching the starter unit to the dryer. There's a hook on the back of the starter unit attaching it to the dryer. Push the starter unit downward to remove it from the dryer.

Take the new starter unit out of the box and connect it to the blue and brown wires. Refer to your photo for proper connection.

Insert the starter unit into the dryer and push it upward so the hook on the back of the starter locks onto the dryer. Screw the bolt back onto the starter unit to secure it to the dryer.

Replace the rear dryer panel and tighten all bolts.

Replace and tighten the two screws on the front panel of the dryer.

Replace the starter knob by lining it up with the peg shape and gently pushing it onto the peg.

You're done!!!
  • Anita from BALTIMORE, MD
  • Difficulty Level:
    Really Easy
  • Total Repair Time:
    15 - 30 mins
  • Tools:
    Pliers, Wrench (Adjustable)
3 of 3 people found this instruction helpful.
Was this instruction helpful to you?
Thank you for voting!
Rotary switch broke off @ knob
Drilled a small hole into the broken stem located inside the knob and drove a screw into the hole and pulled the broken piece out with pliers. Did not disconnect the gas line to dryer so I did the replacement with a mirror. Unpluged the dryer! Removed the back cover screws (5) using a 1/4" nutdriver lefty loosy. removed cover. Removed screw (1) from switch using 1/4" nutdriver. Removed switch. Removed wires from switch using pliers. Placed wires on new switch. Installed new switch. Replaced switch screw. Pluged dryer in. Tested. Unpluged dryer. Replaced back cover. Replaced screws (5) Pluged dryer in. Tested. Rested.
  • James from Riviera Beach, FL
  • Difficulty Level:
    Easy
  • Total Repair Time:
    15 - 30 mins
  • Tools:
    Nutdriver
0 of 1 people found this instruction helpful.
Was this instruction helpful to you?
Thank you for voting!
Broken knob and broken knob stem
Using the diagram on this site, I determined which parts I needed to order. The exploded diagram was really helpful, since I normally don't spend much time thinking about how my washing machine is constructed, and we bought the dryer used, so I didn't have any diagrams or manuals for it. After detaching the backsplash from the cabinet, I pulled the wiring out of the old switch unit and popped them into the new unit. I put the screws back in the same place and then put the new knob on the stem. I couldn't believe how easy it was.
Other Parts Used:
Rotary Start Switch Selector Knob
  • Elisabeth from Portland, OR
  • Difficulty Level:
    Really Easy
  • Total Repair Time:
    Less than 15 mins
  • Tools:
    Screw drivers
10 of 14 people found this instruction helpful.
Was this instruction helpful to you?
Thank you for voting!
Rotary start switch stem broke off
I simply removed the back of the dryer top and disconnected the old start switch and connected the new part. It honestly took me longer to take out the screws to remove the back plate than it did to replace the rotary start switch. It was very easy and I had a lot of confidence due to watching the Partselect instructional video on YouTube. The Partselect Customer Service woman was great too!
Other Parts Used:
Selector Knob with Clip Rotary Start Switch
  • LISA from LOUISVILLE, KY
  • Difficulty Level:
    Really Easy
  • Total Repair Time:
    15 - 30 mins
  • Tools:
    Nutdriver, Socket set
0 of 1 people found this instruction helpful.
Was this instruction helpful to you?
Thank you for voting!
The on/off switch stem broke off
That happened because the on/off selector nob broke, so I instructed my wife to use a small pair pliers to turn the stem as a work around until I could get to it (6 mos). It eventually broke off. I called a repair service that charges $90 to look at it, but cannot estimate the whole job. The dilemma is that the dryer is over five years old, so a repair costing more than a few hundred dollars is not as reasonable as buying a new dryer. What to do? I ordered the parts and diagrams on the internet. They arrived two days later. The dryer is jammed into a narrow space, so to see the two screws in the back, I needed a small mirror on telescoping wand. To get at the broken switch, I needed unscrew two "star" screws and remove the control panel facing. Not Phillips head, not a common slot head. This star screw is hard to find. I finally located it in the fastener section. I bought a bit that fit my stubby ratchet screw driver. I had to use the stubby screw driver because it was such a cramped space. I finally got at the switch, loosened one screw (hex head) and replaced the two wires on clips - no solder needed. Got a kiss and a squeeze from the missus and a load of clean clothes.
Other Parts Used:
Selector Knob with Clip Rotary Start Switch Dryer Door Handle
  • Peter from AMENIA, NY
  • Difficulty Level:
    Difficult
  • Total Repair Time:
    30 - 60 mins
  • Tools:
    Screw drivers, Wrench set
4 of 5 people found this instruction helpful.
Was this instruction helpful to you?
Thank you for voting!
Rod on rotary start switch broken, couldn't start
Took off console cover (two screws) separated back cover from console cover (4 nutscrews) pulled out two connectors from switch to be replaced and then unscrewed one nut screw. replaced with new unit and reversed processs. 5 minutes. Took another 20 minutes playing with cleaning dust, lint, and having fun restoring console to original shine. Had a lot of fun being my own repairman.
Other Parts Used:
Selector Knob with Clip Rotary Start Switch
  • JOHN from RIDGEFIELD, CT
  • Difficulty Level:
    Really Easy
  • Total Repair Time:
    Less than 15 mins
  • Tools:
    Nutdriver
6 of 6 people found this instruction helpful.
Was this instruction helpful to you?
Thank you for voting!
something was sent on top of dryer, fell and snapped knob of at the neck of it.
unscrewed top cover,disconnected wires,took out part ,set in new part, put wires back on and closed up top with cover. I have had to replace other parts to my washer and dryer and have been very pleased with the parts fitting and also the speedy delivery, always had them between 2-3 days.
  • linda from Hoosick falls, NY
  • Difficulty Level:
    Really Easy
  • Total Repair Time:
    Less than 15 mins
  • Tools:
    Screw drivers
0 of 1 people found this instruction helpful.
Was this instruction helpful to you?
Thank you for voting!
the plastic stem fractured off the starter so the starter could not be turned on
Removed the back off the control panel. unclipped and unscrewed the starter and replaced with the new starter, replaced the back of the control panel.
Very easy and the part was mailed and arrived the very next day! Thank you
  • joan from davis, CA
  • Difficulty Level:
    Really Easy
  • Total Repair Time:
    Less than 15 mins
  • Tools:
    Wrench set
0 of 1 people found this instruction helpful.
Was this instruction helpful to you?
Thank you for voting!
My husband was putting the dryer back in place after we finished putting down new tile. In the process, he broke off the start knob. Even though the dryer was about 18 years old, it still worked perfectly so needless to say I was upset. My son told me about this website, ordered the part and it was
My son in law installed the new part, I didn't watch him so not sure how he did it, think he removed 6 screws, took the front panel off, installed the new part , took less than 15 minutes, now, dryer working again! Sure saved me money, of course, the dryer might die tomorrow from old age but today, working like a charm.
  • Mary Carole from Lindale, TX
  • Difficulty Level:
    Really Easy
  • Total Repair Time:
    Less than 15 mins
  • Tools:
    Screw drivers
4 of 5 people found this instruction helpful.
Was this instruction helpful to you?
Thank you for voting!
start switch dies
Easy to do - would have been easier if I had the correct tools the first time round - needed my socket wrench set and a flashlight to see inside to undo the switch itself.
Be careful if you have to pull the knob off again - the mount bracket is flimsy and bends too easily - I had to pull the back off again to put the knob on - this time I taped in place with duct tape
  • Jill from Denver, CO
  • Difficulty Level:
    Easy
  • Total Repair Time:
    15 - 30 mins
  • Tools:
    Wrench set
1 of 5 people found this instruction helpful.
Was this instruction helpful to you?
Thank you for voting!
  • 1
  • 2
Questions and Answers

Be the first to ask our experts a question about this part!

You May Also Need ?
Model Cross Reference
This part works with the following models:
PartSelect Number: PS268227
Manufacturer Part Number: WE4X782
Brand
Model Number
Description
General Electric
64325418
Dryer
General Electric
64325419
Dryer
General Electric
DDE4000RAL
Dryer
General Electric
DDE4100SBLWH
Dryer - Electric
General Electric
DDE4107SBLWH
Dryer - Electric
General Electric
DDE5100RAL
Dryer
General Electric
DDE5100RALWW
Dryer
General Electric
DDE5100SBLAA
Dryer
General Electric
DDE5100SBLWW
Dryer
General Electric
DDE7000SBLAA
Dryer - Electric
General Electric
DDE7000SBLWH
Dryer - Electric
General Electric
DDE7000SBLWW
Dryer - Electric
General Electric
DDE7007SBLAA
Dryer - Electric
General Electric
DDE7007SBLWW
Dryer - Electric
General Electric
DDE7100RAL
Dryer - Electric
General Electric
DDE7100SBLAA
Dryer - Electric
General Electric
DDE7100SBLWW
Dryer - Electric
General Electric
DDE7106RAL
Dryer - Electric
General Electric
DDE7107RAL
Dryer - Electric
General Electric
DDE7109SBLAA
Dryer - Electric
General Electric
DDE7109SBLWW
Dryer - Electric
General Electric
DDE7200SBLAA
Dryer - Electric
General Electric
DDE7200SBLWH
Dryer - Electric
General Electric
DDE7200SBLWW
Dryer - Electric
General Electric
DDE7207SBLAA
Dryer - Electric
General Electric
DDE7207SBLWW
Dryer - Electric
General Electric
DDE7900SBLAA
Dryer - Electric
General Electric
DDE7900SBLWW
Dryer - Electric
General Electric
DDE8200SAMAA
Dryer - Electric
General Electric
DDE8200SAMWW
Dryer - Electric
Customer Service Representative

Get in touch, we're here to help!

Daily 8am - 9pm EST

Contact Customer Service