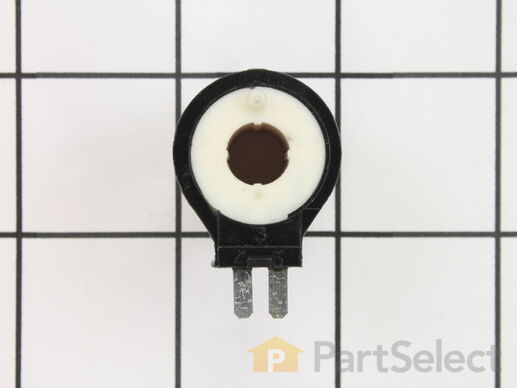
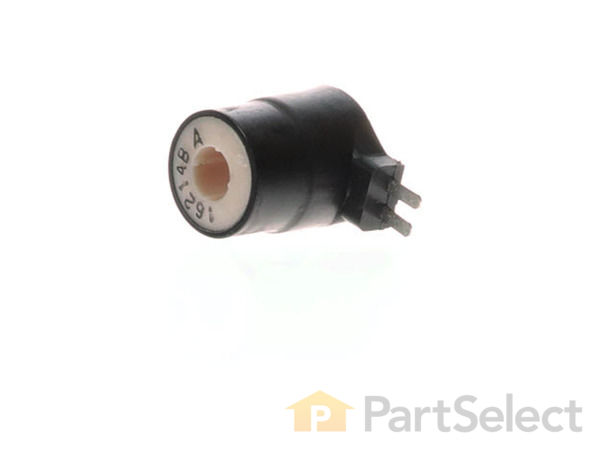
M - Series Secondary Coil - 2 Terminals
$
28.57
In Stock


Get this part fast! Average delivery time for in-stock parts via standard shipping: 1.8 days.
PartSelect Number PS268154
Manufacturer Part Number WE4X693
Manufactured by
GE
You May Also Need?
Product Description
M - Series Secondary Coil - 2 Terminals Specifications
This part is the replacement main valve coil for your dryer. It is black and white in color and has 2 terminals. It is approximately 1 inch long and 1 inch wide. The main valve coil opens the gas valves while the dryer is running. This coil is used with two coil gas shut off valve assemblies. Be sure to turn off the gas before you begin this repair. This part is sold individually and is a genuine OEM part sourced directly from the manufacturer.

How Buying OEM Parts Can Save You Time and Money
Troubleshooting
This part fixes the following symptoms:
No heat or not enough heat | Takes too long to dry
This part works with the following products:
Dryer.
This part works with the following products:
General Electric, Hotpoint.
Part# WE4X693 replaces these:
AP2042753, 276800, WE04X0693
Questions and Answers
Ask our experts a question about this part and we'll get back to you as soon as possible!
Search filter:
Clear Filter
Your search term must have 3 or more characters.
Keep searches simple. Use keywords, e.g. "leaking", "pump", "broken" or "fit".
Sorry, we couldn't find any existing answers that matched.Try using some different or simpler keywords, or submit your new question by using the "Ask a Question" button above!
Diane
December 27, 2019
Does this part also fix a leaky valve? We smell gas and have checked all fittings from main line and those going into dryer. They are all good.
For model number DWXR483GB2WW

Good Day Diane. Thank you for your question in regards to your unit (Model Number DWXR483GB2WW). Based on our research, we have found the following information: A clothes dryer will either leak because its exhaust system is clogged or it's not venting properly. Both problems can cause condensation to form in the drum or water to drip from the dryer's external vent. Hope this helps. Best Regards.
2 people found this helpful.
Was this helpful?
Thank you for voting!
Jim
January 18, 2023
noisy gas valve, what parts do you recommend changing
For model number gtdp490gd0ws

Hello Jim, thank you for your question. The noise is likely from the Glides PS755842 and PS6447706 or Drum Bearing PS960316. However, if you are certain the the noise is coming from the Gas Valve, then you should replace the Gas Valve PS10065159. We are pleased to have been able to help.
1 person found this helpful.
Was this helpful?
Thank you for voting!
Related Parts:
✖
Ask a Question
Ask our experts a question on this part and we'll respond as soon as we can.
Something went wrong. Please try again later.
Your Question Has Been Submitted!
Our experts will send you an email as soon as your question has been answered.
Customer Repair Stories
Average Repair Rating: 3.2 / 5.0, 5 reviews.
What's this?
Search filter:
Clear Filter
Your search term must have 3 or more characters.
Keep searches simple. Use keywords, e.g. "leaking", "pump", "broken" or "fit".
Sorry, we couldn't find any existing installation instruction that matched.
Dryer would heat initially, but would not heat throughout entire cycle.
-Removed top panel
-Removed right side panel
-Gas coils were held in together under a metal strap
-Removed 2 screws holding strap
-Unplugged 1 wire harness to each coil
-Removed Primary and Holding coil
-Replace with two new coils, replace strap and plug in each harness
-Replace side, then top panel
-Under 1 hour job...Took 45 minutes to remove/replace panels and only 5 minutes to replace coils.
-Anyone with a little mechanical ability can save $150 in labor and spend just $50 in parts to fix this problem.
-Questions: Erik at elstransport13@gmail.com
Other Parts Used:
-
Erik from Newport, ME
-
Difficulty Level:Easy
-
Total Repair Time:30 - 60 mins
-
Tools:Nutdriver, Screw drivers
74 of 93 people
found this instruction helpful.
Was this instruction helpful to you?
Thank you for voting!
dryer would not get hot after igniter went on, no gas being let in.
Removed top cover of dryer with screwdiver 2 screws, removed front cover 2 small bolts with 5/16 scoket. Removed coil brackets with shor screwdriver replace coils as ness. and put covers back on and works great!
Vinny
Vinny
Other Parts Used:
-
Vinny from Port Chester, NY
-
Difficulty Level:Really Easy
-
Total Repair Time:30 - 60 mins
-
Tools:Screw drivers, Socket set
45 of 57 people
found this instruction helpful.
Was this instruction helpful to you?
Thank you for voting!
Igniter glows then burner fires but for short time
I changed the two coils for the gas valve and the dryer is now working fine thanks
Other Parts Used:
-
rey from BURLINGAME, CA
-
Difficulty Level:Easy
-
Total Repair Time:30 - 60 mins
-
Tools:Socket set
6 of 6 people
found this instruction helpful.
Was this instruction helpful to you?
Thank you for voting!
Gas dryer only fired at the beginning of it's cycle
Be sure to segregate and label all screws.
Remove back and front of control panel.
Removed dryer top.
Removed dryer front/door panel.
Replaced slides. Due to discoloration it was hard to tell the white fr the green. Double checked partselect videos to be sure which was which.
Propped up drum with the dowel to allow enough room to access the coils. One of the screws was frozen. Soaked in penetrating oil for 30 minutes. Then used a Philips headed socket to break it free. Used needle nose pliers to lift out old coils and to place new coils.
Reversed process to reinstall all panels.
Crossed fingers and tested. AOK.
Other Parts Used:
-
Robert from RIO RANCHO, NM
-
Difficulty Level:A Bit Difficult
-
Total Repair Time:1- 2 hours
-
Tools:Nutdriver, Pliers, Screw drivers, Socket set
1 person
found this instruction helpful.
Was this instruction helpful to you?
Thank you for voting!
GE front load gas Dryer not lighting after it initially starts
I removed the right side panel and top panel from the dryer. I removed the 2 wire and 3 wire connectors from the 2 coils. I removed the bracket holding the 2 coils, replaced the 2 coils, and replaced the bracket. I reconnected the wires to the appropriate coils and replaced the side and tops panels on the dryer. The dryer now lights every time the dryer calls for heat.
Other Parts Used:
-
Bruce from CLEVELAND, NY
-
Difficulty Level:Really Easy
-
Total Repair Time:30 - 60 mins
-
Tools:Nutdriver, Screw drivers
1 person
found this instruction helpful.
Was this instruction helpful to you?
Thank you for voting!
Customer Reviews
Filter By Rating:
Search filter:
Clear Filter
Your search term must have 3 or more characters.
Keep searches simple. Use keywords, e.g. "leaking", "pump", "broken" or "fit".
Sorry, we couldn't find any existing reviews that matched. Try using some different or simpler keywords.
John R - April 14, 2022

replacing second coil
part came fast, video helpful and repair went well !
Romulo H - October 12, 2021

Perfect fit and works good!
It’s the one that I expected and it’s work right away!
Steven O - September 3, 2020

Perfect part
so glad this company excellent description fast shipping. Lifesaver
Paul M - August 30, 2020

The coil fixed my problem
Easy install. After removing the dryer front, the two coils are held under a plate which is held by two screws. Undo the electrical connectors, remove the screws that hold the plate, remove the coils and install the new ones. I do wish though that there was some place on the web where I could get specific information as to the exact resistances etc to expect from these and similar parts. A general instruction that mostly says resistance should either be zero or infinite isn't close enoough.
Paul K - July 16, 2019

Easy fix
Part came fast. Easy swap of both coils. Dryer workers better than before.
Wayne D K - July 31, 2018

Part worked as expected
Lightning quik shipping, fix went well. Thanks for the great service
Spencer S - April 20, 2018

It worked!
Easy to change both the primary and secondary coils. Only challenge was that they shipped from 2 warehouses and one arrived in two day and the other took 8 days. But once I had them in was about 30 minutes work to make the change.
Model Cross Reference
This part works with the following models:
PartSelect Number: PS268154
Manufacturer Part Number: WE4X693
Brand
Model Number
Description