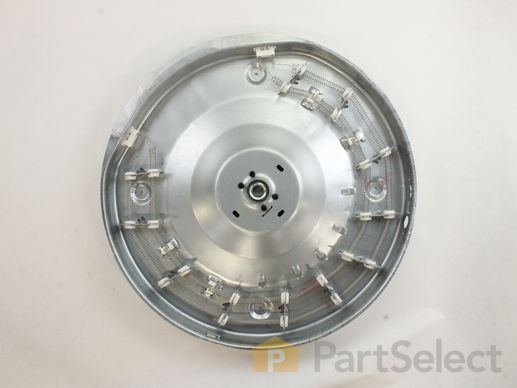
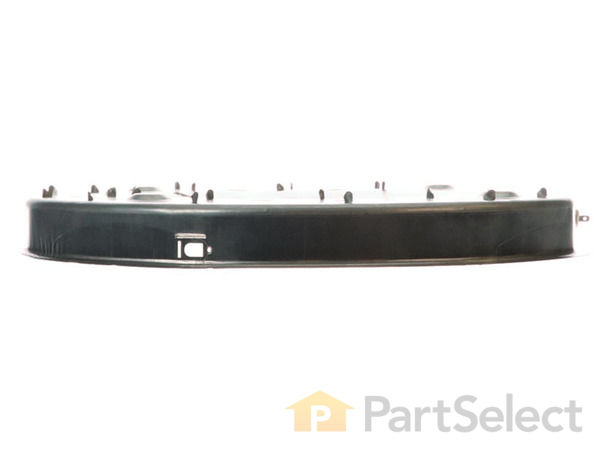
Part Location Diagram of WE11M23 GE Heating Element and Housing
See part 512 in the diagram
Replacing your General Electric Dryer Heating Element and Housing
( Grid squares measure 1x1 inch )
Customer Service Representative

Get in touch, we're here to help!

Daily 8am - 9pm EST

customerservice@partselect.com

Heating Element and Housing WE11M23

 Fits your DBSR453EB2WW!
★★★★★
★★★★★
8 Reviews

Rated by 8 customers 

Easy 

1- 2 hours 

Ratings submitted by customers like you who bought this part.

$ 176.47
  In Stock
Get FREE EconoShip on orders over $100! T&C apply

Get this part fast! Average delivery time for in-stock parts via standard shipping: 1.8 days.

 Fits your DBSR453EB2WW!
PartSelect Number PS265565
Manufacturer Part Number WE11M23
Manufactured by GE
Product Description

Heating Element and Housing Specifications

Note: The insulators on the housing are NOT sold separately.
How Buying OEM Parts Can Save You Time and Money

How Buying OEM Parts Can Save You Time and Money

Part Videos

Replacing your General Electric Dryer Heating Element and Housing

Replacing your General Electric Dryer Heating Element and Housing
Troubleshooting
This part works with the following products:
Dryer.
This part works with the following products:
General Electric, Hotpoint, Kenmore.
Part# WE11M23 replaces these:
AP2619954, 844418, WE11M0014, WE11M0021, WE11M0023, WE11M21
Back to Top
Customer Reviews
Average Rating:
★★★★★
★★★★★
8 Reviews
5.0
Filter By Rating:
  • 5 Stars
    8
  • 4 Stars
    0
  • 3 Stars
    0
  • 2 Stars
    0
  • 1 Star
    0
Sort by:
  • 1
Sorry, we couldn't find any existing reviews that matched. Try using some different or simpler keywords.
  • 1
Customer Repair Stories
 Average Repair Rating: 2.8 / 5.0, 8 reviews. What's this?
Sort by:
  • 1
Sorry, we couldn't find any existing installation instruction that matched.
Loud scrapping sqeaks
Diagnostics, ordered front and back bearing. Added the belt because I was there. Parts came quickly. disassembled, shot photos of wire assemblies. Unprepared for element and lint trap housing failure as the heating element was only 1/2 functional, made followup ordered which included the green and white shims. Note, front bearing replacement does not come with wear shims, disappointing. Very inexpensive and should just be part of replacement package. Reassembled in reverse order, tricky part was the belt reinstall. New light made the repair complete.
Other Parts Used:
Duct Felt Seal Dryer Lint Chute Assembly Light Bulb Drum Bearing Slide - Green (Sold individually) Heating Element and Housing
  • Matthew from AUBURN, WA
  • Difficulty Level:
    Easy
  • Total Repair Time:
    1- 2 hours
  • Tools:
    Pliers, Screw drivers, Socket set
2 of 2 people found this instruction helpful.
Was this instruction helpful to you?
Thank you for voting!
Low heat
Checked the fuse box to see if any breakers tripped on the two 120 lines feeding the dryer.

Checked for clogged exhaust vents/hose/etc, cleaned.

Some paint flaking off inner drum around heat vent.

Unplug & disassembled unit. Took pictures for reference to help with reassembly later. Upon removing drum, found sagging heat coils, one broken, some heat damage to the housing near the top. Determined that more than just coils needed replacing.

Also checked each of the three heat sensors (cycling thermostat, high limit thermostat & safety thermostat) with the digital multimeter. All were positive continuity for low temps.

Tested ONLY the cycling thermostat on the kitchen stove with burner set to warm. Check burner temp with meat thermometer to see it exceed 120F. Continuity broke at high temp. Although the cycling thermostat seemed ok with my generic test, I decided to replace it anyway.

My understanding of the Safety Thermostat & High Limit Thermostat is that they work like safety fuses, breaking at dangerous temps, but not resetting afterward. So these were only tested at room temperature, not with heat.

With the unit open, I checked other components for signs of wearing out. Also cleaned the unit more thoroughly.

Reassembled in stages. The belt is the trickiest part to get back on the motor & tension pulley, it's just a little awkward to reach. Tested to make sure the drum moved freely and belt was correct before finishing the reassembly.

Checked to make sure the dryer was still level, after all the moving around, disassembly & reassembly.

Ran several supervised test loads. Felt the temperature. No tripped breakers or smoke. Exhaust was flowing unhindered. Clothes got dry.
Other Parts Used:
Cycling Thermostat - 4 Wire Heating Element and Housing
  • Jaeson from STATE COLLEGE, PA
  • Difficulty Level:
    A Bit Difficult
  • Total Repair Time:
    30 - 60 mins
  • Tools:
    Screw drivers
3 of 3 people found this instruction helpful.
Was this instruction helpful to you?
Thank you for voting!
Low heat
I bought the Heating Element and Housing together so that I would not have to stretch and run the coils and to save time!
1. I removed the two screws that hold the top down by opening the dryer door and removing the two screws at the top of the door opening. Then I pulled the top off.
2. Then I removed the two screws on the top inside of the dryer on the left right and took the front off.
3. Next I spread the dryer open a little and pulled the drum out while pushing the belt off the back of the drum.
4. Then I removed the screws to the sensors and removed them from the housing.
5. Then I removed the four screws holding the heating element housing to the back of the dryer and took it out and put in the new peace.
6. Do everything in reverse when putting the dryer back together.
  • Larry from Naples, FL
  • Difficulty Level:
    A Bit Difficult
  • Total Repair Time:
    1- 2 hours
  • Tools:
    Screw drivers
1 person found this instruction helpful.
Was this instruction helpful to you?
Thank you for voting!
dryer would not heat
The heating element was broken.
  • Mike from Simpsonville, SC
  • Difficulty Level:
    Difficult
  • Total Repair Time:
    1- 2 hours
  • Tools:
    Nutdriver, Pliers, Screw drivers
40 of 67 people found this instruction helpful.
Was this instruction helpful to you?
Thank you for voting!
dryer wasn't getting hot
1. removed two screws to take off top.
2. removed two screws to take off front.
3. Took belt off pulley and removed drum.
4. inspected old heating element at back of dryer - saw broken wire
5. replaced heating element (round w/ heating coil)
6. Re-assembled dryer

Helpful hints:
1. mark down or take pictures of all wires before removal - easy to mix them up
2. when you re-attach drum-belt, it should be taught. Comes straight down wall around metal pulley and then forms an "S" as it wraps around plastic pulley on way up. To re-attach, stick both arms into dryer - one to pull plastic-pulley and other to attach belt.
  • edward from Sunnyvale, CA
  • Difficulty Level:
    A Bit Difficult
  • Total Repair Time:
    1- 2 hours
  • Tools:
    Screw drivers
61 of 88 people found this instruction helpful.
Was this instruction helpful to you?
Thank you for voting!
Heater element went out
First of all, unplug the dryer. I removed the two screws on the front of the cabinet to remove the top. I then took out the screws to remove the dial panel. Release the belt for the drum through the access hole in the rear of the dryer. Remove the front cover and pull the drum assembly out.

Remove the element disc from the rear of the housing, take note of the the wireing placement. Replace disc and reverse order of disassembly.

This job was easy for me as I am a tinkerer by nature. The hardest part of the whole job was waiting on the part, which by the way was ordered on a Sunday evening and I had the replacement in my hands and back in the dryer running by 1:00 PM on the following Tuesday!

I book marked this website and WILL refer it to others who simply need a repair, not a costly new appliance!
  • Brian from Clinton, MO
  • Difficulty Level:
    Easy
  • Total Repair Time:
    15 - 30 mins
  • Tools:
    Screw drivers
183 of 218 people found this instruction helpful.
Was this instruction helpful to you?
Thank you for voting!
Dryer took a long time to dry clothes
First I removed the removed the screws that held the top on the dryer. Next I removed the screws that held the controls on from the back. I then removed screws that held the left side in place and removed the drum by first removing the drive belt.
The heating element unit was removed by removing four screws and the wiring harnes. I reversed the procedure to install the heating unit and put the machine back together.
  • Darrell from Springdale, AR
  • Difficulty Level:
    Easy
  • Total Repair Time:
    30 - 60 mins
  • Tools:
    Pliers, Screw drivers
39 of 61 people found this instruction helpful.
Was this instruction helpful to you?
Thank you for voting!
dryer would run until you shut it off , timer did not advance , clothes would air dry there was no heat
unplugged dryer ,pulled dryer front and top off and removed drum , found element wire broken . loosened element to be able to remove wire pods . reverserd removal ( belt is a little tricky ) reattached power cord to outlet worked like a charm.
  • david from gaffney, SC
  • Difficulty Level:
    Really Easy
  • Total Repair Time:
    15 - 30 mins
  • Tools:
    Screw drivers
40 of 65 people found this instruction helpful.
Was this instruction helpful to you?
Thank you for voting!
  • 1
Questions and Answers

Ask our experts a question about this part and we'll get back to you as soon as possible!

11 questions answered by our experts.
Sort by:
  • 1
  • 2
Sorry, we couldn't find any existing answers that matched.Try using some different or simpler keywords, or submit your new question by using the "Ask a Question" button above!
Jeff
November 1, 2017
Heating coils come on and off during cycle. Should they stay on during the cycle or cycle on and off.. i've replaced the cycle thermostat to with no improvement of heating .. thank you
For model number DBSR453EB2WW
PartSelect logo
Hi Jeff, Thank you for your question. Yes, your heating element is supposed to cycle on an off. You may have to test both the high limit thermostat and your thermal cut off on your element to make sure they are working. For a dryer, how well it heats counts a lot on air flow. Make sure that your duct and venting has no lint blocking the air ways or else your appliance will not heat correctly. I hope that helps. Good luck with your repair.

6 people found this helpful.

Was this helpful?
Thank you for voting!
Daniel
October 2, 2017
The dryer does not heat at all. How do i know if it is the cycling thermostat or the heating element ? Secondly, in reinstalling the drum, is it difficult to the get the pully in position?
For model number DWWXR463EG1WW
PartSelect logo
Hi Daniel, Thank you for your question. You can actually test both of those parts with a multi meter. When testing, if the meter does not move from its original position then you will know that part is not working. It should not be difficult to get the pulley into position. You just have to pull it into position. Good luck with your repair.

4 people found this helpful.

Was this helpful?
Thank you for voting!
Daniel
December 17, 2019
Can I just replace the heating element coil? If yes, what is the part number for the heating element coil? Thanks!
For model number DPSQ475ET0WW
PartSelect logo
Hi Daniel, Thank you for your question. The coil is only sold with the element for this model. We hope this helps. Thank you and have a great day!

1 person found this helpful.

Was this helpful?
Thank you for voting!
Doug
January 28, 2020
Dryer shuts off after 10-15 minutes running on medium heat with the timed dry cycle set to 30 - 40 minutes. I replaced all of the sensors (3) around the heater element pan as well as the sensors (2) around the blower housing. The dryer seems to heat up ok but it just shuts off after a few minutes. It will restart if time is left in the cycle, apparently after a sensor(s) has reset. I cleaned the dryer of all lint, even installed a new dryer vent with a length of under 10 feet. I don't know what to try next. Heater element? Control board? Thanks in advance for your help.
For model number DCVH660EHBB
PartSelect logo
Hello, Thank you for your question. Looking at your model I would look into replacing the thermal fuse, and thermostats, as well as look into the control board. If the thermal fuse or thermostats have been tripped they will not allow the unit to fully heat to continue cycle. If those are find the issue could be the timer which is located in the control board. We hope this helps.

Was this helpful?
Thank you for voting!
Gerry
June 26, 2022
My GE dryer won't t dry my clothes. Did you have idea what parts do I need to replace? What parts do I need to check first?
For model number PDSR473ET5WW
PartSelect logo
Hello Gerry, Thank you for the question. If the appliance is not heating, we suggest testing the Cycling Thermostat, the High Limit Thermostat, Cycling Thermostat and the Safety Thermostat with a Multimeter to check the Ohms and continuity. If you need help placing an order, customer service is open 7 days a week. Please feel free to give us a call. We look forward to hearing from you!

Was this helpful?
Thank you for voting!
Related Parts:
Additional Links:
Daniel
April 15, 2023
I have installed the new heating element for my GE dryer, but why does it keep tripping my breaker switch? It didn’t do this before, any help will be appreciated. Thanks.
For model number DBXR453E
PartSelect logo
Hi Daniel, thank you for reaching out. Based on our understanding of the issue, we would suggest you check the heating element for a short circuit. If the element has shorted out, it will cause the circuit breaker to trip. You may also need to check the wiring, as a wire may be loose in the electrical panel, which is causing a short circuit. If the problem persists, you may need to check the breaker itself, as it might be worn out and tripping needlessly. We hope this information helps!

Was this helpful?
Thank you for voting!
Aaron
August 23, 2017
I replaced the heating element on my dryer but realized the purple element wire on the right hand side of the heating element has no conductivity so i'm thinking maybe it's bad. It should have conductivity correct? What is this wire for and what is the part number for it so i can order? Thanks
For model number DX2300EG1WW
PartSelect logo
Hi Aaron, Thank you for your inquiry. Yes your wire should have conductivity. Unfortunately I would not be able to tell you what the wire is for without looking at your model. The wire is more than likely part of your appliances wire harness. Unfortunately it does not look like that part is available. You may have to contact your manufacturer to get the part number. Good luck with your repair.

Was this helpful?
Thank you for voting!
Randy
July 12, 2021
Does this assemble come with the front and rear bearing assembly
For model number DCVH515EF0WW
PartSelect logo
Hello Randy, Thank you for the question. This is just the element and the housing that holds the element coil. The Bearing parts are sold separate. We hope this helps!

Was this helpful?
Thank you for voting!
Related Parts:
George
July 20, 2021
What could cause dryer not to dry clothes.
For model number DVLR223EG1WW
PartSelect logo
Hello George, Thank you for the question. We suggest testing the Cycling Thermostat, High Limit Thermostat, Safety Thermostat and the Heating Element. We hope this helps!

Was this helpful?
Thank you for voting!
Related Parts:
Daniel
October 2, 2017
In reinstalling the drum, is it difficult to attach the belt to the pulleys? I asked this question before but it was phrased wrong.
For model number DWXR463EG1WW
PartSelect logo
Hi Daniel, Thank you for your follow up. No, it is pretty simple. You just have to make sure that you run the belt in the same way that it was set up inside of your appliance. I would suggest taking a picture for reference before removing your old belt. Good luck with your repair.

Was this helpful?
Thank you for voting!
  • 1
  • 2
Model Cross Reference
This part works with the following models:
PartSelect Number: PS265565
Manufacturer Part Number: WE11M23
Brand
Model Number
Description
Kenmore
363DDE8509RCMA
Dryer - Kenmore Dryer Model 363.DDE8509RCMA (363DDE8509RCMA, 363 DDE8509RCMA) Parts
Kenmore
363DDE8509RCMAA
Dryer
Kenmore
363DDE8509RCMW
Dryer - Kenmore Dryer Model 363.DDE8509RCMW (363DDE8509RCMW, 363 DDE8509RCMW) Parts
Kenmore
363DDE8509RCMWW
Dryer
Kenmore
363DDE9600RCMA
Dryer - Kenmore Dryer Model 363.DDE9600RCMA (363DDE9600RCMA, 363 DDE9600RCMA) Parts
Kenmore
363DDE9600RCMAA
Dryer
General Electric
61140418
Dryer
General Electric
61140419
Dryer
General Electric
61148418
Dryer
General Electric
61148419
Dryer
General Electric
62140418
Dryer
General Electric
62140419
Dryer
General Electric
62148418
Dryer
General Electric
62148419
Dryer
General Electric
62160T3WB
Dryer
General Electric
62160T5WB
Dryer
General Electric
62190429
Dryer
General Electric
62190449
Dryer
General Electric
62190459
Dryer
General Electric
62190479
Dryer
General Electric
62198429
Dryer
General Electric
62198449
Dryer
General Electric
62198459
Dryer
General Electric
62198479
Dryer
General Electric
62261T0WW
Dryer
General Electric
62261T3WW
Dryer
General Electric
63040419
Dryer
General Electric
63040459
Dryer
General Electric
63040479
Dryer
General Electric
63048419
Dryer
Customer Service Representative

Get in touch, we're here to help!

Daily 8am - 9pm EST

Contact Customer Service