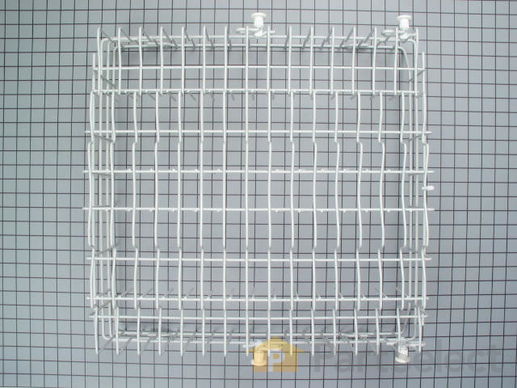
Part Location Diagram of WD28X31820 GE UPPER RACK
See part 615 in the diagram
Replacing your General Electric Dishwasher UPPER RACK
( Grid squares measure 1x1 inch )
Customer Service Representative

Get in touch, we're here to help!

Daily 8am - 9pm EST

customerservice@partselect.com

UPPER RACK WD28X31820

 Fits your GSC3200G00WW!
★★★★★
★★★★★
6 Reviews

Rated by 9 customers 

Easy 

Less than 15 mins 

Ratings submitted by customers like you who bought this part.

$ 218.11
  In Stock
Get FREE EconoShip on orders over $100! T&C apply

Get this part fast! Average delivery time for in-stock parts via standard shipping: 1.8 days.

 Fits your GSC3200G00WW!
PartSelect Number PS17137103
Manufacturer Part Number WD28X31820
Manufactured by GE
Product Description

UPPER RACK Specifications

This upper dishrack and roller assembly is twenty inches long.
How Buying OEM Parts Can Save You Time and Money

How Buying OEM Parts Can Save You Time and Money

Part Videos

Replacing your General Electric Dishwasher UPPER RACK

Replacing your General Electric Dishwasher UPPER RACK
Troubleshooting
This part works with the following products:
Dishwasher.
This part works with the following products:
General Electric, Hotpoint, Kenmore.
Part# WD28X31820 replaces these:
WD28X0240, WD28X0243, WD28X0246, WD28X0252, WD28X0253, WD28X0254, WD28X0262, WD28X0270, WD28X0276, WD28X0278, WD28X0283, WD28X0296, WD28X0298, WD28X0300, WD28X0306, WD28X0313, WD28X0325, WD28X0329, WD28X0341, WD28X10006 , WD28X10015, WD28X10023, WD28X10055, WD28X10210, WD28X10212, WD28X10220, WD28X10366, WD28X240, WD28X243, WD28X246, WD28X252, WD28X253, WD28X254, WD28X262, WD28X270, WD28X276, WD28X278, WD28X283, WD28X296, WD28X298, WD28X300, WD28X306, WD28X313, WD28X325, WD28X329, WD28X341, WD28X41155 Show less
Back to Top
Customer Reviews
Average Rating:
★★★★★
★★★★★
6 Reviews
4.8
Filter By Rating:
  • 5 Stars
    5
  • 4 Stars
    1
  • 3 Stars
    0
  • 2 Stars
    0
  • 1 Star
    0
Sort by:
  • 1
Sorry, we couldn't find any existing reviews that matched. Try using some different or simpler keywords.
  • 1
Customer Repair Stories
 Average Repair Rating: 4.3 / 5.0, 9 reviews. What's this?
Sort by:
  • 1
Sorry, we couldn't find any existing installation instruction that matched.
Wires wee very rusted and some almosth rusted through.
The lower dishrack just lifted out and the new one placed in. The upper rack had stops at the end of the slides which could be removed with the help of a flat blade screw driver, old rack slipped out, new rack slipped in and the stops replaced on the end of the slide which keeps that upper rack from coming al the way out of the dishwasher. There was a link to a "how to do video" on the email order confirmation. It just gave me reassurance that I could easily do the job.
Other Parts Used:
LOWER RACK UPPER RACK
  • Roy from TUCSON, AZ
  • Difficulty Level:
    Really Easy
  • Total Repair Time:
    Less than 15 mins
  • Tools:
    Screw drivers
1 person found this instruction helpful.
Was this instruction helpful to you?
Thank you for voting!
The covering over the original dishracks had worn away and the framework beneath was rusting.
The only trick was the endcaps, which were not intuitive. I followed the instructions in the following Youtube video , which direct the user to bend a tab at the rear of the endcap back away from the front using a quarter in order to allow the endcap to rotate out of position inwards into the interior of the dishwasher. The old racks then slid easily out of the dishwasher, the new ones equally easily slid in, and then the endcaps required the tab to be bent back to allow them to rotate back into position.
Other Parts Used:
LOWER RACK UPPER RACK
  • Douglas from WOODBURY, MN
  • Difficulty Level:
    Really Easy
  • Total Repair Time:
    Less than 15 mins
1 person found this instruction helpful.
Was this instruction helpful to you?
Thank you for voting!
Removing the end caps on the tracks
I gently grasped the end caps with pliers and twisted them toward the center of the dishwasher while gently pulling on them. They came out with some minor difficulty. Be careful or they can be broken. When putting the caps back on the tracks grasp them with pliers to reinsert. Use a small srewdriver to assist in getting the plastic caps to slide into place. Wear light weight gloves when doing this to avoid getting cut on the sharp edges of the tracks.
  • James from Houston, TX
  • Difficulty Level:
    A Bit Difficult
  • Total Repair Time:
    15 - 30 mins
  • Tools:
    Pliers, Screw drivers
1 of 2 people found this instruction helpful.
Was this instruction helpful to you?
Thank you for voting!
dishwasher rack corrosive
Very simple. First recieved Top rack. used a flat head screw
driver to remove cone/tower, put cone on new rack. put rack
on grove slided in easily. Took old rack out.replaced with new easily
Other Parts Used:
UPPER RACK LOWER RACK
  • karen from Corona, CA
  • Difficulty Level:
    Really Easy
  • Total Repair Time:
    Less than 15 mins
  • Tools:
    Screw drivers
3 of 5 people found this instruction helpful.
Was this instruction helpful to you?
Thank you for voting!
Uppper Dish Rack with wheels
It was tricky to get the old rack off. Usually you can unclip the clips closest to the front wheels to pull the rack out. However, there is an area behind one of the wheels that you can kind of release and than pull the rack out. You then have to slide out the funnel/fan piece from the middle. That piece slides/ snaps in the middle of the the new rack. Then slide the new rack in place, re attach the release used to slide oldrack out.
That is it !!
  • Lesley from Laguna Niguel, CA
  • Difficulty Level:
    Easy
  • Total Repair Time:
    15 - 30 mins
8 of 11 people found this instruction helpful.
Was this instruction helpful to you?
Thank you for voting!
2 wheels on original track rusted/broke through
Removing the slide end caps was a little tricky. Key was to tilt and twist the end cap and slide out. Putting them back in was equally as tricky, but reversing the process helped. Sliding the new track in place was simple. Total repair took about 6 or 7 minutes.. Part was ordered on a Monday morning and delivered the following day using standard shipping. Outstanding service.
Other Parts Used:
RACK SLIDE END CAP UPPER RACK
  • Allan from Williston, VT
  • Difficulty Level:
    Really Easy
  • Total Repair Time:
    Less than 15 mins
3 of 4 people found this instruction helpful.
Was this instruction helpful to you?
Thank you for voting!
Replaced the upper dishwasher rack due to rusting.
To remove the upper rack, twist the support rail end caps toward the center of the machine and slightly downward. The caps will come off and you can slide the new rack into place. Reverse the process to replace the end caps. One of mine broke and I will need to order replacements.
The original rack is no longer available. The replacement, which is the only one GE offers, has less storage space and is not as sturdy. It bends downward when full. I am very disappointed and recommend not replacing the rack unless you have no other choice.
  • Jean from Mickleton, NJ
  • Difficulty Level:
    Easy
  • Total Repair Time:
    Less than 15 mins
7 of 8 people found this instruction helpful.
Was this instruction helpful to you?
Thank you for voting!
Rusted Racks
Replaced lower rack with new. Upper rack removed front stoppers, removed old rack, slit new rack in and replaced stoppers. Total time about 15 mins.
Other Parts Used:
UPPER RACK LOWER RACK
  • Eduardo J from San Angelo, TX
  • Difficulty Level:
    Really Easy
  • Total Repair Time:
    15 - 30 mins
  • Tools:
    Screw drivers
4 of 5 people found this instruction helpful.
Was this instruction helpful to you?
Thank you for voting!
Replacement of the Dish Racks due to corrosion
The top dish rack was not an exact replacement, the side shelf did not fit and the center spray did not fit. I ran into much more trouble removing the the top rack than I had thought. I used the old wheels and it finally went on but the other mentioned problems remained.
Other Parts Used:
UPPER RACK LOWER RACK
  • Raymond from Rochester, NY
  • Difficulty Level:
    Difficult
  • Total Repair Time:
    15 - 30 mins
17 of 20 people found this instruction helpful.
Was this instruction helpful to you?
Thank you for voting!
  • 1
Questions and Answers

Be the first to ask our experts a question about this part!

Model Cross Reference
This part works with the following models:
PartSelect Number: PS17137103
Manufacturer Part Number: WD28X31820
Brand
Model Number
Description
General Electric
1200L02
Dishwasher - DISHWASHER
Kenmore
18385
Dishwasher - DISHWASHER
General Electric
3000B10
Dishwasher - DISHWASHER
General Electric
3000W10
Dishwasher - DISHWASHER
Kenmore
361402891
Dishwasher - Kenmore Dishwasher Model 36.1402891 (361402891, 36 1402891) Parts
Kenmore
3631401190
Dishwasher
Kenmore
3631401191
Dishwasher
Kenmore
3631401590
Dishwasher
Kenmore
3631401591
Dishwasher
Kenmore
3631401592
Dishwasher
Kenmore
3631401890
Dishwasher
Kenmore
3631401891
Dishwasher
Kenmore
3631401892
Dishwasher
Kenmore
3631402190
Dishwasher
Kenmore
3631402191
Dishwasher
Kenmore
3631402192
Dishwasher
Kenmore
3631402590
Dishwasher
Kenmore
3631402591
Dishwasher
Kenmore
3631402592
Dishwasher
Kenmore
3631402890
Dishwasher
Kenmore
3631402891
Dishwasher
Kenmore
3631402892
Dishwasher
Kenmore
3631410690
Dishwasher
Kenmore
3631410691
Dishwasher
Kenmore
3631410692
Dishwasher
Kenmore
3631410693
Dishwasher
Kenmore
3631410694
Dishwasher
Kenmore
3631411690
Dishwasher
Kenmore
3631411691
Dishwasher
Kenmore
3631411692
Dishwasher
Customer Service Representative

Get in touch, we're here to help!

Daily 8am - 9pm EST

Contact Customer Service