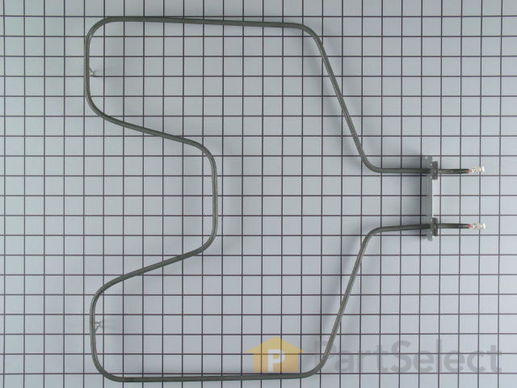
Bake Element - Push On Terminals - 240V
Get this part fast! Average delivery time for in-stock parts via standard shipping: 1.8 days.

Check if this fits your product and find model diagrams
Need help finding your model number?Bake Element - Push On Terminals - 240V Specifications

How Buying OEM Parts Can Save You Time and Money
Ask our experts a question about this part and we'll get back to you as soon as possible!
- < Prev
- 1
- 2
- 3
- Next >

50 people found this helpful.

20 people found this helpful.

6 people found this helpful.

5 people found this helpful.

4 people found this helpful.

3 people found this helpful.

2 people found this helpful.

2 people found this helpful.

1 person found this helpful.

1 person found this helpful.
- < Prev
- 1
- 2
- 3
- Next >
- < Prev
- 1
- 2
- 3
- Next >
The lower (Bake) element is held in by 2 screws. Remove them and gently pull out the element to remove the power wires connected to the element. These wires are very short and there is not much room in which to work. After having removed the wire connectors one slipped from my fingers and went back in the small opening in the back of the oven where the element is inserted. It took some time to fish out the wire. Not wanting to slide out the range I used some surgical forcepts I happen to have grab the wire ( handy to clip wires or compontents in place for some delicate repairs). Its all blind and the opening is very small plus the insulation must be pushed back to gain access. Anyway I managed to grab the wire, attached both wires to the element, replaced the plate and screws holding the element in place, all finished. Worked great. Other ranges I have owned provided a socket to plug in the element, I guess the bottom line gets in the way of quality.. Being 60 years old the worst part of this job is the getting down on my knees to do the work and getting back up again.
-
Brad from Bedford, KY
-
Difficulty Level:Easy
-
Total Repair Time:15 - 30 mins
-
Tools:Pliers, Screw drivers
-
Ronald from Citrus Springs, FL
-
Difficulty Level:Really Easy
-
Total Repair Time:Less than 15 mins
-
Tools:Nutdriver, Screw drivers
Since we had turned the electricity off and still were reluctant to move the oven ourselves, we actually decided to call in a repair person (cost: $90). What he did, though was really simple:
He pulled the oven out from the wall. Used a screwdriver to open the back panel of the oven and was able to pull out the wires. Then, he inserted the new element, hooked it up to the wires, and closed back up the back panel. Then, he moved the oven back into place.
The repair person did this in all of 5 minutes, so if my husband and I had thought about the back panel, we would have easily done it ourselves.
-
Lisa from San Jose, CA
-
Difficulty Level:A Bit Difficult
-
Total Repair Time:15 - 30 mins
-
Tools:Socket set
-
Teri from Simpsonville, SC
-
Difficulty Level:Really Easy
-
Total Repair Time:15 - 30 mins
-
Tools:Nutdriver
I plugged the wires onto the new element, and replaced the screws. My daughter could have done this....
-
mark from severna park, MD
-
Difficulty Level:Really Easy
-
Total Repair Time:Less than 15 mins
-
Tools:Nutdriver
-
patrick from MAIDEN, NC
-
Difficulty Level:Really Easy
-
Total Repair Time:Less than 15 mins
-
Tools:Nutdriver
-
Tammy from Emmitsburg, MD
-
Difficulty Level:Really Easy
-
Total Repair Time:Less than 15 mins
-
Tools:Nutdriver
1.Pulled oven away from wall and unplugged the unit & removed baking racks.
2.Removed the back wire cover behind the oven (3 screws).
3.Used the nutdriver to carefully remove the two holding screws inside the oven. Then I pulled the element towards me to expose the wires.
4. Using the pliers, I disconnected the element from the wires.
5. Using my son's help, I had him push the new element leads into the holes in the back while I connected the leads to the wires behind the oven.
6. Replace the two element retaining screws inside the oven.
7. Replaced the rear panel with the 3 screws.
8. Put the oven back in place and plugged it in. The oven worked perfectly!
-
Douglas from Colorado Springs, CO
-
Difficulty Level:Really Easy
-
Total Repair Time:15 - 30 mins
-
Tools:Nutdriver, Pliers
out the heating element and slid off one connector and attached it to the new element. Then I slid off the other connector and attached it to the new element. Then I screwed the bolts back. I turned the breaker back on and it worked great.
-
Denise from Moyock, NC
-
Difficulty Level:Really Easy
-
Total Repair Time:Less than 15 mins
-
Tools:Socket set
Lockout (LOTO) circuit breaker.
Pull stove away from wall to access the rear of range.
Remove seven (7) screws from rear cover with nutdriver / screwdriver.
Carefully, disconnect stake-on terminals (wires) from element (may need to use needle nose pliers).
Open oven, remove racks.
Remove two (2) screws holding element in place with nutdriver.
Remove old broken element.
Insert new element. Fasten with screws previously removed. Close oven door. Go to rear of unit.
Reconnect wires to element. Make sure insulation seals around the element.
Inspect for any other damage; repair as may be required.
Replace cover panel and fasten with the seven screws previously removed.
Does not hurt to vacuum and clean the area stove, too.
Push stove back into position.
Remove LOTO and turn on circuit breaker (power)
Turn oven on to highest temp to bake off any contaminates on element. Turn OFF. Let cool. Replace racks a/r. Close oven door.
Invite the pretty girl next door to come over to bake something.... OK, this part is optional.
-
Ed from Lee, NH
-
Difficulty Level:Easy
-
Total Repair Time:Less than 15 mins
-
Tools:Nutdriver, Pliers
- < Prev
- 1
- 2
- 3
- Next >
- < Prev
- 1
- 2
- 3
- Next >
- < Prev
- 1
- 2
- 3
- Next >
Manufacturer Part Number: WB44T10010