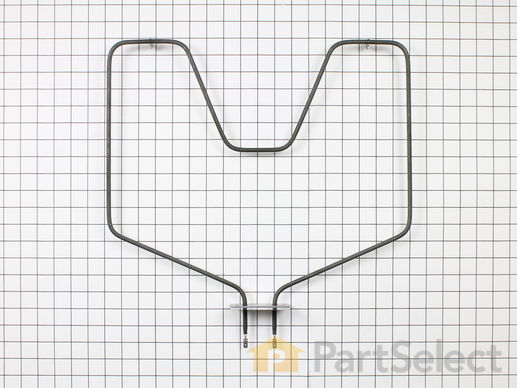
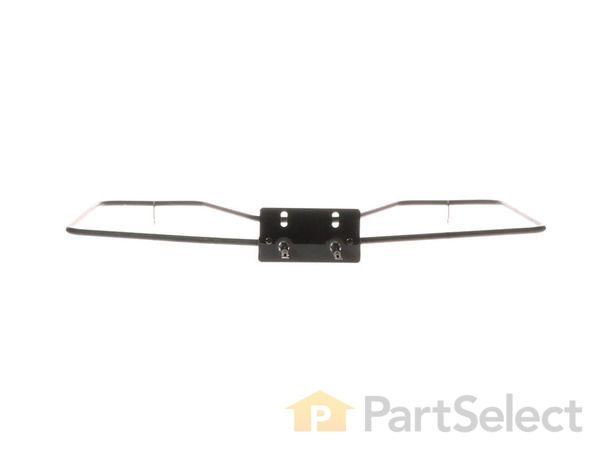
Part Location Diagram of WB44K5018 GE Bake Element - 240V
See part 251 in the diagram
( Grid squares measure 1x1 inch )
Customer Service Representative

Get in touch, we're here to help!

Daily 8am - 9pm EST

customerservice@partselect.com

Bake Element - 240V WB44K5018

 Fits your ZET757BW1BB!
★★★★★
★★★★★
9 Reviews

Rated by 9 customers 

Really Easy 

15 - 30 mins 

Ratings submitted by customers like you who bought this part.

$ 143.87
  In Stock
Get FREE EconoShip on orders over $100! T&C apply

Get this part fast! Average delivery time for in-stock parts via standard shipping: 1.8 days.

 Fits your ZET757BW1BB!
PartSelect Number PS249254
Manufacturer Part Number WB44K5018
Manufactured by GE
Product Description

Bake Element - 240V Specifications

This bake element is found on the bottom of the oven.
How Buying OEM Parts Can Save You Time and Money

How Buying OEM Parts Can Save You Time and Money

Troubleshooting
This part fixes the following symptoms:
Little to no heat when baking | Element will not heat
This part works with the following products:
Wall Oven, Microwave Oven Combo.
This part works with the following products:
General Electric, Kenmore.
Part# WB44K5018 replaces these:
AP2030974, 260846, WB44K5018
Back to Top
Customer Reviews
Average Rating:
★★★★★
★★★★★
9 Reviews
4.3
Filter By Rating:
  • 5 Stars
    6
  • 4 Stars
    1
  • 3 Stars
    1
  • 2 Stars
    1
  • 1 Star
    0
Sort by:
  • 1
Sorry, we couldn't find any existing reviews that matched. Try using some different or simpler keywords.
  • 1
Customer Repair Stories
 Average Repair Rating: 4.3 / 5.0, 9 reviews. What's this?
Sort by:
  • 1
Sorry, we couldn't find any existing installation instruction that matched.
Bake Element was in need of replacement.
#1) Found electrical control breaker and moved to "off" position

#2) Removed two (2) screws with a nut driver, that were holding the bake element in position against the back wall of the oven. Gently pulled the original bake element out toward the door to expose the wire connectors from oven to element, then disengaged the connections.

#3) Removed the damaged element, replaced with the new element, reconnected the wires to the element, and returned same into the back wall opening and reinserted the two (2) screws with nut driver.

Repair was complete. Electrical breaker returned to on. Procedure Done!
  • James from SIMPSONVILLE, SC
  • Difficulty Level:
    Really Easy
  • Total Repair Time:
    Less than 15 mins
  • Tools:
    Nutdriver
1 person found this instruction helpful.
Was this instruction helpful to you?
Thank you for voting!
burnt out bake element in oven
thought I'd unplugged the oven, turns out I disconnected the stove top, which is gas and a separate unit. This cautionary tale is here to remind all to look at the clock of the appliance on which you are working to see if there is still power flowing to it.I failed to notice until I was working at disconnecting the old element to prepare the unit for my husband to repaire after returning home. Thought I'd clean things up a bit before he had to get in there. One bright, big and loud pow! and electric fearsomeness set in but caused little damage to me but my ego. I think I got a scorched knuckle-but not burned. Stuff like this is what keeps the repair techs in business. I set the screw driver down and noted the clock was still lit up. D'oh! Shut off the breaker to the oven, cleaned it up, and left the repair to my husband, who made short work of the replacement. Also, we were sorry not to have bothered to remove the door while working on the element connections at the back of the oven. It would have been easier on his back-especially considering we had difficulty grabbing the wires to plug into the new unit due to my precipitous approach. We used an old hemostat(the pincher like grabber things mentioned in a different post) acquired from his years in the ER, and the oven works fine, is clean(er) and I am all through eating my humble pie. Bake on!
  • stephanie from Bethesda, MD
  • Difficulty Level:
    A Bit Difficult
  • Total Repair Time:
    15 - 30 mins
  • Tools:
    Pliers, Screw drivers
3 of 4 people found this instruction helpful.
Was this instruction helpful to you?
Thank you for voting!
bake element cracked
1-SHUT OFF POWER. You can just unplug if possible, but it may be easier to flip the breaker to kill all power to the unit. 2-Use 1/4 in socket to loosen the two brass screws that hold the bake element into the back of the unit. 3-Gently pull out the wires, and pull the bake element from the wires. 4-Replace bake element and put back together. In all it took me longer to walk to the garage to get/replace my tools than it did to repair the unit. Don't be afraid to do it yourself...especailly cause it'll save you at least 50% on the job. :)
  • Frank from Burr Ridge, IL
  • Difficulty Level:
    Really Easy
  • Total Repair Time:
    Less than 15 mins
2 of 3 people found this instruction helpful.
Was this instruction helpful to you?
Thank you for voting!
The Bake Element Stopped Working
The first task is to turn off the breaker so there is no power coming to the oven. I learned in the hard way that even though the oven is turned off, there is still a hot wire connected to the bake element. Next,I removed the oven door and shelves. Then I used a nutdriver to remove the two screws holding the element in place. I expected to find a plug, however the element is connected to two wires buried in the insulation. I pulled the wires off of the bake element, connected them to the new element and put everything back together. This is not a difficult task.
  • Arnold from Hayes, VA
  • Difficulty Level:
    Easy
  • Total Repair Time:
    30 - 60 mins
  • Tools:
    Nutdriver, Pliers
1 of 2 people found this instruction helpful.
Was this instruction helpful to you?
Thank you for voting!
oven element
remove the screws, replaced the element, replaced the screws.
  • G.T from Lincoln, NE
  • Difficulty Level:
    Really Easy
  • Total Repair Time:
    Less than 15 mins
  • Tools:
    Nutdriver
2 of 4 people found this instruction helpful.
Was this instruction helpful to you?
Thank you for voting!
Bake Element Not Hot.
First I unplugged unit. Theni removed the two screws that hold the element in place . Then went to pull the element out to disconnect the two wires,but was having alittle trouble. There for I removed the large plate(cover) on the back of range,and removed the wires from this location. Put the new element in place,reattached wires,screwed back plate back on ,and pluged back in.
  • Geoff from ANDOVER, MA
  • Difficulty Level:
    Easy
  • Total Repair Time:
    15 - 30 mins
  • Tools:
    Nutdriver
1 of 3 people found this instruction helpful.
Was this instruction helpful to you?
Thank you for voting!
Bake elemen broke in two
Turned off the breaker Pulled the wall oven out of the cabinet (4-screws) set it on the floor. removed the back cover , pulled wire clips removed old broken heat element. and reversed the process.
  • Tom from Plymouth, IN
  • Difficulty Level:
    Really Easy
  • Total Repair Time:
    15 - 30 mins
  • Tools:
    Nutdriver, Screw drivers
4 of 5 people found this instruction helpful.
Was this instruction helpful to you?
Thank you for voting!
Bake element brned out
First shut off circuit breaker. Removed two screws that hold the bake element in place pulled it out about two inches and dicconnected the two terminal wires. Replaced element in reverse order.
Ordered part and recieved the next day. WOW!!
  • jim from Reeds Spring, MO
  • Difficulty Level:
    Really Easy
  • Total Repair Time:
    Less than 15 mins
  • Tools:
    Socket set
3 of 3 people found this instruction helpful.
Was this instruction helpful to you?
Thank you for voting!
Baking element broke
Above all else it is imperative that the circuit breaker to the oven be turned off so that no current is flowing to the appliance. Two screws at the base of the heating element need to be removed at which point you can simply pull the element out. Carefully pull the electrical connections off and remove the broken heating element and replace it with the new one. Reinstall the screws. Turn the power back on and allow the element to heat until the oil that was applied to it at the factory burns away as a vapor in a few minutes. You're done!!!
  • Louis from Paramus, NJ
  • Difficulty Level:
    Really Easy
  • Total Repair Time:
    15 - 30 mins
  • Tools:
    Nutdriver
16 of 17 people found this instruction helpful.
Was this instruction helpful to you?
Thank you for voting!
  • 1
Questions and Answers

Ask our experts a question about this part and we'll get back to you as soon as possible!

1 question answered by our experts.
Sort by:
  • 1
Sorry, we couldn't find any existing answers that matched.Try using some different or simpler keywords, or submit your new question by using the "Ask a Question" button above!
Tom
December 7, 2018
Will oven bake element part #wb44k5018 replace my GE model number jtp14ov2ww bake element?
PartSelect logo
Hello Tom, thank you for your question. Yes, the bake element PartSelect Number: PS249254 is compatible with your model. Good luck with your repair!

2 people found this helpful.

Was this helpful?
Thank you for voting!
  • 1
Model Cross Reference
This part works with the following models:
PartSelect Number: PS249254
Manufacturer Part Number: WB44K5018
Brand
Model Number
Description
Kenmore
91141055590
Wall Oven
Kenmore
91141055591
Wall Oven
Kenmore
9114105590
Wall Oven
Kenmore
91141059590
Wall Oven
Kenmore
91141059591
Wall Oven
Kenmore
9114105990
Wall Oven
Kenmore
91141065690
Wall Oven
Kenmore
91141065791
Wall Oven
Kenmore
91141066790
Wall Oven
Kenmore
91141069690
Wall Oven
Kenmore
91141069791
Wall Oven
Kenmore
91141155590
Wall Oven
Kenmore
91141159590
Wall Oven
Kenmore
91141165690
Wall Oven
Kenmore
91141165791
Wall Oven
Kenmore
91141169690
Wall Oven
Kenmore
91141169791
Wall Oven
Kenmore
91141475690
Microwave Oven Combo
Kenmore
91141475791
Microwave Oven Combo
Kenmore
91141479690
Microwave Oven Combo
Kenmore
91141479791
Microwave Oven Combo
Kenmore
9114779790
Microwave - MICROWAVE/OVEN COMBO
General Electric
JCP17WV2WW
Wall Oven - ELECTRIC WALL OVEN
General Electric
JCT910SY1SS
Wall Oven - Electric
General Electric
JCTP16GV1BB
Wall Oven - Electric
General Electric
JCTP16GV2BB
Wall Oven - Electric
General Electric
JCTP16GV3BB
Wall Oven - Electric
General Electric
JCTP17BW1BB
Wall Oven - Electric
General Electric
JCTP17WV1WW
Wall Oven - Electric
General Electric
JCTP17WV2WW
Wall Oven - Electric
Customer Service Representative

Get in touch, we're here to help!

Daily 8am - 9pm EST

Contact Customer Service