The oven burner igniter simply ignites the gas so it can heat the oven burner. The igniter does this by drawing electrical currents through the oven safety valve to open it. If the element shortens out, is no longer glowing, or is only glowing red or orange, replacing the igniter is the solution. You will need a wire splicing tool to do this repair. First, disconnect the wire harness from the igniter by removing the access panel on the rear of the stove. Next, access the front of oven and take out the racks before removing the bottom of the oven. For the rest of the installation instructions refer to the diagram provided by the manufacturer. Remember to unplug your oven from the power source before beginning this project.
How Buying OEM Parts Can Save You Time and Money
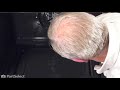
Part Videos
Replacing your Frigidaire Range Oven Bake Igniter
Troubleshooting
This part fixes the following symptoms:
Gas igniter glows | but will not light | Little to no heat when baking | Will Not Start
This part works with the following products:
Range.
This part works with the following products:
Frigidaire, Kenmore, Crosley, Electrolux.
Part# 316489403 replaces these:
AP4433236, 5304508786, 7316489403
Customer Reviews
Average Rating:
★★★★★
★★★★★
20 Reviews
4.0
Filter By Rating:
5 Stars
12
4 Stars
2
3 Stars
2
2 Stars
2
1 Star
2
Sort by:
< Prev
1
2
Next >
Search filter:
Clear Filter
Your search term must have 3 or more characters.
Keep searches simple. Use keywords, e.g. "leaking", "pump", "broken" or "fit".
Sorry, we couldn't find any existing reviews that matched. Try using some different or simpler keywords.
★★★★★
★★★★★
Alan M - February 7, 2024
Verified Purchase
worked
correct part and it fixed my problem . the price was outrageous, $148 for an oven igniter, i was ashamed to charge customer that much.
★★★★★
★★★★★
Liana S - May 28, 2023
Verified Purchase
Not helpful in getting my broken part returned.
My part was broken either in the process of installation or on its journey to my house. I tried calling customer service to figure out how to return the item but only had the option of emailing. I sent an email explaining the situation and asking for steps I needed to take to return it. I never have heard back. I spent almost $150 on this part and feel unhappy about this experience.
May 29, 2023
Thank you for your review. We're sorry to hear that happened, we will be in touch soon to help fix this issue.
★★★★★
★★★★★
Donna W - March 19, 2023
Verified Purchase
A year without an oven
The part is not a major cost, my husband installed the part without any issues and finally I had an oven. The first thing I baked that night was a batch of brownies. It is so nice having a working oven again. Marmee
★★★★★
★★★★★
Rich L - February 8, 2023
Verified Purchase
igniter
it was perfect
★★★★★
★★★★★
Robert H - August 28, 2022
Verified Purchase
Worked like a charm
Fast delivery. Correct part. Video made the job go smoothly. A satisfied customer once again. I will continue to come to PartsSelect for my appliance parts.
★★★★★
★★★★★
Diane M H - May 19, 2021
Verified Purchase
Extremely Easy to Replace
my Bake Igniter was very easy to replace, even for an amateur. Works perfectly and I'm back in the business of baking.
★★★★★
★★★★★
Christopher S - February 6, 2021
Verified Purchase
Igniter
Arrived in new condition in the timeframe promised and installed and operated as described.
★★★★★
★★★★★
Robert C - November 4, 2020
Verified Purchase
Excellent replacement part.
Ordered a generic lower cost igniter that worked for less than a week of service. OEM igniter has been working perfectly for two weeks. ??
★★★★★
★★★★★
Brandon S - August 23, 2020
Verified Purchase
Works great
Exactly as described in post. Easy installation and has been working for a couple weeks now with no issues.
★★★★★
★★★★★
William S - July 23, 2020
Verified Purchase
Did the trick
The igniter was exactly what was needed to get the oven back working. Thank you!
< Prev
1
2
Next >
Customer Repair Stories
Average Repair Rating: 3.4 / 5.0, 10 reviews.
What's this?
Sort by:
< Prev
1
Next >
Search filter:
Clear Filter
Your search term must have 3 or more characters.
Keep searches simple. Use keywords, e.g. "leaking", "pump", "broken" or "fit".
Sorry, we couldn't find any existing installation instruction that matched.
Oven taking along time to heat up
First thing. If your wife insists on helping buy 2 Because the first one will mysteriously come up broke. Just saying This is a very easy replacement project. You can do it. TURN POWER OFF TO RANGE BEFORE REPLACING IGNITER Remove a couple screws take the heat shield out. Remove the bottom drawer unplug the igniter remove a cou
... Read moreple screws holding the igniter in place. Replace the igniter and screws. Plug in the igniter replace bottom drawer. Screw heat shield back down. Turn power to stove back on. You’re done
Read less
don from GOLDENDALE, WA
Difficulty Level:
Easy
Total Repair Time:
30 - 60 mins
Tools:
Nutdriver, Screw drivers
1 personfound this instruction helpful.
Was this instruction helpful to you?
Thank you for voting!
Oven would not light - no glow from ignitor
Followed the instructions that were included in the package and it went very well with no problems. . . . .
Care Of Louann from LOS OLIVOS, CA
Difficulty Level:
Really Easy
Total Repair Time:
15 - 30 mins
Tools:
Screw drivers, Wrench (Adjustable)
1 personfound this instruction helpful.
Was this instruction helpful to you?
Thank you for voting!
Igniter Burned Out
I followed the guidance of the YouTube video presented by Steve from your company. It was very easy and direct. The only issue I had was disconnecting the igniter clip, once I wa able to remove the old one, everything else was simple. I really appreciate this video because it saved me a ton of money for repair cost. I will use this proces
... Read mores again even if it is my refrigerator because it is a Frigidaire also. Thanks to Steve who was very direct, on point, and patient with making this repair video. Kudos!
Read less
Mary from CLEVELAND, OH
Difficulty Level:
Very Easy
Total Repair Time:
15 - 30 mins
Tools:
Pliers, Screw drivers
2 of 2 peoplefound this instruction helpful.
Was this instruction helpful to you?
Thank you for voting!
Our oven igniter went 6 months after we bought the appliance.
I ordered the replacement igniter for the oven portion of the unit from Part select. It shipped very quickly. Upon receiving the igniter it was time to get to work. It took roughly 10 mins to replace and we were back up and running.
Jonathan from PITTSBURGH, PA
Difficulty Level:
Easy
Total Repair Time:
Less than 15 mins
Tools:
Screw drivers, Socket set
7 of 7 peoplefound this instruction helpful.
Was this instruction helpful to you?
Thank you for voting!
Oven would not heat up
Tore the oven apart and replaced the igniter, then put the oven back together. Perhaps if Frigidaire manufactured an appliance that lasted longer than three years this wouldn't have been necessary. This is the second Frigidaire range that only lasted three years. Believe, the next stove we buy will definitely not be a Fridgidaire!
Charlotte from ROCHESTER, NH
Difficulty Level:
A Bit Difficult
Total Repair Time:
30 - 60 mins
Tools:
Nutdriver, Pliers, Screw drivers, Socket set, Wrench set
9 of 10 peoplefound this instruction helpful.
Was this instruction helpful to you?
Thank you for voting!
Stove stopped heating
Removed old Oven Bake igniter, aligned it and installed the new Oven Bake Igniter.
James from HOUSTON, TX
Difficulty Level:
Really Easy
Total Repair Time:
30 - 60 mins
3 of 4 peoplefound this instruction helpful.
Was this instruction helpful to you?
Thank you for voting!
oven wouldn’t light
Unplug oven to prevent shore. Make sure to purchase ceramic wire nuts to complete repair. No access to able to plug in the plug. Need to unscrew the plates in the bottom of the oven to get to the igniter. Cut the plugs off and use the ceramic wire nuts to connect the wires. Put make together. It took a Month for the part to arrive.
Annie from GILLETTE, WY
Difficulty Level:
Very Difficult
Total Repair Time:
1- 2 hours
Tools:
Screw drivers, Socket set, Wrench set
6 of 6 peoplefound this instruction helpful.
Was this instruction helpful to you?
Thank you for voting!
OVEN WOULD NOT HEAT UP OVER 100 DEGREES
I "You Tubed" disassembly and commenced by disconnecting electric power. Removed door via You Tube instruction, removed back panels of unit, and replaced the oven temp probe. Easy Peasy. Then removed bottom of oven, next level above the burner and started to remove the igniter. One nut refused to be removed so I removed the burner a
... Read morend cut the nut and drilled it out. I reinstalled the new igniter with a metal screw from the rear panel and reinstalled the burner. Through the tiny hatchway I reconnected the new igniter and reassembled the oven to test. Just fine heated to 350 in 7 minutes. Awesome. Then, I called my brother, Pat, to give his imprimatur to the hillbilly nut switch. He said ok, I am done.
To any reading this, I would order the igniter and the burner at the same time. That tough nut cost my one extra hour.
I follow the instructions that I received from the e-mail.
Carlton from VERMONTVILLE, NY
Difficulty Level:
Really Easy
Total Repair Time:
30 - 60 mins
Tools:
Screw drivers, Socket set
3 of 4 peoplefound this instruction helpful.
Was this instruction helpful to you?
Thank you for voting!
Stovetop worked, oven did not.
First, remove the warming drawer. This allows access to the igniter's plug. Unplug the igniter. The rest of the job is performed within the oven. Remove the bottom (1/4 inch socket). Then remove the next, v shaped piece. The igniter is bolted to the aerator. Remove bolts, and it pulls right off. Reverse these to install new igniter.
Sparky from ACCOMAC, VA
Difficulty Level:
Easy
Total Repair Time:
30 - 60 mins
Tools:
Nutdriver, Socket set
27 of 34 peoplefound this instruction helpful.
Was this instruction helpful to you?
Thank you for voting!
< Prev
1
Next >
Questions and Answers
Ask our experts a question about this part and we'll get back to you as soon as possible!
22 questions answered by our experts.
Sort by:
< Prev
1
2
3
Next >
Search filter:
Clear Filter
Your search term must have 3 or more characters.
Keep searches simple. Use keywords, e.g. "leaking", "pump", "broken" or "fit".
Sorry, we couldn't find any existing answers that matched.Try using some different or simpler keywords, or submit your new question by using the "Ask a Question" button above!
Tedd
January 13, 2018
Bottom burner won't ignite every time, but the igniter glows every time.These instructions recommend part number 26, but that looks like an igniter for the broiler burner.It looks like what I would need is part number 19, the igniter that goes on the bottom.Can you clear up my confusion.
For model number FPGF3081KFA
Hi Tedd, Thank you for the question. The bottom Bake Igniter is Part Number: PS11770500 for your model number. Hope this helps!
I hit the bake button, set the temp, hit the start button. It goes from 400 to 100 and doesn't heat. I do the clean mode, it goes through the motions, locks door but never heats. The setting for broil starts fine and works great.
For model number FGGF3058RFA
Hello Eddie, thank you for inquiring. For this symptom you will want to replace either the Oven Probe part PS11731755 or the Bake Igniter part PS2364063. We hope this helps.
7 people found this helpful.
Was this helpful?
Thank you for voting!
Suzanne
January 6, 2020
My oven ignites but does not reach temperature before saying it's preheated. I have an oven thermometer in there. Says it's at 270 when oven says it's at 400. It will then continue to heat but not all the way. I can heat the gas igniting with a woosh when the burner comes back on. Sometimes the temp will go up, then the oven stops heating and the temp drops and it will not reignite. I have been told that because it is running off lp the orifice has to be cleaned of deposits periodically. Any ideas?
For model number 790.74339310
Hello Suzanne and thank you for writing.
It certainly sounds like it could be a faulty bake ignitor PS 2364063, you should check for signs of damage, and replace if necessary. It is also possible the temperature sensor is defective. This part has been discontinued for your model and is no longer available. We have no known replacement information in our system. We recommend you contact the manufacturer of the part to see if they have recently released a new substitute. We hope this helps. Please contact us anytime if you require further assistance.
5 people found this helpful.
Was this helpful?
Thank you for voting!
Karen
November 8, 2021
The broiler will heat and work. The bake will not heat at all. Is it the bake igniter we need? Please furnish the correct part number.
For model number LFGF3054TFA
Hello Karen, thank you for your question. We have researched the model you have provided, and we would suggest the Oven Bake Igniter, part number PS2364063. We hope this helps!
4 people found this helpful.
Was this helpful?
Thank you for voting!
Sharon
December 14, 2019
Need a part number for the oven igniter
For model number CGGF3076KBH
Hi Sharon, this part is linked below. Thank you for your question and good luck with your repair!
4 people found this helpful.
Was this helpful?
Thank you for voting!
Mike
March 4, 2020
Are you able to check resistance on the ignitor for my oven? I removed the ignitor from the oven. If you can do you know the resistance spec on the ignitor?
For model number CGGF3042KFJ
Hello Mike, Thank you for the question. The oven igniter should have a resistance reading of 3.2 to 3.6 ohms. If the igniter ohms out within the specification, measure the resistance of the oven safety valve. The gas valve should have 1.5 ohms of resistance. We hope this helps.
Got new burner for oven can't find were to plug it in
For model number FFGF305LSF
Hi Sam,
Thank you for your inquiry. There is a video on our website that you can reference on how to install the
igniter. It may not look exactly like the one you have, but it will give you an idea on how to install it. You will find the video under part number PS1573892. I hope this helps. Thank you and have a great day!
3 people found this helpful.
Was this helpful?
Thank you for voting!
Chad
January 13, 2018
Oven burner will light on bake but will not on convection bake. Igniter will get red but you never hear the actuator ( don't know if this is the right term ) click to let gas into the burner. Do i need a new igniter? Or is this in the control panel? Thanks for your time.
For model number 790.74333310
Hello Chad, Thank you for your inquiry. We would recommend checking the following parts to fix your issue: igniter, oven probe, and control board. You can test the parts with a multimeter. If you are unfamiliar with how a multimeter functions, there are YouTube videos available to assist you. Hope this helps!
3 people found this helpful.
Was this helpful?
Thank you for voting!
Bouchiba
October 9, 2019
Hi I need to know please if the bake igniter is same the top of the oven and the bottom of the oven for propane stove.Thank you
For model number CPGF3081KFB
Hello Bouchiba, Thank you for the question. The igniters are different. The Broil igniter is PartSelect Number PS11770500 and the Bake is PartSelect Number PS2364063. Hope this helps!
Does the igniter for top and bottom the same on this oven ? The part number for bottom is 316489403 .
For model number LGGF2042KFT
Hello Harry, thank you for your question. The bake igniter is PartSelect Number: PS2364063 and the broil igniter is PartSelect Number: PS11770500 for this unit. Please enter the part number into the site for current price and availability. Good luck with your repair!
3 people found this helpful.
Was this helpful?
Thank you for voting!
< Prev
1
2
3
Next >
✖
Ask a Question
Ask our experts a question on this part and we'll respond as soon as we can.