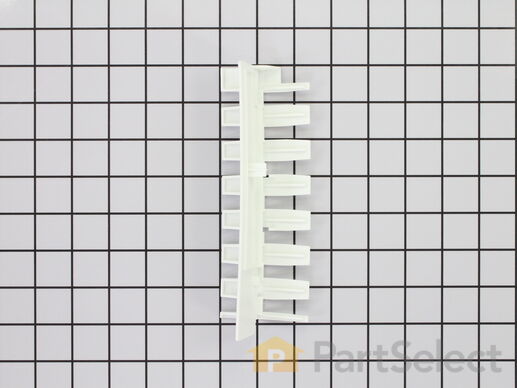
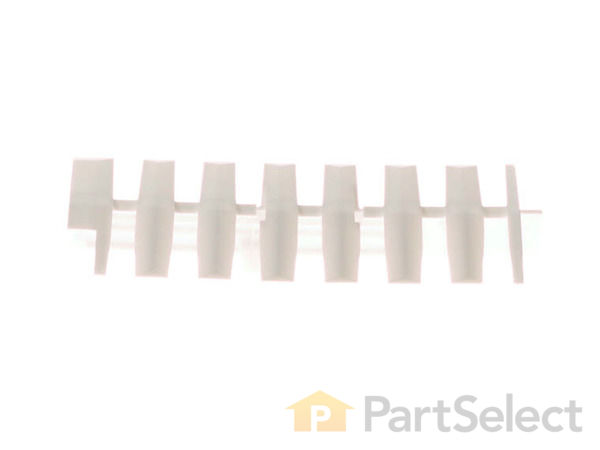
Part Location Diagram of WR29X10085 GE Icemaker Stripper Arm
See part 821 in the diagram
( Grid squares measure 1x1 inch )
Customer Service Representative

Get in touch, we're here to help!

Daily 8am - 9pm EST

customerservice@partselect.com

Icemaker Stripper Arm WR29X10085

★★★★★
★★★★★
12 Reviews

Rated by 9 customers 

Easy 

15 - 30 mins 

Ratings submitted by customers like you who bought this part.

$ 47.81
  In Stock
Get FREE EconoShip on orders over $100! T&C apply

Get this part fast! Average delivery time for in-stock parts via standard shipping: 1.8 days.

PartSelect Number PS2354686
Manufacturer Part Number WR29X10085
Manufactured by GE
Product Description

Icemaker Stripper Arm Specifications

This part strips the ice from the icemaker mold during the ejection cycle. Used on rear mount icemakers.
How Buying OEM Parts Can Save You Time and Money

How Buying OEM Parts Can Save You Time and Money

Troubleshooting
This part fixes the following symptoms:
Ice maker not making ice | Ice maker won’t dispense ice
This part works with the following products:
Refrigerator.
This part works with the following products:
General Electric, Hotpoint.
Part# WR29X10085 replaces these:
AP4413586, 1477633, WR29X10085, WR02X11548
Back to Top
Customer Reviews
Average Rating:
★★★★★
★★★★★
12 Reviews
4.8
Filter By Rating:
  • 5 Stars
    10
  • 4 Stars
    1
  • 3 Stars
    1
  • 2 Stars
    0
  • 1 Star
    0
Sort by:
  • 1
  • 2
Sorry, we couldn't find any existing reviews that matched. Try using some different or simpler keywords.
  • 1
  • 2
Customer Repair Stories
 Average Repair Rating: 4.2 / 5.0, 9 reviews. What's this?
Sort by:
  • 1
Sorry, we couldn't find any existing installation instruction that matched.
The left three tines bind and break off because they don't match the part removing the ice.
The right side of the three left three tines must be shaved about 1/8" to allow the ice remover blades to pass unimpeded.The part should be manufactured better.
  • Robert from CHARLESTON, SC
  • Difficulty Level:
    Easy
  • Total Repair Time:
    15 - 30 mins
2 of 2 people found this instruction helpful.
Was this instruction helpful to you?
Thank you for voting!
Icemaker stripper arm tine broke off (by me), causing ice to remain and not discharge normally. The cause was a stripperarm tine becoming caught under an opposing tine in the icemaker preventing it from discharging ice altogether.
Installed the new stripper arm per instructions - an easy installation. After a few cycles the original problem happened again, the stripper arm tine caught under an opposing tine stopping the unit from operating. I removed the stripper arm, after marking where it was caught, and filed it down so it wouldn't catch anymore. Icemaker works fine now. Troubleshooting tip. If a stripper arm tine is caught under an opposing tine, gently slide a screwdriver between them to release it without breaking the tine. Remove the arm, file it down 1-3 mm, and reinstall.
  • Errol from Mill Creek, WA
  • Difficulty Level:
    Easy
  • Total Repair Time:
    15 - 30 mins
  • Tools:
    Screw drivers
45 of 61 people found this instruction helpful.
Was this instruction helpful to you?
Thank you for voting!
ice maker was making no ice.
snapped in the new stripper arm where the defected one was.
  • Amy from Henderson, NY
  • Difficulty Level:
    Really Easy
  • Total Repair Time:
    Less than 15 mins
3 of 6 people found this instruction helpful.
Was this instruction helpful to you?
Thank you for voting!
Icemaker iced up completely; wouldn't drop ice. Water was dripping all over freezer.
I had to thaw the icemaker with a heat gun to remove it. Prior to repair, I watched your video of removal and replacement of icemaker. Found everything to be as explained in video. It was not necessary to remove the cover plate below the ice maker, since the electrical connection was visible and available after removing the ice maker. Except for dropped screw, everything went as planned. Presently making ice at a frantic pace.
Other Parts Used:
Icemaker Stripper Arm Ice Maker
  • Philip from Hubertus, WI
  • Difficulty Level:
    Easy
  • Total Repair Time:
    Less than 15 mins
  • Tools:
    Nutdriver, Pliers
2 of 8 people found this instruction helpful.
Was this instruction helpful to you?
Thank you for voting!
Icemaker Stripper Arm was broken
Since I'm confined to a wheelchair, my wife had to remove the icemaker which was no problem then with it on the table I was able to install the new stripper arm which was also no problem. The icemaker now works great and thanks to Partselect for their quick delivery and great prices.
  • Walter from Hixson, TN
  • Difficulty Level:
    Easy
  • Total Repair Time:
    30 - 60 mins
  • Tools:
    Screw drivers
2 of 6 people found this instruction helpful.
Was this instruction helpful to you?
Thank you for voting!
Dead ice maker.
Replaced ice maker. Required the removal of one screw and disconecting the control cable.
Other Parts Used:
Icemaker Stripper Arm Ice Maker
  • Charles from Bakersfield, CA
  • Difficulty Level:
    Really Easy
  • Total Repair Time:
    Less than 15 mins
  • Tools:
    Screw drivers
20 of 36 people found this instruction helpful.
Was this instruction helpful to you?
Thank you for voting!
piece broke off on stripper causing ice to jam
tab on right top, flat insert on left. Pull up, toward you and to the right. It pops off. No tools needed.
  • Kevin from Anaheim, CA
  • Difficulty Level:
    Really Easy
  • Total Repair Time:
    Less than 15 mins
6 of 10 people found this instruction helpful.
Was this instruction helpful to you?
Thank you for voting!
broken tine on stripper left one cube to jam the ice maker
There were no fastening hardware. The plastic stripper just snaps in place. I had to be patient and could not get it out until I put upward pressure on the stripper.
  • William from Abita Springs, LA
  • Difficulty Level:
    A Bit Difficult
  • Total Repair Time:
    Less than 15 mins
10 of 18 people found this instruction helpful.
Was this instruction helpful to you?
Thank you for voting!
Water leaking into ice compartment; stripper broken
We called a repair man in to do the work. Not sure what all he used, but he was finished within an hour.
Other Parts Used:
Icemaker Stripper Arm Water Valve
  • James from Greenville, SC
  • Difficulty Level:
    Really Easy
  • Total Repair Time:
    30 - 60 mins
  • Tools:
    Screw drivers, Wrench (Adjustable), Wrench set
19 of 97 people found this instruction helpful.
Was this instruction helpful to you?
Thank you for voting!
  • 1
Questions and Answers

Ask our experts a question about this part and we'll get back to you as soon as possible!

7 questions answered by our experts.
Sort by:
  • 1
Sorry, we couldn't find any existing answers that matched.Try using some different or simpler keywords, or submit your new question by using the "Ask a Question" button above!
Hubert
October 31, 2017
How does the stripper arm go back in the ice maker? I.E. Which side snaps in and where? I assume the side with the little extenders goes to back. Give me the details step by step. Thanks
For model number PCF23MGWABB
PartSelect logo
Hi Hubert, Thank you for the question. First you need to remove the ice maker from the appliance.Once removed you can bend or flex the stripper arm a bit to release it from the slot in the front housing of the ice maker. Next release the other end of the stripper from the pin on the end of the ice maker. To install the new one you need to line up the end of the stripper arm with the small hole with the pin on the ice maker, insert the pin on the ice maker into the hole on the end of the stripper arm.Next flex the arm a bit to fit the front of the arm stripper into the slot at the front housing of the icemaker. Good luck with the repair!

3 people found this helpful.

Was this helpful?
Thank you for voting!
Debbie
January 16, 2018
I need to replace the stripper arm for our ice maker, model wr30x10044 in our GE profile refrigerator.
For model number PSS26LSRESS
PartSelect logo
Hi Debbie, Thank you for your question. There is a video on our website that you can reference on how to install the stripper arm. The refrigerator in the video may not show exactly like the one you have, but it will give you a general idea on how to install the part. You will find the video under part number PS2378115. I hope this helps. Thank you and have a great day!

1 person found this helpful.

Was this helpful?
Thank you for voting!
Jerry
February 25, 2018
Where do I find the video that explains how to install this part?
PartSelect logo
Hi Jerry, Thank you for the question. You will find the video under part number PS2378115. I hope this helps.

1 person found this helpful.

Was this helpful?
Thank you for voting!
Diane
June 13, 2019
I need an arm stripper replacement part for my GE profiler refrigerator ice maker? Is that part available or do i need to purchase a new ice maker?
For model number PSS26MSRDSS
PartSelect logo
Hello Diane, Thank you for contacting us. I have researched the model you have provided and have found the part you are looking for is PartSelect Number PS2354686, Hope this helps!

1 person found this helpful.

Was this helpful?
Thank you for voting!
Bob
August 27, 2019
The ice stripper has got stuck on the ice removal arms. Is there a remedy for this issue.
For model number PSS26NG
PartSelect logo
Good Day Bob. Thank you for your question in regards to your unit (Model Number PSS26NG). We would recommend reaching out to the manufacturer at 800-626-2005 as they may be able to help you troubleshoot this issue. Best Regards.

Was this helpful?
Thank you for voting!
Michael J
March 6, 2018
Ice maker dispenses ice but will only dispense crushed ice and not whole cubes. What part do i need?
For model number PSS23MSWASS
PartSelect logo
Hi Michael, Thank you for your question. According the GE website, "It is normal to get a slight amount of crushed or broken ice cubes before or while dispensing cubed ice. This is most common after crushed ice was used and you then select cubes. The remaining chips in the crusher blades or the bottom of the bucket get picked up as cubed ice is dispensing. When cubed ice is selected, dispensing cubes requires energizing a lever behind the ice bucket to open a flap and allow whole cubes to come out. If an ice cube gets behind the ice bucket, this can prevent the lever from working. Remove the ice bucket and check for ice that may have fallen behind the bucket. If no ice cubes are behind the bucket, try to dispense ice with the bucket removed. Shut the door, press the ice dispenser and listen for a loud snapping noise. If no snap is heard service will be needed. If you hear a snap, reinsert the bucket and try Cubed ice again. If still no cubes, then check for frozen ice in the bucket. To remove and check the ice bucket: Pull the ice bin out by lifting it up in front and sliding it forward. Check for and remove clumped or shaved ice in the bin. If ice remains, run the bin under warm water until the ice melts completely. Dry the bin thoroughly. Reinstall the ice bin by pushing it all the way back against the freezer wall. Allow time for Icemaker to cycle again – to make cubes. Select CRUSHED ICE and then CUBED ICE. Try the dispenser again" I hope this helps. Thank you and have a great day!

Was this helpful?
Thank you for voting!
Diane
June 13, 2019
I'm looking for an arm striper for my ice maker. I believe it is an older model. Can i get a replacement part?
PartSelect logo
Hello Diane, thank you for contacting us, In order for us to locate the correct parts and repair information we will require the model number of the fridge. Once you have located the model number please feel free to resubmit the question and we will be happy to help you. Look forward to hearing from you!

Was this helpful?
Thank you for voting!
  • 1
Model Cross Reference
This part works with the following models:
PartSelect Number: PS2354686
Manufacturer Part Number: WR29X10085
Brand
Model Number
Description
General Electric
CSCP5UGXAFSS
Refrigerator
General Electric
CSCP5UGXCFSS
Refrigerator
General Electric
CSCP5UGXDFSS
Refrigerator
General Electric
CSHS5UGXBSS
Refrigerator
General Electric
CSHS5UGXCSS
Refrigerator
Hotpoint
CSS25USWASS
Refrigerator - W Series
Hotpoint
CSS25USWCSS
Refrigerator - W Series
General Electric
CSS25USWS
Refrigerator - GE Refrigerator Model CSS25USWS Parts
General Electric
CSW25LSWASS
Refrigerator - REFRIGERATOR W SERIES
General Electric
CZS25TSEBFSS
Refrigerator
General Electric
DSD26DGWABG
Refrigerator - W Series
General Electric
DSD26DGWB
Refrigerator - GE Refrigerator Model DSD26DGWB Parts
General Electric
DSD26DGWCBG
Refrigerator - W Series
General Electric
DSD26DHWABG
Refrigerator - W Series
General Electric
DSD26DHWCBG
Refrigerator - W Series
General Electric
DSF25KGTABG
Refrigerator - T Series
General Electric
DSF25KGTBBG
Refrigerator
General Electric
DSF25MGSBBB
Refrigerator
General Electric
DSF25MGSBWW
Refrigerator
General Electric
DSF26DHWABB
Refrigerator - W Series
General Electric
DSF26DHWAWW
Refrigerator - W Series
General Electric
DSF26DHWB
Refrigerator - GE Refrigerator Model DSF26DHWB Parts
General Electric
DSF26DHWCBB
Refrigerator - W Series
General Electric
DSF26DHWCWW
Refrigerator - W Series
General Electric
DSF26DHWW
Refrigerator - GE Refrigerator Model DSF26DHWW Parts
General Electric
DSHF5PGXAEBB
Refrigerator
General Electric
DSHF5PGXAEWW
Refrigerator
General Electric
DSHF5PGXCEBB
Refrigerator
General Electric
DSHF5PGXCEWW
Refrigerator
General Electric
DSHS5PGXAESS
Refrigerator
Customer Service Representative

Get in touch, we're here to help!

Daily 8am - 9pm EST

Contact Customer Service