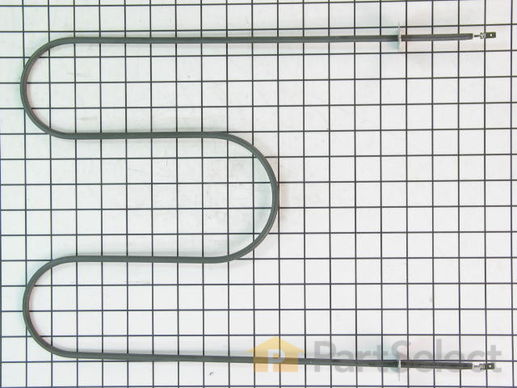
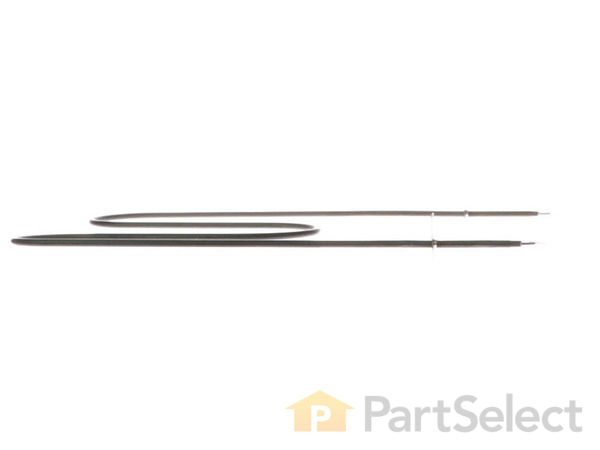
Part Location Diagram of W10201551 Whirlpool Broil Element - Push On Terminals
See part 10 in the diagram
( Grid squares measure 1x1 inch )
Customer Service Representative

Get in touch, we're here to help!

Daily 8am - 9pm EST

customerservice@partselect.com

Broil Element - Push On Terminals W10201551

★★★★★
★★★★★
19 Reviews

Rated by 29 customers 

Really Easy 

15 - 30 mins 

Ratings submitted by customers like you who bought this part.

$ 92.36
  In Stock
Get FREE EconoShip on orders over $100! T&C apply

Get this part fast! Average delivery time for in-stock parts via standard shipping: 1.8 days.

PartSelect Number PS2342087
Manufacturer Part Number W10201551
Manufactured by Whirlpool
Product Description

Broil Element - Push On Terminals Specifications

This broil element is found on the roof of the oven.
How Buying OEM Parts Can Save You Time and Money

How Buying OEM Parts Can Save You Time and Money

Troubleshooting
This part fixes the following symptoms:
Element will not heat | Little to no heat when broiling | Little to no heat when baking | Oven not heating evenly
This part works with the following products:
Range.
This part works with the following products:
Maytag, Kenmore, Jenn-Air, Whirlpool.
Part# W10201551 replaces these:
AP4365339, 1471986, W10201551, 74004106, 7406P237-60, 7406P474-60, W10201551VP
Back to Top
Customer Reviews
Average Rating:
★★★★★
★★★★★
19 Reviews
4.7
Filter By Rating:
  • 5 Stars
    17
  • 4 Stars
    1
  • 3 Stars
    0
  • 2 Stars
    0
  • 1 Star
    1
Sort by:
  • 1
  • 2
Sorry, we couldn't find any existing reviews that matched. Try using some different or simpler keywords.
  • 1
  • 2
Customer Repair Stories
 Average Repair Rating: 4.0 / 5.0, 29 reviews. What's this?
Sort by:
  • 1
  • 2
  • 3
Sorry, we couldn't find any existing installation instruction that matched.
the broiler element was not working
turn off all electric to the wall oven. removed the old broiler. replaced the new broiler and turned on the electric. checked the brolier one to see if it worked....it did thanks for the customer service for her help in finding the replacement part.
  • Gerald from Maiden, NC
  • Difficulty Level:
    Easy
  • Total Repair Time:
    15 - 30 mins
  • Tools:
    Screw drivers
4 of 4 people found this instruction helpful.
Was this instruction helpful to you?
Thank you for voting!
Broil element. Tunes out while using it on Oven Cleaning cycle
Turned off circuit breaker. Unscrewed old element holders from inside broiler - 4 screws. Pulled old element out to expose slip on wire connection at end. R&R with the new one. Screwed assembly back in. Turned on CB and tested. Good to go.
  • Christopher from FALLS CHURCH, VA
  • Difficulty Level:
    Really Easy
  • Total Repair Time:
    15 - 30 mins
  • Tools:
    Pliers, Screw drivers
1 person found this instruction helpful.
Was this instruction helpful to you?
Thank you for voting!
Top Oven Broiler Burner Not Working
1. Turned off the electrical power. 2. Removed 4 philips head screws two from hanger bracket two from oven burner. 3. When hanger bracket screws are removed the bracket can be slid forward off the burner element. 4. When the burner element screws are removed the burner can be pulled forward where the wires can be removed (they are push on connectors)I did not need pliers but you may need them to assist you. Make sure the wires don't fall down into the oven holes. Reattach wires to new burner. Reattach burner to oven rear wall. Reattach hanger bracket. Turn on the electrical power. Broil your self a steak for a job well done.
  • Michael from Harwinton, CT
  • Difficulty Level:
    Really Easy
  • Total Repair Time:
    15 - 30 mins
  • Tools:
    Screw drivers
0 of 1 people found this instruction helpful.
Was this instruction helpful to you?
Thank you for voting!
Sparking broil element, damaged in oven by use
Easy repair. Disconnected power to oven. Removed two screws holding rear connectors and two screws holding element support. Replaced with new element. Turn power on and it worked.
  • michael from bedford, MA
  • Difficulty Level:
    Easy
  • Total Repair Time:
    30 - 60 mins
  • Tools:
    Screw drivers
0 of 2 people found this instruction helpful.
Was this instruction helpful to you?
Thank you for voting!
top element went bad
replacing this was very easy and simple. I removed the 2 screws holding the support bracket then the 2 screws in back of the elemant ,pull clips off the element then installed it back like it was .....very simple...
  • william from culleoka, TN
  • Difficulty Level:
    Really Easy
  • Total Repair Time:
    15 - 30 mins
  • Tools:
    Pliers, Screw drivers
2 of 4 people found this instruction helpful.
Was this instruction helpful to you?
Thank you for voting!
top broiler element burned out
I took the old one out and put the new one in. Even a woman could do it.
  • James from Buzzards Bay, MA
  • Difficulty Level:
    Really Easy
  • Total Repair Time:
    Less than 15 mins
  • Tools:
    Screw drivers
2 of 4 people found this instruction helpful.
Was this instruction helpful to you?
Thank you for voting!
oven heating elements were burned out
I unplugged the oven then, one element at a time, I removed the screws and pulled the connecter out of the sleeve. This was the hardest part as it is a tight fit. Then, reverse the order to replace the element. The upper elements were more work because of the brackets used to hold them in place. But this only took alittle more time to remove and replace each one. When I plugged the oven back in and turned it on everything worked great! Back to baking!
Other Parts Used:
Broil Element - 6 Pass Broil Element - Push On Terminals Lower Bake Element Upper Bake Element - 240V
  • Theresa from Belfair, WA
  • Difficulty Level:
    Easy
  • Total Repair Time:
    30 - 60 mins
  • Tools:
    Screw drivers
11 of 17 people found this instruction helpful.
Was this instruction helpful to you?
Thank you for voting!
element malfunction coating starting to deteriorate
Turned power off at the breaker for the range--double check to be on the safe side ---pair of light rubber type gloves-- stool to sit my old butt down on and a Phillips screw driver--removed the top burner first this is accomplished by removing the screws on each end of the burner unit--now each end of the burner unit has an coupling which will pull apart--wiggle the connection side to side and pull--when you have the couplings apart you have to remove the top brace that this burner unit slides into you remove the old unit and remove the bottom unit the same way except it doesn't have a brace---it helps to have long arms, which I don't , it was a bit of a stretch--be careful---plus I have a very thankful wife!!!!
Other Parts Used:
Broil Element - Push On Terminals Upper Bake Element - 240V
  • Louis from Summit HIll, PA
  • Difficulty Level:
    Easy
  • Total Repair Time:
    15 - 30 mins
  • Tools:
    Screw drivers
0 of 4 people found this instruction helpful.
Was this instruction helpful to you?
Thank you for voting!
Lower Oven element burn out.
Our Maytag electric range has a small oven on top that doubles as a toaster, and food warmer. The lower one is a big oven suitable for Thanksgiving Turkey Etc. It is also a broiler as is the top oven. The top one had the bottom element burn out about 5 months back as well. Now the bottom element on the lower oven had burned out as well. The oven has some age on it, but when I looked to replace it I saw it would be approx $1800.00 - $2000.00 for a new one. I knew the elements were replacable and thought if I should call out the lonely guy, the Maytag repairman. Nope, I pulled the stove out disconnected the 220 power supply. I got the Model number off the back stamped info plate. I looked up Maytags parts on Google and the first one was PartSelect.com. They have easy fill-in spaces for Model and Make and a schematic of the oven and all it's pieces are visually displayed. I found the part I needed and ordered. It arrived in two days, very reasonable, very fast shipping. Pulling out the old elements required only a battery operated screw driver, a flash light, and a magnetic dish to keep track of the screws.The removal of the rear panel takes about 10 sheet metal screws. I marked the leads I disconnected by color with a felt tip pen on the back. I disconnected and removed the aforementioned clips, cleaned inside the oven and placed the new element in, reconnected everything on the back as it had been according to my color assignments, replaced the back with battery operated screwdriver from the magnetic dish, reconnected the 220V power supply. Done, in about 30 minutes; I saved a bunch over a new Stove and at least a couple hundred over a service call. Easy and satisfying.
Other Parts Used:
Broil Element - Push On Terminals Lower Bake Element
  • Joseph from Boerne, TX
  • Difficulty Level:
    Really Easy
  • Total Repair Time:
    15 - 30 mins
  • Tools:
    Screw drivers
4 of 6 people found this instruction helpful.
Was this instruction helpful to you?
Thank you for voting!
Sparking from the heating element
Removed four screws and the brace holding the existing element. Replaced with new broil element and secured with the four screws and brace.
  • Manreet from Fulton, IL
  • Difficulty Level:
    Really Easy
  • Total Repair Time:
    Less than 15 mins
  • Tools:
    Screw drivers
0 of 2 people found this instruction helpful.
Was this instruction helpful to you?
Thank you for voting!
  • 1
  • 2
  • 3
Questions and Answers

Ask our experts a question about this part and we'll get back to you as soon as possible!

11 questions answered by our experts.
Sort by:
  • 1
  • 2
Sorry, we couldn't find any existing answers that matched.Try using some different or simpler keywords, or submit your new question by using the "Ask a Question" button above!
Kris
October 19, 2017
Can you replace top oven element from the front of oven only. (without taking back cover off).
For model number JDR8895aAS
PartSelect logo
Hi Kris, Thank you for the question. Yes you can reach into the oven and remove the element from the front. Most find it easier to go in through the back, it is easier to reach and you can avoid leaning on the door and damaging the hinges. You just need to reach in and remove the screws from the bracket at the back of the oven and from the bracket that holds the element to the top of the oven. Once the screws are removed you can pull the element out and you will see the wires hooked to the element terminals. I suggest getting a close pin or a clip to hold the wires and prevent them from falling back through the hole and into the back of the appliance.Hope this helps!

16 people found this helpful.

Was this helpful?
Thank you for voting!
Jim
November 8, 2019
My broiler and baking elements are not working. I can identify the baking element part but the list has two broilers. Which one is correct?Ps2342087 ps11752536
For model number JDR8895AAS
PartSelect logo
Hello Jim, Thank you for your question. The broiler element under part PS2342087 is for the upper oven, and the broiler element under part PS11752536 is for the lower oven. Hope this helps!

6 people found this helpful.

Was this helpful?
Thank you for voting!
Related Parts:
Jim
November 7, 2019
My broiler and baking elements are not working. I can identify the baking element part but the list has two broilers. Which one is correct?Ps2342087 ps11752536
PartSelect logo
Hi Jim, We would be happy to do some research to find you the correct parts. However, we need your model number and the brand name to locate any information on this. Model numbers can be short or long, and could have a mixture of numbers and letters. Thank you for your question and good luck with your repair!

1 person found this helpful.

Was this helpful?
Thank you for voting!
Bonnie
December 9, 2017
The top element in my bottom oven stays on all the time which is causing over heating. We replaced the sensor but the broiler in the bottom oven is still staying on. Should I replace the broiler element?
For model number JDR8895AAS
PartSelect logo
Hello Bonnie, Thanks for your question. Given that you replaced the sensor it is likely the broil element that will need to be replaced. We would recommend doing so. I hope this helps.

Was this helpful?
Thank you for voting!
Sophie
May 30, 2019
Do you sell bake element for this model oven?
For model number P7 Automatic Oven Cleaning
PartSelect logo
Hello Sophie, thank you for writing. We would be happy to look into this, but we will need the model number of your oven to do so. We look forward to hearing back from you.

Was this helpful?
Thank you for voting!
Roger
January 4, 2020
I need a broil element for a Kenmore range. The wattage is 1730 w. The part resembles partselect number ps2342087, or partselect number ps439671, or partselect number ps249432. Unless have the actual replacement part, i will have to remove the vertical support assembly from the burnt out element and put in on the new one. I may also have to modify the screw plates for the back wall (2.25" from plate to end of push in connector) (plate for screwing is 2" x 1.75"). Overall length is 17", width 12". I hope you can tell me the right part number that is required. Thanks for your help. Roger
For model number Sears Range C880 6305091 Serial Number IME 4995782
PartSelect logo
Hello Roger and thank you for writing. According to our database, the model number you provided is just a portion of a model number with multiple possible variations. To ensure that we recommend parts that will work for your model, please check your information again; you will need to provide us with the full model and serial numbers located on the sticker on the unit itself. Once we have that information, we would be happy to find the part you need. We cannot find parts based on part dimensions as even parts that are the same size can have small differences that make them incompatible with your model. We strictly match parts to models. Thank you for your question and good luck with your repair! We do carry related parts for units just like yours. For example, part number PS11744518. Good luck with your repair.

Was this helpful?
Thank you for voting!
Related Parts:
Warren
January 10, 2020
Cost of one (1) top broiling element?
For model number MER6755AAB/Q/S/W
PartSelect logo
Hello Warren, thank you for your question. The broil element for the upper oven is Part #: PS2342087. Please enter the part number into the site for current price and availability. Good luck with your repair!

Was this helpful?
Thank you for voting!
John
April 8, 2022
Does the broil element fit both the upper and lower oven? What is the broil element part number?
For model number 629JDR8895AAB
PartSelect logo
We do not have any information on model 629JDR8895AAB. However, for model MER6765BAQ17 the broil elements have two different part numbers. For the Upper Oven, the Broil element is part PS2342087. For the Lower oven the Broil element is part PS11752536. Could you please verify the number you provided us with? If you need help placing an order, customer service is open 7 days a week. Please feel free to give us a call. We look forward to hearing from you.

Was this helpful?
Thank you for voting!
Related Parts:
Gary
November 14, 2022
This stove has two ovens. I need the broiler element for the lower oven. What part number do I need? Thanks.
For model number MER6755AAW
PartSelect logo
Hi Gary, thank you for the question. We have researched your model and found the Broil Element you are looking for, the part number is PS11752536. If you need help placing an order for it, please feel free to give us a call. We look forward to hearing from you!

Was this helpful?
Thank you for voting!
Related Parts:
Emily
August 25, 2023
The heating element broke/snapped and caught fire. If I order this part is this something I can repair myself or do I need a repairman?
For model number MER6770ABC
PartSelect logo
Hello Emily, thank you for your inquiry. You can replace the broil element yourself by following these instructions: 1. Open up the oven door and pull the oven racks out. 2. Remove all the screws holding the bracket and carefully pull the element out. 3. When pulling out the element, carefully remove the wires of the element from connectors and make sure the connectors do not fall to the rear side of the oven. 4. Follow the same procedure backwards to install the new element. We hope this information helps!

Was this helpful?
Thank you for voting!
  • 1
  • 2
Model Cross Reference
This part works with the following models:
PartSelect Number: PS2342087
Manufacturer Part Number: W10201551
Brand
Model Number
Description
Kenmore
22-98002
Range - Kenmore Range/Stove/Oven Model 22-.98002 (2298002, 22 98002) Parts
Kenmore
22-98009
Range - Kenmore Range/Stove/Oven Model 22-.98009 (2298009, 22 98009) Parts
Kenmore
62260002600
Range
Kenmore
62260003600
Range
Kenmore
62260008600
Range
Kenmore
62260009600
Range
Kenmore
62960002600
Range
Kenmore
62960002601
Range
Kenmore
62960002606
Range
Kenmore
62960003600
Range
Kenmore
62960008600
Range
Kenmore
62960008601
Range
Kenmore
62960008606
Range
Kenmore
62960009600
Range
Kenmore
62960009601
Range
Kenmore
62960009606
Range
Kenmore
66598002700
Range
Kenmore
66598002701
Range
Kenmore
66598003700
Range
Kenmore
66598003701
Range
Kenmore
66598009700
Range
Kenmore
66598009701
Range
Kenmore
66598013700
Range
Kenmore
66598013801
Range
Kenmore
66598019700
Range
Kenmore
66598019801
Range
Whirlpool
GGE350LWB00
Range - Freestanding, Electric 30"
Whirlpool
GGE350LWQ00
Range - Freestanding, Electric 30"
Whirlpool
GGE350LWS00
Range - Freestanding, Electric 30"
Jenn-Air
JDR8895AAB
Range
Customer Service Representative

Get in touch, we're here to help!

Daily 8am - 9pm EST

Contact Customer Service