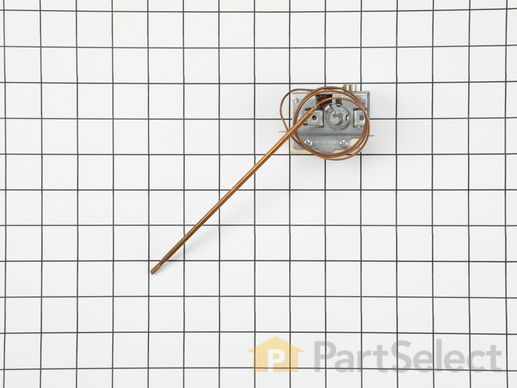
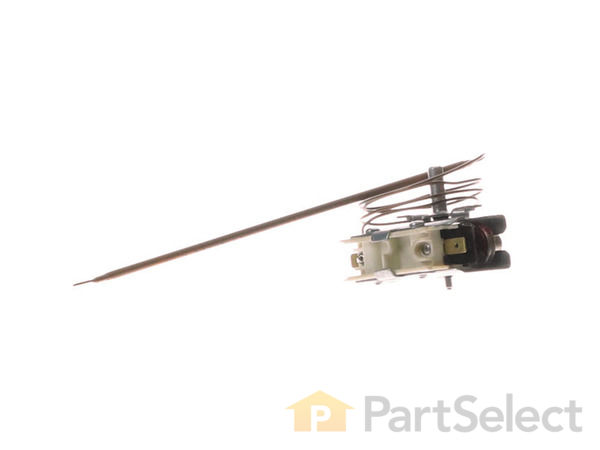
Part Location Diagram of 316032411 Frigidaire Oven Thermostat - 125V 60Hz
See part 11 in the diagram
( Grid squares measure 1x1 inch )
Customer Service Representative

Get in touch, we're here to help!

Daily 8am - 9pm EST

customerservice@partselect.com

Oven Thermostat - 125V 60Hz 316032411

 Fits your WGF324BBWC!
★★★★★
★★★★★
1 Review

Rated by 7 customers 

Easy 

15 - 30 mins 

Ratings submitted by customers like you who bought this part.

$ 173.08
  In Stock
Get FREE EconoShip on orders over $100! T&C apply

Get this part fast! Average delivery time for in-stock parts via standard shipping: 1.8 days.

 Fits your WGF324BBWC!
PartSelect Number PS2339203
Manufacturer Part Number 316032411
Manufactured by Frigidaire
Product Description

Oven Thermostat - 125V 60Hz Specifications

This part establishes and maintains the internal temperature of the oven cavity.
How Buying OEM Parts Can Save You Time and Money

How Buying OEM Parts Can Save You Time and Money

Troubleshooting
This part fixes the following symptoms:
Little to no heat when baking | Oven is too hot | Gas igniter glows | but will not light
This part works with the following products:
Range.
This part works with the following products:
Frigidaire, Tappan, Kenmore, Whirlpool.
Part# 316032411 replaces these:
AP4358457, 1465761, 316032411, 316032404, 4371308, 5303271464, 5303272103, W10252619
Back to Top
Customer Reviews
Average Rating:
★★★★★
★★★★★
1 Review
4.0
Filter By Rating:
  • 5 Stars
    0
  • 4 Stars
    1
  • 3 Stars
    0
  • 2 Stars
    0
  • 1 Star
    0
Sort by:
  • 1
Sorry, we couldn't find any existing reviews that matched. Try using some different or simpler keywords.
  • 1
Customer Repair Stories
 Average Repair Rating: 3.9 / 5.0, 7 reviews. What's this?
Sort by:
  • 1
Sorry, we couldn't find any existing installation instruction that matched.
Oven either over or under heated
1)First unplug range.
On inside of oven, there's a copper, pen-like object connected to a copper wire. 2)Open the clips on side of oven that hold the pen-like object(the probe.)
3)Open the lid of the stove. On left hand side, there's a hole through which to pull the copper wire and probe out of the stove. Or you can just as easily use wire cutters to cut off probe and just pull wire from the oven through the hole. 4)Pull off the oven's thermostat control knob. Using screwdriver, unscrew both screws under where the knob was. 5)Now pull the flat wire connecters from both sides of the old thermostat. Remember which wire goes on which side.
6)Remove old thermostat and copper wire that's connected to it.
Replace thermostat. 7)Feed copper wire with probe through hole on left side of stove.
8)Slide flat wire connecters onto sides of new thermostat. Replace screws. Insert new probe into clips on side of oven. Close stove cover. Replace thermostat control knob. Plug in range. Test thermostat. 9)According to owner's manual, turn oven to 350° and oven should be no more than 50° above setting.
  • Tracie from CLEVELAND, OH
  • Difficulty Level:
    A Bit Difficult
  • Total Repair Time:
    15 - 30 mins
  • Tools:
    Pliers, Screw drivers
2 of 2 people found this instruction helpful.
Was this instruction helpful to you?
Thank you for voting!
The thermostat on my oven no longer worked
I repaired with the use of 1 Phillips & 1 flathead screwdriver. It was very easy.
  • Renita from CHICAGO, IL
  • Difficulty Level:
    Very Easy
  • Total Repair Time:
    15 - 30 mins
  • Tools:
    Screw drivers
3 of 3 people found this instruction helpful.
Was this instruction helpful to you?
Thank you for voting!
Oven would come on when turned off
It was so easy. I am 66 yrs old. It only took 30 minutes and a screwdiver. I was totally amazed and I thank you.
  • Joy from ANDERSON, IN
  • Difficulty Level:
    Really Easy
  • Total Repair Time:
    15 - 30 mins
  • Tools:
    Screw drivers
2 of 3 people found this instruction helpful.
Was this instruction helpful to you?
Thank you for voting!
Oven getting too hot, no control on the heat settings.
First i want to thank you for the quick responce, i got my order in one day. Took top of stove off, took out the old part, put the new one in, made several test to adjust the heat settings put everything back together alls well, now my wife can cook things without burning everything, thank you from the bottom of my heart, a happy wife means a happy man. William L Zeis.
  • William from Springville, CA
  • Difficulty Level:
    Really Easy
  • Total Repair Time:
    15 - 30 mins
  • Tools:
    Nutdriver, Screw drivers
20 of 32 people found this instruction helpful.
Was this instruction helpful to you?
Thank you for voting!
oven became hard to turn on stripping the D shaped oven knob and oven would not turn all the way off oven knob and oven knob and oven would not turn all
prop up stove as if to clean inside open oven door unplug stove follow copper wire from thermostat down into oven take pliers and pop out thermostat rod in upper left hand side of oven pull it out from top then remove all five knobs from three inch face plate remove two screws that hold thermostat to the face plate then remove six screws that hold the face plate disconnect two wires on the thermostat and slide out with copper wire and rod just reverse process install new parts with screw gun you can be in and out in 30 minutes
Other Parts Used:
Oven Thermostat - 125V 60Hz Thermostat Knob
  • gordon from PALMDALE, CA
  • Difficulty Level:
    Really Easy
  • Total Repair Time:
    15 - 30 mins
  • Tools:
    Pliers, Screw drivers
17 of 27 people found this instruction helpful.
Was this instruction helpful to you?
Thank you for voting!
oven would not light
Lifted top burner plate, removed all knobs, removed front plate that holds oven burner control. Removed burner control feedind thermocouple through hole at top of oven. Installed new oven control, fed t-couple back through hole and placed in holder. Put front plate back in place and re-installed knobs. Oven works great now, lights at 200* where as before would not light at less than 400* setting. Took only a straight blade and phillips screwdriver to do the job in less than 1 hour, that included cleaning the front plate and knobs while they wereoff.
  • Lawerance from Fairfax, VT
  • Difficulty Level:
    Easy
  • Total Repair Time:
    30 - 60 mins
  • Tools:
    Screw drivers
18 of 30 people found this instruction helpful.
Was this instruction helpful to you?
Thank you for voting!
Oven would heat up in the off position.
Oven thermostat was bad comes with copper tube, to register the oven temp. Un pluged the wire to the electronic pilot. Removed the face plate, six screws, feed the copper tube thru the oven and stove top. Unscrewed the thermostat, install the new thermostat fed the tube back thru snaped it in place, connected the wires and everything was fine. Oven is now working fine..
Other Parts Used:
Oven Thermostat - 125V 60Hz KNOB-THERMOSTAT
  • Thomas from Pinehurst, MA
  • Difficulty Level:
    A Bit Difficult
  • Total Repair Time:
    30 - 60 mins
  • Tools:
    Nutdriver, Pliers, Screw drivers
24 of 35 people found this instruction helpful.
Was this instruction helpful to you?
Thank you for voting!
  • 1
Questions and Answers

Ask our experts a question about this part and we'll get back to you as soon as possible!

8 questions answered by our experts.
Sort by:
  • 1
Sorry, we couldn't find any existing answers that matched.Try using some different or simpler keywords, or submit your new question by using the "Ask a Question" button above!
Cb
December 4, 2018
Hi The igniter was coming on and working fine but the oven temp was not getting hot enough. I just replaced the thermostat and reconnected the power to the oven, but now the igniter is lite but does not come fully on any longer. I am wondering since the igniter worked fine until i replaced the thermostat could it be the new thermostat is bad? What did i do wrong? Thank you
For model number 316032411
PartSelect logo
Hello, Thank you for your question. If you suspect that the sensor is not working correctly, you will need to test it with a multimeter. The sensor should be tested at room temperature and it should be unplugged from the oven. You will need to measure the resistance between the two prongs at the end of the sensor connector. Replace the oven sensor if the reading is less than 900 Ohms or more than 1200 Ohms. I hope this helps. Thank you and have a great day!

3 people found this helpful.

Was this helpful?
Thank you for voting!
Donell
September 17, 2017
The oven won't stay heated, and the broiler doesn't work all the time. I need to know if it's the heating element?
For model number 79071052401
PartSelect logo
Hi Donell, Thank you for the question. If the elements still come on but do not get hot enough in most cases the Thermostat will need to be replaced. Hope this helps!

2 people found this helpful.

Was this helpful?
Thank you for voting!
Debbra
December 5, 2018
Oven gets too hot. Burns everything i bake, even on 200 degrees. Do i need to replace thermostat.
For model number FGF316DSA
PartSelect logo
Hello Debbra, Thank you for the question. I would recommend replacing the PartSelect Number: PS2339203, PartSelect Number: PS2339203. This part establishes and maintains the internal temperature of the oven cavity.Hope this helps, good luck with this repair!

1 person found this helpful.

Was this helpful?
Thank you for voting!
Charles
August 18, 2021
C Where can i get a installation guide for the oven thermostat
For model number FGF316BSA
PartSelect logo
Hi Charles, Thank you for your question. If you are looking for an installation guide and an owner's manual for your model, you will find a link to them when you bring your model number up on our website. Here are some instructions that a customer posted on how they installed the oven thermostat, "1) First unplug range. On inside of oven, there's a copper, pen-like object connected to a copper wire. 2) Open the clips on side of oven that hold the pen-like object(the probe.) 3) Open the lid of the stove. On left hand side, there's a hole through which to pull the copper wire and probe out of the stove. Or you can just as easily use wire cutters to cut off probe and just pull wire from the oven through the hole. 4) Pull off the oven's thermostat control knob. Using screwdriver, unscrew both screws under where the knob was. 5) Now pull the flat wire connecters from both sides of the old thermostat. Remember which wire goes on which side. 6)Remove old thermostat and copper wire that's connected to it. Replace thermostat. 7)Feed copper wire with probe through hole on left side of stove. 8)Slide flat wire connecters onto sides of new thermostat. Replace screws. Insert new probe into clips on side of oven. Close stove cover. Replace thermostat control knob. Plug in range. Test thermostat. 9)According to owner's manual, turn oven to 350° and oven should be no more than 50° above setting." We hope this helps! If you have any questions, please let us know.

1 person found this helpful.

Was this helpful?
Thank you for voting!
Jennifer
August 26, 2021
Do you have a compatible oven thermostat for a Tappan oven #30 3982 23/05? Help, please! It is an oldie Goldie, I think 1995, and I really like it after 26 years! Thank you for your help! Jenny?
For model number 5303271746
PartSelect logo
Hello Jennifer, Thank you for the question. We are sorry, we looked up the part and it is listed as No Longer Available/Discontinued. There are no part substitutions listed. Our suggestion here would be to call the manufacturer and see if they can provide you with a substitution for these part numbers and contact us back with the updated substitution number. We hope this helps!

Was this helpful?
Thank you for voting!
Thanh
June 5, 2019
The oven turned on and stayed on as soon I turned the gas on from the wall. Regardless the oven control knob turned all the way to the right or all the way to the left.
For model number FGFB33WHSB
PartSelect logo
Hi Thanh, Thank you for your question. If the oven is not heating correctly, then the issue is likely with the oven sensor, sometimes called the oven thermostat, and you will need to check it with a multimeter. When testing the sensor with a multimeter, the sensor should be tested at room temperature and it should be unplugged from the oven. You will need to measure the resistance between the two prongs at the end of the sensor connector. Replace the oven sensor if the reading is less than 900 Ohms or more than 1200 Ohms. I hope this helps. Thank you and have a great day!

Was this helpful?
Thank you for voting!
Paul
February 8, 2018
My 98 year old father's 50+ year oven finally lost its thermostat. Original part number for the oven model number above was eap450338. No one seems to have one of these left. Will your eap 2339203 work in this old oven? If it doesn't, is it returnable? What is your return policy. He does not want to spend $500-1000 to replace oven, and there is not a current model that fits the existing cutout. Ideas?
For model number White Westinghouse OG 25HX01
PartSelect logo
Hello, Thank you for the question. I looked up the part and it is listed as No Longer Available/Discontinued. There is no part substitutions listed. My suggestion here would be to call the manufacturer and see if they can provide you with a substitution for these part numbers. Hope this helps!

Was this helpful?
Thank you for voting!
Darlene
November 13, 2018
Gas stove burners work fine, even the ticking to lite - but no oven at all - hoping its the thermostat - before i order it - want to know if that is the problem - thx - waiting to hear from you -
For model number TGF 3038WA --Tappan
PartSelect logo
Hello Darlene, thank you for your question. The most likely issue is either the igniter. You can test the igniter to be sure it is the problem. First you should remove any covers or shields so you can observe the igniter. The igniter needs to glow white hot to open the gas safety valve. If your element is glowing but won't light the burner after 90 seconds your igniter is too weak to open the gas safety valve and will need to be replaced. If the igniter is not glowing at all you can use a multi-meter to test it for continuity, if there is no continuity that means the igniter needs to be replaced. If neither of the igniters are glowing at all, you will want to test the safety valve and thermostat. I hope this helps, if you have any further questions please let us know.

Was this helpful?
Thank you for voting!
  • 1
Model Cross Reference
This part works with the following models:
PartSelect Number: PS2339203
Manufacturer Part Number: 316032411
Brand
Model Number
Description
Frigidaire
2343-87A
Range - GAS RANGE
Frigidaire
28044
Range - FRIGIDAIRE GAS RANGE
Frigidaire
280440C
Range - GAS RANGE
Frigidaire
280447C
Range - GAS RANGE
Frigidaire
2813-80B
Range - GAS RANGE
Frigidaire
2813A
Range - GAS RANGE
Frigidaire
282240A
Range - GAS RANGE
Frigidaire
282240B
Range - GAS RANGE
Frigidaire
282240C
Range - GAS RANGE
Frigidaire
282247B
Range - GAS RANGE
Frigidaire
282247C
Range - GAS RANGE
Frigidaire
2823
Range - GAS RANGE
Frigidaire
2823-80B
Range - GAS RANGE
Frigidaire
2833
Range - GAS RANGE
Frigidaire
2833-80B
Range - GAS RANGE
Frigidaire
2834-80A
Range - GAS RANGE
Frigidaire
2834-80B
Range - FRIGIDAIRE GAS RANGE
Frigidaire
2834-87B
Range - FRIGIDAIRE GAS RANGE
Frigidaire
283440A
Range - GAS RANGE
Frigidaire
283440B
Range - GAS RANGE
Frigidaire
283440C
Range - FRIGIDAIRE GAS RANGE
Frigidaire
283440D
Range - GAS RANGE
Frigidaire
283447B
Range - GAS RANGE
Frigidaire
283447C
Range - FRIGIDAIRE GAS RANGE
Frigidaire
283447D
Range - GAS RANGE
Frigidaire
283460B
Range - GAS RANGE
Frigidaire
283460C
Range - GAS RANGE
Frigidaire
283467B
Range - GAS RANGE
Frigidaire
283467C
Range - GAS RANGE
Frigidaire
28364
Range - GAS RANGE
Customer Service Representative

Get in touch, we're here to help!

Daily 8am - 9pm EST

Contact Customer Service