This is a surface burner igniter, also known as a top burner ignitor and stove top spark electrode. It is used to generate the spark that lights the surface burner. If your stove will not start, element does not heat, or gas igniter glows but does not light, replacing the igniter can solve these issues. For this installation, you will need a Phillips screwdriver and needle nose pliers. First place the grate on top of the burner, then lift the burner and disconnect the wires. Next remove the two Phillips screws from the bottom of burner, pull igniter out of the burner and wiggle in the new one. Refer to the installation instructions provided by the manufacturer for more instructions.
How Buying OEM Parts Can Save You Time and Money
Part Videos
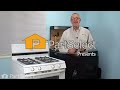
Replacing your Maytag Range Top Burner Igniter
Troubleshooting
This part fixes the following symptoms:
Will Not Start | Gas igniter glows | but will not light | Element will not heat
Keep searches simple. Use keywords, e.g. "leaking", "pump", "broken" or "fit".
Sorry, we couldn't find any existing reviews that matched. Try using some different or simpler keywords.
★★★★★
★★★★★
Linda M - July 30, 2023
Verified Purchase
Correct part ordered
We were very satisfied with the part we ordered.
★★★★★
★★★★★
Andrew Y - October 16, 2022
Verified Purchase
Easy to replace. Great service, and arrived quickly.
Perfect replacement.
★★★★★
★★★★★
Steve S - April 30, 2022
Verified Purchase
??
??
★★★★★
★★★★★
Dorothy M - July 28, 2021
Verified Purchase
Fairly easy install
Was glad to find a part for a 20 year old gas range. The video was not accurate for this installation but I figured it out.
★★★★★
★★★★★
John G - November 19, 2020
Verified Purchase
Fixed Burner Ignition
Burner had no spark, purchased and replaced igniter, install easy and straight forward, 30 mins. Part matched perfectly.
★★★★★
★★★★★
BUD R - September 8, 2020
Verified Purchase
It works!
Getting ready to sell an 18 yr old home with a Jennaire. One set of burners didn’t work so I replaced it with the bbq unit. A week later I took the unit apart and figured out igniters were bad. Got new ones, installed them and took unit back to home. It worked! Now I don’t feel guilty for a stove that wasn’t totally there.
★★★★★
★★★★★
Steve S - December 30, 2019
Verified Purchase
easy repair, worked as expected
the part was in great condition and came fast. My stove is back to working order!
★★★★★
★★★★★
RICHARD M. W - April 26, 2019
Verified Purchase
Worked perfectly
This was a factory part in a factory wrapper. Worked like it was made for it, because it was. Fast service, reasonable price too. Thanks guys.
★★★★★
★★★★★
Deborah E - March 5, 2019
Verified Purchase
fast and easy repair
The part came quickly and the stove is working great.
★★★★★
★★★★★
Joe Z - January 17, 2019
Verified Purchase
Easy Repair
This was a fairly easy installation - wish we had done it sooner!!
< Prev
1
2
Next >
Customer Repair Stories
Average Repair Rating: 3.8 / 5.0, 19 reviews.
What's this?
Sort by:
< Prev
1
2
Next >
Search filter:
Clear Filter
Your search term must have 3 or more characters.
Keep searches simple. Use keywords, e.g. "leaking", "pump", "broken" or "fit".
Sorry, we couldn't find any existing installation instruction that matched.
Back burner would not light
I replace the igniter first that didn’t work so I had to order the wiring and then I replaced that there was a cover that I took off with a screwdriver took the wiring off and put the new wiring in it it was that easy.
Christopher from WOODBURN, OR
Difficulty Level:
Very Easy
Total Repair Time:
Less than 15 mins
Tools:
Pliers, Screw drivers
1 personfound this instruction helpful.
Was this instruction helpful to you?
Thank you for voting!
Top gas burners would not ignite
Removed Stove cartridge from stove-top.
Unfastened bottom screws, I recall 6.
Removed cover.
Removed two screws to igniter.
Used needle nose pliers to remove connectors x 2.
Had to drill to enlarge the mounting screws to new ignitor, then screwed it in place
Connected the t
... Read morewo wires to each igniter.
Back burner would not light. Flame under front burner.
Because the stove is over 10 years old the screws were very hard to loosen up and I needed to use WD 40 several times to loosen them,after that it was a snap for a 71-year-old woman.
The front burner had a noticible flame coming from the base, so I originally purchased a single burner to replace it (you could see a corroded hole at the bottom). Upon taking the unit apart, I noticed the corrosion was much worse than met the eye. Given the age of the unit and that some parts were already becoming discontinued I decided
... Read moreto gut the whole thing and replace it all. The burner unit slides out easily and after unscrewing the sides, you have to disconnect the wires from the underside of the igniters. The venturi tubes and igniters then unscrew from the underside of the burners which twist right out of the assembly. Re-Assembly is very intuitive looking at it and it all goes right back together as it came out. Took 45 minutes total and that includes fighting with some screws that had rusted onto the burner. Reading some of the previous reviews, current prices are double to triple what other people did the repair for leading me to believe parts won't be available for much longer. Make the repair while you still can!
The igniter of the burner was worn out of constant use.
First I did was to google the problem I have. There several video how to solve the problem. It show me different ways to solve my problem. I just follow the instructions. Thank to google without it, I am lost. I may add, that google is a big saver for me.
Israel from HYATTSVILLE, MD
Difficulty Level:
Really Easy
Total Repair Time:
15 - 30 mins
Tools:
Pliers, Screw drivers
1 personfound this instruction helpful.
Was this instruction helpful to you?
Thank you for voting!
Igniter on burner
Firmly grasp burner turn counter clockwise while lifting. Photograph the location of the wires. Remove with a Phillips head screwdriver. The igniter will lift and turn one quarter turn then pull through bottom. Reverse the steps to install the new igniter. Test knew igniter. Put tools away
Watched u tube video as supplied and followed instructions. Had trouble getting burners off so cleaned around edge of burners with fine bladed knife as suggested by other forum user and used oil filter type wrench to remove burner. There are three bumps on burner that hold it in place so need to turn anti clockwise to remove.
David from CHESTER, CA
Difficulty Level:
Easy
Total Repair Time:
30 - 60 mins
2 of 2 peoplefound this instruction helpful.
Was this instruction helpful to you?
Thank you for voting!
j just look at it and figure how itcomes apart and reverse when installation complete easy
took out burner and remove ignite r and reinstall a new one simple as that
Cecil from REDFIELD, SD
Difficulty Level:
Really Easy
Total Repair Time:
15 - 30 mins
Tools:
Pliers, Screw drivers
1 personfound this instruction helpful.
Was this instruction helpful to you?
Thank you for voting!
Replaced igniter in right rear burner
Simply remove the box containing the two right burners. Access the igniter by removing about 8 screws and pull the coupler for the igniter off with a pair of needel nose pliers. Replace with new igniter using the same tool. Re-assemble the box by screwing in the screws and give it a try. Worked great. Once slight hitch, be sure you d
... Read moreon't leave a second screw driving in the box. As it will raddle. So I had to remove and reassemble twice. I'm not a surgeon! Thanks for the fast delivery!
Read less
Marty from Kennesaw, GA
Difficulty Level:
Easy
Total Repair Time:
Less than 15 mins
Tools:
Pliers, Screw drivers
5 of 9 peoplefound this instruction helpful.
Was this instruction helpful to you?
Thank you for voting!
The burner igniter would not spark to light the burner.
I had to unscrew 4 screws on the burner unit and then 2 screws on each igniter. slip the olds out and the new ones in and then replace all the screws. And wa la they sparked and I was cooking again.
Margie from San Antonio, TX
Difficulty Level:
Really Easy
Total Repair Time:
15 - 30 mins
Tools:
Screw drivers
12 of 16 peoplefound this instruction helpful.
Was this instruction helpful to you?
Thank you for voting!
< Prev
1
2
Next >
Questions and Answers
Ask our experts a question about this part and we'll get back to you as soon as possible!
16 questions answered by our experts.
Sort by:
< Prev
1
2
Next >
Search filter:
Clear Filter
Your search term must have 3 or more characters.
Keep searches simple. Use keywords, e.g. "leaking", "pump", "broken" or "fit".
Sorry, we couldn't find any existing answers that matched.Try using some different or simpler keywords, or submit your new question by using the "Ask a Question" button above!
Roi
August 22, 2017
Installed top burner igniter and can't get spark .Other burner works fine .Could new part be defective any ideas
For model number jdg8130ads
Hello Roi, thank you for contacting us. The electrode only makes the spark, unless it was corroded it would not be defective. Its the part that sends the spark to the electrode. The part you would need is a spark module PS11744058 Hope this helps!
Electricity not going to one of the igniters.Are both on same circut or seperate do i need new prong electrode and wire
For model number jenn air gas cooktop
Hi Roi,
Thank you for your inquiry. If your stove will not start, element does not heat, or gas igniter glows but does not light, replacing the igniter can solve these issues. For this installation, you will need a Phillips screwdriver and needle nose pliers. First place the grate on top of the burner, then lift the burner and disconnect the wires. Next remove the two Phillips screws from the bottom of burner, pull igniter out of the burner and wiggle in the new one. Refer to the installation instructions provided by the manufacturer for more instructions. I hope this helps. Thank you and have a great day!
4 people found this helpful.
Was this helpful?
Thank you for voting!
Derrik
November 22, 2019
Our jenn air gas range has two burners that won't light. Do we need to replace both ignitors? They quit working at the same time? Or could there be another problem?
For model number JDS9860ACB
Hello Derrik, thank you for inquiring. You will need to replace the Spark Igniter Set, part number PS11744110 for your model range. Good luck with your repair!
3 people found this helpful.
Was this helpful?
Thank you for voting!
Debby
December 12, 2019
One burner will not auto light but the burner behind it will. When i turn the dial to ignite there is no clicking sound.
For model number JGD8345ADB
Hi Debby, thank you for your question. There are a couple of parts to check in this case. First you should check your burner electrode. Then you should take a look at your igniter switches/harness. If those parts are fine then you may have to look into your spark module being the issue. We hope that helps. Good luck with your repair.
1 person found this helpful.
Was this helpful?
Thank you for voting!
Patrick
February 7, 2020
No spark from burners on left side don't work but if I swap the burners from the right it works.
For model number JDS9860AAB
Hi Patrick. Try to clean out the igniters if this does not work than you will have to replace the igniter. Thank you for your question and good luck with your repair.
1 person found this helpful.
Was this helpful?
Thank you for voting!
Shengli
November 11, 2019
I was cleaning up my stove (jenn air/Maytag jds9860acp) and somehow two burners on same side did now start afterwards. I thought the igniters were somehow damaged because of wet. Bought two new ones and installed. Still did not work. The igniter module is fine for sure because other two burners work just fine. What is the mysterious thing and how I can fix this problem. Thanks!
For model number JDS9860ACP
Hello Shengli, Thank you for the question. I suggest testing the Igniter Switch PartSelect Number PS11744350. These sit behind the knobs on the valve. Check the switch to see if it has continuity in the light position. Hope this helps!
Thank you for your reply. The igniter switch must be good because the good burners work at both left and right sides. I believe the voltage is there at the ignitor and the gap looks good as well. But just no sparks. Can you please advise? Thank you!
For model number JDS9860ACP
Hi Shengli, I could only recommend to replace the burner igniters on the non-working burners. Thank you for your question and good luck with your repair!
Was this helpful?
Thank you for voting!
Alexander
February 1, 2020
Need igniter and the gasket also as mine is deteriorated
For model number 31213wav
Hello and thank you for writing.
The top burner ignitor with electrode PS2082000 is in the list of compatible parts for your model. We hope this helps. Please contact us anytime if you require further assistance.
The gasket is no longer available it has been discontinued.
Was this helpful?
Thank you for voting!
Hazem
February 5, 2020
I replaced the top burner igniter but still did not spark
For model number MGR5752BDQ
Hello and thank you for writing.
It certainly sounds like it could be a faulty spark module PS2086288 you should check the part(s) for signs of damage or test with a multimeter, and replace the part(s) as needed. We hope this helps. Please contact us anytime if you require further assistance.
Neither of the burners on the right side will ignite. Neither of them have the necessary "clicking" sound when I turn the knob to the lighting position. They are getting gas. Both burners on the left side work fine. Thanks for your help.
For model number JDS9860AAP
Hi Sue, Thank you for the question. If the switch behind the knob is not making the click when the knob is turned they may need to be replaced. The switches are all attached to harness,PartSelect Number PS11744350. You can test the switches with a multi meter. The switch should have continuity when it is in the light position. Hope this helps!