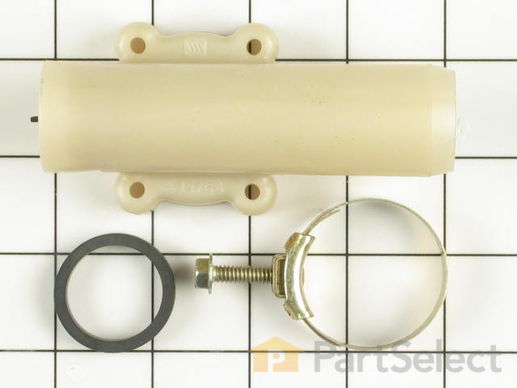
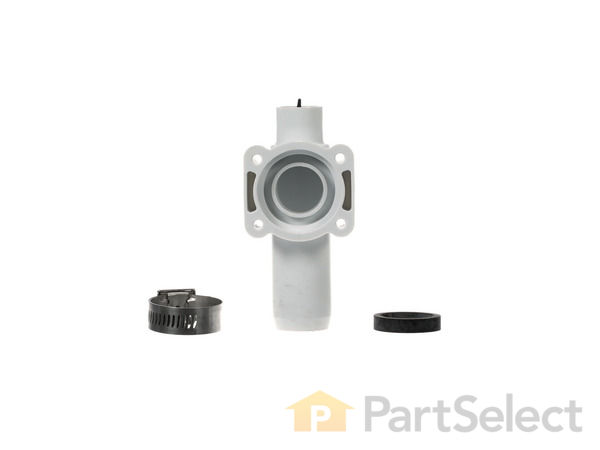
Part Location Diagram of 206638 Whirlpool Siphon Break Connector Kit
See part 19 in the diagram
Replacing your Maytag Washer Siphon Break Connector Kit
( Grid squares measure 1x1 inch )
Customer Service Representative

Get in touch, we're here to help!

Daily 8am - 9pm EST

customerservice@partselect.com

Siphon Break Connector Kit 206638

★★★★★
★★★★★
14 Reviews

Rated by 25 customers 

Easy 

30 - 60 mins 

Ratings submitted by customers like you who bought this part.

$ 73.04
  In Stock
Get FREE EconoShip on orders over $100! T&C apply

Get this part fast! Average delivery time for in-stock parts via standard shipping: 1.8 days.

PartSelect Number PS2017342
Manufacturer Part Number 206638
Manufactured by Whirlpool
Product Description

Siphon Break Connector Kit Specifications

This plastic siphon break comes with a metallic clamp and gasket. It is used with many washing machines.
How Buying OEM Parts Can Save You Time and Money

How Buying OEM Parts Can Save You Time and Money

Part Videos

Replacing your Maytag Washer Siphon Break Connector Kit

Replacing your Maytag Washer Siphon Break Connector Kit
Troubleshooting
This part fixes the following symptoms:
Leaking
This part works with the following products:
Washer, Washer Dryer Combo.
This part works with the following products:
Maytag, International, Jenn-Air.
Part# 206638 replaces these:
AP4023880, 1390, 2-5662, 2-6638, 205662, 206638, 214763, 6-2056620
Back to Top
Customer Reviews
Average Rating:
★★★★★
★★★★★
14 Reviews
5.0
Filter By Rating:
  • 5 Stars
    14
  • 4 Stars
    0
  • 3 Stars
    0
  • 2 Stars
    0
  • 1 Star
    0
Sort by:
  • 1
  • 2
Sorry, we couldn't find any existing reviews that matched. Try using some different or simpler keywords.
  • 1
  • 2
Customer Repair Stories
 Average Repair Rating: 3.5 / 5.0, 25 reviews. What's this?
Sort by:
  • 1
  • 2
  • 3
Sorry, we couldn't find any existing installation instruction that matched.
Motor burned out
Agitator motor burned out -- purchased new one through Parts Direct (parts still available) 4 bolts and plug and play wire harness and now runs like new.
  • Robert from GAHANNA, OH
  • Difficulty Level:
    Really Easy
  • Total Repair Time:
    30 - 60 mins
1 person found this instruction helpful.
Was this instruction helpful to you?
Thank you for voting!
There was a leak coming from the underside of tjhe washer.
It was really quite simple. I found out where the leak was coming from by taking off the front panel and running the washer through the drain cycle. PartSelect website was right on for what part I needed and delivered it promptly. The installation video from PartSelect couldn't have been more clear. I removed a few screws from the back of the washer and installed the new part in about 1 hour. All was good.
  • Ralph from OLATHE, KS
  • Difficulty Level:
    Easy
  • Total Repair Time:
    30 - 60 mins
  • Tools:
    Nutdriver, Screw drivers
1 person found this instruction helpful.
Was this instruction helpful to you?
Thank you for voting!
After 27 years of faithful service, our May tag washer was leaking during the spin/drainage cycle.
The instructional video clearly told me how to remove access panels. I was able to observe the leak during operation, and determined it was coming from the siphon break and running down the internal drain hose. The video clearly showed me how to access the part and replace it. This saved me a $300 service call for sure. Thank-you for your excellent guidance. We're going for 30 years of operation from this appliance!
  • Victor from NEW ORLEANS, LA
  • Difficulty Level:
    Really Easy
  • Total Repair Time:
    15 - 30 mins
  • Tools:
    Nutdriver, Pliers, Screw drivers
4 of 4 people found this instruction helpful.
Was this instruction helpful to you?
Thank you for voting!
leaking hoses and low tension on belts
opened front of washer, removed motor, replaced glides and springs, installed motor and replaced belts. Installed new hoses and vacuum breaker. Its been a week now and no leaks or other problems.
Other Parts Used:
Pump-to-Siphon Break Drain Hose Outer Tub to Pump Hose Siphon Break Connector Kit Glide and Spring Kit
  • john from COTTAGE GROVE, MN
  • Difficulty Level:
    Easy
  • Total Repair Time:
    1- 2 hours
  • Tools:
    Nutdriver, Pliers, Socket set
5 of 7 people found this instruction helpful.
Was this instruction helpful to you?
Thank you for voting!
water leaking
Unplug machine and remove drain hose clamp and hose from rear of the machine.Using Phillips head screw driver remove the 2 screws from the lower front panel of washer. Lift and remove front panel. Using a small socket, remove 2 screws from the inside top left and right of machine which secures the machines top cover and lift cover up (use duct tape to secure washer lid from opening). At the inside rear top of the machine is the Siphon Break Connector. Loosen clamps, remove old Siphon Break Connector and install new one. Reinstall top cover, front panel and then drain hose.
  • Hector from Woodhaven, NY
  • Difficulty Level:
    Easy
  • Total Repair Time:
    1- 2 hours
  • Tools:
    Screw drivers, Socket set
2 of 2 people found this instruction helpful.
Was this instruction helpful to you?
Thank you for voting!
Water leaking from top of siphon break when washer draning , water on floor under washer
Took off front washer panel push drum to one side reached in took out four screws on back of washer removed siphon break from ebow for drain hose pulled siphon break to front of washer cut hose clamp installed new part reversed procedure to put washer together Tested operation worked fine no leaks no water on floor wife very pleased with fix Thanks again for fast delivery and great inventory of parts
  • Gene from Chicopee, MA
  • Difficulty Level:
    Easy
  • Total Repair Time:
    15 - 30 mins
  • Tools:
    Nutdriver, Pliers, Screw drivers
0 of 1 people found this instruction helpful.
Was this instruction helpful to you?
Thank you for voting!
water leaking from the right front & rear of washer
Removed front panel, removed bolts from the front of top panel, lifted. Removed hoses, then 4 screws from siphon break at top right rear of machine, removed siphon break. Installed replacement siphon break and secured with screws. Put some dish soap in hoses and slid them into place and tightened clamps. (It is necessary to move the top panel up and down at various times in the process to do all of this.) Then secured the top with the front bolts. Then installed front panel. Tested the machine, no leak.
  • H Von from Greenville, OH
  • Difficulty Level:
    Easy
  • Total Repair Time:
    30 - 60 mins
  • Tools:
    Nutdriver, Screw drivers, Socket set
0 of 1 people found this instruction helpful.
Was this instruction helpful to you?
Thank you for voting!
Water was showing up in front of the machine
I took the front off the machine and ran the cycle to see when it was leaking. I found it was leaking when it was draining the water out on the inside of the machine where it was going out of the machine. I took that part out off the drain hose and ordered the part no that was stamped on the part. The part came in and I reassembled everything and it did not leak.
  • Lloyd from Raleigh, NC
  • Difficulty Level:
    Easy
  • Total Repair Time:
    30 - 60 mins
  • Tools:
    Nutdriver, Pliers, Screw drivers
2 of 4 people found this instruction helpful.
Was this instruction helpful to you?
Thank you for voting!
Washer was leaking from the siphon break. A little difficult to find, as the water would ru down the drain tube & make you think that the leak was elsewhere.
I removed 2 screws at the bottom front corner of the washer. Then lifted the front panel upwards about 45 degrees, which allows the front panel to be removed.
I then removed one small lag bolt from under each front corner (with a nut driver), which hold the top to the frame.
I was now able to swing the top up to have access to the siphon break.
I then removed the drain hose from the rear of the machine where it is attached to the nipple end of the siphon break, by loosening the hose clamp. Still at the rear, the nipple end of the siphon break is attached with 4 mini lag bolts, Which go through the back plate & hold the siphon break to the inside of the washer. I removed the bolts with a nut driver.
The nipple end now fell away. You must save it, as the siphon break does not come with a new nipple end.from the siphon break. Maytag attaches it with an iron band, as they must think that this repair will never be done! I cut the band with the Dremel, being very careful not to cut the hose.
I pulled the siphon break free from the hose.
The installation is a reversal of the removal, starting with inserting the siphon break in the inner hose, clamping the hose with the supplied hose clamp.
I the removed the inner drain hose
  • Bengt from Matawan, NJ
  • Difficulty Level:
    Easy
  • Total Repair Time:
    30 - 60 mins
  • Tools:
    Nutdriver, Screw drivers
1 of 3 people found this instruction helpful.
Was this instruction helpful to you?
Thank you for voting!
Leaking siphon break valve
1. Unplug power to the washer.
2. Remove 2 screws from bottom front panel on either side. Panel then rotates out and unhooks at the top. Remove front panel
3. Remove bolts from underneath the top front on both sides using a socket.
4. Rotate the top upward to provide space to see and work.
5. From the back of the washer, remove 4 bolts using a socket around the drain tube at the upper left.
6. From the front, the siphon valve can be removed from the inside upper right.
7. From the front, unscrew the clamp holding the drain hose on the water pump housing at the bottom right front and remove the hose. Be prepared for water to drain from the hose. Remove hose and siphon valve together and discard.
8. Install new hose on new siphon valve and screw new clamp tight. Make sure the rubber ring is inserted properly on the new valve (See old valve for reference)
9. Holding the siphon valve in place, use a socket and re-attach the 4 bolts around the drain tube at the back of the washer.
10. From the front, insert the opposite end of the new hose to the water pump at the lower right front and screw the circle clamp tight. Note: Re-use existing clamp.
11. Rotate the top back down into normal position.
12. Plug the power back in and run a short cycle and watch for leaks.
13. If no leaks, re-attach bolts for the top with a socket.
14. Re-attach front panel with 2 screws. Done.
Other Parts Used:
Pump-to-Siphon Break Drain Hose Siphon Break Connector Kit
  • Steven from Indianapolis, IN
  • Difficulty Level:
    Easy
  • Total Repair Time:
    15 - 30 mins
  • Tools:
    Screw drivers, Socket set
24 of 29 people found this instruction helpful.
Was this instruction helpful to you?
Thank you for voting!
  • 1
  • 2
  • 3
Questions and Answers

Ask our experts a question about this part and we'll get back to you as soon as possible!

4 questions answered by our experts.
Sort by:
  • 1
Sorry, we couldn't find any existing answers that matched.Try using some different or simpler keywords, or submit your new question by using the "Ask a Question" button above!
James
January 16, 2018
What is the function of the siphon break unit
PartSelect logo
Hello James, Thank you for your inquiry. It prevents the water from siphoning through the drain hose. If your washer drains into a floor drain or a drain that is lower than the height of the washer's tub, it essentially keeps the fill water from flowing into that drain. If there's high pressure water coming into the tub, the valve inside closes to keep the water from leaking, and it opens at lower pressure. Hope this helps!

9 people found this helpful.

Was this helpful?
Thank you for voting!
Jill
May 17, 2019
Should i also get gasket 2-14765 to go with 2-14764 and 2-6638?
For model number LA612
PartSelect logo
Hello Jill, thank you for your question. Yes, it is recommended to do so. All three of those parts are the correct replacements for your model.

1 person found this helpful.

Was this helpful?
Thank you for voting!
Jeremy
October 31, 2022
Water is shooting out of siphon break connector, just replace this part or should I be looking for another problem?
For model number Maytag A7300
PartSelect logo
Hi Jeremy, thank you for asking. We would recommend checking the following parts to fix your issue: Syphon Break Gasket, part number PS11738895, Siphon Break Connector Kit, part number PS2017342, and Siphon Break Elbow, part number PS11748480. We look forward to hearing from you if you need assistance with placing an order through our 7-days-a-week customer service. We hope this helps!

1 person found this helpful.

Was this helpful?
Thank you for voting!
Related Parts:
Brian
October 16, 2022
I have a leaking issue with my siphon break connector kit. Upon the drain/spin cycle of my washer, water drips from the top reservoir on said kit. I removed this part and cleaned inside and out and noticed the rubber seal at the top of this part. What is causing this issue?
For model number LAT9304AAE
PartSelect logo
Hello Brian, thank you for your inquiry. We have researched your model and found that you may need to replace the Syphon Break Gasket, part number PS11738895. Please reach out to customer service if you need help placing an order. Glad to be of help!

Was this helpful?
Thank you for voting!
Related Parts:
  • 1
You May Also Need ?
Model Cross Reference
This part works with the following models:
PartSelect Number: PS2017342
Manufacturer Part Number: 206638
Brand
Model Number
Description
Maytag
6329
Washer - MAYTAG AUTOMATIC WASHER
Maytag
6349
Washer - MAYTAG AUTOMATIC WASHER
Maytag
6359
Washer - MAYTAG AUTOMATIC WASHER
Maytag
A104
Washer - Top Loading
Maytag
A105
Washer - Top Loading
Maytag
A110
Washer - Top Loading
Maytag
A112
Washer - Top Loading
Maytag
A180
Washer - Top Loading
Maytag
A181
Washer - Top Loading
Maytag
A182
Washer - Top Loading
Maytag
A183
Washer - Top Loading
Maytag
A190
Washer - Top Loading
Maytag
A1910
Washer - Top Loading
Maytag
A209
Washer - Top Loading
Maytag
A209S
Washer - Top Loading
Maytag
A210
Washer - Top Loading
Maytag
A210S
Washer - Residential
Maytag
A211
Washer - Top Loading
Maytag
A211S
Washer - Top Loading
Maytag
A212
Washer - Top Loading
Maytag
A212S
Washer - Residential
Maytag
A282
Washer - Top Loading
Maytag
A283
Washer - Top Loading
Maytag
A284
Washer - Top Loading
Maytag
A305
Washer - Top Loading
Maytag
A310
Washer - Top Loading
Maytag
A310S
Washer - Residential
Maytag
A312
Washer - Top Loading
Maytag
A312S
Washer - Residential
Maytag
A382
Washer - Top Loading
Customer Service Representative

Get in touch, we're here to help!

Daily 8am - 9pm EST

Contact Customer Service