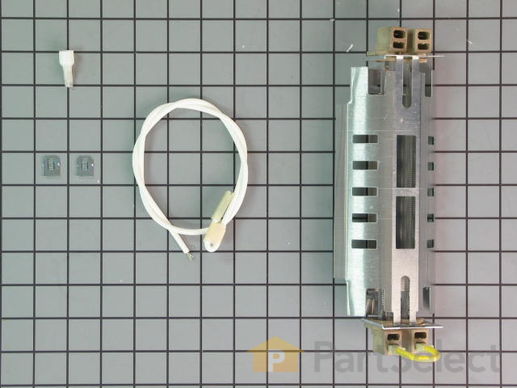
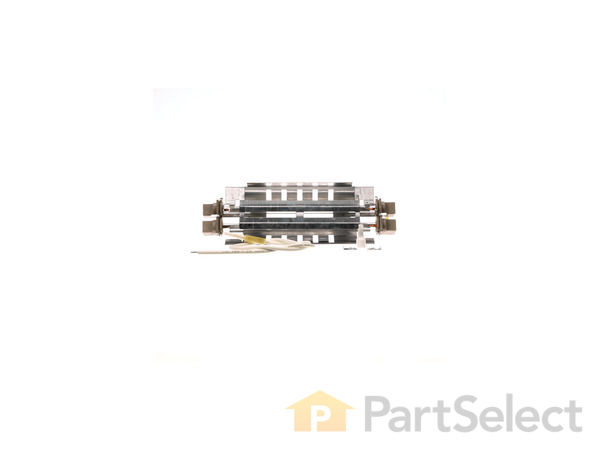
Part Location Diagram of WR51X10101 GE Defrost Heater Harness Kit
See part 230 in the diagram
Replacing your General Electric Refrigerator Defrost Heater Harness Kit
( Grid squares measure 1x1 inch )
Customer Service Representative

Get in touch, we're here to help!

Daily 8am - 9pm EST

customerservice@partselect.com

Defrost Heater Harness Kit WR51X10101

 Fits your CSX22BCBGWH!
★★★★★
★★★★★
15 Reviews

Rated by 202 customers 

Really Easy 

30 - 60 mins 

Ratings submitted by customers like you who bought this part.

$ 61.67
  In Stock
Get FREE EconoShip on orders over $100! T&C apply

Get this part fast! Average delivery time for in-stock parts via standard shipping: 1.8 days.

 Fits your CSX22BCBGWH!
PartSelect Number PS1993872
Manufacturer Part Number WR51X10101
Manufactured by GE
Product Description

Defrost Heater Harness Kit Specifications

This dual heater kit replaces the single heater. It's redesigned to use two heating elements for a better defrost cycle.
How Buying OEM Parts Can Save You Time and Money

How Buying OEM Parts Can Save You Time and Money

Part Videos

Replacing your General Electric Refrigerator Defrost Heater Harness Kit

Replacing your General Electric Refrigerator Defrost Heater Harness Kit
Troubleshooting
This part fixes the following symptoms:
Fridge too warm | Freezer section too warm | Freezer not defrosting | Freezer too cold
This part works with the following products:
Refrigerator.
This part works with the following products:
General Electric, Hotpoint, Kenmore.
Part# WR51X10101 replaces these:
AP4355467, 1399613, WR51X10101, WR51X10032, WR51X10053, WR51X10097
Back to Top
Customer Reviews
Average Rating:
★★★★★
★★★★★
15 Reviews
5.0
Filter By Rating:
  • 5 Stars
    15
  • 4 Stars
    0
  • 3 Stars
    0
  • 2 Stars
    0
  • 1 Star
    0
Sort by:
  • 1
  • 2
Sorry, we couldn't find any existing reviews that matched. Try using some different or simpler keywords.
  • 1
  • 2
Customer Repair Stories
 Average Repair Rating: 3.9 / 5.0, 202 reviews. What's this?
Sort by:
  • 1
  • 2
  • 3
Sorry, we couldn't find any existing installation instruction that matched.
Frost vuildup back panel of freezer, freezer too warm
Followed the video describing the repain and the written directions. The Video is excellent and made the job easy to follow
  • Charles from HERNANDO, FL
  • Difficulty Level:
    Really Easy
  • Total Repair Time:
    30 - 60 mins
  • Tools:
    Nutdriver, Screw drivers
1 person found this instruction helpful.
Was this instruction helpful to you?
Thank you for voting!
Refrigerator warm, freezer cold.
I diagnosed the problem using the guidelines on the website using the refrigerator model number. Refrigerator was warm and freezer had frost buildup on back panel. I followed the instructions in the video and removed the back panel with a screwdriver. The coils were completely covered in ice. I let the ice defrost by itself as this is a spare garage refrigerator and I had the time. Once the ice was melted I was able to remove the defrost heater harness with a screwdriver. The tube was black as described by others. Installation of the new heater harness was easy and the wires didn't need splicing because they were long enough. I also replaced the defrost thermostat as well as the sensors since I had the thing apart anyway. I am a 69-yr old woman DIY-er. Videos were very clear and I was able to save at least the cost of just a repair visit before parts and labor. Fridge has been running great for two weeks now.
Other Parts Used:
Defrost Heater Harness Kit Defrost Thermostat
  • Annette from IOWA CITY, IA
  • Difficulty Level:
    Really Easy
  • Total Repair Time:
    30 - 60 mins
  • Tools:
    Nutdriver, Screw drivers
1 person found this instruction helpful.
Was this instruction helpful to you?
Thank you for voting!
Freezer coils freezing
Took the panel in freezer off, removed the defrost thermostat and heating element out and replaced.
Other Parts Used:
Defrost Heater Harness Kit Defrost Thermostat
  • nick from CHILDRESS, TX
  • Difficulty Level:
    Very Easy
  • Total Repair Time:
    30 - 60 mins
  • Tools:
    Nutdriver, Screw drivers
1 person found this instruction helpful.
Was this instruction helpful to you?
Thank you for voting!
Freezer frosted over and Rrigerator side would not maintain temperature due to failure of defrost heater
After viewing on Youtube I knew exactly what to expect in the repair process. It was easy, easy and saved me a 90 dollar service call plus an over priced replaement part. Time to repair was 25 minutes and included my kid taking the screwdriver.
  • C J from PARKER, AZ
  • Difficulty Level:
    Very Easy
  • Total Repair Time:
    15 - 30 mins
  • Tools:
    Screw drivers
1 person found this instruction helpful.
Was this instruction helpful to you?
Thank you for voting!
Fridge not cooling, freezer icing up
This fridge had this same problem 4 other times, each time about 1 yr apart. Being as I considered myself ''mechanically challenged'' my wife always contacted her favorite appliance repair man. However, he was unavailable, so wife was gearing up to go ahead, bite the bullet, and buy a new fridge. We really didn't want another bill to worry with so she suggested I try the repair myself. She'd watched the repairman do it the last couple of times and ensured me it would be ''a piece of cake'' plus save us some bucks and put off an added expense at least a little longer. Ordering the part from this site was simple. The fridge did have the old 1 bulb element and the new one was the 2 bulb element so I was afraid I'd have to do some splicing, but lucked out and the wire was easily redirected and reached without any stress or problems to plug into the new part. She watched the install video and was able to talk me through it without any problems. We saved at least $125 install bill, plus put off making a big item purchase a while longer. I hope the new 2 element defroster does a better job and we might just get 10 more years out of 'old faithful'!
  • Paula from GREENEVILLE, TN
  • Difficulty Level:
    Easy
  • Total Repair Time:
    30 - 60 mins
  • Tools:
    Nutdriver, Screw drivers
1 person found this instruction helpful.
Was this instruction helpful to you?
Thank you for voting!
No cooling in Frig or Freezer
Removed all items from Freezer. Removed back panel of Freezer (3 screws). Defrosted cooling fins with a heat gun. (about 45 minutes). Removed old Defrost Heater (2 screws). Removed two power lines from Heater. Attached power lines and installed new Heater. (Old Thermostat was O.K.). Replaced back panel. Runs like a champ. Without the defrost time, it took less then 30 minutes. I had this same project done by a service a few years ago and it cost about $300. I order the parts at about 3pm with express shipping. The parts arrived about 10am the next day.
Other Parts Used:
Defrost Heater Harness Kit Defrost Thermostat
  • James from Racine, WI
  • Difficulty Level:
    Easy
  • Total Repair Time:
    15 - 30 mins
  • Tools:
    Nutdriver, Screw drivers
3 of 4 people found this instruction helpful.
Was this instruction helpful to you?
Thank you for voting!
Fridge and freezer section too warm
Replaced defrost heater as suggested in your video and the fridge now works as new. Thank you for easy delivery and excellent video.
Other Parts Used:
Defrost Heater Harness Kit Defrost Thermostat
  • Avanes from Nashua, NH
  • Difficulty Level:
    Really Easy
  • Total Repair Time:
    15 - 30 mins
1 of 3 people found this instruction helpful.
Was this instruction helpful to you?
Thank you for voting!
unit not colling on food side
went well after witching the vido
  • tommy from Gonzales, LA
  • Difficulty Level:
    Really Easy
  • Total Repair Time:
    15 - 30 mins
  • Tools:
    Nutdriver, Screw drivers
0 of 1 people found this instruction helpful.
Was this instruction helpful to you?
Thank you for voting!
Freezer and Refrigerator much too warm
Turned freezer dial to 0, disconnected power cord, emptied freezer and covered food with blanket to keep cold, removed shelves, removed evaporator screws and cover (back wall), removed two defrost heater screws then heater, visual inspection showed element was burned out (like a light bulb), replaced cover but not the screws, left the heater out, plugged back in, turned freezer dial to 7. I then ordered my new part for normal delivery and it arrived 3 business days after the day it was ordered. Repeated the early steps above. My freezer had a single element heater but it did not need the adapter provided, I was able to move the left hand side wire over to the right hand side and plug both in on the right side. This time I put the evaporator cover screws on for a permanent solution. The freezer will likely work fine for a week or two without the defrost heater while you are waiting for the part to arrive but I would not buy any new frozen food until after the repairs are made. I was very satisified with the website, the quick delivery and the quality of the part. I would give it 5 of 5 stars.
  • Jim from Morrisville, NC
  • Difficulty Level:
    Really Easy
  • Total Repair Time:
    15 - 30 mins
  • Tools:
    Nutdriver, Screw drivers
0 of 1 people found this instruction helpful.
Was this instruction helpful to you?
Thank you for voting!
freezer was warm
The instructions were good but the installation video really helped. The refrigerator is working fine now. Thanks.
Other Parts Used:
Defrost Heater Harness Kit Defrost Thermostat
  • Sabrina from White Plains, New York, NY
  • Difficulty Level:
    Easy
  • Total Repair Time:
    30 - 60 mins
  • Tools:
    Screw drivers, Socket set
1 of 2 people found this instruction helpful.
Was this instruction helpful to you?
Thank you for voting!
  • 1
  • 2
  • 3
Questions and Answers

Ask our experts a question about this part and we'll get back to you as soon as possible!

9 questions answered by our experts.
Sort by:
  • 1
Sorry, we couldn't find any existing answers that matched.Try using some different or simpler keywords, or submit your new question by using the "Ask a Question" button above!
Michael
October 6, 2017
I was able to find a video on your site (the site is terrific by the way!) to replace my heater in my fridge, but this video shows a dual element heater being replaced with a dual element heater. My current freezer has a single element heater and the replacement part i was sent is a dual element heater. The wiring is slightly different and the kit came with an extension wire to make it work. I was just looking for a video that shows me the safest way to do that. The model number for my refrigerator/freezer is tfx20jabgww and i was sent replacement heater part #wr51x10101.Please let me know if there is a video showing that.
For model number TFX20JABGWW
PartSelect logo
Hi Michael, Thank you for the question. I just checked our video again and others on YouTube and they all say refer to the instructions. Here is some info I located. What you will need to do is remove the wire that used to go to the left side of the old heater (usually the blue wire) and run it over to the right side of the refrigerator. Both the blue and pink wire will be hooked up on the right side of the new heater. In some cases, if the blue wire is not long enough to reach to the other side, it will need to be extended. Included with the new heater is an extension wire and crimp connector to extend the wire.The new heater should fit in the same place that the old heater went, it can be a tight fit but it will work. Hope this helps!

22 people found this helpful.

Was this helpful?
Thank you for voting!
Raymond
January 23, 2018
Freezer and ice maker work, but when it goes into defrost, it the freezer gets wet, vegetables thaw out and the ice melts into a big blob in the holder. Could this the heater and thermostat that needs to be replaced??
For model number GSH22JSTASS
PartSelect logo
Hello Raymond, Thank you for your inquiry. I would check the heater and thermostat, as well as the temperature sensor and electronic control board-which has the defrost controls built into it. You can test the parts with a multimeter. If you are unfamiliar with how a multimeter functions, there are YouTube videos available to assist you. Hope this helps!

9 people found this helpful.

Was this helpful?
Thank you for voting!
Evelyn
May 13, 2019
How do i diagnos defrost heater,
For model number GSS20IETA WW
PartSelect logo
Hello Evelyn, thank you for your question. First unplug the fridge itself, and then unplug the wires of the Defrost Heater from the unit. Use a multi meter to test the ohms. It should read between 110 and 150 ohms to be functioning correctly. We hope this helps.

9 people found this helpful.

Was this helpful?
Thank you for voting!
Ali
July 21, 2021
Hi, what is the total length of the actual heating element? My fridge is GE gsswwufpdww. And the defrost heater is total no more than roughly 10 inches long. It is in no way 12 inches. I have noticed most are 12 inches. I don't understand. Also i noticed that your heating element has two elements just by looking at it. Mine has 1. I guess two is better than one. I am just wondering what is up with that and the most important point is the length. Thank you.
PartSelect logo
Hi Ali, Thank you for your question. If your model number is GSS22UFPDWW, the defrost heater is approximately 10 inches and the part number for it is PS1993872. If your model number is GSS25UFPDWW, then the heater is approximately 12 inches. The part number for it is PS303781. To verify your model number, here is a link from our website that you may reference to find your complete model number, https://www.partselect.com/Find-Your-Refrigerator-Model-Number.aspx. We hope this helps! If you have any questions, please let us know.

2 people found this helpful.

Was this helpful?
Thank you for voting!
Related Parts:
Kathy
June 13, 2019
I just bought this double defrost heater part but there aren't any instructions included. My fridge has 2 separate, single defrost heaters: One has a blue wire on right side and white wire on left, the second defrost heater has a pink wire on right and white wire on left. I understand that both the pink and blue wires plug into the right side on the new double heater, but what do i do with the white wire from the original old single defrost heaters?
For model number TFX22KRDA WW
PartSelect logo
Hello Kathy, thank you for your question. I just checked our video again and others on YouTube and they all say refer to the instructions. Here is some info I located. What you will need to do is remove the wire that used to go to the left side of the old heater (usually the blue wire) and run it over to the right side of the refrigerator. Both the blue and pink wire will be hooked up on the right side of the new heater. In some cases, if the blue wire is not long enough to reach to the other side, it will need to be extended. Included with the new heater is an extension wire and crimp connector to extend the wire.The new heater should fit in the same place that the old heater went, it can be a tight fit but it will work. Hope this helps!

1 person found this helpful.

Was this helpful?
Thank you for voting!
Ruben
July 12, 2019
Refrigerator not cooling only to 30 on freezer and 36 on fefrigarator
For model number GSL22JGDBLS
PartSelect logo
Hello Ruben, Thank you for the question. I suggest checking the Temperature Sensor, PartSelect Number PS304103.At 70 degrees the resistance should be 9.3K ohms, 90 degrees would be 7.7K ohms. at 100 degrees would be 6.2K ohms, and 120 degrees would be 4.3K ohms. If the thermistor reads outside of range then it needs replaced. Hope this helps!

Was this helpful?
Thank you for voting!
Related Parts:
Ali
July 22, 2021
Hello, Thank you for answering my last question, especially that i had misstyped my model # and you picked up on that. My GE fridge is gss22ufpdww.The icemaker seem to have a flat arm, instead of lifting up to stop making ice and dropping it, it supposedly slides inward horizontally. my question is how on earth is this possible as the ice can drop even on the flat arm as you can imagine. i have seen your youtube video taking out of the old unit which lifts up, and installing the new. when i paid close attention, the new one is like mine flat plastic arm. when i use my hand to check mine to see if it works, slide in and out, it does. spring loaded to stay out and however the ice can push it in is a totatl mystery to me. i have seen the ice filling the tray and keeps going and the arms doesn't doa thing. so i have to turn off the icemaker. i have yet to go through the trouble to see if i place something in front of the arm to hold it in to see if that stops the ice making, the ice from dropping. if that be the case which i am almost certain that it would work, this means the design of the arm is wrong. since it moves easily and i doubt if the spring tension increases as it gets old. i like to know if there is something else besides i guess a senseless design? how could that be? thanks for any feedback and recommendation.
For model number GSS22UFPDWW
PartSelect logo
Hi Ali, Thank you for your question. The paddle attaches horizontally to the bottom of the ice maker with a spring. Once the bucket fills with ice, pressure is placed on the paddle, raising it and sending a signal to stop ice production. So the paddle is pushed upwards and not in to stop the ice productions. We hope this helps! If you have any questions, please let us know.

Was this helpful?
Thank you for voting!
Dana
January 4, 2023
Replacing the defrost heater. The wires look like they have seen some heat. What should I be looking for?
For model number GSS23WSTASS
PartSelect logo
Hi Dana, Thank you for your question. We have included a link to one of our YouTube videos that you may reference on how to install the defrost heater. The refrigerator in the video may appear different from yours, but it will give you a general idea on how to install the part. We have also included a link that you may reference for more information on the defrost heater. If you have any questions, please let us know. We are open 7 days a week. We look forward to hearing from you!

Was this helpful?
Thank you for voting!
Additional Links:
Rick
May 2, 2023
What is the length or the defrost heater
For model number 36350242000
PartSelect logo
Hi Rick, thank you for contacting us. According to our research, the defrost heater, part number PS303762, measures approximately 9.5 inches in length. We hope this information helps!

Was this helpful?
Thank you for voting!
Related Parts:
  • 1
You May Also Need ?
Model Cross Reference
This part works with the following models:
PartSelect Number: PS1993872
Manufacturer Part Number: WR51X10101
Brand
Model Number
Description
Kenmore
36348042894
Refrigerator
Kenmore
36348042896
Refrigerator
Kenmore
36348042897
Refrigerator
Kenmore
36348047894
Refrigerator
Kenmore
36348047896
Refrigerator
Kenmore
36348047897
Refrigerator
Kenmore
36348252894
Refrigerator
Kenmore
36348252896
Refrigerator
Kenmore
36348252897
Refrigerator
Kenmore
36348257894
Refrigerator
Kenmore
36348257896
Refrigerator
Kenmore
36348257897
Refrigerator
Kenmore
36350221000
Refrigerator
Kenmore
36350222000
Refrigerator
Kenmore
36350227000
Refrigerator
Kenmore
36350232000
Refrigerator
Kenmore
36350237000
Refrigerator
Kenmore
36350242000
Refrigerator
Kenmore
36350247000
Refrigerator
Kenmore
36358042894
Refrigerator
Kenmore
36358042896
Refrigerator
Kenmore
36358042897
Refrigerator
Kenmore
36358047894
Refrigerator
Kenmore
36358047896
Refrigerator
Kenmore
36358047897
Refrigerator
Kenmore
36358062894
Refrigerator
Kenmore
36358062896
Refrigerator
Kenmore
36358062897
Refrigerator
Kenmore
36358067894
Refrigerator
Kenmore
36358067897
Refrigerator
Customer Service Representative

Get in touch, we're here to help!

Daily 8am - 9pm EST

Contact Customer Service