Keep searches simple. Use keywords, e.g. "leaking", "pump", "broken" or "fit".
Sorry, we couldn't find any existing answers that matched.Try using some different or simpler keywords, or submit your new question by using the "Ask a Question" button above!
William
May 26, 2022
Do I need to de-energize the capacitor or just unplug it from the magnatron prior to removal?
For model number PT7800SH8SS
Hi William,
Thank you for your question. For safety reasons, since the microwave capacitor can still store electricity even when the microwave is unplugged, it is usually advised that you discharge the capacitor before any attempt at repair. We have included a link on how to do so. If you have any questions, please let us know. We are open 7 days a week. We look forward to hearing from you!
I need a replacement Magnetron cover. I cannot find the part number for this cover. The tabs on my cover have broken off. Is a replacement cover available?
For model number PSB1201NSS01
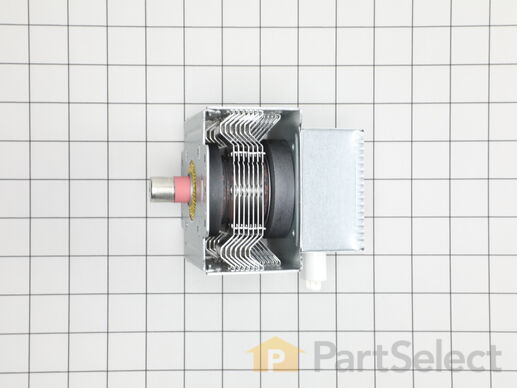
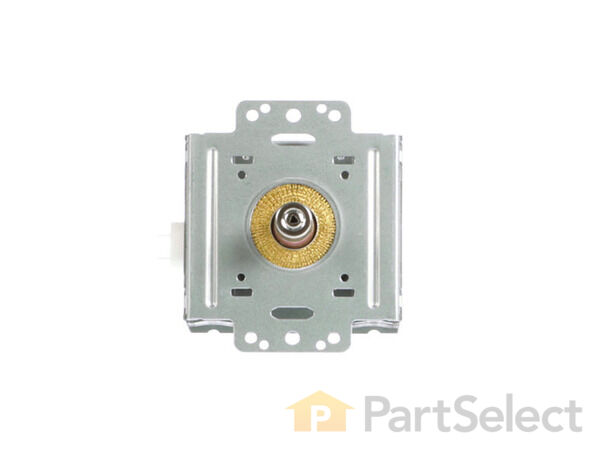
Hello Jessica, thank you for the question. We do not see a separate cover, however the Magnetron may actually come with the part you are searching for. We have a photo on our site for part PS12722595. If you need help placing an order, customer service is open 7 days a week. Please feel free to give us a call. We look forward to hearing from you.
Keep searches simple. Use keywords, e.g. "leaking", "pump", "broken" or "fit".
Sorry, we couldn't find any existing installation instruction that matched.
No power to microwave, no heating.
Unpluged power cord!! Removed front control panel to expose electronics (need to remove top horizontal vent cover to expose mounting hardware). Unplugged leads to control panel board. Removed magnetron with Tstat (3- phillip heads, need stubby). Installed new parts and control panel, plugged it in tested. Done.
1) Removed 4 screws securing the microwave to the cabinet.2) Slid microwave out, unplugged and placed on a work surface that allowed lower trim to hang over. 3a) Removed two screws and removed the cover on top of the oven. 3b) Unplugged high voltage plug from Magnatron. 4) Removed wires from overtemp fuse mounted to Magnatron. 5) Removed the four screws securing the Magnatron to the oven. 6) Removed Manatron. It's a tight fit, but can be done without removing anything else. 7) Replaced Magnatron. This is where I needed the magnetic part retrieval tool. The nature of a Magnatron is the use of strong magnets surrounding the tube. Getting the four screws back into place wasn't possible with just a normal magnetic screwdriver tip. I used the retrieval tool to position the screws back in place. Be sure to not initially tighten any screw completely, until they can be evenly tightened. This ensures correct compression/seating of the shielding material near the neck of the tube. 8) Reverse removal steps. Plugged in and tested microwave function on a cup of tap water. 9) Reinstated in cabinet and got a big thank you kiss from the wife!
Aaron from BLUE RIDGE, TX
Difficulty Level:
Easy
Total Repair Time:
15 - 30 mins
Tools:
Screw drivers
6 of 7 peoplefound this instruction helpful.
Was this instruction helpful to you?
Thank you for voting!
Sparking from the magnetron
Symptom: Terrible sparking coming from the right side of the microwave even with nothing in the microwave. The part that was behind the cover was the business end of what I learned was the magnetron,
Repair process: Without appliance repair experience I went onto Google and searched for parts for my model PEB1590DM2WW. I was able to find a great parts schematic on partselect.com. At first I ordered a magnetron and while waiting for the parts to arrive I also learned that the capacitor can also fail easily as described in the other install feedback on the partsselect website. So I ordered a capacitor just in case. These convection microwaves are around $600 new so a $80 in parts is not out of line for 8 years of service. I installed the magnetron first and turned it on. sparking immediately continued so I quickly shut the unit off. After replacing the capacitor and letting it charge for several minutes before trying to start the microwave cycle was the issue. I choose to leave the replaced magnetron as the original unit was discolored and felt the replacement was inexpensive insurance. I also learned that if the wave guide (which is a plastic/metallic composite material) that covers the opening to the magnetron is burnt or has metal melted to it as mine did it will act similar to the microwave having metal inside the enclosure and will continue to spark and basically melt the wave guide further. Replacing the wave guide was very easy as well.
I am very thankful for the knowledge base and support available from Partselect.com as they made this repair possible on my own. Thank you partselect.com
Reid from LITTLETON, CO
Difficulty Level:
A Bit Difficult
Total Repair Time:
30 - 60 mins
Tools:
Screw drivers
4 of 4 peoplefound this instruction helpful.
Was this instruction helpful to you?
Thank you for voting!
No heat.
Microwave with no heat. Removed casing and checked low voltage side from the fuse through all the microswitches to the primary side of the transformer, all good. Checked HV diode good. Checked secondary side of transformer, good. Checked capacitor, good. Even though the Magnatron electrically checked out good, it had a cracked magnet. Replaced the magnatron and we have heat again!
I removed the main cover ( torx security bit required) and tested the magnetron, capacitor, diode and door interlock switches according to instructions found on the internet. The capacitor and diode tested good but the magnetron looked burnt and corroded on the tip. The magnetron I received was an exact replacement for the original. It was easy to replace the magnetron which arrived in 2 days standard shipping. I also cleaned the fan while I had access to the inside area. Hoping to get another 18 years use from the microwave!
Scott from PIEDMONT, CA
Difficulty Level:
Easy
Total Repair Time:
15 - 30 mins
Tools:
Screw drivers
2 of 2 peoplefound this instruction helpful.
Was this instruction helpful to you?
Thank you for voting!
Burned out magnetron
Removed cover Disconnected capacitor from old magnetron Removed old magnetron Installed new part Connected capacitor Reinstalled cover
Keep searches simple. Use keywords, e.g. "leaking", "pump", "broken" or "fit".
Sorry, we couldn't find any existing reviews that matched. Try using some different or simpler keywords.
★★★★★
★★★★★
Joseph C - October 29, 2021
Verified Purchase
Worked as expected
Perfect replacement
★★★★★
★★★★★
Robert H - September 19, 2018
Verified Purchase
Worked as expected
Fast shipping easy repair great customer service
★★★★★
★★★★★
Christopher C - August 21, 2018
Verified Purchase
Easy repair. Just a few short steps and back in business
After the part arrived, it was just a matter of installing it. It was very easy and whole lot cheaper than buying a new microwave
★★★★★
★★★★★
Michael A - July 2, 2018
Verified Purchase
Magnetron repair
The first part came in the box damaged, customer service was very helpful in getting a new part to replace the damaged one. The new part arrived ready to go and the repair went well.
★★★★★
★★★★★
Max H - May 12, 2018
Verified Purchase
Microwave working again, didn't have to buy new one.
Part I got fit great and was easy to replace. Will check back again if needing any replacement parts. Well satisfied with ease of repairing and how it worked after installing new part. Very pleased. Thanks.
With our Fix app model plate image recognition technology, we'll recommend the parts guaranteed to fit your appliance. Simply snap a photo, and we'll take care of the rest.
"I love love love this app. It's so nice to have useful information (receipts, manuals, parts lists, warranty info, pictures, etc.) on all of my household appliances and devices in one place."
You added to your cart
✖
$
Qty:
Total item(s) in cart:
Order Subtotal
$
*Taxes and shipping will be applied during checkout