The idler pulley wheel helps the belt to rotate the drum in your dryer. If your dryer will not start, will not tumble, or is noisy during operation, the idler pulley wheel may need to be replaced. This part is located beneath the drum of the dryer, so the drum will need to be removed before you can access the idler pulley wheel. It is also recommended to remove the blower housing and motor from the dryer itself, for easier access to the idler pulley wheel. It is connected by a set of two 5/16 screws. This two-inch-wide idler pulley wheel is beige or black in color and is made of plastic. This pulley wheel comes with its own metallic bearing in its center. Be sure to shut off power to the dryer before beginning this repair.
How Buying OEM Parts Can Save You Time and Money
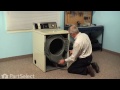
Part Videos
Replacing your Amana Dryer Idler Pulley Wheel with Bearing
Keep searches simple. Use keywords, e.g. "leaking", "pump", "broken" or "fit".
Sorry, we couldn't find any existing reviews that matched. Try using some different or simpler keywords.
★★★★★
★★★★★
John I - June 30, 2023
Verified Purchase
Easy fix
Easy to find and install the correct part. My first ever dryer repair. Good as new.
★★★★★
★★★★★
William L - May 8, 2023
Verified Purchase
Fast shipping
Part worked great.
★★★★★
★★★★★
William O - January 26, 2023
Verified Purchase
Repairing gas dryers are fun and easy!
So, we were not sure of what parts we needed so we ordered a surplus of what we actually needed. It turned out to be the squirrel cage fan nut was - is cracked so the fan wobbled and made a unknowingly sound. Another problem was the left rubber wheel bearing was already bad, and made another squeaky noise, so we change that. It now runs smooth and quiet. If you have my records you see we had some problems like this last year and replace the belt and the two rubber wheels that hide the drum. Thanks
★★★★★
★★★★★
Anthony B - November 10, 2022
Verified Purchase
No More Squealing Sound!!
Good quality part. Replaced and now the Dryer is quiet as a mouse.
★★★★★
★★★★★
Reynaldo T - December 1, 2021
Verified Purchase
Good news
Very satisfied parts fit perfectly and no problems at all , thank you stay safe be safe happy holidays ????
★★★★★
★★★★★
Brian M - July 28, 2021
Verified Purchase
Incredible Experience. Seriously.
Ok so this was the first time I've used PartSelect. My old dryer bit the dust, but with my son going to college in a month, it's a good time to pinch pennies. So I decided to try to fix it myself. I finally found PartSelect and holy crap, yall! What a great experience. It was so easy to find the right parts that I needed, the prices were way less than MFG-direct, and when my parts arrived, I got an email with a freaking walkthru video of the repair for each of the three parts! So satisfyingly easy.
The crazy thing is my washer just bit the dust too. Murphy's law. Normally I'd be irked that my washer broke a week after fixing the dryer. But I'm actually kinda pumped because I get to do another round on PartSelect. My wife will really think I'm Bob Vila if I can go 2 for 2 lol.
Well done yall. UX thru the roof.
★★★★★
★★★★★
Stephen C - June 29, 2021
Verified Purchase
Easy repair
This part was a perfect fit. Informative website and fast shipping made ordering the correct part a breeze
★★★★★
★★★★★
Edward M - May 26, 2021
Verified Purchase
Dryer tub not turning
Bought a tub band and idler pulley. Dryer is working fine now. Parts were well made factory parts. Install was involved but doable if your
mechanically inclined.
★★★★★
★★★★★
Karen S - December 17, 2020
Verified Purchase
Great part, easy to repair
The part was in great condition and my dryer is working wonderfully. It was very easy to repair my dryer with the assistance of the helpful instructional video! I am a 62 year old woman with no experience in appliance repair and was able to replace the dryer belt and idler pulley wheel by myself! Thanks for the helpful video!
★★★★★
★★★★★
John K - August 15, 2020
Verified Purchase
It did the trick!
Between 2 barrel rollers, a belt and a motor pulley wheel my dryer works like new!
< Prev
1
2
Next >
Customer Repair Stories
Average Repair Rating: 2.9 / 5.0, 68 reviews.
What's this?
Sort by:
< Prev
1
2
3
Next >
Search filter:
Clear Filter
Your search term must have 3 or more characters.
Keep searches simple. Use keywords, e.g. "leaking", "pump", "broken" or "fit".
Sorry, we couldn't find any existing installation instruction that matched.
Won't Tumble
Removed lower front panel.
Removed door assembly* making note of the wire positions on the door switch * When removing the door assembly DO NOT LET IT DROP DOWN! Doing so will destroy the door switch. Swing the door assembly upward from the bottom toward you as high as it will go then pull it free.
Removed the d
... Read morerum and belt assembly.
Removed the idler pulley and idler pully spring.
Vacuumed up the interior dryer floor and blew out the motor w/ comp air. Also cleaned the ribbed motor pulley with a nylon brush and brake cleaner sprayed on a shop towel.
Removed the drum tires and cleaned their shafts and internal bearing sleeves with brake cleaner sprayed on a shop towel.
Reinstalled the drum tires after lubricating their shafts with a very light coat of general purpose grease.
Replaced the idler pulley and idler pulley spring after cleaning and lubing shaft and pulley bearing as done on the drum tires.
Reinstalled the drum with the new belt (ribbed side down) roughly in place.
Reinstalled the front door assembly after reconnecting it's wiring making sure to insert it's top locking tabs with the bottom of the door held up high then swung down into place
Tensioned the belt by positioning the flat side of the belt that comes down the right side of the drum over the idler pulley flat side down and then the ribbed side of the belt over the motor shaft. You will have to move the idler pulley arm to apply full tension against the spring in order to have the slack to get it around the motor shaft.
Reinstalled the lower front panel.
Checked dryer operation OK.
This repair was rated a bit difficult because I didn't know the trick for removing/installing the door assembly and destroyed the switch. Furthermore, putting the belt back on is a somewhat difficult challenge because you have to do it mostly by feel
Just take the old parts with my tools and fix it, i did take the pulley bearing with care and put the new one, and adjust the screw on the motor base, the belt just was a little difficult but I did it, it's easy.
The dryer had been squeaking for at least 6 months when it finally became painfully loud and unacceptable
. I had replaced the idler pulley a number of years ago so I assumed that the noise was now due to either the sliders at the front of the drum or bad rollers at the back.. I removed power by turning off the breaker that serviced the dryer. After removing the lower front panel via the two sheet metal screws at the bottom I then removed the
... Read more door panel. The safety switch behind the door had to be removed by depressing the sides of the switch after disconnecting the two push on connectors. One will discover that reconnecting the smaller of the two contacts to the unused contact on the switch will allow one to run the dryer with the door off or open. This can be useful to test operation after the repair is complete before reassembling the door and lower panels. I then removed the large panel that secures the front of the drum. The drum is then removed after releasing tension on the drive belt. All rotating parts and sliders could then be checked. Upon disassembly I found that the rollers and sliders appeared ok and decided to replace the idler pulley as a last attempt to fix the problem. This is best done by removing the tension arm and tensioning spring. the pulley is then more easily removed from the arm using snap ring pliers. After replacing the pulley and thrust washer with new parts I reassembled everything. I found it helpful to pretension the arm using a zip tie wrap in that the belt can be more easily reinstalled on the drum and pulley. When the drum and belt is properly in place and belt threaded, one can reach in with a pair of cutters and snip the tie wrap to re tension the system. The dryer has been running normally again for a week after affecting this repair.
The round exhaust duct in the back my dryer can be removed simply by pulling straight out. This gives full access to the belt tension wheel. Slip belt off the wheel, remove snap ring with snap ring pliers, remove washer and wheel. Install new wheel, attach belt, and reinstall duct by looking right down the middle to line up properly.
... Read more Dryer sounds like new again. 10 minute job.
Read less
Ken from POMPTON LAKES, NJ
Difficulty Level:
Really Easy
Total Repair Time:
Less than 15 mins
1 personfound this instruction helpful.
Was this instruction helpful to you?
Thank you for voting!
All the videos and directions
showed starting withe removal of the dryer top. With my dryer, I needed to start by removing the bottom front panel (2 screws). Next the door panel (2 screws). Now I could remove the top panel (2 screws). From here, the tear down went like the directions th My biggest problems were, figuring out I didn't start with the dryer top. Then
... Read more getting a proper sized snap ring pliers to remove the drum rollers and and the idler pulley.
Viewed video on website, however did not match model but put me in the ball park for an overall view. Thank goodness I had the insight to order the pully with the belt. I believe the pully failed first causing the problem with the belt. Recommend replacing both any way while you have it apart.
After taken apart to replace high limit thermostat fuse and limit thermostat took about 5 minutes. Also our dryer always ran very hot no matter what setting it was on. Replaced idler pulley wheel also because seemed not to rotate very well. Put all back together and worked perfect. Ran and does not overheat now.
Followed the recommended repair under noisy machine, replacing the 3 recommended parts. The 10 minute video was extremely helpful. Important note: there are two(2) drum support rollers. Also, you definitely need very small C ring pliers and don't forget to label all wires before disconnecting.
This dryer is an older one. I have kept it running throughout the years by just replacing parts a needed. This was a kind of rebuild. The dryer was making that squeaking noise when running so I knew the "glides" were worn and the belt, rollers and idler pulley had never been replaced. I ordered the parts from this website and I must say i
... Read moret took a while for them to ship, of course I guess since it was during the holidays that's to be expected. Once I received the parts I took the dryer apart. This model has a lower panel that comes off first then there are two 5/16" sheet metal screws that hold the door panel in place and then two more to hold the top down. Then I removed the front bulkhead which holds the drum glides. I replaced the glides then removed the drum from the dryer. To removed the motor there are two 5/16" screws to removed then pull the motor from the bottom. I then replaced the idler pulley, the two drum rollers on the rear of the dryer and the belt on the drum. Reassembly went fairly easy. I found the door switch was bad during reassembly because the dryer would not shut off once the door was opened. So picked up a new door switch from a local supplier, replaced it and all is good now. There really isn't that much to a dryer. A motor, heating unit (in the rear), control unit/timer on top, and then the rollers, idler pulley, and drum belt. The video instructions on this website were quite helpful. Hopefully it will last another year.
Ask our experts a question about this part and we'll get back to you as soon as possible!
5 questions answered by our experts.
Sort by:
< Prev
1
Next >
Search filter:
Clear Filter
Your search term must have 3 or more characters.
Keep searches simple. Use keywords, e.g. "leaking", "pump", "broken" or "fit".
Sorry, we couldn't find any existing answers that matched.Try using some different or simpler keywords, or submit your new question by using the "Ask a Question" button above!
Patti
October 16, 2017
Drum will not spin, have to manual start it then it turns, also noisy. What do I need?
For model number ale643rbw
Hi Patti, Thank you for the question. I would start by removing the front cabinet so you can see the drum and the motor. Check to make sure the belt is not damaged or wore down and needs to be replaced. Also check the pulley the belts slips onto. Check the roller wheels the drum rests on to see if they are wore down as well. If everything checks out fine you may need to replace the Motor, PartSelect Number PS11739459. Hope this helps!
2 people found this helpful.
Was this helpful?
Thank you for voting!
Bob
April 2, 2018
Electric dryer was making a squealing noise like a belt or bearing. Then drum stopped turning. Now, when start, drum moves only slightly then stops. I opened panel and belt is intact. Your thoughts on the problem? Thanks.
For model number ALE643RBW
Hi Bob,
Thank you for your question. If the dryer is not tumbling, there are some parts that you will need to check to see which ones are causing the issue. You will need to check the belt, the idler pulley wheel with bearing, the drum support rollers and the motor. I hope this helps. Thank you and have a great day!
2 people found this helpful.
Was this helpful?
Thank you for voting!
Joyce
February 28, 2019
Will this fit my performa gas dryer ?Should i replace the drum support rollers and idler pulley wheel?
For model number PDGT920AWW
Hi Joyce, thank you for your question. This part would not work for your appliance. I have listed the correct idler pulley for you down below. You could replace those parts if you see that they are worn down. I hope that helps. Good luck with your repair.
Hello Charles, Thank you for contacting us. I have researched the model you have provided and have found the part you are looking for is PartSelect Number: PS11757553. We hope this helps.
1 person found this helpful.
Was this helpful?
Thank you for voting!
Cary
September 28, 2021
Is the idler pulley wheel pretty free spinning with belt removed or is it kind of tighter to spin by hand? Looks like it is chewing up belt. Thanks much
For model number LEA80AL
Hello Cary, thank you for your question. Turn the pulley wheel by hand. If the wheel barely turns or does not turn at all, the bearing is bad. If the bearing is bad, remove the pulley bracket from the dryer. Unhook the spring and slide out the bracket. Add a few drops of bearing oil where the axle and the wheel meet. Do this on both sides. Turn the wheel by hand and if the bearing is salvageable, it will begin to turn freely after several turns. If it does not turn freely, the pulley wheel must be replaced. We hope this helps.
1 person found this helpful.
Was this helpful?
Thank you for voting!
< Prev
1
Next >
✖
Ask a Question
Ask our experts a question on this part and we'll respond as soon as we can.