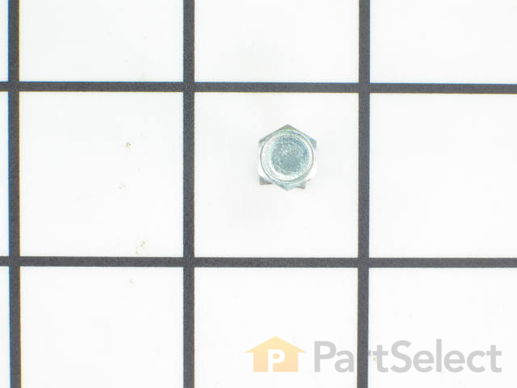
Screw WPY014874
Rated by 6 customers
Easy
1- 2 hours
Ratings submitted by customers like you who bought this part.
Get this part fast! Average delivery time for in-stock parts via standard shipping: 1.8 days.
Screw Specifications

How Buying OEM Parts Can Save You Time and Money
- < Prev
- 1
- Next >
-
Dave from CRANBERRY TWP, PA
-
Difficulty Level:A Bit Difficult
-
Total Repair Time:More than 2 hours
-
Tools:Pliers, Screw drivers, Socket set
After a period of the dryer not being used, the idler pulley wheel froze on the shaft of the idler pulley arm, so I needed to replace both ... Read more parts. After mounting the new wheel and two washers on the new arm and securing with a retaining ring, I went to install this assembly by going in through the small access panel at the rear of the dryer. I slid the belt off the old idler pulley wheel and unhooked the spring from the idler pulley arm; the arm was mounted on a sleeve fastened to the motor bracket by one screw. All that should have been necessary was to back out that screw and replace the old idler pulley assembly with the new one.
That is where the trouble started. Backing out the screw with a socket driver, I found it would go a few turns, then start to bind. I tried turning it in and out to get the threads to engage, but it kept binding. Eventually I gave the screw a hard turn, and then it would turn freely but not move in or out.
Looking on the internet for advice, I found a video that asserts for another model Maytag dryer using the same type of mounting for the idler arm, that there is a design flaw. You can find the video by searching for “Maytag dryer idler pulley defect”. According to the video, the sheet metal screw used to mount the idler pulley arm can gradually loosen due to the pressure and vibration, and begins to “waggle” which eventually damages the threads. I believe this is what happened to my dryer. The video suggests replacing the sheet metal screw with a machine screw and nut for a more durable union.
So now I understood how the screw could be stripped just sitting in the dryer, but that didn’t help me get the screw out. Working through the rear access panel, I tried pulling on the screw head with several types of pliers, pushing the point from behind with a piece of wood while turning the head with a socket driver; eventually I was able to use a pry bar under the screw head and sleeve to apply pressure while turning the head, and with that method the screw backed out. With the screw removed, it could be seen that the threads in the middle part of the thread length were almost completely worn away.
The screw sleeve got somewhat deformed in this process so I ordered a new one, along with an exact replacement sheet metal screw, hoping the threads in the hole were still intact. With the old idler pulley arm now removed, I could transfer the old idler bracket spacer to the new idler pulley arm. When the ordered parts arrived and I tried to mount the idler pulley arm, the new screw would go in only a couple of turns before binding. Rather than risk winding up in the same situation by forcing the screw, I decided to use a machine screw and nut instead.
The original sheet metal screw was a #10. A machine screw the same size would not fit through the hole, and I could not fit my drill into the dryer cabinet in a position to enlarge the hole, so I used a #8 machine screw with a nut and lock washer. First I put some grease on the contact areas of the screw sleeve and idler bracket spacer, then inserted the machine screw through the hole and put the lock washer and nut on the other side of the mounting. The space around the nut is very limited, and most of my tools were too large to hold the nut while the screw was tightened. It was too small for a socket or adjustable wrench, and the clearance from the exhaust duct was too small for the handles of most tools. Eventually, I found a needle nose pliers with short handles that did the job. A thin open end wrench might also work. Then I reconnected the spring and belt to the idler pulley assembly, and closed the access panel. So far the dryer works, but if the #8 screw turns out to be not strong enough, I could get an extension for my drill and enlarge the hole to fit a #10 machine screw and nut.
Looking back on the job, the most difficult part of this repair was removing the damaged screw. This and several other steps might have been a lot easier if I had removed the motor bracket (where the idler pulley arm is mounted) from the dryer and worked outside the cabinet. Part Select has an excellent video “Replacing the Drive Motor” that shows how to do this. It would be a lot of disassembly work, but for someone with good assembly skills could be easier in the long run.
Hopefully most folks out there who replace the idler pulley arm on a dryer will find an easier situation than I did. But for any who have to deal with a stripped mounting screw, I hope this summary will help you resolve it.
-
Alan from BETHESDA, MD
-
Difficulty Level:A Bit Difficult
-
Total Repair Time:More than 2 hours
-
Tools:Nutdriver, Pliers, Screw drivers, Socket set
-
Phil from PROCTORVILLE, OH
-
Difficulty Level:Really Easy
-
Total Repair Time:30 - 60 mins
-
Tools:Screw drivers, Wrench (Adjustable)
2) Pulled the front panel down and off
3) I checked the belt to see if it was broken and it wasn't
4) I tried to turn the drier barrel manually to see if I can move the belt... it did ... Read more n't move. Not knowing if there was just too much resistance, I tested the drier while looking at the motor and motor pulley as it ran.
5) I noticed that the motor pinion rotated, but the belt was slipping against it... that's why it smelled. The rubber was burning
6) Then I found that the idler pulley had stopped rotating, and the belt actually cut a channel into part of the plastic... That's when I realized that I had to replace at least the idler pulley.
7) Not knowing whether the bushing and other parts were going to be salvageable, I ordered parts for the whole assembly... but I wasn't sure how to best approach the repair...
8) Then I found partselect.com, and they had both diagrams of the assembly, all the parts easy to order, and best of all, a video of someone actually going through this repair! I was dumbfounded! :)
9) For swapping the parts I just watched the video on how to pull out the drier barrel... the only difference is that I didn't see a need to unplug the cables from the front top panel before removing the drier tumbler. (Obviously the power was turned off :P)
10) when I removed the barrel, I swapped the whole idler pulley assembly, just keeping the original spring.
11) Put everything back together, and it ran like a champ!
The video helped me save a lot of time though... it showed me how the whole thing is most easily serviced and made the repair a breeze!
-
Mark from Shelburne, VT
-
Difficulty Level:Really Easy
-
Total Repair Time:15 - 30 mins
-
Tools:Screw drivers, Socket set
-
David from Lemont, IL
-
Difficulty Level:A Bit Difficult
-
Total Repair Time:1- 2 hours
-
Tools:Nutdriver, Screw drivers
-
Gene from Virginia Beach, VA
-
Difficulty Level:Easy
-
Total Repair Time:15 - 30 mins
-
Tools:Nutdriver, Pliers, Screw drivers
- < Prev
- 1
- Next >
Ask our experts a question about this part and we'll get back to you as soon as possible!
- < Prev
- 1
- Next >

- < Prev
- 1
- Next >


Manufacturer Part Number: WPY014874

Item is in stock and will ship today if your order is placed before 4:00 PM Eastern Standard Time.
If your order is placed after 4:00 PM EST, the in stock items will ship on the next business day.
Item is not in stock and usually ships 3-5 business days from the time you place your order.
Item is not in stock and usually ships 10-15 business days from the time you place your order.
This item is no longer being made by the manufacturer, and cannot be added to your shopping cart.


