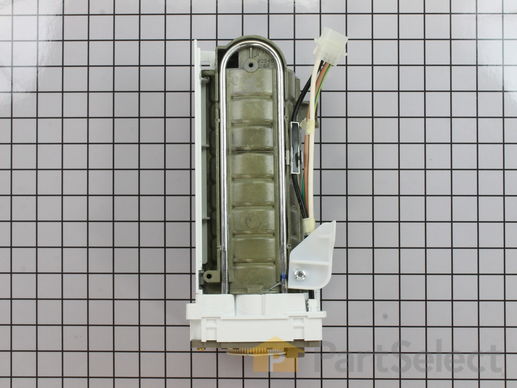
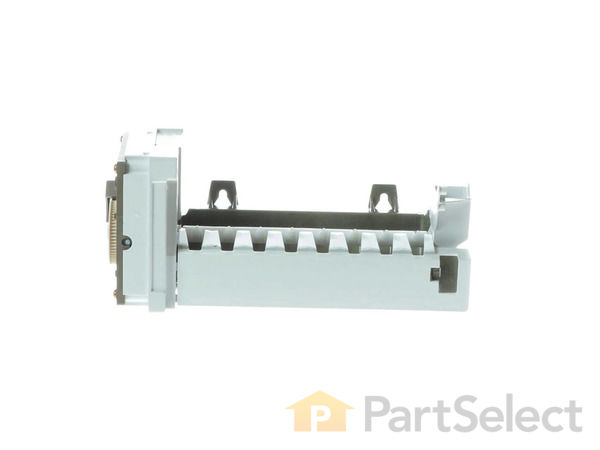
Part Location Diagram of WPW10190965 Whirlpool Ice Maker
See part 100 in the diagram
( Grid squares measure 1x1 inch )
Customer Service Representative

Get in touch, we're here to help!

Daily 8am - 9pm EST

customerservice@partselect.com

Ice Maker WPW10190965

★★★★★
★★★★★
43 Reviews

Rated by 34 customers 

Really Easy 

15 - 30 mins 

Ratings submitted by customers like you who bought this part.

$ 157.77
  In Stock
Get FREE EconoShip on orders over $100! T&C apply

Get this part fast! Average delivery time for in-stock parts via standard shipping: 1.8 days.

PartSelect Number PS11749920
Manufacturer Part Number WPW10190965
Manufactured by Whirlpool
Product Description

Ice Maker Specifications

This is an icemaker for your refrigerator/freezer. Take note that this part does not include the front cover, the wire harness, or the shut-off arm. These must be ordered separately or recycled from your old unit. This unit as a whole will allow your appliance to produce ice. This model makes eight radius ice cubes.If your ice maker is no longer making ice, dispensing ice, or if it is leaking, it will need to be replaced.
How Buying OEM Parts Can Save You Time and Money

How Buying OEM Parts Can Save You Time and Money

Troubleshooting
This part fixes the following symptoms:
Ice maker not making ice | Leaking | Ice maker won’t dispense ice
This part works with the following products:
Refrigerator.
This part works with the following products:
Whirlpool, Kenmore, Amana, Maytag.
Part# WPW10190965 replaces these:
AP6016628, 626633, 626661, 626662, W10122506, W10122507, W10122510, W10190965, W10190966, W10190969, W10270037, W11381372, WPW10190965VP
Back to Top
Customer Reviews
Average Rating:
★★★★★
★★★★★
43 Reviews
4.7
Filter By Rating:
  • 5 Stars
    36
  • 4 Stars
    4
  • 3 Stars
    1
  • 2 Stars
    0
  • 1 Star
    2
Sort by:
  • 1
  • 2
  • 3
Sorry, we couldn't find any existing reviews that matched. Try using some different or simpler keywords.
  • 1
  • 2
  • 3
Customer Repair Stories
 Average Repair Rating: 4.3 / 5.0, 34 reviews. What's this?
Sort by:
  • 1
  • 2
  • 3
Sorry, we couldn't find any existing installation instruction that matched.
After installation, ice maker wouldn't function at all
I took the ice maker out to check things when it wasn't working and I noticed what wasn't visible with the maker installed. The input hose was filled with ice. An ice pick didn't really work so I filled an empty Windex bottle with hot water and sprayed the ice until it was gone. I installed the ice maker again and it's working well.
Other Parts Used:
ARM-SHUT Ice Maker
  • Randy from BOLIVAR, MO
  • Difficulty Level:
    Easy
  • Total Repair Time:
    15 - 30 mins
  • Tools:
    Nutdriver
1 person found this instruction helpful.
Was this instruction helpful to you?
Thank you for voting!
Water inlet valve failed to close, flooded kitchen.
Only two possible failures can cause this problem. The valve itself could fail electronically/mechanically, or the ice maker controller on the ice maker itself failed to tell the valve to close. To cover all the bases I bought both parts. $196.00 To change the ice maker, three screws, one electrical plug, remove and reinstall face cover plate from old ice maker to new one, and remove and reinstall the metal bar that indicated when the ice bin is full, and tells the controller to stop making ice. It’s on YouTube and takes 10 to 15 minutes to complete the change.
To change the inlet valve, there is a little bit more to it then YouTube shows, ESPECIALLY SPECIAL TOOLING I PERSONALLY RECOMMEND. IF YOU DON’T HAVE IT YOU COULD DAMAGE NEW PARTS DURING INSTALLATION. Pull the fridge out, disconnect power and turn off the water. Have towels/ water catch tray/pan handy. Remove screws on the back cover plate as required to access inlet valve. Remove the water inlet line, (mine was 1/4 inch compression fitting, copper tubing.) remove 2 screws that hold valve in place. Pull valve out to full extension of electrical plug. Here is the part that YouTube DOES NOT COVER, take note of how many wires of go to each prong of the connector and its orientation while removing. I’m not a electrician/spark chaser, my guess it is a solenoid/relay type valve, when energized, it will open or close the valve. This is an AC circuit, and I will be honest, I don’t think polarity is a concern, but don’t quote me on that. It’s just easier to take note and put it back the way it was. It worked for 20 plus years, it should to the same if you put it back the way you found it, given you removed and replaced an identical part or a suitable substitute. Depending what valve you receive your water supply line from the valve to the ice maker can vary. It could be a Nylon compression fitting, (which could require additional parts,) or a quick disconnect. That is covered in YouTube, and its exact. Mine was a QD, cut 1/4 inch off nylon tubing and insert, pull back on line to insure security. Done. Very simple. Reconnect electrical plug, IN ITS PROPER ORIENTATION. Reattach valve with two screws. The next step IS NOT COVERED IN YOUTUBE. Before you reinstall cover plate, and push the fridge back, turn on water supply to the valve and perform a leak check. I would recommend applying power and make sure the valve cycles, and the line between the valve and ice maker doesn’t leak. I was good on the line between the valve and ice maker, that did not leak. My copper inlet tubing compression fitting failed at the valve attach point, and required special tooling to repair. A compression fitting to fix a leak you tighten till leak stops. So they say. This fitting was over torqued at one time or another, and leaked, so I spliced in about 6 inches of new copper tubing added a union, and 3 new compression fittings. The bad part, I had to go to hardware store, buy 10 feet of tubing (only needed 6 inches), the B-nuts, and the brass sleeves. To make the new attach point at the valve and new line, since the valve is mostly made of plastic, I used the union to fabricate the new end going to the valve, removed the union and attached the line to the valve. Here is where the special tool comes in, the fitting on the valve, is a very low profile hex head fitting, made of brass which is a soft material, very easy to strip if the wrench slips, and a back up wrench is near impossible to install as a back up with out fouling the B-nut while tightening the fitting. So I ground down a 1/2 or 9/16 open end wrench to fit, (check your fittings size before grinding or buying a wrench, yours could be metric), made it a thin wrench, so I can tighten compression fitting and back up the valve side WITH OUT DAMAGING THE VALVE I just paid 70 bucks for. If you own expensive tools Harbor Freight is your friend for a wrench to grind down or buy a thin wrench.
Snap-On makes thin wrenches, but I think they cost more then the valve. Once my splice was installed, I performed another leak check, all was good, I reinstalled, back cover panel, and pushed the fridge back. Since the ice maker was changed, the longest time took was adjusting ice cube size. You have to wait a complete cycle to see what size is dumped, then make the adjustment, and wait another complete cycle to see results. And do that until you get desired results. Those adjustments are on YouTube, and are fairly accurate. I ended up doing more then 1/2 turn at a time. More like 4 complete turns counter clockwise for larger ice. But it works! To change the valve actually takes about 15-20 minutes, very easy, I had complications. My luck, with any kind of plumbing, I make many trips to the hardware store. That is a given and completely unavoidable. Hope this helps.
Ron O.
Other Parts Used:
Ice Maker Refrigerator Single Water Inlet Valve
  • Ada from MOUNTAIN HOME, AR
  • Difficulty Level:
    Very Easy
  • Total Repair Time:
    30 - 60 mins
  • Tools:
    Screw drivers, Wrench (Adjustable), Wrench set
4 of 4 people found this instruction helpful.
Was this instruction helpful to you?
Thank you for voting!
Old ice maker was leaking.
This is the second time I have replaced an ice maker. I removed one screw and loosened two. Pulled the ice maker free and unplugged the power supply. Plugged in the new ice maker reattached the screws. Replaced the cover and the stop making ice arm . That was it done. Simple installation.
  • Gary from LABELLE, FL
  • Difficulty Level:
    Very Easy
  • Total Repair Time:
    Less than 15 mins
  • Tools:
    Nutdriver
1 person found this instruction helpful.
Was this instruction helpful to you?
Thank you for voting!
The icemaker needed to be replaced
Repair went very well! The online instructions were clear, the new icemaker arrived quickly and I am very pleased.
  • Donna from PT CHARLOTTE, FL
  • Difficulty Level:
    A Bit Difficult
  • Total Repair Time:
    30 - 60 mins
  • Tools:
    Nutdriver
1 person found this instruction helpful.
Was this instruction helpful to you?
Thank you for voting!
Icemaker leaking water
Remove ice bin and top shelf above icemaker because you will need the clearance to remove icemaker. Loosen two top screws and remove bottom screw. Lift icemaker up off of two top screws and lift end closest to you a little higher to get water fill tube out of the end of icemaker. Remove front cover and insert a small screwdriver into retainer to unlatch plug on the wiring harness. On the back end on the harness is a thermostat that slides out of a u-shaped retainer. Remove on-off wire that runs the length of the icemaker and install on the new icemaker. Remove front cover and install on new icemaker. Reverse order when reinstalling. Note that plugging in wiring harness and snapping in temp sensor is necessary before remounting. My icemaker was producing in 3 hrs.
  • Wallace from MACHESNEY PK, IL
  • Difficulty Level:
    Easy
  • Total Repair Time:
    15 - 30 mins
  • Tools:
    Nutdriver, Screw drivers
1 person found this instruction helpful.
Was this instruction helpful to you?
Thank you for voting!
Ice maker was leaking & creating a mess in the ice bucket
Look at several YouTube videos on removal of same or similar units and that will help. Clear out the area in the freezer above the ice maker and removed the shelf. Removed the ice bucket. Remove the single screw attaching the bottom of the old ice maker to the left freezer wall. Loosen the two screws at the top of the old ice maker holding it to the left freezer wall. Loosen and removed the old ice maker. If the electrical cable from the freezer rear to the old ice maker was not easily removed from the freezer, remove it from the old ice maker using a screwdriver. Loosen the clamp attaching the cable to the old ice maker for temperature sensing and remove the old ice maker. Then do all the steps in reverse for the new ice maker, taking care to insure that the cable was firmly seated in the connector and the temperature sensing clamp closed tightly (hand pressure). The hardest part is positioning and replacing the bottom screw attaching the new ice maker to the left freezer wall; this involves a little jiggering to get it correctly positioned and seated. All else went well. It's been over three weeks and the unit works great. I did not need to use the cable supplied with the replacement ice maker, so I discarded it.
  • Michael from PHOENIX, AZ
  • Difficulty Level:
    Easy
  • Total Repair Time:
    30 - 60 mins
  • Tools:
    Screw drivers, Socket set
1 person found this instruction helpful.
Was this instruction helpful to you?
Thank you for voting!
unhooking elec. tab connector from old ice maker.
unhooking elec. connection on old ice maker was hardest part, everyone said to push in tab with a screw driver while pulling connector apart, not on mine, as soon as I pried tab up it came right off.
  • Timothy from ST AUGUSTINE, FL
  • Difficulty Level:
    A Bit Difficult
  • Total Repair Time:
    30 - 60 mins
  • Tools:
    Nutdriver
1 person found this instruction helpful.
Was this instruction helpful to you?
Thank you for voting!
Ice Maker Stopped Making Ice
This is a very straightforward repair. You will need a 1/4 inch nut driver to complete it. First - unplug your refrigerator. Second - remove the ice bin and any shelves that may get in your way. Next - remove the 3 screws that hold the ice maker to the freezer wall, being careful to support the ice maker while you unplug the wiring harness from the freezer. If necessary, remove the wire bail from the old ice maker and reinstall it on the new one. Plug in the new ice maker and attach it with the 3 screws. Remove the plastic cover from the front of the old ice maker and install it on the new one. Finally - reinstall the ice bin and any shelves you removed, plug in the refrigerator and you are done. Congratulations on a successful appliance repair!
  • William from MADISON, VA
  • Difficulty Level:
    Really Easy
  • Total Repair Time:
    15 - 30 mins
  • Tools:
    Nutdriver
1 person found this instruction helpful.
Was this instruction helpful to you?
Thank you for voting!
Ice Maker stopped producing
Used a voltage meter to detect the problem (used a video from the web to determine how to isolate the problem. I needed to replace the unit, that I had repaired two years ago for $150.00 or more for parts an a service call. The part I ordered came right away and the repair took about 15 minutes.
  • Brian from Alto, MI
  • Difficulty Level:
    Really Easy
  • Total Repair Time:
    15 - 30 mins
  • Tools:
    Screw drivers
9 of 11 people found this instruction helpful.
Was this instruction helpful to you?
Thank you for voting!
Washer top adgitator / Frig. Ice maker not producing
Washer; I watched the repair video, and replaced the agitator. It was so simple I think that it took longer to watch the video. Refrigerator; I replaced the ice maker, and the solenoid valve. It was very easy to replace the parts, however it took a while to diagnose the problem. I found an appliance repair man that told me what contact points on the front of the ice maker would trigger the clock (so I didn't have to wait for an hour for the clock to activate). There is also a set of contacts that when jumpered will trigger the solenoid valve. It only took a total of 25 minutes to fix both the washer, and the dryer. If you take a piece of 14 Ga. solid wire about 6" long and strip the ends about 3/8" and bend it into a U you have a jumper. If you jump the contact points on the front of the icemaker letters T & H this will start the clock operation. If you jump letters L & V, the solenoid should open to allow water to flow to the tray. If water does not flow, the filter should be checked in the valve. If the valve sounds like it is opening, sometimes the inlet to the ice maker can freeze stoping the flow. In my case I found the solenoid valve was getting only a week signal, and would only function about 25% of the time.
Other Parts Used:
Ice Maker Water Inlet Valve Washer Agitator
  • Rich from Arnold, CA
  • Difficulty Level:
    Really Easy
  • Total Repair Time:
    15 - 30 mins
  • Tools:
    Nutdriver, Screw drivers, Socket set, Wrench set
12 of 18 people found this instruction helpful.
Was this instruction helpful to you?
Thank you for voting!
  • 1
  • 2
  • 3
Questions and Answers

Ask our experts a question about this part and we'll get back to you as soon as possible!

42 questions answered by our experts.
Sort by:
  • 1
  • 2
  • 3
Sorry, we couldn't find any existing answers that matched.Try using some different or simpler keywords, or submit your new question by using the "Ask a Question" button above!
David
January 1, 2018
Ice maker not getting any water into it to make ice. Water trough into the ice maker has no ice in it. Changed out inlet valve and still no water. Disconnected the hose to ice maker gong into the trough and no water in hose. If the ice maker is bad will it keep the inlet valve from opening to let water into ice maker?
For model number ED5GVEXVDO3
PartSelect logo
Hi David, Thank you for the question. If the valve was replaced the next part is the ice maker. If the ice maker is defective it will not send the signal to the valve to open up and send water. Hope this helps!

20 people found this helpful.

Was this helpful?
Thank you for voting!
George
March 8, 2018
Put new ice maker in is not working the old one was working fine but leak
For model number WPW10190965
PartSelect logo
Hi George, Thank you for your question. If you have just installed the new ice maker, it will take 24 hours before it starts to work. If the ice maker has been installed longer than 24 hours, then you will need to check the connections to see if it is installed correctly and also check the water filter, the water inlet valve and the electronic control board to see if these parts are having any issues. I hope this helps. Thank you and have a great day!

12 people found this helpful.

Was this helpful?
Thank you for voting!
Laura
March 12, 2018
The ice maker is freezing the water, but only dumps the ice if i manually lift the arm and then after awhile it dumps the ice. Do i need a new ice maker or another part?
For model number ED5VHEXVB01
PartSelect logo
Hello Laura, thank you for your question. If the unit is not ejecting the ice on its own there is an issue with the front module or timer assembly for the icemaker. I would recommend replacing the icemaker assembly part number WPW10190965. I hope this helps!

10 people found this helpful.

Was this helpful?
Thank you for voting!
Mark
December 21, 2017
Hi,,,,,,have a kitchen aid frig ktrc19k,,,,,,bought a replacement ice maker through you this week,,,,,the ice maker was the exact duplicate of the one taken out #626661,,,everything fit perfect but no ice,,,,,,,had already replaced water valve recently,,,,having the same results as with the old ice maker,,,,i verified power at the ice unit and adjusted control arm so that it is down all the way and not hitting plastic trim on ice tray first,,,,,am i missing something here,,,,,,i was suspecting maybe a bad neutral but can't find one,,,,,,any idea's would be appreciated,,,,,mark
For model number ice maker
PartSelect logo
Hi Mark, Thank you for your question. Once a new ice maker is installed into a refrigerator, it will take approximately 24 hours before it starts making ice. I hope this helps. Thank you and have a great day!

4 people found this helpful.

Was this helpful?
Thank you for voting!
Gary
March 8, 2018
The shut off arm has a piece of plastic that forces the ice maker to stop when the ice bin is full. We have broken this piece of plastic. I cannot find this (or the shut off arm) in any of your parts diagrams. How do i order this part? Thanks.
For model number ASD2524VES00
PartSelect logo
Hello Gary, thank you for your question. The bail off arm for this unit is part number WP2155231 but the part itself doesn't include the plastic piece. The plastic pieces is on the inside of the icemaker, and the arm activates this part to shut off the unit. To fix this issue you would have to replace the icemaker itself which is part number WPW10190965. I hope this helps!

3 people found this helpful.

Was this helpful?
Thank you for voting!
Chuck
February 15, 2018
Icemaker replacement, which is correct replacement item , w10190965 or eckmf94 ?Thank you
For model number MTB2455AR
PartSelect logo
Hello Chuck, Thank you for contacting us. I have researched the model you have provided and have found the part you’re looking for is PartSelect Number: PS2121513. Hope this helps!

2 people found this helpful.

Was this helpful?
Thank you for voting!
Kathy
October 2, 2017
Does the ice maker ps11749920 come with the control arm?
For model number ED5PVEXWS00
PartSelect logo
Hi Kathy, Thank you for the question, The shut off arm is sold sepratly. You will need to order PartSelect Number PS11740252. Good luck with the repair!

2 people found this helpful.

Was this helpful?
Thank you for voting!
Related Parts:
Brad
December 9, 2017
I have a broken ice stripper arm and want to know if I need to replace the entire ice maker or can I buy just the stripper arm?
For model number GD5PHAXMS10
PartSelect logo
Hello Brad, Thanks for your question. The ice stripper arm is sold with a fill cup in a kit as part number PS2378115 for this model. I hope this helps.

1 person found this helpful.

Was this helpful?
Thank you for voting!
Related Parts:
Jack
January 20, 2018
I had sent a question and you answered it but the your model had a q where my label inside the freezer had 001. Is this the same model number? I get water out the dispenser in front but the ice maker does not bring water to the it to make more ice.
For model number ED2VHEXVQ01
PartSelect logo
Hello Jack, Thanks for your question. The model ending in Q01 is the only result we are showing as similar in our database - the 0 on yours could actually be a Q as they look similar. You may want to test the water inlet valve with a multimeter to ensure it has continuity - replace it if it does not. If the water valve is functioning, consider replacing the ice maker itself. I hope this helps.

1 person found this helpful.

Was this helpful?
Thank you for voting!
Related Parts:
Dennis
February 5, 2018
I need module only for Whirlpool wpw10190965 icemaker
For model number ED5CHQXKB03
PartSelect logo
Hi Dennis, Thank you for your question. The module is available if you would like to order it. You may order it online, through one of our online chat sessions or by calling our customer service line and anyone would be happy to assist you. I hope this helps. Thank you and have a great day!

1 person found this helpful.

Was this helpful?
Thank you for voting!
  • 1
  • 2
  • 3
Model Cross Reference
This part works with the following models:
PartSelect Number: PS11749920
Manufacturer Part Number: WPW10190965
Brand
Model Number
Description
Kenmore
10650212010
Refrigerator
Kenmore
10650212011
Refrigerator - REFRIGERATOR
Kenmore
10650222010
Refrigerator
Kenmore
10650223010
Refrigerator
Kenmore
10650228010
Refrigerator
Kenmore
10650229010
Refrigerator
Kenmore
10650342010
Refrigerator
Kenmore
10650343010
Refrigerator
Kenmore
10650343011
Refrigerator - REFRIGERATOR
Kenmore
10651102110
Refrigerator
Kenmore
10651103110
Refrigerator
Kenmore
10651103111
Refrigerator - REFRIGERATOR
Kenmore
10651109110
Refrigerator
Kenmore
10653532300
Refrigerator
Kenmore
10653534300
Refrigerator
Kenmore
10653542300
Refrigerator
Kenmore
10653544300
Refrigerator
Kenmore
10654586401
Refrigerator
Kenmore
10654596401
Refrigerator
Kenmore
10655122700
Refrigerator - Kenmore Refrigerator Model 106.55122700 (10655122700, 106 55122700) Parts
Kenmore
10655386401
Refrigerator
Kenmore
10655396401
Refrigerator
Kenmore
10655546402
Refrigerator
Kenmore
10656186501
Refrigerator
Kenmore
10656196501
Refrigerator
Kenmore
10656586501
Refrigerator
Kenmore
10656596501
Refrigerator
Kenmore
10656612500
Refrigerator
Kenmore
10656619500
Refrigerator
Kenmore
10656622500
Refrigerator
Customer Service Representative

Get in touch, we're here to help!

Daily 8am - 9pm EST

Contact Customer Service