This broil element is for ranges.
Broil element is at the top of the oven and supplies the heat for broiling.
Disconnect electrical power to the range before installing this part. Wear work gloves to protect your hands.
How Buying OEM Parts Can Save You Time and Money
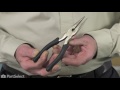
Part Videos
Replacing your Whirlpool Wall Oven Broil Element
Troubleshooting
This part fixes the following symptoms:
Element will not heat | Little to no heat when broiling | Oven not heating evenly
This part works with the following products:
Wall Oven, Range, Microwave Oven Combo.
This part works with the following products:
Whirlpool, KitchenAid, Maytag.
Part# WP9760771 replaces these:
AP6014069, 4456103, 9760771
Customer Reviews
Average Rating:
★★★★★
★★★★★
21 Reviews
4.9
Filter By Rating:
5 Stars
20
4 Stars
0
3 Stars
0
2 Stars
1
1 Star
0
Sort by:
< Prev
1
2
3
Next >
Search filter:
Clear Filter
Your search term must have 3 or more characters.
Keep searches simple. Use keywords, e.g. "leaking", "pump", "broken" or "fit".
Sorry, we couldn't find any existing reviews that matched. Try using some different or simpler keywords.
★★★★★
★★★★★
Thomas H - November 21, 2021
Verified Purchase
Did not work
The part looked fine but after installing it did not work!
★★★★★
★★★★★
Patricia H - August 6, 2021
Verified Purchase
Easy repair
This part arrived quickly and I replaced the part with the help of a tutorial that was sent to my email.
I love PartSelect
Thank you
★★★★★
★★★★★
Raymond C - July 30, 2021
Verified Purchase
Easy repair!
Factory Whirlpool part, easy repair with YouTube video provided. Thanks!
★★★★★
★★★★★
Dennis C - March 25, 2021
Verified Purchase
The installation of the Broil Element was a breeze
Thanks to the help of the people at PartSelect I got the correct part and started the installation and after a few minutes of looking at how the part connected to the oven connection I proceeded to take the old element out and put the new one right back in. I am not usually a repair person but I decided to jump into the product because it was going to be two weeks before Whirlpools contractors could schedule me. At 82 I guess I can try anything, so I did.
I could not believe it went in and worked.
★★★★★
★★★★★
Daniel C - March 24, 2021
Verified Purchase
Easy, but frustrating,
Part was perfect, but a Phillips head was very difficult to remove in 1 spot.
All good though
★★★★★
★★★★★
Carole S - December 3, 2020
Verified Purchase
Broil element fixed!
My husband (who isn't handy) was able to install in only a few minutes! ONly difficulty was working around the door.
★★★★★
★★★★★
Paul B - November 1, 2020
Verified Purchase
Easy, inexpensive, no experience oven repair!
I have no previous experience in repairing ovens but when I looked at the cracked heating element I thought it may be doable. A little research on google and gvoila! I realized this was the correct part and the installation videos were easy to follow. Took me about 30 minutes to have my oven back in working order thanks to this part!
★★★★★
★★★★★
K K M - August 8, 2020
Verified Purchase
Fast and Easy
PartSelect got me my part quickly and it was easy to install. The how to video on the site showed me everything I needed to know.
★★★★★
★★★★★
Charles K - May 30, 2020
Verified Purchase
Perfect
The part was just as I needed and described what I needed and in a fast ordering and receiving way. Service was Great. Thanks for your help.
★★★★★
★★★★★
Carolyn H - May 6, 2020
Verified Purchase
I have a broiler
Fantastic and the video to fix it was great. Thanks
< Prev
1
2
3
Next >
Customer Repair Stories
Average Repair Rating: 3.8 / 5.0, 3 reviews.
What's this?
Sort by:
< Prev
1
Next >
Search filter:
Clear Filter
Your search term must have 3 or more characters.
Keep searches simple. Use keywords, e.g. "leaking", "pump", "broken" or "fit".
Sorry, we couldn't find any existing installation instruction that matched.
REPLACED NONFUNCTIONAL BROIL ELEMENT
EASY. FOLLOWED THE YOUTUBE INSTRUCTIONS ON THE WEBSITE.
It was relatively "easy" at age 74. Needed phillips screwdriver and needle nose pliers (not nut driver). Put 2 binder clips on connection wires so they would not fall back behind oven. Figure I saved about $100-$200 for less than 30 minutes work.
david from SANTA FE, TX
Difficulty Level:
Easy
Total Repair Time:
15 - 30 mins
Tools:
Pliers, Screw drivers
17 of 18 peoplefound this instruction helpful.
Was this instruction helpful to you?
Thank you for voting!
< Prev
1
Next >
Questions and Answers
Ask our experts a question about this part and we'll get back to you as soon as possible!
6 questions answered by our experts.
Sort by:
< Prev
1
Next >
Search filter:
Clear Filter
Your search term must have 3 or more characters.
Keep searches simple. Use keywords, e.g. "leaking", "pump", "broken" or "fit".
Sorry, we couldn't find any existing answers that matched.Try using some different or simpler keywords, or submit your new question by using the "Ask a Question" button above!
Bev
August 13, 2017
Is this part easy for me to replace myself and does it come with the necessary pieces such as screws and things.?
For model number RBD245PRB00
Hi Bev,
Thank you for your inquiry. Unfortunately this is just the element. You should be able to reuse any screws that you need from your old element.
First things first. Disconnect your appliance from the power. Unscrew the element from the areas that it is mounted to the appliance on. Be careful not to remove the element too quickly. Gently pull it forward a little bit, wrap something around the wires that connect to the element. They are very short, so if you do not wrap something around them, they will fall back inside of the oven. If your wires fall behind the appliance, you will need to remove the rear panel of your oven to push them back through the holes. Once you have something fastened around your wires (a twist tie would be the best option, or a small dog clip that you could get at an office supplies store), you can pull the wires off your old element. After this you will be able to install your new element. Just plug the wires on to the new part, remove what you used to wrap around the wires, and then screw the element back into place. Good luck with your repair!
6 people found this helpful.
Was this helpful?
Thank you for voting!
Terry
April 18, 2018
My oven burned out the broil element, with a light show!!! i ordered a new broil element and thermostat from you and just put them in but the broil element will not heat. the bottom element will heat, any ideas?
For model number RBS305PRS00
Hi Terry,
Thank you for your question. If the broil element isn’t working, you should first do a visual inspection for signs that the element has blistered or separated. If the element appears normal then you can check for continuity with a multi-meter. Remove power from the appliance before performing this test. Remove the back panel and locate the terminals for the broil element and inspect the terminals and wires for signs of overheating or damage. If there is no continuity then the element will need to be replaced. If the wires are damaged then they will need to be repaired. If the element is ok then you will need to check the broil circuit to determine the cause. This involves live voltage checks and should only be performed by qualified persons. Components to check include fuses, if the range is equipped, and oven control thermostat or electronic control. If the oven is not heating correctly, then the issue is likely with the oven sensor, sometimes called the oven thermostat, and you will need to check it with a multimeter. When testing the sensor with a multimeter, the sensor should be tested at room temperature. You will need to measure the resistance between the two prongs at the end of the sensor connector. Replace the oven sensor if the reading is less than 900 Ohms or more than 1200 Ohms. If the sensor is okay then you will need to check the electronic control board. I hope this helps. Thank you and have a great day!
3 people found this helpful.
Was this helpful?
Thank you for voting!
Terry
April 9, 2018
My Whirlpool wall oven broil element went out (with quite a light show) i replaced the element and it will not heat.
For model number RBS305PRS00
Hi Terry,
Thank you for your question. If the oven is not heating correctly, then the issue is likely with the oven sensor, sometimes called the oven thermostat, and you will need to check it with a multimeter. When testing the sensor with a multimeter, the sensor should be tested at room temperature. You will need to measure the resistance between the two prongs at the end of the sensor connector. Replace the oven sensor if the reading is less than 900 Ohms or more than 1200 Ohms. I hope this helps. Thank you and have a great day!
2 people found this helpful.
Was this helpful?
Thank you for voting!
Jeff
October 3, 2019
My wife cleaned the oven using the auto clean option. All went well. About 4 hours later, we turned on the oven and the fans and display all operated correctly, but the heating elements did not heat up. Neither the broiler on top or the baker on the bottom would heat up. Someone suggested that we replace the heating elements, but is that what you would recommend as well? By the way, the microwave still operates properly.
For model number GMC275PDS08
Hello Jeff, Thank you for the question. I suggest testing the oven Sensor, PartSelect Number PS11748765. Testing the temperature sensor probe on your oven is easy. With the sensor at room temperature, measure the resistance between the two prongs at the end of the sensor connector. The resistance of the sensor should read approximately 1080 – 1090 ohms at room temperature. Hope this helps!
The paperwork behind the oven panel says the broiler element should measure 45-55 ohms. Mine measures 18.8 ohms. Is this an issue? What does a new one measure?
For model number PBS305PDS14
Hi Joe, thank you for reaching out. We have researched and found that the continuity of the broil element, part number PS11747303, should be between 0 and 50 ohms. If the number is higher than 50 ohms, or you see a single 1 with no decimal on the left side of your screen, your element is broken and needs to be replaced. Glad to be of assistance!
1 person found this helpful.
Was this helpful?
Thank you for voting!
Gerome
November 8, 2021
what are the dimensions between the terminals and at the middle of element?
For model number WP9760771
Hi Gerome,
Thank you for your question. The distance between the terminals is 17 inches. The distance to the middle of the element is 9 inches. If you would like to place an order for the broil element, you may order it either online or by calling our customer service line and anyone will be happy to assist you. We hope this helps! If you have any questions, please let us know.
Was this helpful?
Thank you for voting!
< Prev
1
Next >
✖
Ask a Question
Ask our experts a question on this part and we'll respond as soon as we can.