This thermostat is also known as a thermal cut-off fuse and is used in conjunction with your range. This part establishes and maintains the internal temperature of the oven cavity. When the temperature of your range gets too hot it will trip the high-limit thermostat safety, this will cut the power to the oven so that it does not continue to overheat. For this installation, you will need a Phillips screwdriver and a pair of needle-nose pliers. If your oven does not heat after a self-cleaning cycle you may need to replace the high-limit thermostat.
How Buying OEM Parts Can Save You Time and Money
Part Videos
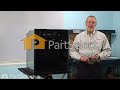
Replacing your KitchenAid Wall Oven Range High-Limit Thermostat
Troubleshooting
This part fixes the following symptoms:
Little to no heat when baking | Door won’t open after self cleaning cycle | Will Not Start | Element will not heat
This part works with the following products:
Wall Oven, Range.
This part works with the following products:
KitchenAid, Whirlpool, Maytag, General Electric.
Part# WP9759242 replaces these:
AP6014015, 4452223, 9759242, WP9759242VP
Customer Reviews
Average Rating:
★★★★★
★★★★★
16 Reviews
4.6
Filter By Rating:
5 Stars
12
4 Stars
3
3 Stars
0
2 Stars
0
1 Star
1
Sort by:
< Prev
1
2
Next >
Search filter:
Clear Filter
Your search term must have 3 or more characters.
Keep searches simple. Use keywords, e.g. "leaking", "pump", "broken" or "fit".
Sorry, we couldn't find any existing reviews that matched. Try using some different or simpler keywords.
★★★★★
★★★★★
Eugene R - August 8, 2022
Verified Purchase
Repair done easily
The part came in as ordered and works perfectly.
★★★★★
★★★★★
Kari B - November 12, 2021
Verified Purchase
Flawless!
They had the part, I paid for expedited shipping and had the oven working in 2 days! I. Recommend without reservation.
★★★★★
★★★★★
Stacie B - December 24, 2020
Verified Purchase
works great
the part was just what we needed, was delivered quickly, and works great
★★★★★
★★★★★
Joel G - April 24, 2020
Verified Purchase
Worked as expected.
The part came quickly. Oven also needed 110C thermal fuse and it is up and running. Thanks.
★★★★★
★★★★★
Darrell K - April 14, 2020
Verified Purchase
Easy installation
Installed in 30 min
Thanks for great service
Darrell
★★★★★
★★★★★
Paul O - February 29, 2020
Verified Purchase
Part solved problem works great
Works great solved the problem
★★★★★
★★★★★
William S - January 21, 2019
Verified Purchase
Easy repair
Good instructions for repair
★★★★★
★★★★★
Jeff C - January 10, 2019
Verified Purchase
Worked as expected
Great experience!
★★★★★
★★★★★
Steven J - December 12, 2018
Verified Purchase
Worked Perfectly
Great transaction. Worked as expected.
★★★★★
★★★★★
Thomas B - November 26, 2018
Verified Purchase
Part worked perfectly
Part came fast
< Prev
1
2
Next >
Customer Repair Stories
Average Repair Rating: 4.0 / 5.0, 12 reviews.
What's this?
Sort by:
< Prev
1
2
Next >
Search filter:
Clear Filter
Your search term must have 3 or more characters.
Keep searches simple. Use keywords, e.g. "leaking", "pump", "broken" or "fit".
Sorry, we couldn't find any existing installation instruction that matched.
After using the self cleaning feature for the 10th or so time, the range locked up and nothing worked.
First we watched a YouTube on how to replace the thermostat. It was easy to turn off the circuit breaker. It was a little tricky to pull the range away from the wall and then we were able to unplug. Because our range is a dual fuel model, the back had a lot more screws to remove to get to the thermostat because there were covers over a
... Read more lot of wires and the gas line I presume. However, we did get off the 12 or so screws with a regular screw driver. We easily located the thermostat and quickly realized that the two screws holding the thermostat in place were neither flat head nor phillips. We were able to remove one of them and merely twisted it sideways, installed the new thermostat with one screw and attached the wires. When we flipped the circuit breaker and plugged in the over, Voila, it worked. The hardest part was getting all the covers off the back. I hope it doesn't happen again because this was an expensive replacement part.
Read less
Shay from KITTY HAWK, NC
Difficulty Level:
Easy
Total Repair Time:
30 - 60 mins
Tools:
Screw drivers
1 of 2 peoplefound this instruction helpful.
Was this instruction helpful to you?
Thank you for voting!
After using the self cleaning feature the oven would not work
Don't, Don't, Don't!!!!!!! call a repair man to replace the thermo fuse. If you are able to use the T.V. remote and crack a twist top off a cold beer, then you can DO this. I am 47 years old and half retarded and my 84 year old neighbor and I completed this task in 12 minutes. Turn off the breaker panel, pull the oven out, (it is hard
... Read morewired). We placed it on a 4 wheeled dolly. Unscrew 11 screws, pop the panel. The fusee is at the top/center with two screws holding it. Pull the two wires off, screw it back in place. Put back the panel & 11 screws. Put the oven back in place. Turn on the breaker and you are done. PS Tell your wife or girl friend this might take an hour or so. Send her to the store for a six pack & steak.
Read less
Sherrill from Seattle, WA
Difficulty Level:
Really Easy
Total Repair Time:
Less than 15 mins
Tools:
Screw drivers
18 of 18 peoplefound this instruction helpful.
Was this instruction helpful to you?
Thank you for voting!
Wouldn't heat after a cleaning cycle run
I first did a search with my issue, found out there were many others with the same issue. That then led me to see the part, a fuse / thermostat, was the culprit and easy to replace it seemed. But first called a service co. who confirmed my findings, and quoted a fix of a $2-300! So I bought the part; worse case I'd have someone else ins
... Read moretall. The web site noted the few screws to remove and a key suggestion to find a box of same height to easily slide out oven; I used a porter cable nail gun case which worked great. Took my time removing trim, mounting screws etc., slid out oven easy. Removed back plate and there was the older one. Removed and installed new in a minute. Spent more time cleaning around trim than actual install. What a great day it was. Wife was happy too!
Read less
carlos from Holtsville, NY
Difficulty Level:
Really Easy
Total Repair Time:
Less than 15 mins
Tools:
Screw drivers
4 of 6 peoplefound this instruction helpful.
Was this instruction helpful to you?
Thank you for voting!
Wall-Oven not working after self-cleaning
Shut off power at breaker and removed oven door to lessen weight. Removed oven trim and retaining screws and tried pulling out of cabinet. Stuck on power cable, so had to remove Mircrowave oven above to get to power cable plug. Removed oven back cover panel to access thermostat. Easy to unplug and replace with new thermostat. Reassemb
... Read moreled and turned on power. Cooked dinner in oven.
Read less
Jim from San Antonio, TX
Difficulty Level:
A Bit Difficult
Total Repair Time:
30 - 60 mins
Tools:
Screw drivers
6 of 13 peoplefound this instruction helpful.
Was this instruction helpful to you?
Thank you for voting!
After using the self cleaning mode on this oven the oven would not heat, but the power remained on, only a heating problem.
My husband did the repair and said it was very easy to do with the following instructions that I got from the Fix Ya website.
This is a design flaw in the Kitchenaid convection ovens. I can help fix this problem if you have a built in oven (I don't know if the parts are located in the same place for stand alone ovens). Firs
... Read moret it is not a FUSE that has blown rather it is the thermostat in the rear of the oven. (Part #4452223) This small part cost about $37 US and after shipping it will cost you about $47. I tried to get an estimate from an electrician as to what of frustration I decided to tackle the problem mthey would charge for the part and to come out and fix the oven an the price was about $90 for the part and anywhere between $100 and $170 more for the service call + repair! After a day myself.
The very first thing you must do is shut off the circuit breaker to the oven and put a very large sign on the panel that reads DO NOT TOUCH! That is 220 volts to that oven and while most panels have just the oven ont circuit you dont want anyone reactivating that circuit by mistake!
The next part requires a little work. Find the side panel screws (usually located in the oven door) and remove the two panel flanges that cover the 2 or 4 mounting screws that keep the oven in the wall. Now go underneath the oven and find the power junction box, take off the cover and disconnect the wires that run from the oven. Remember which goes where. Next remove the little nut that holds the electical conduit cable to the junction box then loosen the wires. Once this is done you can now slide the oven out and get to the thermostat.
This part requires a little elbow grease. Find a platform or table that fits just under where the stove will slide out and slide the oven on top of the table or whatever for support. In the back of the oven there will be a sheet metal panel that covers the thermostat and other wires, remove the 5 or 6 screws that hold this panel on and put the panel aside. Almost in the middle of the oven's back you will see a little black device with two wires running out of it (one red the other white or yellow). It will have the part number on its front, remove the wire and notice that the thermostat is half red and half white (remember this for the new part will have the same markings) the red wire goes onto the lead coming from the red markings. When you have the new part simply put the new one in (remember: the red side to the red wire), attach it to the back of the oven, replace the sheet metal cover and slide the oven back into place securing it with the screws. Viola! you are done! Turn on the power and then test the oven (I used the broil setting to warm it up then switch to a temperature setting). The entire process took me about an hour and I am NOT a handyman!
Read less
Laurie from Camarillo, CA
Difficulty Level:
Easy
Total Repair Time:
30 - 60 mins
30 of 34 peoplefound this instruction helpful.
Was this instruction helpful to you?
Thank you for voting!
After selfclean cycle, oven stopped getting warm
First I cut off power ! 2 screws for oven trim,4 more to disconnect from cabinet. Hardest part was pulling oven out and pushing back in. I found a big box of correct size to rest it on so I didn't need to disconnect the powerline. 8 more screws to remove the back panel. 2 screws to remove the thermostat.Then put it back together. New par
... Read moret had arrived sooner than expected, cost of the part was less than a minimum service call would have been! I absolutly will use your site again.PS Wife was amazed and now thinks I'm a genious.
Read less
edward dennis from cocoa, FL
Difficulty Level:
Easy
Total Repair Time:
15 - 30 mins
Tools:
Screw drivers
4 of 6 peoplefound this instruction helpful.
Was this instruction helpful to you?
Thank you for voting!
oven would not heat up, after self cleaning
Repair was fairly simple, unscrewed oven from cabinet and pulled it out. Then remove screws on back panel to access the thermostat location. Unscrew old thermostat, unplug it from connectors and plug in new thermostat. Then screw back in place, replace cover and pop oven back in place. Now fire it up, worked for me! Thanks to part-select.
... Read more Good luck everyone. Probably saved $200 service call.
Read less
Richard from Chicago, IL
Difficulty Level:
Easy
Total Repair Time:
30 - 60 mins
Tools:
Screw drivers
3 of 5 peoplefound this instruction helpful.
Was this instruction helpful to you?
Thank you for voting!
Power shut down and door lock-up after self-cleaning
My wife used the self cleaning function for the first time after 1.5 years of owning, of course out of warranty. A quick google search identified the problem. Called Kitchenaid, they said of course it can't be that simple, they had never heard of this problem, need to schedule a service call. Googled and found this site, Ordered the part
... Read more, came in, only took a screwdriver and about 20 minutes, just like all the other posts.
shame on Kitchenaid for not owning up to the problem. I even e-mailed them all the links, they did not acknowledge them.
Read less
john from new market, MD
Difficulty Level:
Really Easy
Total Repair Time:
15 - 30 mins
Tools:
Screw drivers
50 of 56 peoplefound this instruction helpful.
Was this instruction helpful to you?
Thank you for voting!
Oven wouldn't heat after running self cleaning cycle
I removed the two stainless trim pieces (2 screws) and then two screws which hold the oven frame to the cabinet. Be careful to put a pad on your floor before you pull the oven out of the cabinet as there are sharp edges on the bottom of the oven. I removed apprximately 12 screws holding the back panel in place. The fixed set point ther
... Read moremostat is in middle toward the top of the oven cavity after removing the rear panel. Just remove two screws and slide the terminal connectors onto the new thermostat. Very easy job for someone who is not too handy.
Read less
Jerry from Lebanon, TN
Difficulty Level:
Really Easy
Total Repair Time:
30 - 60 mins
Tools:
Screw drivers
4 of 7 peoplefound this instruction helpful.
Was this instruction helpful to you?
Thank you for voting!
Self Cleaning blows the thermostat fuse
Something Kitchen Aid wont tell you but running a self clean on this model stove blows the fuse located on the back of the stove.
First I slid the stove out and removed the back of the stove held in place by 8 Phillips screws. The thermostat fuse is located near the top middle on the back of the stove. Remove the 2 screws hold
... Read moreing it in place. Disconnect the wires, plug in the new part. Put it all back together. Job done in less than 30 minutes.
This repair would have cost $164 through A&E factory service.
Read less
Joseph from Worthington, PA
Difficulty Level:
Really Easy
Total Repair Time:
15 - 30 mins
Tools:
Screw drivers
136 of 154 peoplefound this instruction helpful.
Was this instruction helpful to you?
Thank you for voting!
< Prev
1
2
Next >
Questions and Answers
Ask our experts a question about this part and we'll get back to you as soon as possible!
23 questions answered by our experts.
Sort by:
< Prev
1
2
3
Next >
Search filter:
Clear Filter
Your search term must have 3 or more characters.
Keep searches simple. Use keywords, e.g. "leaking", "pump", "broken" or "fit".
Sorry, we couldn't find any existing answers that matched.Try using some different or simpler keywords, or submit your new question by using the "Ask a Question" button above!
Jim
December 11, 2017
Do you now have a trustworthy replacement thermostat/sensor that will not burn out every time I use the self-cleaning feature on my wall oven. We have spent a great deal of money for a self cleaning oven, but have instead, an oven combo that is a never ending source of frustration. This sensor has been replaced 3 or 4 times, twice at your cost and twice and my cost of the part and a service call.,
For model number KEBS277DWH7
Hi Jim, Thank you for the question. I think you might be looking for the manufacture of the appliance. PartSelect is an online website that sell appliance parts. I can tell you KitchenAid has not changed or upgraded the thermostat and we do have a one year warranty on the parts we sell. Hope this helps!
4 people found this helpful.
Was this helpful?
Thank you for voting!
Lisa
July 11, 2019
I have no power to my range. Oven, stove top, light. Breaker good. The oven quit and stove quit. Then they came back on for a minute now dead again. Could it be both thermostats? Appliance repair very far out on scheduling. Thanks
For model number KESS907SWW06
Hello Lisa, thank you for your question. Yes, the issue could be one of the thermostats. We would recommend testing them to verify if they are faulty or not. The part numbers are PartSelect Number: PS11747248, PartSelect Number: PS11741729, PartSelect Number: PS11747263. If the thermostats are tested and are fine, the issue would be with the electronic control board or power cord and terminal block. I hope this helps!
3 people found this helpful.
Was this helpful?
Thank you for voting!
Edward
February 11, 2020
Perhaps i was not clear, the model kdrs807sss00 is a floor range unit and not a wall oven as the installation video depicts. I was asking specifically about the my unit and how do i access the part to be replaced. Thanks, edward
For model number KDRS807SSS00
Hi Edward, thank you for your question. Unfortunately we do not have an installation video specifically for your appliance. The video does depict a wall oven but the installation should be very similar so that you can install the part on your appliance as well. Good luck with your repair.
1 person found this helpful.
Was this helpful?
Thank you for voting!
Yvonne
February 1, 2019
The oven does not turn on when i press the start button. The lights in the oven do come on. How can i fix this problem?
For model number GBD307PRB00
Hello Yvonne, Thank you for the question. If none of the buttons work on the control panel and the oven will not start, it sounds like a defective Control Board, Part Number: PS987992. I looked up the part and it is listed as No Longer Available/Discontinued. There is no part substitutions listed. My suggestion here would be to call the manufacturer and see if they can provide you with a substitution for these part numbers. Hope this helps!
1 person found this helpful.
Was this helpful?
Thank you for voting!
Curtis
October 15, 2019
How do u test ps11747248 thermostat? What should ohms read?
For model number Kess907sss04
Hello Curtis, thank you for inquiring. When testing this Thermostat with a multi-meter, it should read as 0 at room temperature to be working correctly. You can find further information at this link: https://www.partselect.com/Dryer+test-thermostat+repair.htm. I hope this helps and good luck with your repair!
1 person found this helpful.
Was this helpful?
Thank you for voting!
Aviva
July 21, 2021
My oven no longer heats. I set it to 350 but it doesn't get higher than 200 and even getting to that will take about 30-45 mins. What can I do to test what is broken and needs to be replaced? The broiler in the oven is working just fine.
For model number KGSS907XSP00
Hello Aviva, Thank you for the question. We suggest testing the Temperature Sensor. Testing the temperature sensor probe on your oven is easy. With the sensor at room temperature, measure the resistance between the two prongs at the end of the sensor connector. The resistance of the sensor should read approximately 1080 – 1090 ohms at room temperature. We hope this helps!
The model is a double over model (top normal + convection, bottom normal). I recently self-cleaned both the top and the bottom ovens. I went to use the oven yesterday, and the top oven works fine, and the bottom oven does not heat. The controls operate normally (i can enter a temperature), but the lower oven does not heat. Your parts diagram only shows the top oven. 1. Do you believe the fault is the thermal fuse on the lower oven, and 2. Do you have a diagram for the lower oven. All of the manuals online only show the top oven. Thanks
For model number KEBS207DBL6
Hi Ed,
Thank you for your question. It could be the fuse that is causing the issue, but you may also have to check the thermostat and the control board as well. There are 2 diagrams listed on our website that you may reference. One is labelled internal oven and the other diagram is labelled oven. I hope this helps. Thank you and have a great day!
Was this helpful?
Thank you for voting!
Tom
February 6, 2018
Why would the thermal fuse go out
For model number GBD307PRB01
Hi Tom, Thank you for the question. This part establishes and maintains the internal temperature of the oven cavity. When the temperature of your range gets too hot it will trip the high-limit thermostat safety, this will cut the power to the oven so that it does not continue to overheat. When it trips it will need to be replaced. Hope this helps!
Was this helpful?
Thank you for voting!
Jonathan
July 29, 2019
My oven will light and heat but often stops heating once the temp has been holding in the 400 degree range. Display continues to read the set point temp but oven cools down.
For model number KGRS303BSS
Hi Jonathan,
Thank you for your question. If the oven is not heating correctly, then the issue is likely with the oven sensor, sometimes called the oven thermostat, and you will need to check it with a multimeter. When testing the sensor with a multimeter, the sensor should be tested at room temperature and it should be unplugged from the oven. You will need to measure the resistance between the two prongs at the end of the sensor connector. Replace the oven sensor if the reading is less than 900 Ohms or more than 1200 Ohms. I hope this helps. Thank you and have a great day!
Was this helpful?
Thank you for voting!
Edward
February 11, 2020
Does this part install similar to the wall oven in the installation video? In other words do i have to get to the back of the range and remove the back panel? Thanks, edward
For model number KDRS807SSS00
Hi Edward,
Thank you for your question. To do this repair, you will need to remove the oven from the wall. There are instructions listed with the part on our website that you may reference on how to install the thermostat. Just click on Customer Repair Stories and there will be instructions from different customers that you may reference. We hope this helps. Thank you and have a great day.
Was this helpful?
Thank you for voting!
< Prev
1
2
3
Next >
✖
Ask a Question
Ask our experts a question on this part and we'll respond as soon as we can.