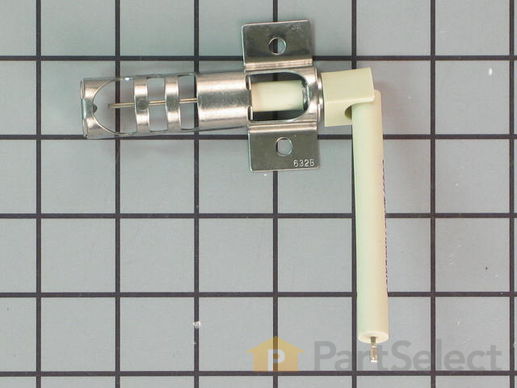
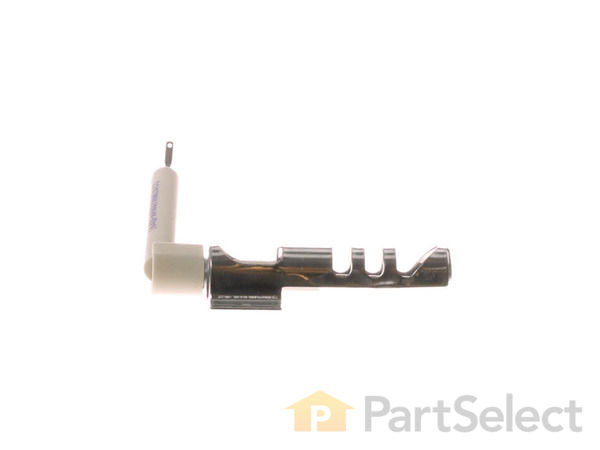
Part Location Diagram of WP9758079 Whirlpool Bake Igniter
See part 16 in the diagram
( Grid squares measure 1x1 inch )
Customer Service Representative

Get in touch, we're here to help!

Daily 8am - 9pm EST

customerservice@partselect.com

Bake Igniter WP9758079

 Fits your GS563LXST0!
★★★★★
★★★★★
37 Reviews

Rated by 18 customers 

Really Easy 

30 - 60 mins 

Ratings submitted by customers like you who bought this part.

$ 57.35
  In Stock
Get FREE EconoShip on orders over $100! T&C apply

Get this part fast! Average delivery time for in-stock parts via standard shipping: 1.8 days.

 Fits your GS563LXST0!
PartSelect Number PS11747217
Manufacturer Part Number WP9758079
Manufactured by Whirlpool
Product Description

Bake Igniter Specifications

This part ignites the gas to light the oven burner.
How Buying OEM Parts Can Save You Time and Money

How Buying OEM Parts Can Save You Time and Money

Troubleshooting
This part fixes the following symptoms:
Will Not Start | Little to no heat when baking | Gas igniter glows | but will not light
This part works with the following products:
Range.
This part works with the following products:
Whirlpool, Maytag, Kenmore, Amana.
Part# WP9758079 replaces these:
AP6013984, 9758079, WP9758079VP
Back to Top
Customer Reviews
Average Rating:
★★★★★
★★★★★
37 Reviews
4.8
Filter By Rating:
  • 5 Stars
    34
  • 4 Stars
    2
  • 3 Stars
    0
  • 2 Stars
    0
  • 1 Star
    1
Sort by:
  • 1
  • 2
  • 3
Sorry, we couldn't find any existing reviews that matched. Try using some different or simpler keywords.
  • 1
  • 2
  • 3
Customer Repair Stories
 Average Repair Rating: 3.7 / 5.0, 18 reviews. What's this?
Sort by:
  • 1
  • 2
Sorry, we couldn't find any existing installation instruction that matched.
Oven clicked, but would not ignite in gas range
Turned off power to range. Removed the lower panel that was secured by two screws, as well as the metal cover beneath it also secured by screws.. Removed the two screws securing the igniter, and pulled apart the black tubing that secured the igniter. (I had to pull hard to get it apart). Plug the new end into that same black tubing. screw in the two screws to secure the new igniter (this is tricky because one screw is hard to reach) I laid something in the base to cover the holes so I wouldn't lose a screw if it dropped. Screw metal panel back in, followed by the lower oven panel.
  • karin from SURPRISE, AZ
  • Difficulty Level:
    Easy
  • Total Repair Time:
    30 - 60 mins
1 person found this instruction helpful.
Was this instruction helpful to you?
Thank you for voting!
replace bake ignitor ; flame spreader removal difficulty
As the 2 screws in the front of the flame spreader didn't screw into anything , and made getting the flame spreader very difficult to remove, once I got the flame spreader out , I did cut off the screws so future install & removal would be easy. I had to hacksaw the screws off , as the screws are otherwise impossible to remove. The screws were damaging the oven metal sheet work during first removal ! Otherwise the new bake ignitor install would have been a very quick 20 minutes. Also I watched u-tube bake ignitor install & oven door remove videos, which were extremely helpful.
  • Steven from SAN ANSELMO, CA
  • Difficulty Level:
    A Bit Difficult
  • Total Repair Time:
    30 - 60 mins
  • Tools:
    Nutdriver, Pliers, Screw drivers, Wrench (Adjustable)
2 of 2 people found this instruction helpful.
Was this instruction helpful to you?
Thank you for voting!
Oven would lite once and after that it would just click 3 times and nothing, click 3 times and the same thing!
Removed the bottom pan and heat shield plate, removed the drawer to get to the igniter disconnect the one wire from it and removed it and just repeated the same process backwards to put the new one in. All under 15 mins
  • Robert from BUFFALO, NY
  • Difficulty Level:
    Really Easy
  • Total Repair Time:
    Less than 15 mins
  • Tools:
    Screw drivers
2 of 2 people found this instruction helpful.
Was this instruction helpful to you?
Thank you for voting!
When I put the Oven on Bake, it would not Ignite
Just took the bottom cover off the bottom of the stove, pulled the old igniter and put the new one on.

This did not solve my problem.
What do I need to do next?
  • Mark from HARRISBURG, PA
  • Difficulty Level:
    Easy
  • Total Repair Time:
    30 - 60 mins
  • Tools:
    Screw drivers
2 of 2 people found this instruction helpful.
Was this instruction helpful to you?
Thank you for voting!
Gas oven would shut off mid cook
Removed grills. Removed bottom plate.
Removed flame shield.
Removed igniter, 2 hex head screws. Bottom one is a bit awkward. Disconnected wire. Installed new igniter. Careful not to drop stuff in the hole. Like a socket. I did
  • Glenn from ROANOKE, TX
  • Difficulty Level:
    Really Easy
  • Total Repair Time:
    30 - 60 mins
  • Tools:
    Pliers, Screw drivers, Socket set
2 of 2 people found this instruction helpful.
Was this instruction helpful to you?
Thank you for voting!
oven would not completely heat up, only heating to about 150 degrees Temp.
contracted a repair service person
  • Isaac from MATTESON, IL
  • Difficulty Level:
    Very Easy
  • Total Repair Time:
    15 - 30 mins
  • Tools:
    Screw drivers
2 of 2 people found this instruction helpful.
Was this instruction helpful to you?
Thank you for voting!
very intermittent oven won't light. Can hear gas and spark but won't light when spark isn't at ignitor tip (shorting somewhere before the tip)
Remove;
Bottom drawer- pull open and lift up slightly when fully open then pull the drawer the rest of the way out.
Unplug ignitor terminal- there is a small tang inside the terminal end that needed pressed out of the small hole of the ignitor, with a pick.
Oven racks.
Oven bottom- 2 long phillips screws at the back. lift the back up 1st then the front comes up and out.
Burner diffuser- 2 small phlilips at front (they only prevent the diffuser from sliding, they don't screw into anything). slide diffuser forward out of the notch then lift the front up. pull rear tabs out of the notches to completely remove.
Ignitor- two 8mm (5/16) bolts holding ignitor to burner. pull ignitor out of guide holes.
Reverse to install new ignitor.
  • Mark from COLUMBUS, OH
  • Difficulty Level:
    Easy
  • Total Repair Time:
    30 - 60 mins
  • Tools:
    Nutdriver, Screw drivers
3 of 3 people found this instruction helpful.
Was this instruction helpful to you?
Thank you for voting!
Didn’t work
Took out old one but electric hook up fell in the hole had to fish it out also dropped a screw in the hole could’ve find it used a different one
  • James E. from WAYNE, MI
  • Difficulty Level:
    Really Easy
  • Total Repair Time:
    30 - 60 mins
  • Tools:
    Screw drivers
1 of 2 people found this instruction helpful.
Was this instruction helpful to you?
Thank you for voting!
Oven wouldn't maintain operating temperature. Wouldn't re-light during extended cook time.
Initially called repairman to come diagnose problem. He determined it was the bake ignitor AFTER 15 MIN. I authorized the repair of $300 but after waiting a week, the part that arrived was wrong. He ordered the broiler ignitor and state the new part would be another week out. We mutually agreed this repair wasn't going to happen anymore. ZERO CHARGE.
I then began a parts search on my own and found it here at PartSelect for @ $50. I also needed a freezer shelf for another appliance. Got both parts for $120 including shipping. They arrived in 4 days.
The repair was pretty simple.
Open oven door. Open hinge clips on door with small flat screwdriver. Remove door in upward motion. Remove wire racks. Using Cordless drill remove fine thread screws at rear bottom oven tray. Remove heat shield by pulling back towards you while looking down where it attaches and remove from slots. There are 2 screws here. The screws are nearly impossible to take out because of the heat they have encountered. No need to bother with them. Just tug/pullout of designated slots and lift up and out. Bake ignitor will be mounted to the flame tube. Use a small towel to lay in the bottom to prevent from losing the small bolts used to attach to flame tube. Remove with small ratchet. Remove and unplug ignitor. Careful not to let wire fall down the hole. Watch when replacing to insert into the not so visible guide. Reassemble in reverse order.
I think this took me about 30 minutes to complete and the oven seems to be working just fine now. Good Luck! Hope this helps. And I saved @ $250.
Other Parts Used:
Bake Igniter Door Shelf
  • Jeffery from PAYSON, UT
  • Difficulty Level:
    Really Easy
  • Total Repair Time:
    30 - 60 mins
  • Tools:
    Screw drivers, Socket set
3 of 3 people found this instruction helpful.
Was this instruction helpful to you?
Thank you for voting!
Stove would not light due to faulty electronic ignighter
Very easy repair, simply remove old ignighter and install new one. Take pictures if you need help remembering where everything goes.
  • Victor from SAINT PETERS, MO
  • Difficulty Level:
    Really Easy
  • Total Repair Time:
    30 - 60 mins
2 of 2 people found this instruction helpful.
Was this instruction helpful to you?
Thank you for voting!
  • 1
  • 2
Questions and Answers

Ask our experts a question about this part and we'll get back to you as soon as possible!

43 questions answered by our experts.
Sort by:
  • 1
  • 2
  • 3
Sorry, we couldn't find any existing answers that matched.Try using some different or simpler keywords, or submit your new question by using the "Ask a Question" button above!
Alton
September 5, 2017
The gas value open and works, the electronic ignition click three times but the oven does light. when you open the door you can smell gas.
For model number WFG510S0AB2
PartSelect logo
Hi Alton, Thank you for your inquiry. It sounds like you may need to replace your ignitor. I would suggest testing it with a multi-meter. Most of the time when you are having that issue, it is your ignitor that is the problem. However it is always best to double check. I hope that helps. Good luck with your repair!

27 people found this helpful.

Was this helpful?
Thank you for voting!
Mike
November 27, 2017
The top burners work fine, but the problem is with oven. I enter bake on the pad pad for 5 minutes and the oven doesn't turn on. I hear the action of the igniter clicking, but it doesn't turn on and the gas comes out. When the broiler is turned on I can see the the igniter spark the gas causing it to work properly. I removed the bottom pan and heat shield in order to check if the igniter on the bottom tube was sparking and nothing was happening. What are your suggestion?
For model number WFG515S0ES0
PartSelect logo
Hi Mike, Thank you for the question. Sounds like the bake igniter,PartSelect Number: PS11747217. Good luck with the repair!

16 people found this helpful.

Was this helpful?
Thank you for voting!
John
September 14, 2017
The oven will preheat and when it is time to keep hot you can here the click of it trying to reheat and some times it will start and some times not.
For model number SF367LXSB0
PartSelect logo
Hi John, Thank you for your inquiry. The bake igniter is one part that fixes the issue the majority of the time, but you will also have to check the The surface burner spark igniters, the gas valve, the spark module, the broil igniter and the oven sensor. I hope this helps. Thank you and have a great day!

12 people found this helpful.

Was this helpful?
Thank you for voting!
GISELA CARDOZA
July 30, 2018
I'm guessing i need the bake igniter but i want to make sure before i purchase the part. When i set my oven to bake i can here the clicking sound and then after that i get gas smell. Should i be looking at something else other than that? Should i test the broil feature as well?
For model number AMANA MOD#AGR5630BDS1
PartSelect logo
Hello Gisela, thank you for your question. It sounds like the issue is with the bake igniter. If you are able to use the "broil" function as usual but the "bake" function is clicking, without lighting we would recommend replacing the bake igniter only. I hope this helps!

7 people found this helpful.

Was this helpful?
Thank you for voting!
Shawn
April 19, 2018
The oven works intermittently. Most of the time it heats up to the desired temperature and maintains temperature. Also, if desired temperature is increased, it will re-ignite and heat to desired temp and maintain temperature. However, there are times when the oven does not heat up or maintain desired temperature... please help.
For model number SF362LXSB0
PartSelect logo
Hi Shawn, Thank you for your question. If the oven is not heating correctly, then the issue is likely with the oven sensor, sometimes called the oven thermostat, and you will need to check it with a multimeter. When testing the sensor with a multimeter, the sensor should be tested at room temperature. You will need to measure the resistance between the two prongs at the end of the sensor connector. Replace the oven sensor if the reading is less than 900 Ohms or more than 1200 Ohms. I hope this helps. Thank you and have a great day!

6 people found this helpful.

Was this helpful?
Thank you for voting!
Roy
March 30, 2018
The igniter on the oven ticks and the gas is released but the oven doesn't light it doesn't have that glow part it has a igniter
For model number WFG510S0AS2
PartSelect logo
Hi Roy, Thank you for the question. Sounds like the igniter is defective and will need to be replaced. Hope this helps!

3 people found this helpful.

Was this helpful?
Thank you for voting!
Connie
November 6, 2017
How do you check to see if the igniter is broken?
For model number WFG374LVS1
PartSelect logo
Hi Connie, Thank you for the question.You can test the igniter for continuity or test for 120 VAC to the igniter while the control is set for Bake. You will need a Multi Meter to test the igniter. hope this helps!

3 people found this helpful.

Was this helpful?
Thank you for voting!
Cheryl
November 24, 2017
My oven will preheat to the desired temperature but then beeps continuously and shuts off or it gives me an error code of F2E0. I would press cancel and restart it and it would work fine but now it just clicks to start and I smell gas. Do I need the bake igniter?
For model number WFG374LVB1
PartSelect logo
Hello Cheryl, Thanks for your question. With error code F2E0, check the connection between the touch pad (keypad) and control board (clock) to make sure it is secure. Select the 'cancel' function and wait 60 seconds. If error code reappears then replace the touch pad. The control board part number is PS11754598. With regards to the gas smell, it can be worthwhile to check both the igniter and the burner valve to see if there are any issues with either. I hope this helps.

3 people found this helpful.

Was this helpful?
Thank you for voting!
Related Parts:
James
December 25, 2017
What the warranty on part# 9758079
PartSelect logo
Hi James, Thank you for the question. All of the parts we sell have a 1 year warranty. Please see the link below for our warranty information. Hope this helps! https://www.partselect.com/One-Year-Warranty.htm

3 people found this helpful.

Was this helpful?
Thank you for voting!
Carrie
February 11, 2019
My oven will heat but it takes twice as long to reach my desired temp. My oven peeps and tells me its ready but my thermometer says a different story. If i set it to 400 it will peep around 200 saying its ready. Do I need a new igniter?
For model number GS475Lems1
PartSelect logo
Hello Carrie, Thank you for the question. I suggest testing the Oven Sensor, PartSelect Number PS11749737. Testing the temperature sensor probe on your oven is easy. With the sensor at room temperature, measure the resistance between the two prongs at the end of the sensor connector. The resistance of the sensor should read approximately 1080 – 1090 ohms at room temperature. Hope this helps!

2 people found this helpful.

Was this helpful?
Thank you for voting!
  • 1
  • 2
  • 3
Model Cross Reference
This part works with the following models:
PartSelect Number: PS11747217
Manufacturer Part Number: WP9758079
Brand
Model Number
Description
Kenmore
66475113610
Range - GAS RANGE
Kenmore
66475113611
Range - Gas Range
Kenmore
66475272502
Range
Kenmore
66475273502
Range
Kenmore
66475274502
Range
Kenmore
66475279502
Range
Kenmore
66572132301
Range
Kenmore
66572133301
Range
Kenmore
66572134301
Range
Kenmore
66572162301
Range
Kenmore
66572162302
Range
Kenmore
66572163301
Range
Kenmore
66572163302
Range
Kenmore
66572164301
Range
Kenmore
66572164302
Range
Kenmore
66572169301
Range
Kenmore
66572169302
Range
Kenmore
66572172301
Range
Kenmore
66572172302
Range
Kenmore
66572173301
Range
Kenmore
66572173302
Range
Kenmore
66572174301
Range
Kenmore
66572174302
Range
Kenmore
66572179301
Range
Kenmore
66572179302
Range
Kenmore
66575132301
Range
Kenmore
66575133301
Range
Kenmore
66575134301
Range
Kenmore
66575162301
Range
Kenmore
66575162302
Range
Customer Service Representative

Get in touch, we're here to help!

Daily 8am - 9pm EST

Contact Customer Service