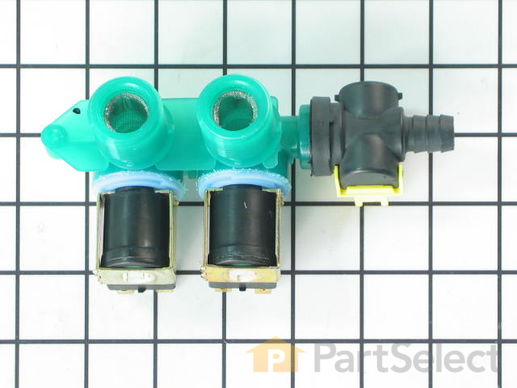
Water Inlet Valve with Bi-Metal Thermistor WP8578341
Rated by 5 customers
Easy
30 - 60 mins
Ratings submitted by customers like you who bought this part.
Get this part fast! Average delivery time for in-stock parts via standard shipping: 1.8 days.
-
5 Stars 3
-
4 Stars 0
-
3 Stars 0
-
2 Stars 0
-
1 Star 0
- < Prev
- 1
- Next >
- < Prev
- 1
- Next >
- < Prev
- 1
- Next >
-
Greg from SHELBYVILLE, KY
-
Difficulty Level:Easy
-
Total Repair Time:30 - 60 mins
-
Tools:Pliers, Screw drivers, Socket set
Remove drain hose from plumbing
Turn off water valves to washer hot & cold, (may need pliers if tight).
Remove hoses from washer water inlet valve, use small bucket to catch any water draining from hoses.
Loosened two Phillips head screws one located in each corner behind contr ... Read more ol panel, then tilt panel back exposing two large clips.
Using a flat blade screwdriver carefully pry clips up and remove.
Grab cabinet and carefully tilt back and slide out of the way.
Remove electrical connectors from hot and cold solenoids (Note their location). Remove other electrical connector (if equipped).
Remove small sheetmetal screw from back of washer holding valve in place.
Remove valve and discard.
Install new valve in reverse order of removal.
NOTE: With cabinet removed inspect other items for wear and or damage, clean all crud from the cabinet and spray WD-40 on sliding parts of adjustable feet (trust me, save yourself some headache here).
Warning: Inspect your water hoses if they are rubber replace them as the are prone to failure; install nylon re-enforced ones.
When hose are all installed turn on water and check for leaks.
-
darrell from NEWPORT NEWS, VA
-
Difficulty Level:Really Easy
-
Total Repair Time:30 - 60 mins
-
Tools:Pliers, Screw drivers, Socket set
remove back of washer. remove old inlet valve, replace with new one, check all conection ( electronic and water ) replace back check operations after hook ups are made
fixed
Harrison
-
Harrison from Whittier, NC
-
Difficulty Level:A Bit Difficult
-
Total Repair Time:15 - 30 mins
-
Tools:Nutdriver, Pliers, Screw drivers, Wrench (Adjustable)
-
Robert from Grants Pass, OR
-
Difficulty Level:Easy
-
Total Repair Time:1- 2 hours
-
Tools:Pliers, Screw drivers
- unplug power
- undo hot/cold water hoses
- remove two screws holding the control panel (box on top with the knobs) to the machine top
- unhook two brass colored clips holding control panel to machine top
- unplug the wiring harness secured to the top
... Read more - remove two bolts on top of back, and two on bottom
Very easy once you get started. The inside of the machine was very accessible and everything is very modular and easy to replace.
The problem for me was that after diagnosing the problem online and receiving the part, I found the *real* reason the machine did not stop filling. Inside the control panel was a large mouse nest (made mostly with a chewed wiring schematic) and mouse. It had chewed completely through the rubber hose connecting the water level switch to the tub. So when the tub filled, the switch never got the signal to shut off. Got rid of the mouse and replaced the hose. Wound up installing water mixing value anyway since I had the part and the machine apart. The old valve had a lot of crud built up in it. With the new value the water pressure was much better.
So the moral might be to take your machine apart and have a look around before ordering the part...it may not be what you think...
-
Steve from New Hope, PA
-
Difficulty Level:Easy
-
Total Repair Time:1- 2 hours
-
Tools:Screw drivers, Socket set
- < Prev
- 1
- Next >
Ask our experts a question about this part and we'll get back to you as soon as possible!
- < Prev
- 1
- Next >

- < Prev
- 1
- Next >
Manufacturer Part Number: WP8578341

Item is in stock and will ship today if your order is placed before 4:00 PM Eastern Standard Time.
If your order is placed after 4:00 PM EST, the in stock items will ship on the next business day.
Item is not in stock and usually ships 3-5 business days from the time you place your order.
Item is not in stock and usually ships 10-15 business days from the time you place your order.
This item is no longer being made by the manufacturer, and cannot be added to your shopping cart.


