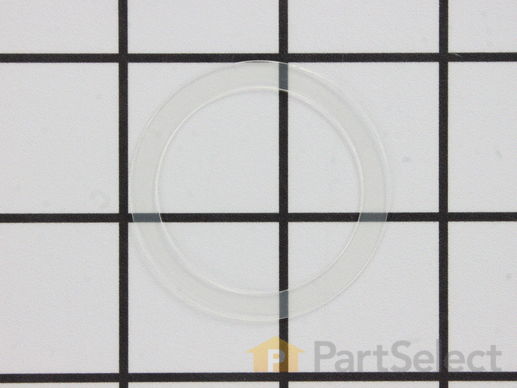
Part Location Diagram of WP8268340 Whirlpool Spray Arm Seal
See part 3 in the diagram
Replacing your KitchenAid Dishwasher Spray Arm Seal
( Grid squares measure 1x1 inch )
Customer Service Representative

Get in touch, we're here to help!

Daily 8am - 9pm EST

customerservice@partselect.com

Spray Arm Seal WP8268340

★★★★★
★★★★★
3 Reviews

Rated by 11 customers 

A Bit Difficult 

1- 2 hours 

Ratings submitted by customers like you who bought this part.

$ 5.42
  On Order
Get FREE EconoShip on orders over $100! T&C apply
PartSelect Number PS11745436
Manufacturer Part Number WP8268340
Manufactured by Whirlpool
Product Description

Spray Arm Seal Specifications

Also known as a wash arm seal.
How Buying OEM Parts Can Save You Time and Money

How Buying OEM Parts Can Save You Time and Money

Part Videos

Replacing your KitchenAid Dishwasher Spray Arm Seal

Replacing your KitchenAid Dishwasher Spray Arm Seal
Troubleshooting
This part fixes the following symptoms:
Not cleaning dishes properly | Noisy | Leaking
This part works with the following products:
Dishwasher.
This part works with the following products:
KitchenAid, Kenmore, Whirlpool, Maytag.
Part# WP8268340 replaces these:
AP6012229, 8268340
Back to Top
Customer Reviews
Average Rating:
★★★★★
★★★★★
3 Reviews
5.0
Filter By Rating:
  • 5 Stars
    3
  • 4 Stars
    0
  • 3 Stars
    0
  • 2 Stars
    0
  • 1 Star
    0
Sort by:
  • 1
Sorry, we couldn't find any existing reviews that matched. Try using some different or simpler keywords.
  • 1
Customer Repair Stories
 Average Repair Rating: 2.4 / 5.0, 11 reviews. What's this?
Sort by:
  • 1
  • 2
Sorry, we couldn't find any existing installation instruction that matched.
Missing order
I wish I could describe how my repair went! My order was shipped on August 27 (per: the company's email ). However, I have not received our part, yet and it is September 11! I contacted the company, via email. The company's reply: Check FedEx's tracking. I tried that, but as soon as I got to that site, I remembered......PartSelect NEVER sent a tracking number for FedEx, whaaaat!!! Needless to say, I'm not a happy camper!!!
  • Patsy from PFAFFTOWN, NC
  • Difficulty Level:
    Very Difficult
  • Total Repair Time:
    More than 2 hours
1 person found this instruction helpful.
Was this instruction helpful to you?
Thank you for voting!
Dishes would not get clean.
Remove arm-spray . The original part sent to me was the wrong one.
I called PartSelect and told them about the problem. They corrected the situation by sending out the correct part. I am now waiting on the return instructions for the the original part (arm-spray) that was sent to me.
ThankYou
Rich Koneval
5/15/2021
Other Parts Used:
Lower Spray Arm Spray Arm Seal
  • Richard from MEDINA, OH
  • Difficulty Level:
    A Bit Difficult
  • Total Repair Time:
    30 - 60 mins
  • Tools:
    Pliers, Screw drivers
1 person found this instruction helpful.
Was this instruction helpful to you?
Thank you for voting!
PartSelect screwed up.
Couldn't do the repair because you people sent the wrong part.
I ordered #1174536, spray arm seal, but got #wp8268340, bearing.
Waiting for you to make this right.
Please feel free to publish this. Tom Hanna
  • Thomas from BLOOMFIELD, MI
  • Difficulty Level:
    Very Difficult
  • Total Repair Time:
    More than 2 hours
1 person found this instruction helpful.
Was this instruction helpful to you?
Thank you for voting!
Broken plug
The instruction video absolutely helped me. I was really pleased that I received a frig magnet because I will use this company for all my DIY PARTS
Other Parts Used:
Lower Spray Arm Support/Hub Spray Arm Seal
  • Catherine from PITTSFIELD, PA
  • Difficulty Level:
    Really Easy
  • Total Repair Time:
    15 - 30 mins
  • Tools:
    Screw drivers
1 person found this instruction helpful.
Was this instruction helpful to you?
Thank you for voting!
machine has been extremely noisy for over 6 months, then quiet running altogether.
Double checked the model number , watched the video, ordered the parts . I got them in about three days , They looked exactly like the old ones. Proceeded with the disassembly just like the video explained and everything was going great.until I got to the installation part. The new unit would not fit in the sump. even though it looked exactly the same size as the old one. I worked with it every way I could, lubricating it and applying light pressure and finally beating the fire out of with a hammer and it just would not seat in the bottom of the sump. I removed it and reinstalled the old one and fit right in. So I removed all the parts out of the new unit and installed them in the old housing. From that point on the installation went well and now the dishwasher is as quiet as a mouse and so is my wife now. I did not have anything to measure the diameter of the unit accurately but eyeballing it with a rule it looked to be maybe a n 1/8" larger. So it appears to have been a tolerance problem. Not happy about that but I was able to get dishwasher going and the video was great help .
Other Parts Used:
Sump and Motor Assembly Lower Spray Arm Support/Hub Spray Arm Seal
  • Scott from GREENVILLE, NC
  • Difficulty Level:
    A Bit Difficult
  • Total Repair Time:
    More than 2 hours
  • Tools:
    Screw drivers, Wrench (Adjustable)
1 person found this instruction helpful.
Was this instruction helpful to you?
Thank you for voting!
Upper rack not cleaning-whole dishwasher not cleaning
Used bowls in upright position in upper shelf determining no water to upper shelf after running in rinse cycle. Added a cup of Vinegar in rinse cycle. Performed bowl test in upper rack & still no water in bowls. Dismantled inside of unit by removing both spray arms & found lower seal deteriorated & upper seal in need of replacing. Replaced seals & redid bowl test & found no water getting to top rack still. Found utube vid showing removing garbage disposal portion of unit. Requires removing screen in bottom of dishwasher. One screw attaches garbage disposal cover. Found non food items & food by broken garbage disposal. Repaired disposal, removed debri & reinstalled all components. Redid bowl test in upper shelf & bowls were overflowing!!????Dishwasher works GREAT now & can hear garbage disposal operating along with massive water being sprayed!!!
Other Parts Used:
Spray Arm Seal Spray Arm Seal
  • Diann from VIAN, OK
  • Difficulty Level:
    Easy
  • Total Repair Time:
    30 - 60 mins
  • Tools:
    Nutdriver, Screw drivers
4 of 6 people found this instruction helpful.
Was this instruction helpful to you?
Thank you for voting!
Loud sound
Just start to look at all the different videos on the problems that can be making that loud sound and just have the feeling for the circulation pump but then it seems that changing the circulation pump and motor assembly was easier and more logic for a 13 year old appliance. Just start and went that way ordering the part and following all the video instructions that came to be easier than I thought. Thank you
Other Parts Used:
Spray Arm Seal Circulation Pump and Motor Assembly
  • Loren from WILMINGTON, NC
  • Difficulty Level:
    Easy
  • Total Repair Time:
    1- 2 hours
  • Tools:
    Pliers, Screw drivers, Wrench (Adjustable)
2 of 3 people found this instruction helpful.
Was this instruction helpful to you?
Thank you for voting!
Lower spray arm seal replacement
Remove upper tray and spray arm. Remove two screws retaining pipe for upper spray arm and overhead. Unscrew retainer on top of lower spray arm and remove. Gently rotate the upper feed pipe clockwise until pipe can be removed from lower pipe. You may then remove the lower pipe and bearing housing where the seal is. Reverse order for reassembly. I also replaced upper spray arm bushing. Very simple, remove one screw and the arm will come out.
Other Parts Used:
Spray Arm Seal Spray Arm Seal
  • Fred from Grafton, OH
  • Difficulty Level:
    Easy
  • Total Repair Time:
    30 - 60 mins
  • Tools:
    Nutdriver, Screw drivers
16 of 28 people found this instruction helpful.
Was this instruction helpful to you?
Thank you for voting!
Primary problem door dropped open
I first replaced the door balance kit. I had to unhook the water supply to pull the unit out. I replaced the door balance kit first. The pieces were slightly different than my old parts, but fairly easy to figure out. Also, the spring was off on one side so had to confirm where to reconnect it. That took about 30 minutes. I then took out the racks and installed the chopper. The old one came out easily, but it took about 20 minutes to seat the new chopper properly and then reassemble the lower arm. This part of the repair was about another 30 minutes total. Lastly, I replaced the upper rack adjusters, which had broken a while ago and I had pulled together with nylon straps. The new adjusters have metal screws which should be more durable than the plastic clips used in the original equipment. This part of the job took about another 20 minutes, but was easy to complete. The dishwasher door works like new and the top rack is easier to load with the adjusters working properly again.
Other Parts Used:
Door Balance Link Kit Dishrack Adjuster Housing Dishwasher Chopper Assembly Spray Arm Seal
  • Daniel from River Falls, WI
  • Difficulty Level:
    A Bit Difficult
  • Total Repair Time:
    1- 2 hours
  • Tools:
    Nutdriver, Screw drivers, Wrench set
2 of 7 people found this instruction helpful.
Was this instruction helpful to you?
Thank you for voting!
water not spraying right.
removed parts and the ordered the parts. It was very easy to order parts from Partselect. I unscrewed a few screws and the disassembly was a breeze. I then revresed my steps and the new parts were instlalled no problem. Now on the the motor replacement. Thanks Partselect.com
Other Parts Used:
Spinner Kit Spray Arm Seal Lower Spray Arm Support/Hub Spray Arm Seal Cap
  • Frank from Davenport, IA
  • Difficulty Level:
    A Bit Difficult
  • Total Repair Time:
    30 - 60 mins
  • Tools:
    Socket set
33 of 187 people found this instruction helpful.
Was this instruction helpful to you?
Thank you for voting!
  • 1
  • 2
Questions and Answers

Ask our experts a question about this part and we'll get back to you as soon as possible!

1 question answered by our experts.
Sort by:
  • 1
Sorry, we couldn't find any existing answers that matched.Try using some different or simpler keywords, or submit your new question by using the "Ask a Question" button above!
Stephen
August 27, 2017
How do you remove the spray arm to get to the filter to replace it.
For model number KUDI01TJBL1
PartSelect logo
Hi Stephen, Thank you for your question. There is a tab in the middle of the arm. It is a nut that keeps it in place. You are to unscrew that and then you should be able to remove the part. Good luck with your repair.

2 people found this helpful.

Was this helpful?
Thank you for voting!
  • 1
You May Also Need ?
Model Cross Reference
This part works with the following models:
PartSelect Number: PS11745436
Manufacturer Part Number: WP8268340
Brand
Model Number
Description
Kenmore
665110739120
Dishwasher
Kenmore
665110739130
Dishwasher
Kenmore
665110739140
Dishwasher
Kenmore
665110739190
Dishwasher
Kenmore
66513102K900
Dishwasher
Kenmore
66513102K901
Dishwasher
Kenmore
66513102K902
Dishwasher
Kenmore
66513103K900
Dishwasher
Kenmore
66513103K901
Dishwasher
Kenmore
66513103K902
Dishwasher
Kenmore
66513104K900
Dishwasher
Kenmore
66513104K901
Dishwasher
Kenmore
66513104K902
Dishwasher
Kenmore
66513109K900
Dishwasher
Kenmore
66513109K901
Dishwasher
Kenmore
66513109K902
Dishwasher
Kenmore
66513112K700
Dishwasher
Kenmore
66513112K701
Dishwasher
Kenmore
66513112K702
Dishwasher
Kenmore
66513113K700
Dishwasher
Kenmore
66513113K701
Dishwasher
Kenmore
66513113K702
Dishwasher
Kenmore
66513114K700
Dishwasher
Kenmore
66513114K701
Dishwasher
Kenmore
66513114K702
Dishwasher
Kenmore
66513119K700
Dishwasher
Kenmore
66513119K701
Dishwasher
Kenmore
66513119K702
Dishwasher
Kenmore
66513212K901
Dishwasher
Kenmore
66513212K902
Dishwasher
Customer Service Representative

Get in touch, we're here to help!

Daily 8am - 9pm EST

Contact Customer Service