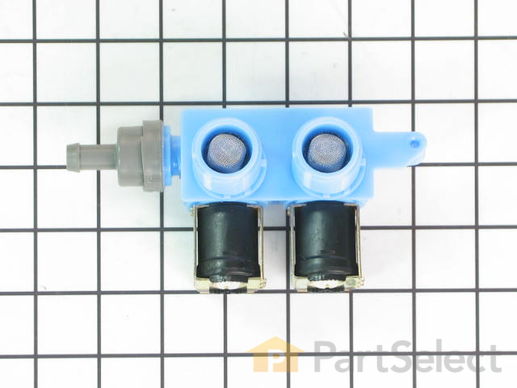
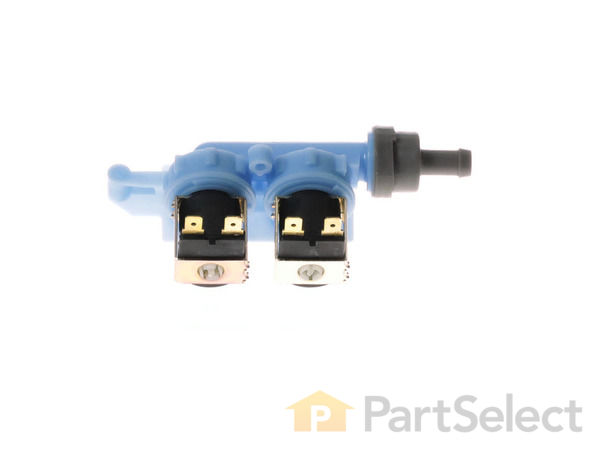
Part Location Diagram of WP8181694 Whirlpool Water Inlet Valve
See part 1 in the diagram
( Grid squares measure 1x1 inch )
Customer Service Representative

Get in touch, we're here to help!

Daily 8am - 9pm EST

customerservice@partselect.com

Water Inlet Valve WP8181694

★★★★★
★★★★★
28 Reviews

Rated by 27 customers 

Really Easy 

15 - 30 mins 

Ratings submitted by customers like you who bought this part.

$ 75.56
  In Stock
Get FREE EconoShip on orders over $100! T&C apply

Get this part fast! Average delivery time for in-stock parts via standard shipping: 1.8 days.

PartSelect Number PS11744913
Manufacturer Part Number WP8181694
Manufactured by Whirlpool
Product Description

Water Inlet Valve Specifications

Used with some front load washers. The attaching solenoids on the valve open and close according to the desired temperature, or amount of water needed.
How Buying OEM Parts Can Save You Time and Money

How Buying OEM Parts Can Save You Time and Money

Troubleshooting
This part fixes the following symptoms:
Leaking | No hot or cold water | Water Filling Issues | Will not drain
This part works with the following products:
Washer.
This part works with the following products:
Kenmore, Whirlpool, KitchenAid.
Part# WP8181694 replaces these:
AP6011714, 8181694, WP8181694VP
Back to Top
Customer Reviews
Average Rating:
★★★★★
★★★★★
28 Reviews
4.9
Filter By Rating:
  • 5 Stars
    26
  • 4 Stars
    1
  • 3 Stars
    1
  • 2 Stars
    0
  • 1 Star
    0
Sort by:
  • 1
  • 2
  • 3
Sorry, we couldn't find any existing reviews that matched. Try using some different or simpler keywords.
  • 1
  • 2
  • 3
Customer Repair Stories
 Average Repair Rating: 4.3 / 5.0, 27 reviews. What's this?
Sort by:
  • 1
  • 2
  • 3
Sorry, we couldn't find any existing installation instruction that matched.
Water inlet valve - srew to hold in place did not line up (piece has been modified by at least 1/4 inch.
Need to elongate the hole in the frame to allow the screw that holds the valve in place to be inserted. You could not even start it as is. Also it put pressure on the valve so it would not seat properly. Need to include in the instructions you may need to elongate this opening in order to complete this repair. Other than that is was extremely easy. Parts fit well. Video instructions were great. Other than not knowing about the valve screw placement changing both pieces were extremely easy. Washing machine was repaired within minutes and is functioning properly again. Even the diagnosis tool was excellent as I have no experience with repairing washing machines but your site helped me trouble shoot the issue, order the parts (and receive in a couple of days) and replace the defective pieces in minutes. Changing these 2 items got me up and running an days and cost significantly less than what a repairmen would have charged just to show up at the door. Appreciate all your help!
Other Parts Used:
Flowmeter Water Inlet Valve
  • Jim from PLYMOUTH, MA
  • Difficulty Level:
    A Bit Difficult
  • Total Repair Time:
    30 - 60 mins
  • Tools:
    Nutdriver, Pliers
1 of 2 people found this instruction helpful.
Was this instruction helpful to you?
Thank you for voting!
Lack of water entering tub
Turned off power, turned off water supply, removed water supply hoses, removed top of washer, photographed electrical connections, removed intake hose, removed screw from part to the machine and removed valve and replaced. Reverse order to install new part and test water supply.
  • Peter from W MELBOURNE, FL
  • Difficulty Level:
    Very Easy
  • Total Repair Time:
    15 - 30 mins
  • Tools:
    Nutdriver, Pliers, Screw drivers
1 person found this instruction helpful.
Was this instruction helpful to you?
Thank you for voting!
Failing inlet valve allowed water accumulation when off
Easiest repair on 2003 front loading washer. This unit cleverly uses star tool machine screws with a hex head so you can pick your favorite tool. Turn off the water supply. Remove the hot and cold hoses at the inlet valve, draining any water into a small bucket. Have a towel for dribbles. *This is a good time to examine the hoses and replace them if they are anything other than perfect. Burst or leaking hoses is the #1 cause of water damage in homes.* Three screws releases the top cover which slides 1/2 inch back and lifts off easily. Remove one screw securing the inlet valve (same size screw as the others). Pull the old inlet valve away from the rear panel for easier access. Remove the 4 wires from the solenoids (they pull straight off but maybe need a little finesse), and re-attach to the new inlet valve. Using pliers, release the hose clamp on the old valve sliding it down a couple of inches, then move the hose to the new valve and reposition the hose clamp. Toss the old inlet valve in the trash, screw the new one in place, replace the top panel, reattach and hand-tighten your hoses, turn on the water, look for any leaks, and go have a three martini lunch with the money and time you saved.
  • Robert from SCOTTSDALE, AZ
  • Difficulty Level:
    Very Easy
  • Total Repair Time:
    15 - 30 mins
  • Tools:
    Pliers, Screw drivers
1 person found this instruction helpful.
Was this instruction helpful to you?
Thank you for voting!
water was back filling into the tub when not in use
Unplugged power cord, turned off both water valves on the wall, Disconnected the water hoses o the back where they are attached to the water inlet valve. Note: there will likely be some water left in the hoses. Then removed top lid of washer (this is a front load washer) by removing the 3 nut screws on the back of the lid and sliding it to the back and lifting off.. Disconnected the small hose that is attached to the water inlet valve by squeezing the hose clamp and sliding the hose off. Removed the 4 wires connected to the water inlet valve (marked each one with a number in order) then removed the Phillips head screw on the back of the machine holding the water inlet valve, sliding the valve to the right, . Removed valve, and replaced with new one, and re-installed by reversing order of removal.
  • Larry from BONAIRE, GA
  • Difficulty Level:
    Very Easy
  • Total Repair Time:
    15 - 30 mins
  • Tools:
    Nutdriver, Pliers, Screw drivers
2 of 3 people found this instruction helpful.
Was this instruction helpful to you?
Thank you for voting!
water valve would not open all the time
First took a picture and printed after disconnecting machine electric supply and removing top cover. removed screw holding vale in place, removed wiring .removed valve,attached wires to new valve inserted in place attached tubing and installed mounting screw and hoses, checked all again and tested
  • Elwyn from NORWAY, ME
  • Difficulty Level:
    Really Easy
  • Total Repair Time:
    30 - 60 mins
  • Tools:
    Screw drivers
1 person found this instruction helpful.
Was this instruction helpful to you?
Thank you for voting!
I find water in the drum after a few days of non use
Removed the three screws in the back took off the top and swamped out the part. I recommend that the inlet valve is checked periodically by removing the hoses to see if there's any build up on the filter.
  • Anthony from Brooklyn, NY
  • Difficulty Level:
    Very Easy
  • Total Repair Time:
    30 - 60 mins
  • Tools:
    Pliers, Screw drivers
3 of 4 people found this instruction helpful.
Was this instruction helpful to you?
Thank you for voting!
Leaking in the washing machine
My hubby and I replaced the part in about 20 minutes, including moving the washing machine. We love doing household projects like this. We're a great team and putting in this part showed how good we work together. Thanks for the quick response too!
  • Jan from CHANDLER, AZ
  • Difficulty Level:
    Very Easy
  • Total Repair Time:
    15 - 30 mins
  • Tools:
    Pliers, Screw drivers
1 person found this instruction helpful.
Was this instruction helpful to you?
Thank you for voting!
Water was leaking in tub after cycle was finished , so much when a new cycle started it had to drain before it would even start .
turned off water valves , disconnected and placed hoses into small bucket . removed top . I then removed screw off old valve , shimmied it out of the hole , removed hose with pliers , slipped off white set of plugs and then black set .. Then I put hose on new valve , placed plugs ( black & white ones ) be sure to mark the correct side .. for me two white were on the right side of valve and black on left side .. placed valve back into its respective spot . attached the screw .. note I sled mine to the right just a bit and all lined up perfectly . Attached hoses , ran test cycle on warm , cold , hot .. All hoses were hooked up correctly and leak free . put lid back on and perfect .. The hardest part , was moving the shelves above my washer , really was super simple . Watch the video twice. You will be able to do it in no time. Saved me 245$ . From my appliance shop the part 150.$ 100 service call and the install fee $ since the install was so easy couldn't be much but .. Its a guesstimate ..You can do it !
  • Linda from TOPEKA, KS
  • Difficulty Level:
    Really Easy
  • Total Repair Time:
    15 - 30 mins
  • Tools:
    Nutdriver, Pliers, Screw drivers, Wrench (Adjustable)
1 person found this instruction helpful.
Was this instruction helpful to you?
Thank you for voting!
Water constantly leaking into the washer
Simple repair. #20 Torx, pair of pliers and 10 minutes to complete the job. Part was exact fit. Turned off the water supply, removed the three screws at the back, slid the top to the back and lifted it off to reveal the valve. Removed the screw holding the valve in place, slid the valve to the right and pulled the valve out to the inside. Used pliers to move the hose retainer off the valve, removed the hose, unplugged the wires, and reversed the procedure to install the new valve.
  • Timothy from LAS VEGAS, NV
  • Difficulty Level:
    Very Easy
  • Total Repair Time:
    Less than 15 mins
  • Tools:
    Pliers, Screw drivers
1 person found this instruction helpful.
Was this instruction helpful to you?
Thank you for voting!
Water would accumulate in the washer drum over several days of non use
Repair was very simple. First watch the video that is available on this website. The installation went exactly like the video described. I pulled the washer away from the wall a few inches. Removed the three screws that hold the top on. Removed the top. Shut off the water and removed the water lines. Removed the single screw that holds the inlet valve in place (T20 torx).Removed the inlet valve, removed the hose from the valve. Reversed the operation to re-install. About a 20 minute job, tops. Tested the washer when finished and it worked great. It has been a couple of weeks now and no water has accumulated in the drum.
  • Ronald from RUSSIAVILLE, IN
  • Difficulty Level:
    Really Easy
  • Total Repair Time:
    15 - 30 mins
  • Tools:
    Nutdriver, Pliers
3 of 4 people found this instruction helpful.
Was this instruction helpful to you?
Thank you for voting!
  • 1
  • 2
  • 3
Questions and Answers

Ask our experts a question about this part and we'll get back to you as soon as possible!

12 questions answered by our experts.
Sort by:
  • 1
  • 2
Sorry, we couldn't find any existing answers that matched.Try using some different or simpler keywords, or submit your new question by using the "Ask a Question" button above!
Terrill
February 15, 2019
My washer fills with only a litte water the shuts off and an error code of hf appears
For model number GHW9400PW0
PartSelect logo
Hello Terrill, Thank you for the question. The Error code indicates an issue with the water filling. I suggest checking the water pressure to the appliance. If the pressure is good, you may have a defective water valve,PartSelect Number: PS11744913. Hope this helps, good luck with this repair!

6 people found this helpful.

Was this helpful?
Thank you for voting!
Bill
March 6, 2019
When asking for cold wash and rinse cycle the washer fills with hot water. Could this be a temp sensor, fill valve or user input control board? Thank you for your response
For model number 11044832200
PartSelect logo
Hello Bill, thank you for inquiring. This could be either the Water Inlet Valve PS11744913; the Temperature Sensor PS11755214; or the Flowmeter PS11748313. We hope this helps.

4 people found this helpful.

Was this helpful?
Thank you for voting!
David
September 8, 2021
Tub very slowly fills with water after it is used and clothes removed. In a few days it is full to overflowing. Is this almost certainly the water inlet valve or is there another part which might be causing this. Is there some way to be sure before I order or can I return the part if it does not fix the problem?
For model number GHW9150PW0
PartSelect logo
Hello David , Thank you for the question. This is a common issue with a defective Water Inlet Valve. You can turn the power off to the appliance but leave the water lines connected to the Valve. If it continues to fill, the valve will nee to be replaced. We hope this helps!

3 people found this helpful.

Was this helpful?
Thank you for voting!
SCOTT
May 29, 2019
Cold water settings ok, but will not allow hot water. Machine only washes with cold water. Do i need a water inlet valve?
For model number GHW9150PW0
PartSelect logo
Hello Scott, thank you for inquiring. For this symptom you will want to replace either this Water Inlet Valve part PS11744913, the Temperature Sensor part PS11755214, or the Water Level/Pressure Switch part PS11755855. We hope this helps.

1 person found this helpful.

Was this helpful?
Thank you for voting!
Allen
August 29, 2017
I just replaced my water inlet valve with a new one purchased from you. Now my washer will not turn on. Will a faulty water inlet valve keep the washer from turning on?
For model number GHW9100LW1
PartSelect logo
Hi Allen, Thank you for your question. The water inlet valve should not effect your machine getting power to your control boards. You may want to check the wiring to make sure you have plugged everything back in the right places. If that is not it, you may want to look at having a look at your door latch or your flow meter. I hope this helps. Good luck with your repair.

1 person found this helpful.

Was this helpful?
Thank you for voting!
James
January 21, 2020
How many volts are these 110/220?
PartSelect logo
Hello and thank you for writing. These are usually used for 110-volt units. We hope this helps. Please contact us anytime if you require further assistance.

1 person found this helpful.

Was this helpful?
Thank you for voting!
Patrick
March 14, 2018
Is this oem or aftermarket?
PartSelect logo
Hi Patrick, Thank you for your question. This is an OEM part. I hope this helps. Thank you and have a great day!

Was this helpful?
Thank you for voting!
Jared
September 18, 2019
Hi, Does this inlet valve part work for my Whirlpool washer? (my washer model number is: ghw9100lw). thanks!
For model number GHW9100LW
PartSelect logo
Hello Jared, Thank you for contacting us. I have researched the model you have provided and have found the part you are looking for is PartSelect Number: PS11744913. Hope this helps!

Was this helpful?
Thank you for voting!
Patricia
December 12, 2019
Our water inlet valve is damaged...what is the replacement part number?
For model number GHW9400PL0
PartSelect logo
Hello Patricia, thank you for inquiring. This Water Inlet Valve part number PS11744913 is the compatible replacement for your model washer. Good luck with your repair!

Was this helpful?
Thank you for voting!
Steve
October 1, 2021
My fill valve is bad,but I can't find part number. Any help will be appreciated. Thanks. Steve Kenmore Elite smart wash Quiet pac HE41 Frontload washer
For model number 110.45081400
PartSelect logo
Hello Steve, Thank you for your inquiry. The fill valve is the same as the water inlet valve part# PS11744913. We hope this helps.

Was this helpful?
Thank you for voting!
  • 1
  • 2
Model Cross Reference
This part works with the following models:
PartSelect Number: PS11744913
Manufacturer Part Number: WP8181694
Brand
Model Number
Description
Kenmore
11042822200
Washer
Kenmore
11042822201
Washer
Kenmore
11042822202
Washer
Kenmore
11042822203
Washer
Kenmore
11042824200
Washer
Kenmore
11042824201
Washer
Kenmore
11042824202
Washer
Kenmore
11042824203
Washer
Kenmore
11042826200
Washer
Kenmore
11042826201
Washer
Kenmore
11042832200
Washer
Kenmore
11042832201
Washer - Kenmore Washing Machine
Kenmore
11042834200
Washer
Kenmore
11042834201
Washer
Kenmore
11042836200
Washer
Kenmore
11042836201
Washer
Kenmore
11042922200
Washer
Kenmore
11042922201
Washer
Kenmore
11042922202
Washer
Kenmore
11042922203
Washer
Kenmore
11042924200
Washer - Kenmore Washing Machine
Kenmore
11042924201
Washer
Kenmore
11042924202
Washer
Kenmore
11042924203
Washer
Kenmore
11042926200
Washer
Kenmore
11042926201
Washer
Kenmore
11042926202
Washer
Kenmore
11042926203
Washer
Kenmore
11042926220
Washer - WASHER
Kenmore
11042932200
Washer
Customer Service Representative

Get in touch, we're here to help!

Daily 8am - 9pm EST

Contact Customer Service