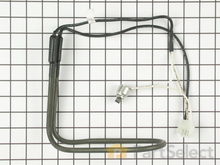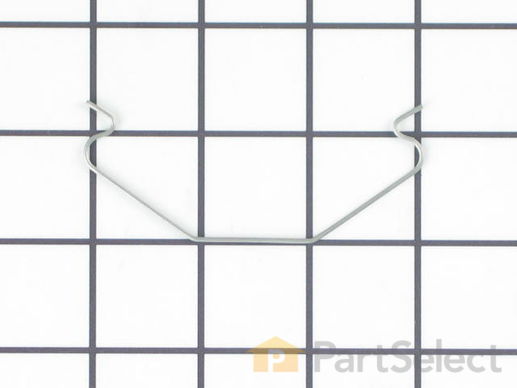
Defrost Heater Clip WP67005457
Rated by 6 customers
Easy
30 - 60 mins
Ratings submitted by customers like you who bought this part.
$
9.40
In Stock
Get FREE EconoShip on orders over $100! T&C apply
Get this part fast! Average delivery time for in-stock parts via standard shipping: 1.8 days.
PartSelect Number PS11743628
Manufacturer Part Number WP67005457
Manufactured by
Whirlpool
Troubleshooting
This part fixes the following symptoms:
Fridge too warm
This part works with the following products:
Refrigerator.
This part works with the following products:
Maytag, Jenn-Air, Crosley, Admiral.
Part# WP67005457 replaces these:
61003202, 61004152, 67005457
Customer Repair Stories
Average Repair Rating: 3.2 / 5.0, 6 reviews.
What's this?
Sort by:
- < Prev
- 1
- Next >
Search filter:
Clear Filter
Your search term must have 3 or more characters.
Keep searches simple. Use keywords, e.g. "leaking", "pump", "broken" or "fit".
Sorry, we couldn't find any existing installation instruction that matched.
Automatic defrost was not functioning correctly, had to manually defrost every week
I watched your video, took notes, ordered the parts and installed them. Refrigerator works great. Might not have needed all three components, however I live in a remote part of Alaska so I ordered the works. Thinking that the other parts were also well used also and probably close to failure. THE REFRIGERATOR IS WORKING LIKE NEW. Your
... Read more
delivery time was astonishing. I order alot over the internet. The video was very well filmed and had all the right info, easy to understand. I would like to do business with you again. But you'll have to wait awhile for this frig to break again. Thanks alot.
Read less
Other Parts Used:
-
Andrew from Cordova, AK
-
Difficulty Level:Easy
-
Total Repair Time:30 - 60 mins
-
Tools:Nutdriver
2 of 6 people
found this instruction helpful.
Was this instruction helpful to you?
Thank you for voting!
Ice buildup on freezer floor
I followed the video on Part Select which covered everything in detail. The longest time was to defrost the coils. After removing the cover, part of the coils were iced up. The actual repair only took about 10 minutes. I had found my old heater element had bent so it was no longer heating the coils. I also replaced the Adaptive Defrost Ti
... Read more
mer since both work in conjunction with each other. Thank you Part Select for making life easier.
Read less
Other Parts Used:
-
Lester from Jacksonville, FL
-
Difficulty Level:Easy
-
Total Repair Time:30 - 60 mins
-
Tools:Nutdriver, Pliers
1 of 2 people
found this instruction helpful.
Was this instruction helpful to you?
Thank you for voting!
The coils would freeze up and it wouldn't cool.
I removed the screws on the covers and remove them, then taken the screws from the timer, the temperature control just set in there, then pulled out a lttle ways and disconnected the wires and then removed. Installed the new ones. I taken the back panel off and removed the clip and pulled the defrost heater out a ways and removed the wir
... Read more
es and removed the defrost heater. Installed the new defrost heater and clip and the covers.
Read less
Other Parts Used:
-
Jimmy from Stratford, TX
-
Difficulty Level:A Bit Difficult
-
Total Repair Time:1- 2 hours
-
Tools:Screw drivers, Socket set
83 of 636 people
found this instruction helpful.
Was this instruction helpful to you?
Thank you for voting!
Temperature in refrigerator & freezer above appropiate.
Unplug the refrigerator, open the back of the freezer, there were blocks of ice everywhere. I defrosted the ice using hair drier. Remove the heater and thermostat assembly and replace it with the new one.
Other Parts Used:
-
Hernan from Seguin, TX
-
Difficulty Level:Easy
-
Total Repair Time:30 - 60 mins
-
Tools:Nutdriver
0 of 2 people
found this instruction helpful.
Was this instruction helpful to you?
Thank you for voting!
Defrost did not happen, expansion unit iced up, cooling was minimal.
Only had to remove 2 screws and slide the fan cover panel down and out, then lift out the coil cover panel. Then used a space heater to thaw the coils (block of ice) so that I could get to the defrost heating element (OK, so I was in a hurry. Could have just unplugged for a day an let it thaw on its own). Defrost heating element has just
... Read more
one connector (snaps in place), one thermo-switch (snaps onto coil) and one supporting retainer clip to disconnect. Literally under a minute at this point to remove the old one and replace it with the new one. I recommend two retainer clips to hold the new element in place, since the old element had sagged a lot with only one clip and that could have contributed to its demise. Reinstall the two panels, secure with the two screws, plug it back in, done deal. Works like new again.
I was very impressed with these parts - they were exact and obviously factory replacements. It doesn't get any easier than this.
I was very impressed with these parts - they were exact and obviously factory replacements. It doesn't get any easier than this.
Read less
Other Parts Used:
-
John from Simsbury, CT
-
Difficulty Level:Really Easy
-
Total Repair Time:15 - 30 mins
-
Tools:Nutdriver
4 of 4 people
found this instruction helpful.
Was this instruction helpful to you?
Thank you for voting!
Freezer icing up and refer not cooling
Removed all parts and replaced defrost heater/thermostat and new clip then replaces Defrost board (new ones just snap in) and replaced all parts back and seems to be back to normal.
Thank you Parts Select
Thank you Parts Select
Other Parts Used:
-
Bryan from Maple Valley, WA
-
Difficulty Level:Easy
-
Total Repair Time:30 - 60 mins
-
Tools:Nutdriver, Screw drivers
39 of 46 people
found this instruction helpful.
Was this instruction helpful to you?
Thank you for voting!
- < Prev
- 1
- Next >
Back to Top
Questions and Answers
Be the first to ask our experts a question about this part!
✖
Ask a Question
Ask our experts a question on this part and we'll respond as soon as we can.
Sorry, we couldn't find a match for "".
Here's a guide for finding your model number.
Something went wrong. Please try again later.
Your Question Has Been Submitted!
Our experts will send you an email as soon as your question has been answered.
Back to Top
You May Also Need
?


Back to Top
Model Cross Reference
This part works with the following models:
PartSelect Number: PS11743628
Manufacturer Part Number: WP67005457
Manufacturer Part Number: WP67005457
Brand
Model Number
Description
Back to Top

Defrost Heater Clip
$
9.40
In Stock
✖
Stock Status
In Stock
Item is in stock and will ship today if your order is placed before 4:00 PM Eastern Standard Time.
If your order is placed after 4:00 PM EST, the in stock items will ship on the next business day.
On Order
Item is not in stock and usually ships 3-5 business days from the time you place your order.
Special Order
Item is not in stock and usually ships 10-15 business days from the time you place your order.
NLA - No Longer Available
This item is no longer being made by the manufacturer, and cannot be added to your shopping cart.


