This defrost thermostat is a temperature sensing mechanism used in freezers and refrigerators. The thermostat senses the rise in evaporator temperature during a defrost cycle and turns the defrost heater off once frost is melted from the coils. If the freezer is not defrosting, or the freezer section is too warm, it is best to replace the thermostat to fix the problem. The tools needed for this project are: 1/4 inch nut driver, flat blade screwdriver, needle nose pliers, wire strippers, and pair of wire nuts. Remember to unplug your appliance from the power source for safety and refer to the manual provided by the manufacturer for installation instructions.
How Buying OEM Parts Can Save You Time and Money
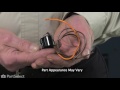
Part Videos
Replacing your Kenmore Refrigerator Defrost Thermostat
Troubleshooting
This part fixes the following symptoms:
Fridge too warm | Freezer not defrosting | Frost buildup | Freezer section too warm
Keep searches simple. Use keywords, e.g. "leaking", "pump", "broken" or "fit".
Sorry, we couldn't find any existing reviews that matched. Try using some different or simpler keywords.
★★★★★
★★★★★
Emilio Plaza A - August 14, 2021
Verified Purchase
Easy installation
Part was shipped accordingly, installed and fridge is working on point.
★★★★★
★★★★★
Roy H - June 27, 2021
Verified Purchase
The Defrost Thermostat was the exact part I needed
After figuring out where my problem with the refrigerator was, I did a search of how to get to the possible problem parts, I came across the video from PartsSelect. I watching the provided video to disassemble the area of the freezer, which was very helpful. After confirming the heating element was OK, I removed the thermostat switch that controlled it, and did a diagnostic and confirmed is wasn't closing to turn on the heating element at the prescribed temperature. I click on the link to the Defrost Thermostat switch and found the identical switch, so I ordered it. A couple of days later the part arrived. For grins, I preformed the same diagnostic on the new part to confirm that my test of the old part was correct. I then installed it and reassembled and started the fridge back up, and everything was back to normal.
★★★★★
★★★★★
Matthew S - September 4, 2020
Verified Purchase
Pretty Easy Fix
Purchased this after watching a few of the Do-it-yourself links on this site. Everything works great and saved a ton off money !!
★★★★★
★★★★★
Emilio S - February 9, 2019
Verified Purchase
nice work
perfect tanks profecional work
★★★★★
★★★★★
Patricia H - October 31, 2018
Verified Purchase
Defrost thermostat
I was really impressed with the installation video it was so helpful. I was pretty proud of myself for repairing our refrigerator myself and saving our family hundreds of dollars. It actually has given me confidence to try other projects myself. PartSelect is fabulous! Thank you
★★★★★
★★★★★
Harold K - October 30, 2018
Verified Purchase
Refrigerator repair
I ordered a defrost thermostat, and a control board. I didn't need the thermostat but kept it just incase I would need it. The control board did the trick. The refrigerator works fine.
I returned the used one and hope you will send me the $60 that you promised to send.
It was great doing business with your company. The parts came quickly.
Harold Kohn
★★★★★
★★★★★
James H - September 5, 2018
Verified Purchase
Reasonably easy repair. Not the easiest area to work in.
The part worked great. Delivery was slower than expected. Will use your service again when needed. Thank you
★★★★★
★★★★★
Mark H - April 26, 2018
Verified Purchase
defrost thermostate\
right part it fixed my refrigerator.
< Prev
1
Next >
Customer Repair Stories
Average Repair Rating: 2.7 / 5.0, 7 reviews.
What's this?
Sort by:
< Prev
1
Next >
Search filter:
Clear Filter
Your search term must have 3 or more characters.
Keep searches simple. Use keywords, e.g. "leaking", "pump", "broken" or "fit".
Sorry, we couldn't find any existing installation instruction that matched.
Did not install as repair person diagnosed the wrong problem.
Repair not done. The next repair person said it was the compressor. Cost to fix $1,000.00. So we spent between parts and service calls 600.00 and it’s not fixable.Had to purchase a new onefor2,200.00. Have been without a refrigator for 2 weeks.
The vents at the back of the freezer were constantly getting packed with ice. A repairman failed to spot the problem. I used Partselect's web site to do my own analysis and determined that it was the defrost thermostat. I followed the web site's instructions, which were exceptionally good. Behind the rear wall of the freezer was
... Read morea lot of ice on the cooling fins and heavily encrusted over the old thermostat. (It was not really difficult, but I am in my 70s and no longer do things like this on my own.) After replacing the part, I checked the ohms of the old part and found it to be faulty. Since then, the refrigerator has been working great. I wish I had started here. The repairman I had hired replaced the "control board" at significant expense. I doubt very much that anything was wrong with the old control board. Many thanks to Partselect for an exceptionally helpful web site.
Read less
Richard from SAN FRANCISCO, CA
Difficulty Level:
A Bit Difficult
Total Repair Time:
30 - 60 mins
Tools:
Nutdriver, Screw drivers
4 of 4 peoplefound this instruction helpful.
Was this instruction helpful to you?
Thank you for voting!
Refrigerator would not cool, while the freezer kept food frozen and the ice maker worked fine. Also, noticed frost build up at the rear of the freezer compartment
First, turned off the circuit breaker. Then: 1. Removed all food, , wire sliding baskets, and the ice bin. 2. Removed ice maker by removing the electrical connector from the socket in the rear panel, removed the single bottom screw with a 1/4” nut driver, loosened the 2 top screws with a 1/4” nut driver, and lifting the unit
... Read more up and off the 2 loosened screws. 3. Removed the freezer door by loosening the 4 screws( 2 on each side) with a 1/4” nut driver and then lifting the door face off the loosened screws. 4. The next task is to remove the panel at the rear of the freezer compartment: use a flat blade screw driver to compress the side clips that hold the ice maker electrical socket, pushing it into the space behind the rear panel, then removing the rear plastic cover in the center of the rear panel, and finally removing the thermistor cover on the right rear upper corner of the rear panel( separate the thermistor from this piece, threading it through the slot in the top of the plastic cover. Now, the rear panel can be removed by removing the 4 1/4”” hex head screws with the nut driver and gently easing the panel from its position. 5. Now comes the hard part: the defrost thermostat and most of the surrounding “plumbing” was encased in ice. I used a hair dryer to melt the ice, which created an overflow of water drawing into the collection pan; get ready to mop up this water. 6. With ALL the ice melted( this took over an hour), I simply cut the 2 wires, stripped the feed ends, removed the defective unit, clipped the new thermostat to the copper tube where the old unit was clipped, cut excess wire/stripped the new wires and used 2 orange wire nuts to connect each wire. Now all the parts and pieces can be reinstalled in the reverse order
Read less
Carl from EAST LYME, CT
Difficulty Level:
Really Easy
Total Repair Time:
30 - 60 mins
Tools:
Nutdriver, Screw drivers
5 of 5 peoplefound this instruction helpful.
Was this instruction helpful to you?
Thank you for voting!
COILS WAS ICING ON REFRIGRATOR SOLID ICED FOUND ENTIRE COILS
CHECK DEFROST THERMOSTAT WITH VOLT OHM METER AND FOUND THERMOSTAT BAD ALSO OHMED OUT HEATER AND HEATER CHECKED OK INSTALLED HEAT SRINK CONNECTORS ON NEW DEFROST THERMOSTAT PUT SYSTEM BACK INTO O PRATION ALSO CHANGED WATER FILTER ON REFERGRATOR SYSTEM WORKING OK AND NO ICING OF COILS THANKS WADE BOYLES
WADE from PILOT MTN, NC
Difficulty Level:
Very Easy
Total Repair Time:
1- 2 hours
Tools:
Nutdriver, Pliers, Screw drivers, Socket set
5 of 5 peoplefound this instruction helpful.
Was this instruction helpful to you?
Thank you for voting!
Freezer would not defrost, refrigerator was warm, no airflow into fridge
Info on your site allowed me to determine the most likely cause of the problem, defrost thermostat, and that fixed it. Good installation instructions on the site too. Part was super easy to install. Hardest part was removing the snap-in/screwed-in plastic parts that held the sliding baskets and back panel in place. Didn't break any...
... Read more..Thank You!
Read less
SCOTT from ELECTRIC CITY, WA
Difficulty Level:
Easy
Total Repair Time:
30 - 60 mins
Tools:
Screw drivers, Socket set
6 of 8 peoplefound this instruction helpful.
Was this instruction helpful to you?
Thank you for voting!
Freezer cold, refrigerator warm
Overload relay accessible from back, by compressor unit. Very easy to change out. Diagram from your site placed defrost thermostat in same area.It wasn't. Found another diagram, showed it in refrigerator light area, took that apart, not there. Yet another diagram showed it in the duct work area at back of refrigerator cabinet. Not there.
... Read more Finally removed back of freezer compartment, found thermistor and thermostat with the fins. Clipped wires, wired in parts, quick fix. Longest amount of time was spent finding the old parts to replace them. Actual replacement took less than 15 minutes. Refrigerator holding at 35 degrees set on 2 now, better than ever. Total cost, less than $120, doing iy ourselves....priceless.
The refrigerator was not getting cold and the coils were not defrosting.
Start by removing the freezer door and inner baskets so you have some space. Next, take out the ice maker by removing the 3 screws that attach it to the side and unplug it from the harness. Then the cover for the thermistor and the fan vent should be popped off carefully leaving the back cover only. The back cover is held on by 4 screw
... Read mores, one in each corner. Remove all 4 screws and carefully loosen the back cover by pulling the top forward and laying it level to pull it out. Behind the cover are the coils and other components. If the coils are covered with ice they should be defrosted by using a blow dryer. Once the ice is clear, the thermostat is located towards the top left clamped onto a copper pipe that circles up and around. Carefully pull it off the pipe and cut the wires making sure you leave enough to reattach the new ones with a butt connector. Strip about 1/4 inch of insulation off the wires and crimp both ends into the butt connector making sure they are tight. Heat shrink is highly recommended. Clamp the new thermostat to the copper pipe where the old one used to be and your almost done. Replace the back cover the opposite of the way it was pulled out by putting it in flat with the bottom part in front. Once it is all the way to where it needs to be, push the top upwards while sliding the bottom downwards, then push it in flat against the back. It can be bent slightly if needed. Put the screws back in that hold it on and replace the plastic covers. Then reinstall the ice maker being sure the hose for the water is correctly positioned so that the water goes into the ice maker. Turn it back on and put the baskets and door back on and you're done.
Read less
Cheryl K from Pinellas Park, FL
Difficulty Level:
A Bit Difficult
Total Repair Time:
30 - 60 mins
Tools:
Screw drivers
149 of 167 peoplefound this instruction helpful.
Was this instruction helpful to you?
Thank you for voting!
< Prev
1
Next >
Questions and Answers
Ask our experts a question about this part and we'll get back to you as soon as possible!
11 questions answered by our experts.
Sort by:
< Prev
1
2
Next >
Search filter:
Clear Filter
Your search term must have 3 or more characters.
Keep searches simple. Use keywords, e.g. "leaking", "pump", "broken" or "fit".
Sorry, we couldn't find any existing answers that matched.Try using some different or simpler keywords, or submit your new question by using the "Ask a Question" button above!
Rechelle
July 31, 2018
Every couple days my freezer coils freeze over. The freezer is ice cold but the refrigerator gets warm. I defrost the coils and it will work for a couple days but then it starts to freeze over again. Where should i start? Defrost thermostat? ???
For model number MFF2557KES
Hi Rechelle, Thank you for your question. Yes. The two parts to test first would be your defrost thermostat and your defrost heater. You may also want to take a look at your thermistor inside of your freezer as well. If those parts are fine, the problem may lay in your control board. I hope that helps. Good luck with your repair.
9 people found this helpful.
Was this helpful?
Thank you for voting!
Sandie
May 6, 2018
Our frig is too cold. Freezes everything. Dial is all the way down. Is this the part for us?
For model number 59673502201
Hi Sandie, Thank you for the question. I first suggest checking the Damper, PartSelect Number: PS11743533 to see if it is stuck open and allow to much cold air through from the freezer. You can also test the defrost thermostat. The best way to do this is to remove the thermostat from the refrigerator so you can control the temperature of the sensor. You can let the sensor warm up to room temperature. With the sensor warmed up to room temperature the sensor should read approximately 6.2K Ohms at 68°F. With the thermistor submerged is a glass full of ice water, the sensor should be very close to 32°F which should read approximately 16.3K Ohms. If the values that you are getting are far off from these readings, then the sensor is bad and should be replaced. Hope this helps!
8 people found this helpful.
Was this helpful?
Thank you for voting!
Ray Whitaker
June 4, 2019
Drain froze over in freezer. Check defrost heater and measures 28 ohms. This seem reasonable. Measured defrost thermostat at 20f and at 70f. Number stay the same . How do you test this part?
For model number JFC2087HRS
Hello Ray, thank you for writing. You can test the Defrost Thermostat with a multi-meter. The multi-meter will display 0.000 if the Defrost Thermostat is in the closed position, and should be in the closed position when it is cold. To check to be sure that it is opening at the proper temperature, place it in water and slowly heat the water. When the Defrost Thermostat opens, the multi-meter will display an O.L., indicating that there is no continuity through it. If there is no 0.000 when it is cold, or an O.L. when it is hot, then the thermostat is bad and should be replaced. We hope this helps.
4 people found this helpful.
Was this helpful?
Thank you for voting!
John
October 24, 2019
I just replaced the defrost thermostat on my 1 and half year old Amana fridge with a Whirlpool 67003426 thermostat, but I was wondering if there was a more robust thermostat on the market in case this one has an early demise. Thank you!
For model number ABB1924BRW00
Hi John,
Thank you for your question. Based on the model number you provided, this would not be the correct thermostat for your refrigerator. The part number listed under your model number for the bi-metal defrost thermostat is PS11749348. This would be the only defrost thermostat listed for your model. I hope this helps. Thank you and have a great day!
1 person found this helpful.
Was this helpful?
Thank you for voting!
Ann
December 27, 2019
Our freezer is working but not refrigerator. There is ice built up on coil . What part should we change first?
For model number MBF2256KEB
Good Day Ann. Thank you for your question in regards to your unit (Model Number MBF2256KEB). Based on our research you may need to replace one or more of the following parts: 1) Defrost Thermostat (PartSelect Number PS11743535). 2) Defrost/Evaporator Heater (PartSelect Number PS11743472). You can order these parts either online at our website www.PartSelect.com or by calling us by phone at 888-260-4310. Best Regards.
1 person found this helpful.
Was this helpful?
Thank you for voting!
Michael
March 24, 2022
Forgot to use incandescent bulb in my clamp lamp for aiming at my garage fridge this winter, and now with temps above freezing in chicago, fridge/freezer is not cooling. Do I need change thermostat? or?
Thanks!
For model number 59665932400 Sears kenmore fridge
Hello Michael, Thank you for your inquiry. We have researched the model you have provided and we would recommend checking the following parts to fix your issue: the defrost thermostat, the evaporator fan motor, the thermistor, the defrost heater, and the run capacitor. You can test the parts with a multimeter. If you are unfamiliar with how a multimeter functions, we have videos available to assist you. We hope this helps and if you need help placing an order, customer service is open 7 days a week. Please feel free to give us a call. We look forward to hearing from you!
My compressor does not kick in. We had a power surge the evening before it quit. I have already replaced the compressor start device and capacitor, which did not fix the problem. It looks like everything passes the test, does that mean i need to order a new control board?
For model number JBL2086HES
Hi Karim,
Thank you for your question. If you have replaced the compressor start device and the capacitor and you have checked the other parts, I would check the electronic control board to see if it is working correctly. I hope this helps. Thank you and have a great day!
1 person found this helpful.
Was this helpful?
Thank you for voting!
Mark
September 21, 2023
This photograph of Defrost Thermostat WP67003426 looks exactly like what I have just removed from my Maytag MBL2258XES3 in every detail; however, this model does not appear in your cross reference list for this part. Can you tell me if it is the right part?
For model number MBL2258XES3
Hi Mark, thank you for contacting us. Based on our research, your model does not come with a defrost thermostat. You may need to replace the control board, part number PS11755733. It manages the functions of the refrigerator such as cooling and defrost times. We hope that helps!
DEFROST WATER BUILDING UP INSIDE BOTTOM OF FREEZER COMPARTMENT AND REFREEZING AS ICE JUST UNDER THE LAST FREEZER DRAWER
For model number KSRP22FTSS01
Hi Wayne, thank you for getting in touch. We would suggest checking the drain line for any blockage first. If it is fine, the issue could be with the defrost thermostat, part number PS11750673. Its function is to clip onto the evaporator and protect your evaporator from overheating during the defrost cycle. You may need to replace it to fix the issue. We hope this sorts out your problem!
My fridge cycles on and off to cool but its runs for a longer than usual time between turning off. Also occasionally the temp in the fridge and freezer rise up 5 to 10 degrees and it takes several hours to cool back down.
Ive cleaned the coils under the fridge and checked door seals and they look good.
Thanks for your help
For model number MFD2562KEW
Hi Brian, thank you for the question. The issue seems to be with the Thermistor and you may need to replace it, the part number is PS2003772. The Temperature Sensor senses the temperature inside the refrigerator and sends information to the electronic control. We hope this solves your problem!