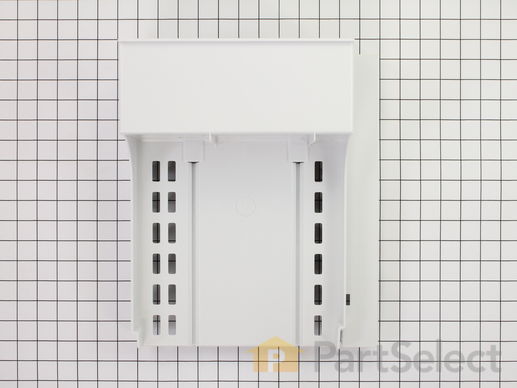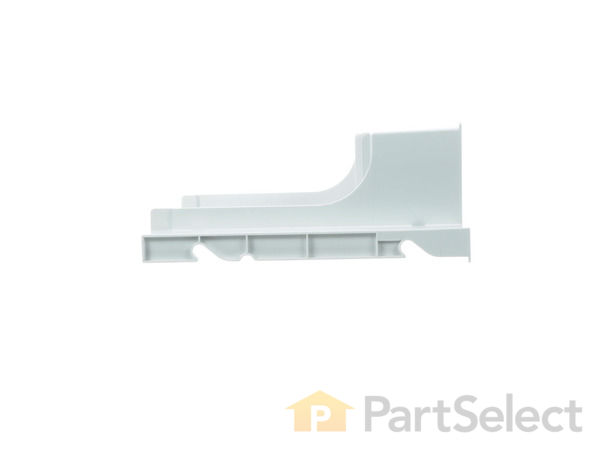
Ice Bucket Housing WP61004881
Rated by 11 customers
Easy
30 - 60 mins
Ratings submitted by customers like you who bought this part.
Get this part fast! Average delivery time for in-stock parts via standard shipping: 1.8 days.
Ice Bucket Housing Specifications

How Buying OEM Parts Can Save You Time and Money
-
5 Stars 2
-
4 Stars 0
-
3 Stars 0
-
2 Stars 0
-
1 Star 0
- < Prev
- 1
- Next >
- < Prev
- 1
- Next >
- < Prev
- 1
- 2
- Next >
#1 - The Ice Maker started leaking. This was pretty straight forward. When we turned the ice maker on, eventually after a couple hours icicles would start to form near the front. I bought a replacement Ice Maker, and fixing th ... Read more is was incredibly easy. There's a video about it on this website, and after following it exactly, the new replacement was in and working very quickly.
#2 - This refrigerator must've been quite old. The next problem was the enclosure which holds onto the Augur Drive Motor. The plastic and the 4 screws that hold onto the motor all rusted off, making the motor basically fall backwards becoming completely useless. It's too bad there's no video on how to replace this part, because there's more moving parts with this one. Here are the steps I had to take to replace the enclosure:
1. First I had to remove the Enclosure Divider (PS107595). Push right to remove the 2 grips at the top, then pull back then up to remove it.
2. Unscrew the enclosure using a socket or nutdriver
3. (1st hard step) unplug the motor from the back of the fridge. This is hard because the cord is relatively short, and the enclosure takes up a lot of space. Remember to turn off the power before doing this step!
4. Unscrew all the machine parts from the enclosure (Augur Motor, Solenoid, Yoke, etc...) This was actually quite difficult because a couple of screws were placed on extremely tight. We basically had to break the old enclosure into little pieces before we could unscrew everything. The last screw actually needed to be undone using vice grips. That's how tight they were
5. In order to place the Augur Motor on the new enclosure, you have to remove the engagement yoke from it. This also was tightened on too tight. I had to use vice grips to hold the base still while hitting the yoke hard with a hammer to get it loose. It only came lose after maybe 1 hour of failed attempts. I supposed patience paid off on this one. If it doesn't come off, just give it a few tries every few hours so you come at it with a clear head.
6. Attached all the components to the new enclosure
7. Reattached the engagement yoke back onto the Augur Motor (give it a light tap with a hammer or screw driver so it's fastened well... not TOO much though!)
8. Plug the motor back into the fridge, place the enclosure back into the freezer, then put the divider back in
The parts that were difficult for me were:
- Screws were WAY too tight. My dad thinks they might've used glue to make sure they're fastened on tight. Don't do this! It only makes maintenance in the future difficult
- The engagement yoke was also on too tight. This might actually be from turning ice this whole time, but it's also possible someone overdid it or used glue here too. Don't overdo it when replacing the parts!
- Lastly, and I didn't mention this in the instructions, but in order to get the solenoid off the old enclosure, I had to unplug everything so I could safely smash the old enclosure to pieces to get at it. When I did this, I forgot to take pictures of what plugs go where. When it came time to put it back together, I *think* the wires are in the right place now. The machine works, but hopefully I didn't put everything in backwards. Take photos of how wires are plugged in before you unplug them!!
-
Glen from SAN MARCOS, CA
-
Difficulty Level:A Bit Difficult
-
Total Repair Time:30 - 60 mins
-
Tools:Pliers, Screw drivers, Socket set
-
Travis from Westchester, CA
-
Difficulty Level:A Bit Difficult
-
Total Repair Time:30 - 60 mins
-
Tools:Pliers, Screw drivers, Wrench (Adjustable)
-
Chet from Marietta, GA
-
Difficulty Level:Really Easy
-
Total Repair Time:30 - 60 mins
-
Tools:Pliers, Screw drivers
-
Lou from san antonio, TX
-
Difficulty Level:A Bit Difficult
-
Total Repair Time:15 - 30 mins
-
Tools:Pliers, Screw drivers
2. Removed vertical panel next to ice bin by sliding two top supports off of support posts and pulling the panel out and up.
3. Removed screw on left side holding ice enclosure in place.
4. Pull ice enclosure out about six inches and tip back end down exposing electrical connector.
5. Detach th ... Read more e electrical connector by pressing the release tabs on the top and bottom of the connector.
6. Removed ice eclosure by pulling it up and out.
7. Detached motor (4 screws) and relay (4 screws) from plastic enclosure. Make sure to keep track of screw positions since they are not all the same size. Use same positions to reassemble.
8. Hold shaft of motor with needle nose vise grips and remove the "U" shaped end piece by turning it clockwise. A sharp rap with a screwdriver handle breaks it loose. Pay attention to the orientation of the washer under the "U" shaped piece (the raised inner edge next to the shaft goes against the "U" shaped piece.
9. Attach the motor and relay to the new ice enclosure paying attention to the screw position.
10. Put the washer on the motor shaft (raised side up) and screw on "U" shaped piece (counter-clockwise).
11. The rest of the installation is a reversal of the removal process.
-
John from Virginia Beach, VA
-
Difficulty Level:Really Easy
-
Total Repair Time:15 - 30 mins
-
Tools:Screw drivers, Socket set
The most difficult part of the repair was removing the 2 pronged fork from the shaft of the motor as it was reversed threaded on the motor. I held the motor in place on while using two pair of pliers to remove the fork from the end of the motor shaft. I used one pair of pliers to hold the shaft in place while using the other pair of pliers to turn the fitting in the opposite direction.
Once this was off, it took only 5 minutes to reattach the motor to the new enclosure and place it back into the freezer. Total repair time was about 30 minutes because I had to figure out how to get the fork off of the motor shaft. Everything else went very smooth. The new part fit perfectly.
-
Michael from Alpharetta, GA
-
Difficulty Level:Easy
-
Total Repair Time:15 - 30 mins
-
Tools:Pliers, Wrench set
I did one unnecessary step and removed the magnet from the housing. Better to remove the entire housing, then transfer the motor and ma ... Read more gnet to the new housing.
I noticed that others had problems unscrewing the drive unit (which you need to do to transfer it to the new housing.) I simply held the center hub with a pair of pliers, and gave the drive one tap with a hammer. Like the other reviews, note that it unscrews opposite way.
Reassembly was quicker and easier; just undo everything you did to get the housing out of the freezer.
-
Michael from Vienna, VA
-
Difficulty Level:Easy
-
Total Repair Time:30 - 60 mins
-
Tools:Nutdriver, Pliers, Screw drivers
Saved me a few hundred dollars the repairman would have charged!
... Read more >THANKS
-
Pat from Clarkston, MI
-
Difficulty Level:Really Easy
-
Total Repair Time:15 - 30 mins
-
Tools:Nutdriver, Screw drivers
job was easy except for housing
that you reverse thread off. used visecrips
which helped. otherwise no problems.
-
Gregory from Auburn, CA
-
Difficulty Level:A Bit Difficult
-
Total Repair Time:30 - 60 mins
-
Tools:Nutdriver, Pliers, Screw drivers
-
mark from marietta, GA
-
Difficulty Level:Easy
-
Total Repair Time:30 - 60 mins
-
Tools:Nutdriver, Screw drivers
- < Prev
- 1
- 2
- Next >
Be the first to ask our experts a question about this part!
Manufacturer Part Number: WP61004881

Item is in stock and will ship today if your order is placed before 4:00 PM Eastern Standard Time.
If your order is placed after 4:00 PM EST, the in stock items will ship on the next business day.
Item is not in stock and usually ships 3-5 business days from the time you place your order.
Item is not in stock and usually ships 10-15 business days from the time you place your order.
This item is no longer being made by the manufacturer, and cannot be added to your shopping cart.


