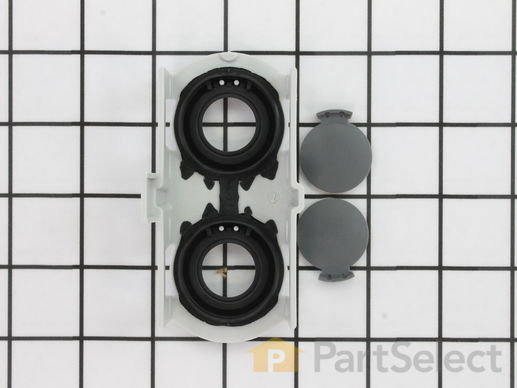
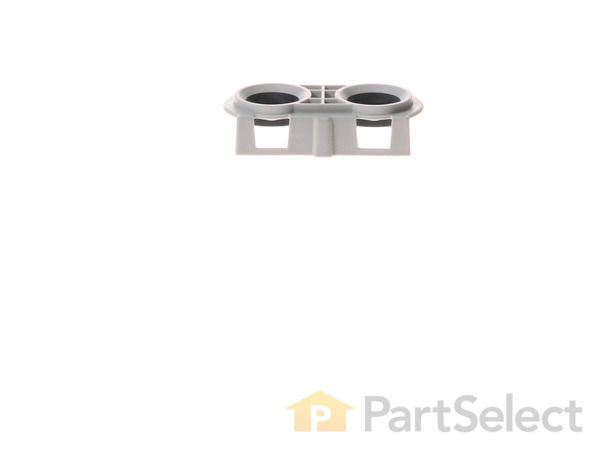
If you notice that your dishwasher is leaking, or is not cleaning dishes properly, you may need to replace the docking station. The docking station is located on the water supply tube at the back of the appliance. It provides water to the upper and middle spray arm. This part comes with the accompanying flappers. This product is approximately 4 inches in length and 2 inches in width, and is made of white and gray plastic. To access the docking station, you will need to remove the upper rack. To do this, simply remove the end caps that keep the rack on the slides. Make sure to attach the flappers to the docking station before installing it in the dishwasher.
How Buying OEM Parts Can Save You Time and Money
Troubleshooting
This part fixes the following symptoms:
Not cleaning dishes properly | Leaking
This part works with the following products:
Dishwasher.
This part works with the following products:
Maytag, Jenn-Air, Amana, Magic Chef.
Part# WP6-917647 replaces these:
AP6009888, 6-917647, 6-918805, 99002674, 99003143
Questions and Answers
We're sorry, but our Q&A experts are temporarily unavailable.
Please check back later if you still haven't found the answer you need.
Keep searches simple. Use keywords, e.g. "leaking", "pump", "broken" or "fit".
Sorry, we couldn't find any existing answers that matched.Try using some different or simpler keywords, or submit your new question by using the "Ask a Question" button above!
Greg
May 22, 2019
Should the docking station that has 2 rubber flappers both be closed when installed. One of the the rubber flappers is presently 1/2 closed/open and i believe that would limit flow of water to upper rack and that is inhibiting the top rack from getting cleaned?
For model number MDB7600AWW
Hello Greg, Thank you for the question. Both flappers should be closed. Thank you for your inquiry, good luck with this repair!
3 people found this helpful.
Was this helpful?
Thank you for voting!
Tom
July 19, 2019
Why are there 2 ports on this dishwasher part? The top rack connects to one - what is the second one for?
For model number Mdb5601
Hello Tom, thank you for your question. One is for the Upper Spray arm and one is for the Middle Spray Arm on your model. We hope this answers your question!
1 person found this helpful.
Was this helpful?
Thank you for voting!
Kevin
March 4, 2019
I need two docking stations, does this price include 2 parts or do i need to order two of them?Thank you
Hello Kevin, Thank you for the question. The docking Station is sold individually. Hope this helps!
1 person found this helpful.
Was this helpful?
Thank you for voting!
Part Videos
Replacing your Maytag Dishwasher Docking Station with Flappers
Customer Repair Stories
Average Repair Rating: 4.4 / 5.0, 23 reviews.
What's this?
Keep searches simple. Use keywords, e.g. "leaking", "pump", "broken" or "fit".
Sorry, we couldn't find any existing installation instruction that matched.
Wash Quality Was Getting Bad
The upper arm was held in by a torx screw. The shoulder on the screw held the arm in place. Once removed I simply swapped parts and installed screw. The lower arm was held on by a plastic nut with knurled edges that you can remove by hand. The arm simply lifted off and I swapped arms again. The rollers are held on by a curled plastic lock that grips the wire basket.
Remove the racks top and bottom. The Station D seals are at the far back on the tube that supplies water to the top and middle spray heads. Unsnap the old one and snap in the new - it only goes one way! This will repair the seal aroound the tube that supplies the middle sprayer and restore pressure to all 3 heads. Repalcing the screen accumulator is harder. you need a torx driver. remove the little thumb nut on the bottom sprayer and remove the sprayer. Then remove the tube where you just replaced the D station. (You of course could have done this earlier if you were doing both repairs) then 6 screws on the impeller housing. Now remove the 1 torx screw on the impeller and pull the impeller up and off. Remove the 3 screws on the cover and 2 screws on the accumulator. Clean all the old food scraps that are clogging up the works and reassemble in reverse order. Washer is working again!!
First I read all the reports for not cleaning properly already listed on this site. I had to replace the docking station with flappers. When I removed the station I lost the flappers down the water delivery tube just like Jon said I would in his repair post so I removed the water distribution assembly fished out the old flappers and snapped in the new. But then I figured I might as well check out the accumulator while I was in the tub anyway - I had read that you need Torx screwdriver bit, which I had, undid the screws, pulled out the accumulator screen which was about 80% clogged, discovered I need a new chopper blade and my impeller is disintegrating, put it back together and lost ten minutes looking for the three screws I had incorrectly put in too soon, and now it is cleaning a packed full load like it was supposed to do. **I love this site - I went to the virtual repairman and it listed every problem I had with this appliance in the order they happened (door latch broke years ago). - I think I am going to look up stuff that I own so I will know ahead what could go wrong with them.
And absolutely NO DUCT TAPE was used in this repair.
Stephen J from Sammamish, WA
Difficulty Level:
Easy
Total Repair Time:
Less than 15 mins
Tools:
Screw drivers
11 of 11 peoplefound this instruction helpful.
Was this instruction helpful to you?
Thank you for voting!
door latch and seal not working correctly and broken
Removed the screws holding the door liner in place removed latch. Waited for half of the parts to get here, about 2 weeks. Parts got here except for Door latch and seal they were back ordered. One month after I ordered all parts finally arrive. Replace door latch assembly and replace door seal reinstall retaining screws....Done works good again. Parts were all the correct ones just took a long time to get here.
Removed assembly holding the docking station to insure the passageway was clear. I reversed the flappers and noticed an improvement in cleaning then decided to order a new part. Installation was simple and the repair seems to have worked well.
Edward from Springfield, VA
Difficulty Level:
Really Easy
Total Repair Time:
Less than 15 mins
6 of 7 peoplefound this instruction helpful.
Was this instruction helpful to you?
Thank you for voting!
Broken door latch and poor glass washing
This repair was really three separate easy repairs.
The top rack docking station is really simple -- pop the old one off and snap the new one on.
The impeller is easy IF you have the right Torx screwdriver. You have to take a few layers of water handling plastic parts off to get the the impeller, but it's all pretty easy. I did strep a couple of Torx bits when I put one of the parts back on, but I've had this apart at least three times and they held up the first few times. I'll buy some new screws next time.
There are a few things to keep in mind when changing the door latch and control panel. First, change the latch as soon as it breaks, instead of waiting for it to break more and destroy the control panel in the meantime. I'd have save $60 and most of the work if I hadn't put it off. Second, turn off the power. Changing the panel requires removing and replacing some wires, and it would be EASY to contact wires that you probably don't want to. A nutdriver makes quick work of everything that the Torx doesn't fit, and the remove/replace is pretty easy. Be attentive when refitting the ribbon cable for the control panel - if you're not familiar with this kind of connector you need to figure out the funky slidelock mechanism of the shell. It's easy though.
All the parts fit perfectly, and appear to be factory exact replacements. It works fine now, too.
I noticed that the dishes on the top rack were not getting clean. While the dishwasher was running, I opened the door to see if the arms were moving/spraying and they were not. I cleaned the filter and checked the impeller and both were clean and not damaged. After looking how the top rack slides into the "flapper" I took it off to inspect it. It was missing the rubber to make the seal with the tube from the top rack. After replacing this part, the dishwasher is cleaning like new. Here is the part PS2340934 Docking Station with Flappers
Jim from New Berlin, WI
Difficulty Level:
Really Easy
Total Repair Time:
Less than 15 mins
4 of 4 peoplefound this instruction helpful.
Was this instruction helpful to you?
Thank you for voting!
The dished were not getting cleaned
By reading online about some similar problems, I discovered that the accumulator did, in fact, have some holes worn through the screen and was leaking sediment back into the rinse water. After waiting for 2-3 months because the apart was on back-order at the factory, it took me less that 1 hour to remember how the unit went together (reviewed the parts diagram online) and connect everything up. On the first rinse, the dishes were really clean - well worth the wait. Doing dished by hand reminded me of the old days....
Maytag should be ashamed to put such poor plastic material in an otherwise good design. The seals that join the rotary sprayers to the rear wall had hardened and crumbled away. When I discovered that water pressure had been lost at the spray arms, it was a simple fix. Snap off the failed parts, pay Partselect $37 because Maytag wanted to save a dime and snap in the new parts. (Parts that will fail again in another 3 years.)
Keep searches simple. Use keywords, e.g. "leaking", "pump", "broken" or "fit".
Sorry, we couldn't find any existing reviews that matched. Try using some different or simpler keywords.
★★★★★
★★★★★
Brenda P - June 17, 2020
Verified Purchase
Easy
This part was so easy to replace. Just snap the old one off and the new one on. Simple. Shipping was fast. Customer service is awesome.
★★★★★
★★★★★
Brenda B - February 18, 2018
Verified Purchase
Easy fix.
Dishwasher is working like new again. This part needs to be replaced as normal maintenance because the rubber ring deteriorates over time causing the upper spray arms to stop spinning. You’ll know it time to replace when your glasses no longer rinse clean.
★★★★★
★★★★★
George B - February 17, 2018
Verified Purchase
web site very easy to work with, lots of help
Easy to install and took care of the problem as stated on site. Impressed with the quick delivery
Model Cross Reference
This part works with the following models:
PartSelect Number: PS11743061
Manufacturer Part Number: WP6-917647
With our Fix app model plate image recognition technology, we'll recommend the parts guaranteed to fit your appliance. Simply snap a photo, and we'll take care of the rest.
"I love love love this app. It's so nice to have useful information (receipts, manuals, parts lists, warranty info, pictures, etc.) on all of my household appliances and devices in one place."
You added to your cart
✖
$
Qty:
Total item(s) in cart:
Order Subtotal
$
*Taxes and shipping will be applied during checkout