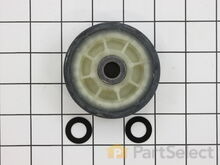
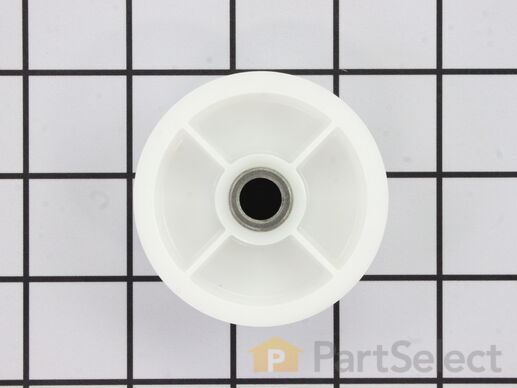
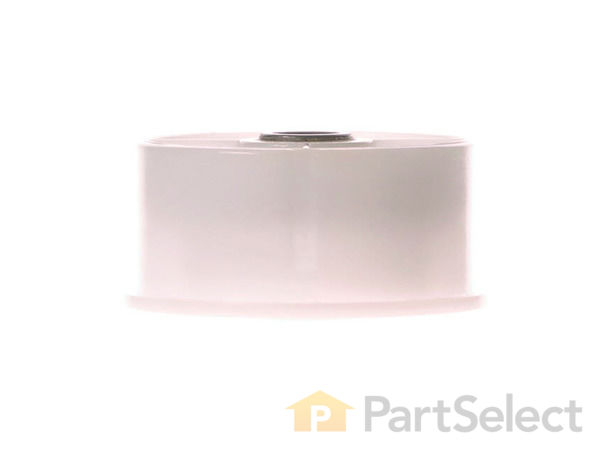
Part Location Diagram of WP6-3700340 Whirlpool Idler Pulley Wheel and Bearing
See part 8 in the diagram
Replacing your Maytag Dryer Idler Pulley Wheel and Bearing
( Grid squares measure 1x1 inch )
Customer Service Representative

Get in touch, we're here to help!

Daily 8am - 9pm EST

customerservice@partselect.com

Idler Pulley Wheel and Bearing WP6-3700340

★★★★★
★★★★★
13 Reviews

Rated by 64 customers 

Easy 

1- 2 hours 

Ratings submitted by customers like you who bought this part.

$ 22.11
  In Stock
Get FREE EconoShip on orders over $100! T&C apply

Get this part fast! Average delivery time for in-stock parts via standard shipping: 1.8 days.

PartSelect Number PS11743032
Manufacturer Part Number WP6-3700340
Manufactured by Whirlpool
Product Description

Idler Pulley Wheel and Bearing Specifications

The idler pulley tightens the drive belt to properly spin the dryer drum. It is attached to an idler bracket. This part comes with the idler pulley and center bearing. To replace this part, you will need a Phillips screwdriver, channellock pliers, a 5/16ths nut driver, and a flat blade screwdriver. Make sure to disconnect power to the dryer before beginning this repair.
How Buying OEM Parts Can Save You Time and Money

How Buying OEM Parts Can Save You Time and Money

Part Videos

Replacing your Maytag Dryer Idler Pulley Wheel and Bearing

Replacing your Maytag Dryer Idler Pulley Wheel and Bearing

Replacing your Maytag Dryer Idler Pulley Wheel and Bearing

Replacing your Maytag Dryer Idler Pulley Wheel and Bearing
Troubleshooting
This part fixes the following symptoms:
Noisy
This part works with the following products:
Dryer, Washer Dryer Combo.
This part works with the following products:
Maytag, International, Crosley.
Part# WP6-3700340 replaces these:
AP6009859, 33001783, 6-3700340, WP6-3700340VP
Back to Top
Customer Reviews
Average Rating:
★★★★★
★★★★★
13 Reviews
4.8
Filter By Rating:
  • 5 Stars
    10
  • 4 Stars
    3
  • 3 Stars
    0
  • 2 Stars
    0
  • 1 Star
    0
Sort by:
  • 1
  • 2
Sorry, we couldn't find any existing reviews that matched. Try using some different or simpler keywords.
  • 1
  • 2
Customer Repair Stories
 Average Repair Rating: 2.9 / 5.0, 64 reviews. What's this?
Sort by:
  • 1
  • 2
  • 3
Sorry, we couldn't find any existing installation instruction that matched.
These were changed proactively while I had the dryer apart to replace the motor.
I removed the control panel and front panel, then the brace holding in the drum. Then the drum came out easily.

Replacing the rollers is easy, use circlip pliers to remove the old circlips, replace the rollers, and reinstall the circlips.

After removing the idler pulley by removing one bolt and the spring, I replaced the idler roller, again with the circlip pliers. Then the idler arm bolts back to the motor mount, and the spring is replaced.

Reinstalling is easy - place the drum, have someone support it while you install the drum brace, then replace the front panel, then the control panel.
Other Parts Used:
Idler Pulley Wheel and Bearing Multi Rib Belt - 91-5/8 Inches Idler Spring with Rubber Dampener Drum Support Roller Kit
  • Steve from SANDY, UT
  • Difficulty Level:
    Easy
  • Total Repair Time:
    1- 2 hours
  • Tools:
    Nutdriver, Screw drivers
2 of 2 people found this instruction helpful.
Was this instruction helpful to you?
Thank you for voting!
Dryer was noisy and seemed to be loosing heat
Did an internet search for parts for my older Maytag dryer. Landed on PartSelect and man I am glad I did! Entered my model number and boom! Complete schematics on the dryer, with part numbers. Also have diagnostic questions to point you in the right direction. Figured out what parts I needed, ordered via phone. Fantastic customer service. PartSelect also has excellent installation videos you can watch to assist. Took me a little over an hour to open up the dryer, replace the drum rollers, drum belt, idler roller and both front and rear felt seals. Buttoned dryer back up, hit the run switch and it purs like brand new. I cannot recommend PartSelect to highly. Great company, great customer service, quick shipping.
Other Parts Used:
Idler Pulley Wheel and Bearing Multi Rib Belt - 91-5/8 Inches Dryer Drum Felt Seal Drum Support Roller Kit
  • DONALD from FORT MILL, SC
  • Difficulty Level:
    Easy
  • Total Repair Time:
    1- 2 hours
  • Tools:
    Nutdriver, Pliers, Screw drivers
1 person found this instruction helpful.
Was this instruction helpful to you?
Thank you for voting!
Bearing and shaft noise.
Followed the directions of the video and all went smooth. Cleaning the lint and parts was the more time consuming than the actual repair. 30 minutes for the repair and an hour for the clean. All and all very easy.
Other Parts Used:
Idler Pulley Wheel and Bearing Roller Shaft Idler Shaft Retaining Ring Idler Arm Screw Sleeve
  • Franklin from YPSILANTI, MI
  • Difficulty Level:
    Really Easy
  • Total Repair Time:
    1- 2 hours
  • Tools:
    Nutdriver, Pliers, Screw drivers
1 person found this instruction helpful.
Was this instruction helpful to you?
Thank you for voting!
Dryer emitted a squeaky noise every time it started
We inherited this dryer three years ago upon purchasing our current house. At that time I found this website to purchase and install a couple of the baffles that were missing. This time, I checked the troubleshooting for my current problem and ordered all of the parts I felt I needed to resolve the problem. Once I received the parts, I followed the great how-to videos by Steve to disassemble the front of the dryer and remove the drum. I could not get to the repairs right away since the interior of the dryer was quite dirty and I took a lot of time to clean it out. Once I got to removing and replacing the drum rollers, idler pulley, rear drum felt shaft, and drum belt, everything went smoothly and was just as easy as Steve described in the videos. If I didn't have such a dirty machine interior, removing the old parts and installing the new parts would have taken less than an hour. I had to hold off on installing the front glide kit and front drum felt seal since I forgot to order two of each (I'll install these at a later date. I proceeded to putting everything back together and testing the dryer. The dryer now runs quietly and works great.
Other Parts Used:
Idler Pulley Shaft Washer Retaining Ring Idler Pulley Wheel and Bearing Roller Shaft Idler Shaft Retaining Ring Multi Rib Belt - 91-5/8 Inches Dryer Drum Felt Seal Front Glide Kit Drum Support Roller Kit
  • Robert W from OTSEGO, MI
  • Difficulty Level:
    Easy
  • Total Repair Time:
    More than 2 hours
  • Tools:
    Nutdriver, Screw drivers, Socket set, Wrench (Adjustable)
1 person found this instruction helpful.
Was this instruction helpful to you?
Thank you for voting!
Loud squealing noise
Disassembled dryer and replaced drum support roller and shaft. That took care of the noise but I still replaced the belt and idler pulley while I had it apart.
Other Parts Used:
Idler Pulley Wheel and Bearing Roller Shaft Multi Rib Belt - 91-5/8 Inches Drum Support Roller Kit
  • Doyce from PENSACOLA, FL
  • Difficulty Level:
    Really Easy
  • Total Repair Time:
    30 - 60 mins
  • Tools:
    Nutdriver, Screw drivers, Socket set
5 of 9 people found this instruction helpful.
Was this instruction helpful to you?
Thank you for voting!
Dryer make scraping sound while running.
Followed the directions on the video. I recommend changing both tumbler wheels and idler pulley when you have unit apart as well as the drive belt. When I opened the dryer cabinet I immediately saw what my scraping noise was being caused by. A screw holding a baffle in the dryer tub had backed out and was scraping the cabinet wall on each rotated pass. Like I said, when you have the cabinet apart you might as well change parts that are going to fail. The repair was very easy and now I have many more years of service with my dryer. Had I opened the dryer before to see what parts I needed I would have seen the loose screw.
Other Parts Used:
Idler Pulley Wheel and Bearing Multi Rib Belt - 91-5/8 Inches Drum Support Roller Kit
  • Paul S from Peoria, AZ
  • Difficulty Level:
    Really Easy
  • Total Repair Time:
    30 - 60 mins
  • Tools:
    Nutdriver, Screw drivers, Socket set
5 of 9 people found this instruction helpful.
Was this instruction helpful to you?
Thank you for voting!
Squeeking
If you have the option to take a part the dryer before ordering the parts to track down the squeaking part, do so. In my case a squeaking part is still usable. Unfortunately the squeaking part was not the rollers or the belt depicted as a high percentage of the squeaking problems as noted on the webpage.My was the Idler Pulley. INSTALLATION of idler pulley, I started by watching the youtube videos, took pictures during the removal of the parts to assist in the installation. removed front panels parts, moved drum forward off the rollers, reached in and pulled the idler pulley to the left in order to remove belt. pulled the drum out. And with a flat head screw driver popped off the e clip (bought extra e clip just in case i lost it) reinstalled everything, BUT take note of the Idler pulley, it has one side bigger than the other BUT in the CLOSE UP VIDEO THE GENTLEMAN INSTALLS IT BACKWARDS. Not sure if this has a major effect on the pulley, but wanted to give it a heads up (your pictures will help you with this to keep track of how it should look at the end).
  • Nicole from HUNTINGTN STA, NY
  • Difficulty Level:
    Easy
  • Total Repair Time:
    30 - 60 mins
  • Tools:
    Nutdriver, Pliers, Screw drivers
1 person found this instruction helpful.
Was this instruction helpful to you?
Thank you for voting!
Squeeking drum
Went smoothly. Took the opportunity to vacuum out entire cabinet. Also removed tumbler vanes inside dryer as coins had made their way into them. The only other suggestion I have is that I didn't notice cabinet screws were different lengths till I started reassembly. Might be smart to label and separate them
Other Parts Used:
Idler Pulley Wheel and Bearing Roller Shaft Drum Support Roller Kit
  • KARL from NAMPA, ID
  • Difficulty Level:
    Really Easy
  • Total Repair Time:
    30 - 60 mins
  • Tools:
    Nutdriver, Pliers, Screw drivers, Wrench set
5 of 9 people found this instruction helpful.
Was this instruction helpful to you?
Thank you for voting!
A few weeks ago our dryer stated making metal to metal sounds and about the same time stopped drying the clothes.
I looked at this website and found the symptoms, noisy, and no heat or not enough heat. I ordered the recommended parts. They were the drum support roller kit, idler pulley wheel and bearing, high limit thermostat, and lastly the front glide kit. I had anticipated having to use all of these parts. Upon following the instructions in the videos (couldn't ask for better instructions) I disassembled the dryer to see how bad everything was before replacing the parts. The left drum support roller spun easily, but had a little roughness and slight noise, the right one spun easily but not like I thought a new one would have spun, the idler pulley was stiff and very noisy. The thermostats all seemed to be in good shape (had continuity). I cleaned the bearings and shafts of all of the rollers with alcohol, paper towels and cotton swabs. The bearings and shafts all looked like new, so I lubed them with a slight amount of high temperature grease and reassembled the rollers. They moved smoothly and quietly. The fan was quite full of lint, even cleaning the filter after every load does not stop all of the lint. It has been in use probably over 10 years. After everything was back together, it runs like a well oiled sewing machine and has been drying well. I did return the parts unopened. This would not have been so successful without the videos. Thanks to all of you.
Other Parts Used:
Idler Pulley Wheel and Bearing High Limit Thermostat (Limit: 200-30) Front Glide Kit Drum Support Roller Kit
  • William from ENTERPRISE, AL
  • Difficulty Level:
    Really Easy
  • Total Repair Time:
    More than 2 hours
  • Tools:
    Nutdriver, Screw drivers
5 of 9 people found this instruction helpful.
Was this instruction helpful to you?
Thank you for voting!
Noisy & Drum stop working
Replaced damaged parts and recommended parts normally causing the problem. Dryer is working again like new. I expended $112 rather than $600 for a new equipment. Good deal!
Other Parts Used:
Retaining Ring Idler Pulley Wheel and Bearing Roller Shaft Idler Shaft Retaining Ring Multi Rib Belt - 91-5/8 Inches Dryer Drum Felt Seal Drum Support Roller Kit
  • Tulio from ASHLAND, MA
  • Difficulty Level:
    Really Easy
  • Total Repair Time:
    30 - 60 mins
  • Tools:
    Nutdriver, Pliers, Screw drivers, Socket set, Wrench set
5 of 10 people found this instruction helpful.
Was this instruction helpful to you?
Thank you for voting!
  • 1
  • 2
  • 3
Questions and Answers

Ask our experts a question about this part and we'll get back to you as soon as possible!

15 questions answered by our experts.
Sort by:
  • 1
  • 2
Sorry, we couldn't find any existing answers that matched.Try using some different or simpler keywords, or submit your new question by using the "Ask a Question" button above!
Anna
July 20, 2017
My dryer is making obnoxiously loud noises but as the cycle keeps going the noises tend to calm down until they just completely stop. I was told squeaking noises are directly related to the idler pulley? With this purchase do I need to get anything else? Or will it all come together?
PartSelect logo
Hi Anna, the idler pulley WPW10547292 for your dryer comes as a complete assembly, it includes everything you will need for a successful installation. I would also recommend ordering some turbine oil TJ93240 at the same time. Apply a small amount to the idler pulley bearing, the drum rollers, and the blower wheel bearing. This will help everything rotate smoothly. Good luck with your repair.

8 people found this helpful.

Was this helpful?
Thank you for voting!
Ryan
February 6, 2018
The idler pulley flew off my dryer! I can't find a snap ring or washer inside so i need either or does the bearing snap on and hold the pulley in place?
For model number MLE2000AYW
PartSelect logo
Hi Ryan, Thank you for your question. No, there is a retaining ring that holds the part on the pulley arm. I have listed that part in a link down below for you. Good luck with your repair.

3 people found this helpful.

Was this helpful?
Thank you for voting!
Related Parts:
David
April 16, 2018
Dryer makes a constant screeching sound when power on. With power off and I manually turn drum the noise is apparent. What part do you think I need? Cost? Thank you
For model number WED7600XW0
PartSelect logo
Hi David, Thank you for the question. There are a few parts to check. You can check the Drum Support Rollers, PartSelect Number: PS11752609, Drum Support Shafts, PartSelect Number: PS11753708 or PartSelect Number: PS11753707 depending on the threads. The Idler Pulley Wheel and Arm, PartSelect Number: PS11756154 and the drive belt, PartSelect Number: PS11746374. You can look for wear and damage on this parts. Hope this helps!

3 people found this helpful.

Was this helpful?
Thank you for voting!
Dex
July 20, 2017
My dryer is experiencing intense vibrations during cycle. It only happens when the drum is turning. Rollers are good. Where should I look next?
PartSelect logo
Hello Dex, thanks for the question. You will need to inspect the blower wheel, it is fairly common for lint to build up or get stuck inside the fins of the blower wheel, which will cause the excess vibrations. I hope this helps, if you have any further questions please let us know.

2 people found this helpful.

Was this helpful?
Thank you for voting!
Paul
January 14, 2018
Dryer was and continues to make chirping noises. I ordered and changed the two rear drum support wheels and one shaft for the right support wheel. Also changed the two front glide strips as well as the belt. While I had everything apart, I took the opportunity to remove and clean the idler pulley bearing and shaft. Put everything back together and its making the same chirping noise as before. I guess i should have replaced the idler pulley bearing instead of just cleaning it? Any other possibilities?
For model number MDE2500AYW
PartSelect logo
Hello Paul, Thanks for your question. Given all of the other parts you have replaced, we would also advise replacing the idler pulley bearing to see if that fixes the chirping noise. If that does not work, it could be the motor as well, but that should be a last resort given how core of a component the motor is. I hope this helps.

2 people found this helpful.

Was this helpful?
Thank you for voting!
Related Parts:
Evie
July 20, 2017
My dryer is too hot during all cycles including delicates. When I removed my delicates they were way too hot, but it hasn’t always been like this. This is new. What is the most likely scenario here?
PartSelect logo
Hi Evie, thanks for your question. This issue is commonly caused by a shorted heating element, a restricted ducting system, or a cycling thermostat that has failed.  I hope this helps.

1 person found this helpful.

Was this helpful?
Thank you for voting!
John
March 5, 2019
My dryer is making a knocking noise about every 5 rotations or less. What could it be?
For model number MDE7400AYW
PartSelect logo
Hello John, thank you for your question. We would recommend checking the rollers, belt, idler pulley, felt seals and glides first. I hope this helps!

1 person found this helpful.

Was this helpful?
Thank you for voting!
Stephen
September 17, 2019
You told me yesterday that I would need two fabric washers for the idler pulley. Where does the second one go? On the older shaft before sliding on the pulley?
For model number MDE8757AYW
PartSelect logo
Hello Stephen, Thank you for the question. The washers will go on each side of the roller. So on one side you will have the retaining ring,washer then roller and the other side you will have the hex nut, washer then roller. Hope this helps!

1 person found this helpful.

Was this helpful?
Thank you for voting!
Shannon
December 3, 2019
Does the idler pulley wheel come with a new shaft? Or is it literally just the wheel?
For model number MDE2500AYW
PartSelect logo
Hi Shannon, Thank you for your question. The idler pulley arm and shaft is not sold with the pulley. The part number listed under your model number for the idler arm and shaft is PS11743033. I hope this helps. Thank you and have a great day!

Was this helpful?
Thank you for voting!
Sandra
December 4, 2019
My tension pulley looks like it has a grove in it. My question is is it supposed to or is it broken?
For model number MDE5500AYW
PartSelect logo
Hello Sandra, thank you for your question. It appears to have a slight groove in it. Over time, a larger groove may appear due to wear. I hope this helps!

Was this helpful?
Thank you for voting!
  • 1
  • 2
You May Also Need ?
Model Cross Reference
This part works with the following models:
PartSelect Number: PS11743032
Manufacturer Part Number: WP6-3700340
Brand
Model Number
Description
Crosley
CDE4205AYJ
Dryer - Residential
Crosley
CDE4205AYW
Dryer - Residential
Crosley
CDE4205AZJ
Dryer - Residential
Crosley
CDE4205AZW
Dryer - Residential
Crosley
CDG4205AWJ
Dryer - Residential
Crosley
CDG4205AWW
Dryer - Residential
Maytag
MDB9206AWW
Dryer - Maytag Dryer Model MDB9206AWW Parts
Maytag
MDE14PDACL
Dryer - Electric
Maytag
MDE14PDACQ
Dryer - Electric
Maytag
MDE14PDACW
Dryer - Electric
Maytag
MDE14PDADL
Dryer - Electric
Maytag
MDE14PDADW
Dryer - Electric
Maytag
MDE14PDAGW
Dryer - Electric
Maytag
MDE14PNAGW
Dryer - Gas
Maytag
MDE14PNAYW
Dryer - Gas
Maytag
MDE14PNAZW
Dryer - Gas
Maytag
MDE14PRAYW
Dryer - Gas
Maytag
MDE16CSAGW
Dryer - Electric
Maytag
MDE16CSAKA
Dryer - Electric
Maytag
MDE16CSAKQ
Dryer - Electric
Maytag
MDE16CSAYA
Dryer - Electric
Maytag
MDE16CSAYQ
Dryer - Commercial
Maytag
MDE16CSAYW
Dryer - Electric
Maytag
MDE16CSAZA
Dryer - Electric
Maytag
MDE16CSAZQ
Dryer - Commercial
Maytag
MDE16CSAZW
Dryer - Commercial
Maytag
MDE16CSDGW
Dryer - Electric
Maytag
MDE16CSDYW
Dryer - Electric
Maytag
MDE16CSDZW
Dryer - Electric
Maytag
MDE16MNAGW
Dryer - Electric
Customer Service Representative

Get in touch, we're here to help!

Daily 8am - 9pm EST

Contact Customer Service