Part Location Diagram of WP56461 Whirlpool Idler Pulley Shaft
See part 22 in the diagram
( Grid squares measure 1x1 inch )
Customer Service Representative

Get in touch, we're here to help!

Daily 8am - 9pm EST

customerservice@partselect.com

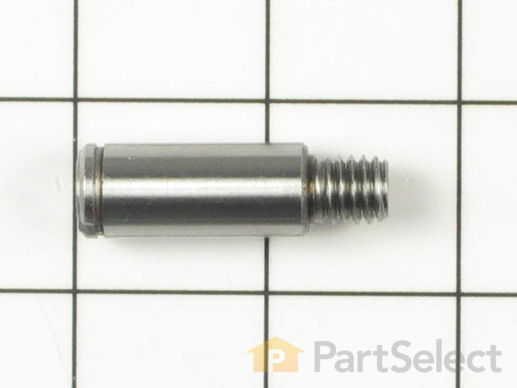
Idler Pulley Shaft WP56461

Rated by 8 customers 

Easy 

30 - 60 mins 

Ratings submitted by customers like you who bought this part.

$ 65.61
  In Stock
Get FREE EconoShip on orders over $100! T&C apply

Get this part fast! Average delivery time for in-stock parts via standard shipping: 1.8 days.

PartSelect Number PS11742857
Manufacturer Part Number WP56461
Manufactured by Whirlpool
Product Description

Idler Pulley Shaft Specifications

This shaft is made to fit the center of the idler pulley wheel of many clothes dryers. It is less than two inches long, and is made of metal.
How Buying OEM Parts Can Save You Time and Money

How Buying OEM Parts Can Save You Time and Money

Troubleshooting
This part fixes the following symptoms:
Noisy
This part works with the following products:
Dryer, Washer, Washer Dryer Combo.
This part works with the following products:
Amana, Speed Queen, Magic Chef.
Part# WP56461 replaces these:
14218947, 38228, 56461, 56461P, R0605560
Back to Top
Customer Repair Stories
 Average Repair Rating: 3.1 / 5.0, 8 reviews. What's this?
Sort by:
  • 1
Sorry, we couldn't find any existing installation instruction that matched.
Belt and idler pulley bad.
Remove the front of the washer. Remove the pump and motor assembly using the 1/2 inch socket. Remove the pump from the motor and hoses from the pump. Replace the bad idler pulley and place new belt on pulley. Reassemble the pump to the motor and install the assembly back into the washing machine. Reasemble the hoses and put belt on driven pulley for the drum. Reinstall the front cover.
Other Parts Used:
Idler Pulley Shaft Idler Pulley Wheel Spin Belt
  • Richard from Holcombe, WI
  • Difficulty Level:
    A Bit Difficult
  • Total Repair Time:
    15 - 30 mins
  • Tools:
    Nutdriver, Screw drivers, Socket set
2 of 3 people found this instruction helpful.
Was this instruction helpful to you?
Thank you for voting!
A squealling noise from the idler pulley.
Removed the bottom panel. Removed door to dryer and disconnected the door switch. Removed the top of the dryer. Now I had access to the drum basket of the dryer. Removed the belt and took drum out. The idler was accessible and easy to replace. I replaced the other drum support rollers. These were a bit difficult when it came to removing the clamp pins holding the rollers. Once you get one the other is easy. Reassembly is relatively easy and quick. Dryer no longer squeals, runs nice. I felt really good.
Other Parts Used:
Idler Pulley Wheel with Bearing Idler Pulley Shaft Drum Support Roller
  • Wardell from Glenwood, IL
  • Difficulty Level:
    Easy
  • Total Repair Time:
    1- 2 hours
  • Tools:
    Socket set
1 person found this instruction helpful.
Was this instruction helpful to you?
Thank you for voting!
wore out roller & shaft
removed screws for lower panel, disconnected wires from door switch, removed front door assy, lifted top, removed drum, replaced idler shafts and rollers with fresh lube. reassembled.
Sounds like new. really fast shipping, parts easily located on this website. Thanks!!!
Other Parts Used:
Idler Pulley Shaft Drum Support Roller
  • Randy from Longview, WA
  • Difficulty Level:
    Really Easy
  • Total Repair Time:
    30 - 60 mins
  • Tools:
    Screw drivers, Wrench set
0 of 1 people found this instruction helpful.
Was this instruction helpful to you?
Thank you for voting!
Drum was not turning smoothly
Ordered belt first. After taking it apart, it was clear that the bushing in on of the drum supporting roller was bad. As a result, it has also worn out the shaft. I replaced the roller, roller shaft, and the belt. It is running like new now.
Other Parts Used:
Idler Pulley Shaft Drum Support Roller
  • Chenyi from Atlanta, GA
  • Difficulty Level:
    Easy
  • Total Repair Time:
    30 - 60 mins
  • Tools:
    Nutdriver, Screw drivers
0 of 1 people found this instruction helpful.
Was this instruction helpful to you?
Thank you for voting!
The rollers on the drum were worn out
Unplugged dryer removed the front, removed & marked the wires. Removed the drum & drive belt. Removed the snap ring on front of roller with a pgtai awl.Removed the wheel & worn washers, removed the nut on the back of the roller shaft. reppaced it all in reversed proceedure. Other than a few little scrapes on the knuckles it was Quite easy.
Other Parts Used:
Thrust Washer Drum Support Roller - for round ported models Idler Pulley Shaft Multi Rib Belt Washer Retaining Ring
  • Richard from Vassar, MI
  • Difficulty Level:
    Easy
  • Total Repair Time:
    1- 2 hours
  • Tools:
    Nutdriver, Screw drivers
1 person found this instruction helpful.
Was this instruction helpful to you?
Thank you for voting!
Screeching sound coming from back of the dryer.
First removed the bottom access panel, then the then pried the top lid open. Then, I could get to the four screws holding the front of the drum in place. Once that was removed, reached underneath drum and disconnected belt from tensioner pulley and motor. Removed the drum and discovered the problem. One of the two drum rollers had completely disintergrated from the shaft, actually "melting" off of its roller shaft. Removed both of the rollers and shafts by putting a flathead screwdriver on the slot of the shaft, and at the same time holding the locknut behind the bracket with a box wrench. I replaced both shafts and rollers and reused the same washers and snaprings. I used a screwdriver and a vice to remove the snap rings off of the old shafts. The best bet is to use a pair of snap ring pliers, which I didn't have. I used some white silicone grease to lube the new rollers up, reinstalled them and replaced the belt. You MUST route the belt around the drum before you install, then connect the belt to the motor underneath and wrap it around the tensioner. While I had everything opened up, I shop-vac"d the inside of my dryer(filthy). I did this before putting anything back together. Also, when re-installing the front dryer panel, make sure the motor inlet and the lint outlet tube form an airtight seal. All in all, this was a fairly strightforward job. The dryer now works great and is as quiet as a mouse.
Other Parts Used:
Drum Support Roller Idler Pulley Shaft Multi Rib Belt
  • Brian from Yucaipa, CA
  • Difficulty Level:
    A Bit Difficult
  • Total Repair Time:
    1- 2 hours
  • Tools:
    Screw drivers, Socket set
16 of 16 people found this instruction helpful.
Was this instruction helpful to you?
Thank you for voting!
Noisy dryer, sounded like drying tennis shoes
Ordered parts per recommendation of expert. Removed front of dryer, removed inner panel, replaced drum support roller, idler pulley shaft, and replaced the belt. Put inner front door on and then front of dryer, voila!!! It works just fine.
Other Parts Used:
Drum Support Roller - for round ported models Idler Pulley Shaft Multi Rib Belt
  • Cheryl from Flushing, MI
  • Difficulty Level:
    Really Easy
  • Total Repair Time:
    15 - 30 mins
  • Tools:
    Nutdriver, Screw drivers
8 of 11 people found this instruction helpful.
Was this instruction helpful to you?
Thank you for voting!
Loud chirpping noise
Unplug the dryer. Remove bottom panel by removing the two retaining nuts. Unplug the motor cable connections. Remove the blower unit. Remove the two screws holding the motor down. Release the belt by slipping it off the tension pulley. Slide the motor out carefully.

I had to replace the idler pulley shaft. The pulley had scored the shaft and was digging into it causing the excessive noise. Reinstall the new shaft and pulley. You will need to remove and re-attach the retaining ring.

I took the opportunity to then blow out the motor unit. It was filled with lint. I then decided to replace the original belt.

You need to unscrew the rear retaining clips and use a putty knife or (I ended up using a small tire tool) to lift and separate the top. I then slide the belt up to the front of the drum. I unscrewed each bolt from the drum and removed the belt at each corner. By doing this it kept the drum aligned with the unit. Then just reverse the process to install the new belt.

Re-install the parts in order of removal. Done. Total repair took about 45 minutes. Would have been quicker except I forgot to re-attach the power clip to the motor and had to remove the unit again.

Noise is gone, dryer runs like a champ, hopefully for another ten years.
Other Parts Used:
Thermostat Idler Pulley Wheel with Bearing Idler Pulley Shaft Multi Rib Belt
  • David from Winston, GA
  • Difficulty Level:
    A Bit Difficult
  • Total Repair Time:
    15 - 30 mins
  • Tools:
    Nutdriver, Screw drivers
10 of 24 people found this instruction helpful.
Was this instruction helpful to you?
Thank you for voting!
  • 1
Questions and Answers

Be the first to ask our experts a question about this part!

You May Also Need ?
Model Cross Reference
This part works with the following models:
PartSelect Number: PS11742857
Manufacturer Part Number: WP56461
Brand
Model Number
Description
Amana
7493-LEM437
Dryer - DRYER
Speed Queen
AE3213
Dryer - Residential
Speed Queen
AE3413
Dryer - Residential, Electric
Speed Queen
AE4113
Dryer - Residential
Speed Queen
AE4213
Dryer - Residential
Speed Queen
AE4413
Dryer - Residential, Electric
Speed Queen
AE5113
Dryer - Residential
Speed Queen
AE5213
Dryer - Residential
Speed Queen
AE5413
Dryer - Residential, Electric
Speed Queen
AE7133
Dryer - Residential
Speed Queen
AE7233
Dryer - Residential
Speed Queen
AE9133
Dryer - Residential
Speed Queen
AE9233
Dryer - Residential
Speed Queen
AE9433
Dryer - Residential, Electric
Speed Queen
AEE933
Dryer - Residential, Electric
Speed Queen
AEE953
Dryer - Residential, Electric
Speed Queen
AEM197
Dryer - Residential, Automatic
Speed Queen
AEM333
Dryer - Residential, Electric
Speed Queen
AEM353
Dryer - Residential, Electric
Speed Queen
AEM377
Dryer - Residential, Automatic
Speed Queen
AEM397
Dryer - Residential, Automatic
Speed Queen
AEM407L
Dryer - Residential, Automatic
Amana
AEM407L2
Dryer
Speed Queen
AEM407L2-PAEM402L2
Dryer - Speed Queen Dryer Model AEM407L2-PAEM402L2 (AEM407L2PAEM402L2, AEM407L2 PAEM402L2) Parts
Speed Queen
AEM407W
Dryer - Residential, Automatic
Amana
AEM407W2
Dryer
Speed Queen
AEM407W2-PAEM402W2
Dryer - Speed Queen Dryer Model AEM407W2-PAEM402W2 (AEM407W2PAEM402W2, AEM407W2 PAEM402W2) Parts
Amana
AEM427L2
Dryer
Speed Queen
AEM427L2-PAEM427L2
Dryer - Speed Queen Dryer Model AEM427L2-PAEM427L2 (AEM427L2PAEM427L2, AEM427L2 PAEM427L2) Parts
Speed Queen
AEM427W
Dryer - Residential, Automatic
Customer Service Representative

Get in touch, we're here to help!

Daily 8am - 9pm EST

Contact Customer Service