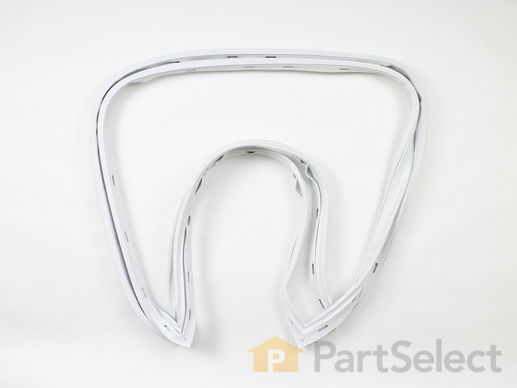
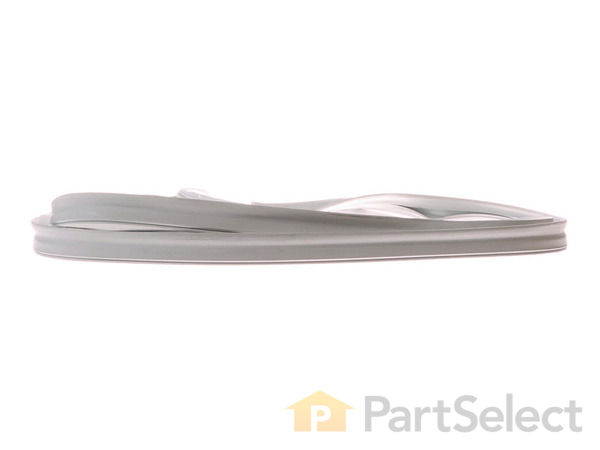
We're sorry, but our Q&A experts are temporarily unavailable.
Please check back later if you still haven't found the answer you need.
4 questions answered by our experts.
< Prev
1
Next >
Sort by:
Search filter:
Clear Filter
Your search term must have 3 or more characters.
Keep searches simple. Use keywords, e.g. "leaking", "pump", "broken" or "fit".
Sorry, we couldn't find any existing answers that matched.Try using some different or simpler keywords, or submit your new question by using the "Ask a Question" button above!
Michael
March 22, 2018
When i performed the search, this model is not listed. I used the next closest model number (ucf200/g). I am inquiring as to whether or not the gasket seal is the same dimensions and will fit my model (ucf200/c). The freezer is about 20 years old and runs like a champ but the seal is that old as well and is in need of replacement. I just want to verify before i spend $190.00 only to have to send it back for it being incompatible. Thanks you in advance for the assistance. Mike
For model number UCF200/C
Hello Michael, Thank you for contacting us. I have researched the model you have provided and have found the part you’re looking for is Part Number: PS11742228. Hope this helps!
6 people found this helpful.
Was this helpful?
Thank you for voting!
Guy
December 5, 2021
My Amana upright freezer door is not sealing well anymore. I’m trying to find the correct part # to purchase to replace it. Any help would be great. Thanks
For model number ESU20JW
Hello Guy, Thank you for contacting us. We have researched the model you have provided and have found the part you are looking for is PartSelect Number PS11742228. If you need help placing an order, customer service is open 7 days a week. Please feel free to give us a call. We look forward to hearing from you!
Was this helpful?
Thank you for voting!
Duane
October 24, 2022
To Whom It May Concern - I have an old United Commercial Heavy Duty freezer that's not sealing around the door properly (it frosts up very heavily) The Model Number is UCF200/C and the Serial Number is 00706777CD. It was manufactured March 1997. I really don't want to get rid of it but if I can't find parts I may have too. Thanks! Duane Decker 360.601.4341
Hello Duane, thank you for contacting us. According to our research, this part will fix your issue. If you require assistance to place an order, please contact customer service. We hope that helps!
Was this helpful?
Thank you for voting!
Kelley
January 17, 2023
Hello. I have an old United refrigeration company model UFC 200 that I am looking for a door gasket for a serial number is 00505884JB. I would like to know if this gasket will fit said freezer as the Dimensional drawings and likeness are quite similar.
For model number UFC200
Hi Kelley, thank you for your inquiry. Yes, this gasket will fit your model. Customer service is available 7 days a week if you require assistance placing an order. Thanks again for reaching out!
Was this helpful?
Thank you for voting!
< Prev
1
Next >
Customer Repair Stories
Average Repair Rating: 2.9 / 5.0, 6 reviews.
What's this?
< Prev
1
Next >
Sort by:
Search filter:
Clear Filter
Your search term must have 3 or more characters.
Keep searches simple. Use keywords, e.g. "leaking", "pump", "broken" or "fit".
Sorry, we couldn't find any existing installation instruction that matched.
Door stopped sealing in lower section of the door
Remove lower door hinge only, and door pops out. Then lay door on floor and remove the screws fastening the inner freezer tray & gasket to the door; this is where the cordless drill w/nut driver attachment is handy as there are 30+ screws to remove and an open freezer with all your food gaining temperature. At this point drop the new gasket in the dryer on low heat for 5-10 mins to soften it, regardless of it's condition. Have someone clean the sealing area on the freezer and where you have removed the old gasket on the door while you fit the new gasket in. Renew all rusted screws and smear a little grease on hinge for future protection since the door is off. Remount door and check for leaks, the door should close and seal on it's own WITHOUT pushing. This is where I realised the importance of warming the gasket, I got lucky by passing a blow dryer along the leaking areas with the door closed. Point: When buying a new freezer look for compression of the gasket which is an indicator of a warped door. My freezer is only 5yrs old and I shouldn't be changing the gasket so soon!
Leif from Miami, FL
Difficulty Level:
Easy
Total Repair Time:
15 - 30 mins
Tools:
Nutdriver, Socket set
32 of 34 peoplefound this instruction helpful.
Was this instruction helpful to you?
Thank you for voting!
Bad seal/gasket on freezer door.
Using a 3/8" wrench I took the top hinge off of the door. I had a friend around so I put him to work but the project could be done alone. We set the door on a countertop and began removing the old gasket with the nut driver on a cordless drill/screwgun. We eventually decided it was worth the extra effort to set the door on sawhorses in the garage (where the freezer is located).
I had stored the new gasket in the garage before installation and wished I had brought it inside to warm it up first. I remembered reading posts about using a hair dryer to soften the gasket but forgot about the post about putting the gasket in the clothes dryer for a few minutes. Stretching the new gasket around the door while it was cold was tricky in some spots but doable. One or two of the the corners of the new gasket began to pull apart but not enough to compromise the seal - although for the price of the gasket, I would have rather this not happened. I wish I would have used the clothes dryer first. Instead, we simply threw in a few screws in places and stretched the gasket around the corners. This was one time I was especially glad to have another person around.
After negotiating the corners and replacing all of the screws, we quickly placed the door back on the bottom hinge and put the top hinge back on. It was again nice to have a friend help square up the door before tightening the top hinge. We used a hair dryer to soften the gasket and a lot of hand work to mold the gasket and close the gap beyween the door and the freezer. Again, I think the clothes dryer would have saved time here as well. The gasket was quite compressed and needed a lot of work to help it "open up" and make a good seal.
Good luck on your own repair!
Jeff from North Jackson, OH
Difficulty Level:
Easy
Total Repair Time:
30 - 60 mins
Tools:
Nutdriver, Socket set, Wrench set
16 of 16 peoplefound this instruction helpful.
Was this instruction helpful to you?
Thank you for voting!
Ice was building up in freezer
My seal around the freezer door was in need of changing. Placed the new seal in the dryer for about 10min while I removed all the screws from around the door. When I got to the bottom of the door the screws were rusty. Removed the old seal. Have back up screws on hand incase this happens. I cleaned the area at the bottom of the door that had become rusty. Then draped the new seal over the top of the door and started screwing the new one to the door. It was done! Pretty quick and easy.
Brad from Springtown, TX
Difficulty Level:
Easy
Total Repair Time:
30 - 60 mins
Tools:
Screw drivers, Socket set
8 of 9 peoplefound this instruction helpful.
Was this instruction helpful to you?
Thank you for voting!
Door gasket leak
Followed other instructions posted. Put gasket in dryer for a few minutes. My son held gasket back while I removed/reinstalled screws. It would have been much more difficult if I had attempted to do it by my self
Followed instructions including web. Soaked new gasket in HOT water. Took door off freezer and put it on horses. Two person job.
Richard from Newark, DE
Difficulty Level:
A Bit Difficult
Total Repair Time:
More than 2 hours
Tools:
Nutdriver
4 of 5 peoplefound this instruction helpful.
Was this instruction helpful to you?
Thank you for voting!
Door gasket not sealing allowing ice/ frost to form around and inside the door.
It was easy to take the door off by taking the two screws (located on the top of the freezer) off the top hinge and lift the door up off the bottom hinge. I took it outside and laid it on a table. Removed all the screws and took off the panel so I could remove the old gasket and clean the door and panel. The inside of the door was full of ice so we removed that and the insulation which I replaced. My wife then put the new gasket in the dryer on medium temp for about 5 minutes. We slipped the new gasket on the panel and lined it up on the door and screwed it back on the door. Then we put it back onto the freezer bottom first then replaced two screws on top hinge. Shut the door and use a blow dryer on the gasket with the door closed to make the gasket seal / conform to the door/freezer until there are no gaps between the gasket and the freezer. Note: Once the ice and water are out of the door the door doesn't weigh nearly as much as it did. Also
Cliff from SLOCOMB, AL
Difficulty Level:
Really Easy
Total Repair Time:
1- 2 hours
Tools:
Nutdriver
1 personfound this instruction helpful.
Was this instruction helpful to you?
Thank you for voting!
< Prev
1
Next >
Customer Reviews
Average Rating:
★★★★★
★★★★★
3 Reviews
5.0
Filter By Rating:
5 Stars
3
4 Stars
0
3 Stars
0
2 Stars
0
1 Star
0
< Prev
1
Next >
Sort by:
Search filter:
Clear Filter
Your search term must have 3 or more characters.
Keep searches simple. Use keywords, e.g. "leaking", "pump", "broken" or "fit".
Sorry, we couldn't find any existing reviews that matched. Try using some different or simpler keywords.
★★★★★
★★★★★
Betty S - November 21, 2018
Verified Purchase
Easy to install.
Freezer working great now!
★★★★★
★★★★★
Michael A - August 24, 2018
Verified Purchase
Perfect fit
Shipped quick and was a perfect fit after many weeks of searching for the right part.
★★★★★
★★★★★
Roland D - August 19, 2018
Verified Purchase
Easy repair!
Perfect fit and online instructions made I easy!
< Prev
1
Next >
Model Cross Reference
This part works with the following models:
PartSelect Number: PS11742228
Manufacturer Part Number: WP4-81049-001
The Fix App makes it easy to manage all your stuff in one place. Just snap a photo and we'll find and store your user manuals, receipts, and product information in one easy-to-find place!
"Like magic. I took a picture of the model number on my refrigerator, and the app identified it right away … Very convenient. I'm impressed." ★★★★★ - Clever Jeff