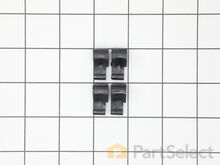
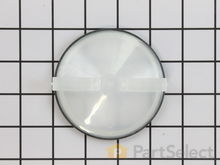
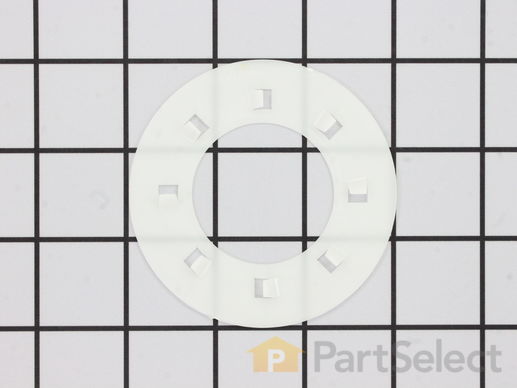
Part Location Diagram of WP3951608 Whirlpool Spacer, Thrust
See part 22 in the diagram
( Grid squares measure 1x1 inch )
Customer Service Representative

Get in touch, we're here to help!

Daily 8am - 9pm EST

customerservice@partselect.com

Spacer, Thrust WP3951608

★★★★★
★★★★★
1 Review

Rated by 20 customers 

Really Easy 

15 - 30 mins 

Ratings submitted by customers like you who bought this part.

$ 11.10
  In Stock
Get FREE EconoShip on orders over $100! T&C apply

Get this part fast! Average delivery time for in-stock parts via standard shipping: 1.8 days.

PartSelect Number PS11742044
Manufacturer Part Number WP3951608
Manufactured by Whirlpool
Product Description

Spacer, Thrust Specifications

Sits in between the agitator base and upper agitator.
How Buying OEM Parts Can Save You Time and Money

How Buying OEM Parts Can Save You Time and Money

Troubleshooting
This part fixes the following symptoms:
Will not agitate
This part works with the following products:
Washer, Washer Dryer Combo.
This part works with the following products:
Whirlpool, Amana, Crosley, Estate.
Part# WP3951608 replaces these:
AP6008903, 3951608
Back to Top
Customer Reviews
Average Rating:
★★★★★
★★★★★
1 Review
5.0
Filter By Rating:
  • 5 Stars
    1
  • 4 Stars
    0
  • 3 Stars
    0
  • 2 Stars
    0
  • 1 Star
    0
Sort by:
  • 1
Sorry, we couldn't find any existing reviews that matched. Try using some different or simpler keywords.
  • 1
Customer Repair Stories
 Average Repair Rating: 4.1 / 5.0, 20 reviews. What's this?
Sort by:
  • 1
  • 2
Sorry, we couldn't find any existing installation instruction that matched.
Replaced the motor coupling 2 weeks before, when I started using again noticed the agitator wasn’t moving clothes. Started investing and found out about the “ dogs “. Tore into my machine. Sure enough! That was the problem!
Followed the video
Other Parts Used:
Spacer, Thrust Agitator Directional Cogs
  • Karen from FLETCHER, NC
  • Difficulty Level:
    Really Easy
  • Total Repair Time:
    30 - 60 mins
  • Tools:
    Nutdriver, Pliers, Socket set
1 person found this instruction helpful.
Was this instruction helpful to you?
Thank you for voting!
Upper agitator would not push clothes down as required for cleaning
I went on YouTube and seen how to do this job it showed it to be quite simple I then went on parts select.com put in my model serial number and was able to come up with a complete parts breakdown I then ordered the parts that I needed when they arrived I installed them the washer is working great thank you Parts select
Other Parts Used:
Spacer, Thrust Agitator Cam Kit
  • Edward from JUSTICE, IL
  • Difficulty Level:
    Very Easy
  • Total Repair Time:
    15 - 30 mins
  • Tools:
    Socket set
2 of 2 people found this instruction helpful.
Was this instruction helpful to you?
Thank you for voting!
Top half of agitator would not work.
My unit is 12 years old and this is the first issue I have had with it "Whirlpool washing machine". Repair was very easy and simple. The only problem I ran into was the agitator bolt head had came into contact with water. The head had rusted and crumbled witch made the repair take longer than normal.
I had my daughter time the reassembly witch took 8 minutes. I strongly suggest using name brand parts over aftermarket, wither you get them from PartSelect or elsewhere I don't care. Try the repair yourself, you can do it.
Other Parts Used:
Washer, Agitator Spacer, Thrust Agitator Bolt Agitator Cam Kit
  • jason from ATHENS, TN
  • Difficulty Level:
    Very Easy
  • Total Repair Time:
    15 - 30 mins
  • Tools:
    Screw drivers, Socket set
4 of 8 people found this instruction helpful.
Was this instruction helpful to you?
Thank you for voting!
Upper agitator would not move
Begin by removing the fabric softener dispenser then the barrier cap can be pulled from the agitator this will allow access to the agitator retainer bolt use an 11mm socket and extension to remove it once the bolt is out the agitator assembly can be pulled straight up out of the machine. To separate the upper agitator from the lower placing the agitator on the floor and placing your feet on the lower half and pulling up on the upper half will separate the two parts, however before performing this operation the agitator cam assembly may be heat set in place, looking down into the upper agitator there are four lugs that hold the cam in place if you use a sharp knife and cut thru the areas that have been heated and welded together separation of the two half's will be made easier. Once all the old cam parts are out reassemble the new parts the same way as the old ones were removed, the cam kit and the thrust washer kit come with a diagram in case you forget how to reassemble the parts. The agitator assembly simply slips back onto the drive splines, the attachment bolt has a seal under it that can be crushed if the attachment bolt is tightened too tight, I could not find a torque specification for this bolt so what I did was tighten the bolt until it contacted the seal completely and then applied just enough torque to turn the bolt until the agitator began to turn along with the bolt, then just install the barrier cap and seal and replace the fabric softener dispenser and the job is done, if you're washer is like mine I spent more time cleaning parts than actually performing this repair.
Other Parts Used:
Agitator Cap Barrier with Seal Spacer, Thrust Direct Drive Motor Coupling Agitator Cam Kit
  • Nathan from OCEANSIDE, CA
  • Difficulty Level:
    Easy
  • Total Repair Time:
    30 - 60 mins
  • Tools:
    Socket set
4 of 4 people found this instruction helpful.
Was this instruction helpful to you?
Thank you for voting!
My washer was squealing on the spin cycle! Also shaking & moving!
We also purchased from this site the agitator repair kit! The youtube videos were extremely helpful!
  • Donna from IRON MOUNTAIN, MI
  • Difficulty Level:
    Really Easy
  • Total Repair Time:
    30 - 60 mins
  • Tools:
    Nutdriver, Socket set, Wrench (Adjustable)
2 of 2 people found this instruction helpful.
Was this instruction helpful to you?
Thank you for voting!
uper agitator not moving
after i got the part... problem with fedex in my area had the washer going before the truck drove off. Very good instrection thanks
Other Parts Used:
Spacer, Thrust Agitator Cam Kit
  • Charlie from Lockney, TX
  • Difficulty Level:
    Really Easy
  • Total Repair Time:
    Less than 15 mins
  • Tools:
    Socket set
1 of 2 people found this instruction helpful.
Was this instruction helpful to you?
Thank you for voting!
no agitation
Removed agitator found the agitator dogs were broke, identified all parts needed ordered from PartSelect, recieved all parts , repair was very simple 10 min job , works great! Saved lots of money !
Other Parts Used:
Agitator Cap Barrier with Seal Agitator Directional Cogs Fabric Softener Dispenser Spacer, Thrust Washer Agitator Cam Kit
  • Samuel from Auburndale, FL
  • Difficulty Level:
    Really Easy
  • Total Repair Time:
    Less than 15 mins
  • Tools:
    Socket set
2 of 3 people found this instruction helpful.
Was this instruction helpful to you?
Thank you for voting!
stop agitator not turning
popped off the softener cap, removed inner seal cap, removed bolt holding the top agitator and removed top agitator by pulling up. Removed the ring holding the dogs in place. Replaced the dogs and slipped it all back together
Other Parts Used:
Seal, Inner Cap Agitator Directional Cogs Spacer, Thrust
  • Robert from Millsboro, DE
  • Difficulty Level:
    Easy
  • Total Repair Time:
    Less than 15 mins
  • Tools:
    Socket set
2 of 3 people found this instruction helpful.
Was this instruction helpful to you?
Thank you for voting!
top of agitator not turning
The whole process is almost intuitive if you have taken things apart before. Pull up on the softener dispenser and remove it. Reach into the center of the agitator post, grip the handles on the sealing disc, twist and pull to remove. This exposes the bolt holding the agitator down. Use an 11mm socket and an extension to remove the bolt. Pull the assembly in one piece. Separate the top from the bottom carefully, remove the cam assembly from the top section. Place the new asssembly in its place and reassemble the agitator in the reverse order. When reinserting the sealing disc, clean the surfaces carefully, coat the O-ring with liwuid soap, and twist the disc while pressing down to ensure a good seal.
Other Parts Used:
Spacer, Thrust Agitator Cam Kit
  • Russell from Bella Vista, AR
  • Difficulty Level:
    Easy
  • Total Repair Time:
    15 - 30 mins
  • Tools:
    Socket set
1 of 3 people found this instruction helpful.
Was this instruction helpful to you?
Thank you for voting!
Agitator cogs was worn out
remove the lid and screw pull out agitator and replaced it, very easy. My neighbor threw it out because of this, smh i just got a new washer for free
Other Parts Used:
Agitator Directional Cogs Fabric Softener Dispenser Spacer, Thrust
  • Hector from Bronx, NY
  • Difficulty Level:
    Really Easy
  • Total Repair Time:
    Less than 15 mins
  • Tools:
    Socket set
0 of 1 people found this instruction helpful.
Was this instruction helpful to you?
Thank you for voting!
  • 1
  • 2
Questions and Answers

Ask our experts a question about this part and we'll get back to you as soon as possible!

1 question answered by our experts.
Sort by:
  • 1
Sorry, we couldn't find any existing answers that matched.Try using some different or simpler keywords, or submit your new question by using the "Ask a Question" button above!
David
February 13, 2018
I replaced the clutch assembly, and don't know where the plastic thrust washer #wp3951608 goes inside the agitator assembly
For model number LSQ8500JQ1
PartSelect logo
Hi David, Thank you for the question. The Thrust Spacer sits in between the agitator base and upper agitator. Hope this helps!

12 people found this helpful.

Was this helpful?
Thank you for voting!
  • 1
You May Also Need ?
Model Cross Reference
This part works with the following models:
PartSelect Number: PS11742044
Manufacturer Part Number: WP3951608
Brand
Model Number
Description
Kenmore
11020232711
Washer - Washer
Whirlpool
1CLSQ9549PG0
Washer - Residential
Whirlpool
1CLSQ9549PG1
Washer - Residential
Whirlpool
1CLSQ9549PW0
Washer - Residential
Whirlpool
1CLSQ9549PW1
Washer - Residential
Whirlpool
1CWTW4800YQ1
Washer - WASHER
Whirlpool
1CWTW4800YQ2
Washer - WASHER
Whirlpool
1CWTW5200VQ0
Washer - Residential
Whirlpool
1CWTW5200VQ1
Washer - Residential
Whirlpool
1CWTW5300VW0
Washer - Residential
Whirlpool
1CWTW5300VW1
Washer - Residential
Whirlpool
1CWTW5500SQ0
Washer - Residential
Whirlpool
1CWTW5500ST0
Washer - Residential
Whirlpool
1CWTW5520SQ0
Washer - Residential
Whirlpool
1CWTW5700SW0
Washer - Residential
Whirlpool
1CWTW5790VQ0
Washer - Residential
Whirlpool
1CWTW5790VQ1
Washer - Residential
Whirlpool
1CWTW57ESVW0
Washer - Residential
Whirlpool
1CWTW57ESVW1
Washer - Residential, Automatic
Whirlpool
1CWTW5800SG0
Washer - Residential
Whirlpool
2DLSQ7533JQ0
Washer - WASHER
Whirlpool
2DLSQ7533JQ3
Washer - Residential
Whirlpool
2DLSQ7533JQ4
Washer - Residential
Whirlpool
2DLSQ7533JQ5
Washer - Residential
Whirlpool
2DLSQ8000JQ0
Washer - Residential
Whirlpool
2DLSQ8000JQ3
Washer - Residential
Whirlpool
2DLSQ8000JQ4
Washer - Residential
Whirlpool
2DLSQ8000JQ5
Washer - Residential
Whirlpool
2DWTW4800YQ0
Washer - Residential, Automatic
Whirlpool
2DWTW5405SQ0
Washer - Residential
Customer Service Representative

Get in touch, we're here to help!

Daily 8am - 9pm EST

Contact Customer Service