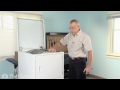
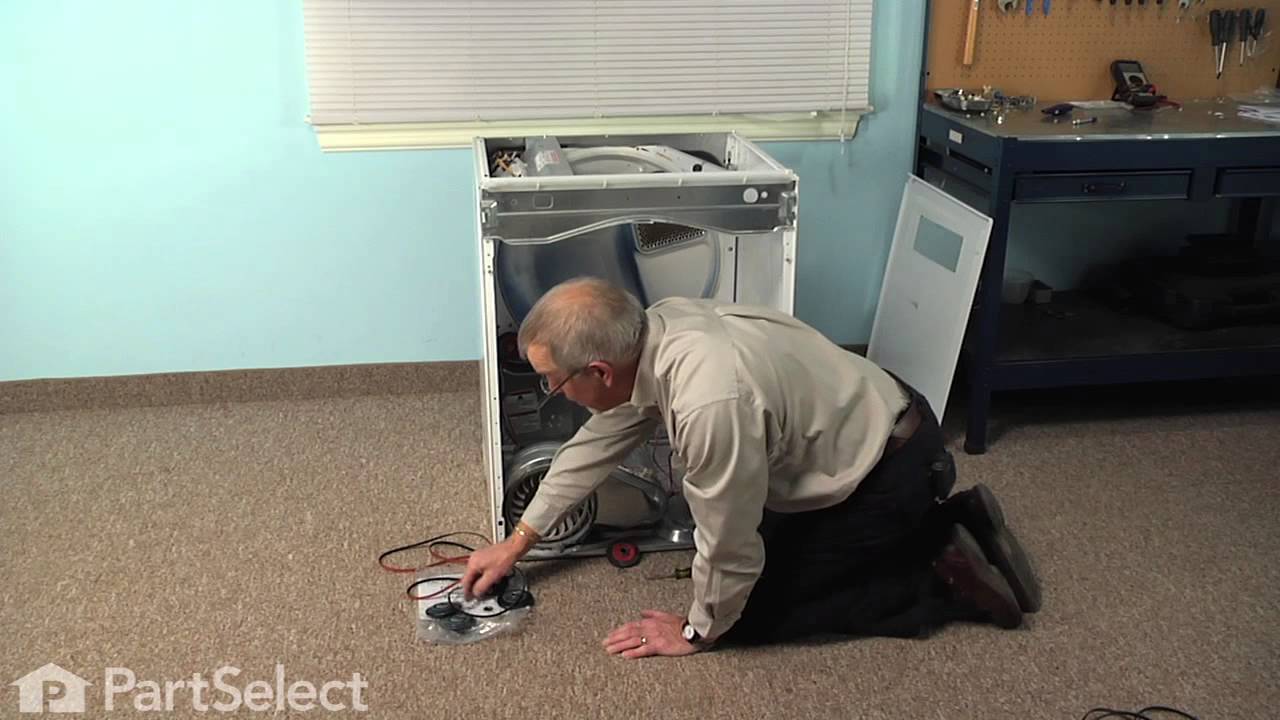
If your dryer is noisy, will not tumble, or is leaving marks on your clothes, you may need to replace the drum glide. The drum glide is installed on the front bulkhead either at the top or the bottom, regardless of the brand of dryer. To gain access to the drum glide, you will have to open the cabinet on the dryer. This drum glide is sold individually but it is important to note that they should be replaced in pairs. Before beginning this repair, it is important to disconnect the dryer from the power source. The tools required for this repair are a putty knife and a 5/16 nut driver.
Keep searches simple. Use keywords, e.g. "leaking", "pump", "broken" or "fit".
Sorry, we couldn't find any existing reviews that matched. Try using some different or simpler keywords.
★★★★★
★★★★★
Terry C - March 27, 2019
Verified Purchase
Drum Glide
This is a replacement for the original drum glide on a Speed Queen AEM 697 electric dryer. The profile was the same as the original part, but it was much thicker, so the new oem style felt pads weren't installed beneath the glide. Also, the 'T' end wouldn't fit into the bracket slot, requiring modification before it could be installed. All in all, the part performs as is should, but don't expect a 'plug and play' installation.
★★★★★
★★★★★
James B - February 20, 2019
Verified Purchase
So simple, avg. homeowner can do it!
Problem began with squealing, I ordered a new belt. After taking the dryer apart, discovered the real issue was the tensioner pulley was seizing up, and worn down from the belt. Immediately got on Part Select.com ordered the pulley, and even though the drum glides were in decent condition, replaced the "wear" in them with new ones. Added on the next step up shipping(2-3 days), on Mon. @ 2:00 P.M., Parts were at my door next day @ 1:00P.M. Part select takes a lot of pressure off
of having never worked on a dryer before, with the identical part and QUICK RESPONSE! Now, what else needs fixing?
★★★★★
★★★★★
FRANK W - December 17, 2018
Verified Purchase
Great Part
easy to install
★★★★★
★★★★★
BRAD Z - December 3, 2018
Verified Purchase
easy repair worked reat
all is good thank you for quick service
★★★★★
★★★★★
Karen L - November 23, 2018
Verified Purchase
Easy repair
Easy to install, works great
★★★★★
★★★★★
Nick R - August 7, 2018
Verified Purchase
Fassssstt delivery
Parts came rapidly, fit perfectly. Would definitely recommend this site.
★★★★★
★★★★★
Robert C - August 2, 2018
Verified Purchase
Great part
The part came quickly and the dryer is working perfect.
★★★★★
★★★★★
Amanda A - May 31, 2018
Verified Purchase
Dryer repaired
This part along with a few others came fast and my repair was a success!
★★★★★
★★★★★
Maureen H - April 3, 2018
Verified Purchase
Worked great - up and running
Received the part in 2 days it was easy to install. Thanks so much!
★★★★★
★★★★★
Linda W - February 19, 2018
Verified Purchase
Easy repair.
My dryer is working again in record time.
< Prev
1
Next >
Customer Repair Stories
Average Repair Rating: 3.4 / 5.0, 50 reviews.
What's this?
Sort by:
< Prev
1
2
3
Next >
Search filter:
Clear Filter
Your search term must have 3 or more characters.
Keep searches simple. Use keywords, e.g. "leaking", "pump", "broken" or "fit".
Sorry, we couldn't find any existing installation instruction that matched.
loud screeching noise, motor seized, long time to dry
disassembling took about ten minutes. found that lint needed to be cleaned out. idler lever pulley was locked up and the belt had worn the pulley down. guide felt pads were off the drum guides. motor seized up. studied videos and ordered parts for each problem. once parts arrived the total repair took a total of 45 minutes. saved $300-400
... Read more, and did not have to buy a new dryer. dryer working better than it has in four or five years, heating up better and no noise. would recommend buying own parts and replacing. on a scale of 1-10, this is a 2. this is an electric dryer. hope this helps!
dryer made squeaking noise when first starting to run
I first watched the video and disassembled the dryer to see if I could determine what part was squeaking. All looked good except the wheel on the Idler lever which was tight. I vacuumed up the years of lint and reassembled the dryer and waited for the parts to arrive. I ordered the idler lever and also the 2 drum support wheels, belt and
... Read more2 drum guides since I thought that is was a good idea to go ahead and replace these parts once I had the dryer disassembled again. Good choice on the belt as once I removed the old belt there was a crack on the underside of the belt. I bought snap ring pliers at home depot but the tips were too big to fit the holes on the snap rings on the drum rollers. I bought another snap ring plier set from an automotive store that came wth 5 snap ring attachments - but again all were too large to fit the snap rings on the drum support rollers. I used a nail and small screwdriver to expand and pull off the snap rings but this approach was frustrating and time consuming. Not sure where to get snap ring pliers that are small enough to fit the holes on the snap rings - so hope that you have better luck locating a set thats small enough! I was able to return the pliers that I purchased - so all good. I was surprised at how easy the dryer came apart and how easy it was easy to work on. When disassembling the dryer - we took pictures of the wire connections before we disconnected them, however at one point we tilted the dryer back to clean behind it and the top slipped a little away from the side panel of the dryer and one of the wires that was connect to the wire block that is up by where the power cord connects cam loose - and it took some time to find and figure out a wiring diagram for this connection. Suggest that you take a pictire of this wire connection block once you lift the lid - just in case a slip occurs and a wire may disconnect. When replacing the idler lever - have a little grease available when you install the new idler lever (between the arm and the bolt area as it constantly moves and the old brease has probably worn away) . After making these repairs I dont think I will ever buy a new dryer as any part , including the heater and motor would be easy to replace and cheaper than a new dryer.
showed starting withe removal of the dryer top. With my dryer, I needed to start by removing the bottom front panel (2 screws). Next the door panel (2 screws). Now I could remove the top panel (2 screws). From here, the tear down went like the directions th My biggest problems were, figuring out I didn't start with the dryer top. Then
... Read more getting a proper sized snap ring pliers to remove the drum rollers and and the idler pulley.
Rumbling and thumping then the drum failed to rotate under power
There was initial rumbling and thumping then the drum failed to rotate under power. I could however rotate the drum by hand. This site suggested the rollers or belt as well as the idler assembly. I decided to renew all the wearable parts and ordered the belt, rollers, glides and idler assembly. It was in fact the idler. The idler wheel h
... Read moread disintegrated and collapsed in the center. It must have run (rumbling) until it finally seized and stopped. Replaced all the parts and the dryer is even better now than new. It was a good opportunity to vacuum out all the lint inside the cavity (that took most of the time and also found $0.36 in loose change). Also found it easier to remove the electrical connections with pliers rather than pull on the wires and risk detaching the wire from the clip.
This dryer is an older one. I have kept it running throughout the years by just replacing parts a needed. This was a kind of rebuild. The dryer was making that squeaking noise when running so I knew the "glides" were worn and the belt, rollers and idler pulley had never been replaced. I ordered the parts from this website and I must say i
... Read moret took a while for them to ship, of course I guess since it was during the holidays that's to be expected. Once I received the parts I took the dryer apart. This model has a lower panel that comes off first then there are two 5/16" sheet metal screws that hold the door panel in place and then two more to hold the top down. Then I removed the front bulkhead which holds the drum glides. I replaced the glides then removed the drum from the dryer. To removed the motor there are two 5/16" screws to removed then pull the motor from the bottom. I then replaced the idler pulley, the two drum rollers on the rear of the dryer and the belt on the drum. Reassembly went fairly easy. I found the door switch was bad during reassembly because the dryer would not shut off once the door was opened. So picked up a new door switch from a local supplier, replaced it and all is good now. There really isn't that much to a dryer. A motor, heating unit (in the rear), control unit/timer on top, and then the rollers, idler pulley, and drum belt. The video instructions on this website were quite helpful. Hopefully it will last another year.
Loud squealing noise coming from the idler pulley. The pulley was not spinning freely on the shaft of the idler pulley lever to the point of putting a groove in the pulley and damaging the belt. To fix the problem replaced the belt, idler pulley, and idler pulley lever. Because I had the dryer apart also replace the following items. Dru
... Read morem support roller and drum slides.
1st of all my dryer came apart differently than your video showed. I had to remove the lower front panel (2 5/16 screws) then remove the upper front panel (2 5/16 screws)and the spring clips mentioned in the video, then the top with two more screws. After that the removal of the front drum support assembly was as shown in the video. I
... Read morethen loosened the drive belt, removed the drum and the external grip ring securing the idler pulley. The pulley rotated very hard since the shaft and bearing were partially seized. I cleaned the shaft before installing the new pulley. When I initially took the dryer apart to see what the problem was I noticed the front drum guides were showing wear so I ordered and replaced them and the felt pads just to prevent problems in the near future.
Ask our experts a question about this part and we'll get back to you as soon as possible!
2 questions answered by our experts.
Sort by:
< Prev
1
Next >
Search filter:
Clear Filter
Your search term must have 3 or more characters.
Keep searches simple. Use keywords, e.g. "leaking", "pump", "broken" or "fit".
Sorry, we couldn't find any existing answers that matched.Try using some different or simpler keywords, or submit your new question by using the "Ask a Question" button above!
Norm
July 21, 2021
Ps11741931 drum glide - how many come in this pack - it looks like the original uses 2 slides and 1 pad per side is that correct is this slide a 2 pack ?
For model number sde3606ayw
Hi Norm,
Thank you for your question. The drum glides are sold indiviidually. We hope this helps! Good luck with the repair!
4 people found this helpful.
Was this helpful?
Thank you for voting!
Janet
May 27, 2022
Does this cabrio dryer have drum glides, or just rollers?
For model number WED6600VWO
Hello Janet, thank you for your question. for model WED6600VW0, there are Rollers only PS11752609. If you need help placing an order, customer service is open 7 days a week. Please feel free to give us a call. We look forward to hearing from you.