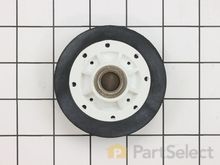
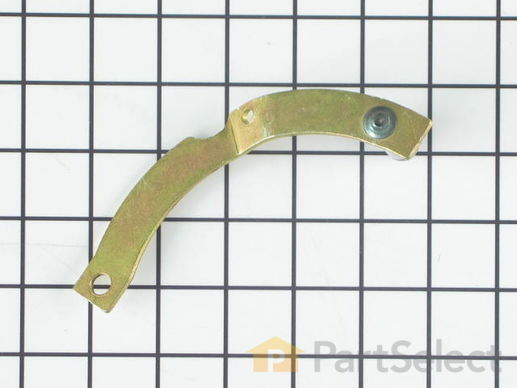
Part Location Diagram of WP37001144 Whirlpool Idler Pulley Lever and Shaft
See part 13 in the diagram
( Grid squares measure 1x1 inch )
Customer Service Representative

Get in touch, we're here to help!

Daily 8am - 9pm EST

customerservice@partselect.com

Idler Pulley Lever and Shaft WP37001144

Rated by 15 customers 

Easy 

1- 2 hours 

Ratings submitted by customers like you who bought this part.

$ 37.89
  In Stock
Get FREE EconoShip on orders over $100! T&C apply

Get this part fast! Average delivery time for in-stock parts via standard shipping: 1.8 days.

PartSelect Number PS11741920
Manufacturer Part Number WP37001144
Manufactured by Whirlpool
Product Description

Idler Pulley Lever and Shaft Specifications

This arm is what attaches to the idler pulley wheel.
How Buying OEM Parts Can Save You Time and Money

How Buying OEM Parts Can Save You Time and Money

Troubleshooting
This part fixes the following symptoms:
Noisy
This part works with the following products:
Dryer.
This part works with the following products:
Amana, Speed Queen, Maytag, Crosley.
Part# WP37001144 replaces these:
AP6008779, 37001144, 40113501, 5-0910, 500910
Back to Top
Customer Repair Stories
 Average Repair Rating: 2.8 / 5.0, 15 reviews. What's this?
Sort by:
  • 1
  • 2
Sorry, we couldn't find any existing installation instruction that matched.
The wheel bearing it doesn't work
Just take the old parts with my tools and fix it, i did take the pulley bearing with care and put the new one, and adjust the screw on the motor base, the belt just was a little difficult but I did it, it's easy.
Other Parts Used:
Idler Pulley Wheel with Bearing Idler Pulley Lever and Shaft
  • Diego from DORAVILLE, GA
  • Difficulty Level:
    Easy
  • Total Repair Time:
    15 - 30 mins
  • Tools:
    Pliers, Screw drivers, Socket set
4 of 4 people found this instruction helpful.
Was this instruction helpful to you?
Thank you for voting!
Loud squealing noise
Loud squealing noise coming from the idler pulley. The pulley was not spinning freely on the shaft of the idler pulley lever to the point of putting a groove in the pulley and damaging the belt. To fix the problem replaced the belt, idler pulley, and idler pulley lever. Because I had the dryer apart also replace the following items. Drum support roller and drum slides.
Other Parts Used:
Idler Pulley Wheel with Bearing Idler Pulley Spring Multi Rib Belt Drum Glide Idler Pulley Lever and Shaft Drum Support Roller Retaining Ring Single Drum Glide Felt Pad Thrust Washer
  • Bruce from Frazer, PA
  • Difficulty Level:
    Easy
  • Total Repair Time:
    1- 2 hours
  • Tools:
    Nutdriver, Screw drivers, Socket set
1 person found this instruction helpful.
Was this instruction helpful to you?
Thank you for voting!
Progressively louder squeaky noise when drying
I followed the instructions found on this site. The hardest part was figuring out how to release the clamps at the front of the dryer so I could remove the top.

The key was to unbolt the clamps at the back of the dryer first, then to use a putty knife to release the two clamps at the front of the dryer that hold the top to the front.

The rest was easy by following the steps already listed on this site and removing the two front pieces, then the drum and replacing the parts. Putting it back together was simple since I placed things in order and had taken pictures with my cell phone as I went through the process.

The time I took, included vacuuming the inside of the dryer thoroughly. Now it runs like new.
Other Parts Used:
Idler Pulley Wheel with Bearing Idler Pulley Spring Drum Support Roller and Shaft Assembly Multi Rib Belt Idler Pulley Lever and Shaft Drum Support Roller
  • George W from Austin, TX
  • Difficulty Level:
    A Bit Difficult
  • Total Repair Time:
    More than 2 hours
  • Tools:
    Pliers, Screw drivers, Wrench set
4 of 5 people found this instruction helpful.
Was this instruction helpful to you?
Thank you for voting!
Dryer making loud squeeking noises
The pully wheel was completely worn down as the belt had cut into it over time. I'm not sure if the lever and shaft needed replacing but since the part was inexpensive I decided to replace it as well as the wheel. The easiest way to access the parts was to turn the dryer on its side and remove the bottom panel of the dryer. This eliminated the need to remove the drum. It was then easy to reach in with a wrench and remove nut and bolt that held on the pulley lever. I also had to remove the spring which was attached to the lever. Next I put the new pully wheel on the shaft of the new pulley lever. The most difficult part of the job was installing retainer clip which holds the wheel on the shaft. This took a little persistance. After this was done it was simple to put the assembly back in place, reattach the spring and tighten the nut and bolt. I then replaced the bottom panel of he dryer, turned it upright and plugged it in. The whole job took just over an hour. One tip: Before removing the old assembly, I took a picture of it with my cell phone camera so I would remember how it went back together.
Other Parts Used:
Idler Pulley Wheel with Bearing Idler Pulley Lever and Shaft Retaining Ring
  • James from North Kingstown, RI
  • Difficulty Level:
    Easy
  • Total Repair Time:
    1- 2 hours
  • Tools:
    Pliers, Socket set, Wrench set
15 of 15 people found this instruction helpful.
Was this instruction helpful to you?
Thank you for voting!
Idler Pulley Bearing froze
First of all I would not have done this if it wasn't for
your website. Using the schematics to figure out
the right parts was easy. It was also helpful in the
actual repair process. I have added your website
to my favorites in my browser. The parts arrived in 3 days and I live in Reno. Great Website.

M.B.
Other Parts Used:
Idler Pulley Wheel with Bearing Multi Rib Belt Idler Pulley Lever and Shaft Retaining Ring Thrust Washer
  • Maure from Sparks, NV
  • Difficulty Level:
    A Bit Difficult
  • Total Repair Time:
    1- 2 hours
  • Tools:
    Nutdriver, Wrench set
2 of 3 people found this instruction helpful.
Was this instruction helpful to you?
Thank you for voting!
Noisey
Pulled bottom access panel of, pulled front door section off, pulled lint filter assembly out, pulled drum out, disconnected idler arm, installed new idler arm and wheel, new belt around drum, drum back in, front door assembly back on, then routed belt over idler arm wheel, lint assembly back on, bottom access panel back on. very easy job, the hardest part was pushing the new idler wheel over the new pulley lever, but with a few firm taps with a hammer it was on. *Tips...save the idler wheel washers and retaining clip from bad wheel and be sure to draw yourself a diagram of what color wires hook up where, in case you forget.
Other Parts Used:
Idler Pulley Wheel with Bearing Multi Rib Belt Idler Pulley Lever and Shaft
  • Steve from Howell, MI
  • Difficulty Level:
    Easy
  • Total Repair Time:
    15 - 30 mins
  • Tools:
    Nutdriver, Screw drivers
1 of 2 people found this instruction helpful.
Was this instruction helpful to you?
Thank you for voting!
Belt was worn - ready to break, Decided to replace the parts that commonly go bad.
I removed the bottom panel, then the larger front panel that includes the door. After that, removed the top 2 screws so that the top would swing up (but not lift off). After that, I removed the front "bulkhead", and the drum. Then it was just a short matter of sweeping everything out, and replacing the parts one by one. Most came off with a socket, or snap ring pliers. Pretty obvious at this point...

Be sure to label any wires - I removed 5 wires all total, and wrote down the colors and where they went.

It's great to have help when working with the drum. BTW, you CAN replace the belt without taking out the drum, but you better have strong fingers to move the belt tensioner and slip the belt on it - all with one hand. I did it, but that was the least "fun" part....
Other Parts Used:
Idler Pulley Wheel with Bearing Idler Pulley Spring Multi Rib Belt Drum Glide Idler Pulley Lever and Shaft Drum Support Roller Glide Bracket Kit Single Drum Glide Felt Pad Thrust Washer
  • Larry from Lima, OH
  • Difficulty Level:
    Really Easy
  • Total Repair Time:
    1- 2 hours
  • Tools:
    Screw drivers, Socket set
1 of 2 people found this instruction helpful.
Was this instruction helpful to you?
Thank you for voting!
screeeeaching
pulled dryer out far enough to lean it back against an object for supprt. removed small bottom front cover then door front after disconecting light and switch wires(make note of which goes where), remove top bolts and flip over carefully allowing to hang without disconnecting wire harness, remove belt and drum. at this point it was posible to get to the belt tentioner pully w/o removing the motor but was easier to replace after i discovered there were only two bolts holding the motor in place. at this point i needed two wrenches to remove the pully lever from the motor frame and replace. put everything back together in reverse and no more screaching. : total parts needed were $27.00 as i thankfully decided to replace pully and lever asumming that six months of screaching may have caused wear to the lever and was right. i replaced the belt while i was in there bringing the total to $42 and change. the belt was not needed so i now have a spare which may come in handy someday. thanks to partselect.com i saved BIG $ in repairs or replacement and now have turned the buzzer on to know when the laundry is done.
Other Parts Used:
Idler Pulley Wheel with Bearing Multi Rib Belt Idler Pulley Lever and Shaft
  • heather from uniontown, OH
  • Difficulty Level:
    Easy
  • Total Repair Time:
    1- 2 hours
  • Tools:
    Nutdriver, Screw drivers
1 of 2 people found this instruction helpful.
Was this instruction helpful to you?
Thank you for voting!
loud squeeking during use of dryer
when i first heard the noise i thought it was the belt. after changing that i still heard the noise but louder.
so i took off the bottom face plate took off the door and the bracket holding the tumbler then took out the tumbler to see what was wrong.
being a 6' 4" 250lbs it was hard for me to see what was behind the motor. i finally saw that the idler wheel had come half way off of the lever.
I changed the pulley lever, pulley wheel and all the washers. it was fairly simple. and when done the noise was gone. it only costed me about $15 which made me happy cheap fix.
Other Parts Used:
Idler Pulley Wheel with Bearing Idler Pulley Lever and Shaft Retaining Ring Thrust Washer
  • Gene from cassopolis, MI
  • Difficulty Level:
    A Bit Difficult
  • Total Repair Time:
    30 - 60 mins
  • Tools:
    Nutdriver, Screw drivers, Socket set
0 of 1 people found this instruction helpful.
Was this instruction helpful to you?
Thank you for voting!
Dryer wouldn't rotate the drum.
Removed the screws holding the bottom to the sides (but after taking it all apart, I think I could have done the repair by just taking the front off :-(.
Removed the screws holding the front to the sides. Noted the wiring (three wires go to the front door switch). Removed the wires from the switch (they are quick connects, so no tools necessary). Removed the front. Pull the drum out.
Disconnected the spring from the idler pulley lever. Removed the bolt and nut holding the idler pulley lever assembly to the bottom. (The old pulley had basically frozen in place which caused the belt to break). Put the new washers, wheel assembly and retaining ring on the new idler pulley lever. Bolted it back in place. Connected the spring. Put the new belt around the drum and slid the drum into place. Put the belt around the motor pulley and past the idler wheel (make sure it is on the correct side so this takes up the tension). Put the bottom screws back in. Connected the wires back up to the front. Put the front in place. (Make sure that the drum is properly seated in back so the front goes on and the drum will turn). Put the front screws back on.
Other Parts Used:
Idler Pulley Wheel with Bearing Multi Rib Belt Idler Pulley Lever and Shaft Retaining Ring Thrust Washer
  • Dan from Newfield, NY
  • Difficulty Level:
    A Bit Difficult
  • Total Repair Time:
    1- 2 hours
  • Tools:
    Nutdriver, Screw drivers, Socket set, Wrench set
23 of 607 people found this instruction helpful.
Was this instruction helpful to you?
Thank you for voting!
  • 1
  • 2
Questions and Answers

Be the first to ask our experts a question about this part!

You May Also Need ?
Model Cross Reference
This part works with the following models:
PartSelect Number: PS11741920
Manufacturer Part Number: WP37001144
Brand
Model Number
Description
Amana
7493-LEM437
Dryer - DRYER
Speed Queen
AEM197
Dryer - Residential, Automatic
Speed Queen
AEM377
Dryer - Residential, Automatic
Speed Queen
AEM397
Dryer - Residential, Automatic
Speed Queen
AEM407L
Dryer - Residential, Automatic
Amana
AEM407L2
Dryer
Speed Queen
AEM407L2-PAEM402L2
Dryer - Speed Queen Dryer Model AEM407L2-PAEM402L2 (AEM407L2PAEM402L2, AEM407L2 PAEM402L2) Parts
Speed Queen
AEM407W
Dryer - Residential, Automatic
Amana
AEM407W2
Dryer
Speed Queen
AEM407W2-PAEM402W2
Dryer - Speed Queen Dryer Model AEM407W2-PAEM402W2 (AEM407W2PAEM402W2, AEM407W2 PAEM402W2) Parts
Amana
AEM427L2
Dryer
Speed Queen
AEM427L2-PAEM427L2
Dryer - Speed Queen Dryer Model AEM427L2-PAEM427L2 (AEM427L2PAEM427L2, AEM427L2 PAEM427L2) Parts
Speed Queen
AEM427W
Dryer - Residential, Automatic
Amana
AEM427W2
Dryer
Speed Queen
AEM427W2-PAEM427W2
Dryer - Speed Queen Dryer Model AEM427W2-PAEM427W2 (AEM427W2PAEM427W2, AEM427W2 PAEM427W2) Parts
Amana
AEM477L2
Dryer
Speed Queen
AEM477L2-PAEM477L2
Dryer - Speed Queen Dryer Model AEM477L2-PAEM477L2 (AEM477L2PAEM477L2, AEM477L2 PAEM477L2) Parts
Speed Queen
AEM477W
Dryer - Residential, Automatic
Amana
AEM477W2
Dryer
Speed Queen
AEM477W2-PAEM477W2
Dryer - Speed Queen Dryer Model AEM477W2-PAEM477W2 (AEM477W2PAEM477W2, AEM477W2 PAEM477W2) Parts
Speed Queen
AEM497L
Dryer - Residential, Automatic
Amana
AEM497L2
Dryer
Speed Queen
AEM497L2-PAEM497L2
Dryer - Speed Queen Dryer Model AEM497L2-PAEM497L2 (AEM497L2PAEM497L2, AEM497L2 PAEM497L2) Parts
Speed Queen
AEM497W
Dryer - Residential, Automatic
Amana
AEM497W2
Dryer
Speed Queen
AEM497W2-PAEM497W2
Dryer - Speed Queen Dryer Model AEM497W2-PAEM497W2 (AEM497W2PAEM497W2, AEM497W2 PAEM497W2) Parts
Speed Queen
AEM677L2
Dryer
Speed Queen
AEM677L2 PAEM677L2
Dryer - Speed Queen Dryer Model AEM677L2 PAEM677L2 (AEM677L2PAEM677L2) Parts
Speed Queen
AEM677L2PAEM677L2
Dryer - Speed Queen Dryer Model AEM677L2PAEM677L2 Parts
Speed Queen
AEM677W
Dryer - Residential, Automatic
Customer Service Representative

Get in touch, we're here to help!

Daily 8am - 9pm EST

Contact Customer Service