This cylinder felt seal is used in dryers and is located between the back of the drum and the rear dryer panel. If your dryer is experiencing any of these symptoms, replacing the felt seal could solve your problem: squealing or banging noise, clothes are getting stuck between tub and felt pad, takes too long to dry, not heating enough or not heat at all, or does not tumble. The tools needed for this installation are a 5/16 nut driver and a putty knife. Make sure to unplug the dryer from the power source before beginning this project. Refer to the manual provided by the manufacturer for further instructions.
How Buying OEM Parts Can Save You Time and Money
Part Videos
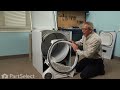
Replacing your Speed Queen Dryer Cylinder Felt Seal
Keep searches simple. Use keywords, e.g. "leaking", "pump", "broken" or "fit".
Sorry, we couldn't find any existing reviews that matched. Try using some different or simpler keywords.
★★★★★
★★★★★
Paul S - June 7, 2019
Verified Purchase
Easy repair
Fast delivery, and great quality. Thank you
★★★★★
★★★★★
Sherrene H - April 9, 2019
Verified Purchase
dryer fix
replaced a couple of parts and had the dryer apart so changed out the felt too got the parts quick and installed with no problem
★★★★★
★★★★★
David S - March 7, 2019
Verified Purchase
Felt seal replacement
Part was exactly what I needed. Installed with high temp adhesive and dryer works fine. I always use your company to buy replacement parts for my appliances. Thanks.
★★★★★
★★★★★
Michael B - February 5, 2019
Verified Purchase
Hard To Find !!!
This PARTicular PART was replacing My over 20 year old Dryer " cylinder felt seal "
Nobody seemed to carry them anymore!!!
Took a lil bit of time to be located,but
PartSelect got Me one & it fit perfectly.
PartSelect has been helping Me maintain
My Dryer for many, many years, from electrical to hardware & more...
Michael T Becker
★★★★★
★★★★★
John B - September 6, 2018
Verified Purchase
Perfect fit
The parts came and I watched the linked video to make sure I installed the seals correctly and the dryer is performing like new.
★★★★★
★★★★★
Jim H - June 4, 2018
Verified Purchase
Replace front felt!
The parts came promptly (heat resistant glue and felt. Biggest time was spent cleaning out the old glue. To fit the felt around the rim it helped Gavin’s a couple more sets of hands to hold while glue set. Since then I have a like new dryer.
★★★★★
★★★★★
Scott C - April 13, 2018
Verified Purchase
Not a good response
The part was the wrong part. Was approx 6 inches short. Couldn't use it so was a waste of money. Will never use you to order anything else.
★★★★★
★★★★★
Jacquelyn N - February 12, 2018
Verified Purchase
Just what i needed minus the glue
Wish this came with a small bottle of hi temp glue. Other than that, it was perfect for what was needed.
★★★★★
★★★★★
Ted S - February 10, 2018
Verified Purchase
Felt seal Replacement
It was ok, the part fit, would have really liked additional instructions and to have had glue supplied with it.
< Prev
1
Next >
Customer Repair Stories
Average Repair Rating: 2.9 / 5.0, 21 reviews.
What's this?
Sort by:
< Prev
1
2
3
Next >
Search filter:
Clear Filter
Your search term must have 3 or more characters.
Keep searches simple. Use keywords, e.g. "leaking", "pump", "broken" or "fit".
Sorry, we couldn't find any existing installation instruction that matched.
Front Drum Seal became detatched.I Recommend replacing both seals.
Step by step, I removed the bottom front panel with a putty knife to compress the spring clamps, removed the inner lint trap, disconnected the door switch and springs and blower connection under the drum, removed the lint trap/ blower housing, remove nuts at bottom sides of door panel, lift top front of dryer (putty knife, spring clamps)
... Read moreto remove nuts at the top then removed the door panel. I then released the belt from the (spring) pulley and pulled the drum out. Pay attention to how the seals were put on! I removed the old seals and cleaned off the old adhesive with acetone and a steel scrubby( wear gloves when using acetone and when applying new adhesive, and work in a ventilated area!) Follow instructions for applying the adhesive for the seals. Put back together in reverse order. Repair successful!
Read less
jeanne from NEWBERRY, FL
Difficulty Level:
Really Easy
Total Repair Time:
1- 2 hours
Tools:
Nutdriver
1 personfound this instruction helpful.
Was this instruction helpful to you?
Thank you for voting!
the drum was clunking and scraping,also it had begun to eat clothing
I disconnected power and vent hose then tipped dryer on its back. I took off lower panel and door ,disconnecting wires to door and light and hanging them over the side,i then removed the front plate and felt seal the plastic fan shroud and lint trap come out as one piece along with the front plate.when i could look down on the drum,standi
... Read moreng on the left side ,i disconnected the screw connecting the top plate to the left side plate allowing the top to gain a little play,this is the amount needed for the drum to be removed,pull belt tensioner slightly as to release tension remove the belt from motor shaft.At this point remove drum and set aside,the lower felt ring and support rollers will be exposed as well as tension spring and tension roller,i used a mirror and guided the snap ring pliers into place on the tension roller,At this point pull on rear felt ring it may come loose easy ,if not work some adhesive remover into the cracks where the glue is and keep agitating it ,eventually the glue will begin to release and more and more of the remover can get in washing the felt ring off,clean real good after using remover soap and water and allow to dry ,apply a thin ring of high heat adhesive smooth out to spread even all around when it becomes tacky begin applying new felt ring,while this adhesive cures perform the same procedure on the front panel and its felt ring while these rings are drying into place undo snap rings and pull support rollers out and replace in like order replacing thrust washers and snap rings if you damage them ,the roller on the tensioner is more tricky but if you use a mirror and a light it is easy to sneak in there lastly when preparing to reassemble and drum and belt are in place just before you replace the front panel it is prudent to replace the neoprene slides,reassemble front plate and ensure that the felt ring lines up and goes in evenly all the way around re-attach top left corner ,reinstall door and wires as well as bottom plate this will conclude the procedure i learned all of this the hard way i should have just replaced all the parts at once i was in that machine 6 different times Daniel 2017
raised the top (screwdriver) undid the front , then removed 4 screws (front seal )removed) undid the dryer belt , remove drum , wire brushed the drum , applied glue (tacky) applied the felt belt aka rear belt seal , dries quickly. reassemble
disassembled found bunch of worn out parts . I went to website wich was very helpful found all . my worn out parts online. dryer is very quiet now I wish i would have done it sooner.P.S. going to fix my dads dryer next. thank you
Was not drying properly. Making a rubbing noise metal to metal sound.
First had to remove the front panel after lifting the top up on its hinges and supporting it. Diconnected wires to the front panel after marking them where they go. Saw where drum was rubbing above the impeller housing for the fan. Removed the drum slides and replaced them with new slides and brackets. Removed the belt and replaced it. It
... Read more is a little tricky with the belt on the tensioner so pay close attention on how you remove it, it will make putting the new one on easier.Replaced the felt gasket with high temp glue. Cleaned inside and outside of cabinet. Put the panel back on,hooked up the wires and it looks and runs like new again.
Felt seal was shredded and glide bracket was worn through
The on-line video showed the dryer top being loosened from the front as the first step. On our dryer, the bottom panel in the front needed to be removed first - two screws, then the front panel(with door)- two more screws and two wires for the switch. Next was the front guide panel - four screws. The glide brackets bolted to this panel
... Read more and the felt seal was glued to it. Reverse the process to put it all together, and my wife was happy again.
Thanks to this website we were able to not only find the parts, but a video that told us how to take the dryer apart. Unfortunately, between the time we diagnosed the problem, ordered the parts, and they arrived, the drum had worn into the front bulkhead. We were able to file the sharp parts dull and install the brackets, felt pads, and
... Read more drum glides along with the felt seal, but ended up breaking the dryer door switch. Once that came in, it has been working. I'm not sure how long the repair will last, but it was much better than buying a new one.
Dryer banging and clothes getting stuck between tub and felt pad while tumbling.
Very easy repair. I took off the bottom fromt panel with a nut driver. Then I took off the face/door panel. Take note of the wires that need to come off by marking them with a sharpie or tape. The top of the dryer can be stood up to allow access to the ductwork that has the felt pad on it. The felt pad was worn through in spots, the
... Read moredrum glide was completely gone and both cylinder glide brackets were almost completely worn through. I just replaced the brackets and the pads. The old felt came off fairly easily. I scraped the old glue for the felt off with a knife and cleaned and dried the surface before applying the hi temp adhesive. I waited 1 minute while the glue became tacky (be careful, the glue starts out thin and tends to run) and the felt pad was easily put back in place with my wife's help. Everything was very simple and it cost $87.00 for parts and shipping. I felt that this should be a good investment since I have had no other problems with this dryer and this is normal wear and tear. Better than paying $600+ for a new dryer. The video for changing the felt pad was very detailed and easy to follow as well.
As it turned out, the felt was only part of the problem. The guide bracket had been cut thru by the drum. This all started when a golf tee got stuck in the drum area. It took very little time to destroy the guide bracket. Dryer was built by Whirlpool. Parts are built to the bare minimum. These appliances are designed to break in a c
... Read moreouple of years. There is no doubt about it. I installed the new guide brkt, glued the new felt on and put it all back together. The job is pretty straight forward but you need to be mechanically inclined.
Read less
Stuart from Port Charlotte, FL
Difficulty Level:
A Bit Difficult
Total Repair Time:
1- 2 hours
Tools:
Nutdriver, Pliers, Screw drivers
1 personfound this instruction helpful.
Was this instruction helpful to you?
Thank you for voting!
Drum Not spinning
First, I unplugged the dryer. Then I used a flat screw driver to pop the top open. I removed 2 bolts from the front cover and removed the front door cover. I also took pictures of the electrical connector on the door so I would remember how the wires went back on. Then I removed 4 bolts from the front drum guide and lint screen holder. Th
... Read moreis allowed me to remove the drum & old belt. While the drum was out, I pried an access panel open on the side of the dryer. I then glued the new back felt piece in place. I put the new belt around the drum and re installed it. I re-installed the front guide and front cover re-connecting the door electrical switch. With the access panel open, I attached the belt to the motor. I then plugged it back in and turned it on to verify operation pryor to snapping the top cover back in place. Very easy repair.
Ask our experts a question about this part and we'll get back to you as soon as possible!
12 questions answered by our experts.
Sort by:
< Prev
1
2
Next >
Search filter:
Clear Filter
Your search term must have 3 or more characters.
Keep searches simple. Use keywords, e.g. "leaking", "pump", "broken" or "fit".
Sorry, we couldn't find any existing answers that matched.Try using some different or simpler keywords, or submit your new question by using the "Ask a Question" button above!
Elisha
September 16, 2017
I have a Maytag dryer.. are clothes are getting stuck in the front part of the dryer.. it's ripping them & getting black marks on them.. do i need to get a cylinder felt seal for the front???
For model number MDET336AYW
Hello Elisha, thank you for contacting us. That does sound like it could be the felt seal. You may also want to check the lint duct assembly. The part the lint trap goes in and make sure there is nothing there that can catch on clothes or looks worn down. Good luck with the repair!
I need a front felt seal but can not find it help plz
For model number MDET336AYW
Hello Brandon, Thank you for contacting us. I have researched the model you have provided and have found the part you are looking for is PartSelect Number PS11741917. Hope this helps!
4 people found this helpful.
Was this helpful?
Thank you for voting!
Kathryn
July 4, 2019
I need to replace the front felt seal on the drum. This part is listed in the diagram as being in the front bulkhead assembly but the description says it's the rear. Can i use this on the front or is there another part?
For model number Ale643raw
Hi Kathryn, thank you for your question. Looking at your model the felt seals on both the back and the front are the same type, so yes, this part would also work on the front of your drum there. I hope that helps. Good luck with your repair.
3 people found this helpful.
Was this helpful?
Thank you for voting!
Kevin
July 16, 2019
I'm wondering if this is the correct part number for the front of the drum on my Amana dryer? It is torn and the stitching has let go over a large section.
For model number ALE331RCW
Hi Kevin, thank you for your question. Yes, this is the part that you are looking for according to your manufacturer and the model number provided. I hope that helps. Good luck with your repair.
2 people found this helpful.
Was this helpful?
Thank you for voting!
Jack
July 23, 2019
The dryer felt seal for the drum came out and was twisted beyond repair. Will the dryer run ok if this seal is not replaced?
For model number MDG3706AWW
Hello Jack, thank you for your question. It would be recommended to replace it if it is damaged, as not having one could lead to your clothes getting caught up inside the dryer or a squealing or banging noise. It could also lead to a lack of heat in the dryer. We hope this answers your question.
2 people found this helpful.
Was this helpful?
Thank you for voting!
Jennifer
December 12, 2017
Putting new felt seal on rear drum today. Which way does the felt seal go, thinner part facing up with thicker edge towards the barrel? I thought I could use the old one as a reference but it’s really worn out!
Hi Jennifer, Thank you for the question.Here is a link to the video on the repair. It should help determine how to install the new seal. Good luck with the repair!
https://www.youtube.com/watch?v=TqCqrLo2JKo
2 people found this helpful.
Was this helpful?
Thank you for voting!
Paul
July 1, 2019
Is this belt for both the front and rear of the drum?
Hello Paul, Thank you for the question. This cylinder felt seal is used in dryers and is located between the back of the drum and the rear dryer panel. In order for us to locate the correct front seal we will require the model number of the unit. Once you have located the model number please feel free to resubmit the question and we will be happy to help you. Look forward to hearing from you!
1 person found this helpful.
Was this helpful?
Thank you for voting!
Paul
July 1, 2019
Hi, I need the front drum gasket seal.
For model number SDE405DAYW
Hi Paul,
Thank you for your question. The part number listed under your model number for the seal is PS11741917. I hope this helps. Thank you and have a great day!
1 person found this helpful.
Was this helpful?
Thank you for voting!
Doug
June 24, 2021
I see this fits the rear bulk head. Will this seal fit the Front bulkhead as well. If not what part is needed for that.
For model number ADE30RGS171TW01
Hello Doug, Thank you for the question. The will fit the front and read. We hope this helps!
Was this helpful?
Thank you for voting!
Lyle
July 30, 2021
When you turn on the clothes dryer there is a loud squealing "er, er, er" noise which at first would go away once the dryer was going but lately it comes and goes so getting worse. Looks like the front felt seal is worn and drum is shiny where the felt seal is worn. Should one replace both the front and rear felt seals while the unit is apart? Anything else needing repair that could be causing this? Thanks.
For model number Maytag Neptune dryer
Hello Lyle, Thank you for your inquiry. We do recommend changing both the front and rear felt seals. You should also check the drum glides, belt and rollers. For more specific information, may we confirm the model number of your dryer? We look forward to hearing from you.
Was this helpful?
Thank you for voting!
< Prev
1
2
Next >
✖
Ask a Question
Ask our experts a question on this part and we'll respond as soon as we can.