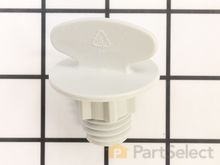
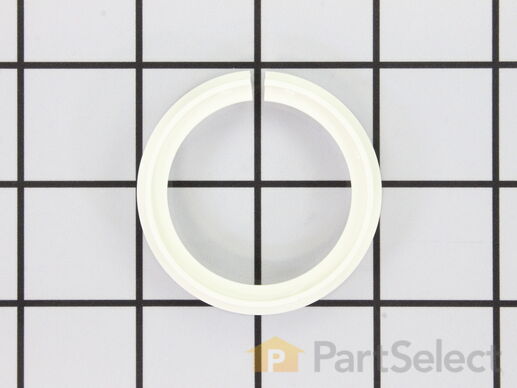
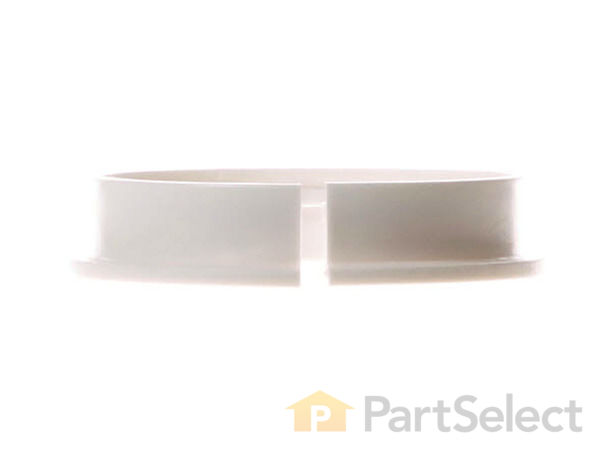
Seal, Lower Sprayarm
$
9.08
In Stock


Get this part fast. Average delivery time via standard shipping: 1.8 days.
PartSelect Number PS11741334
Manufacturer Part Number WP3376846
Manufactured by
Whirlpool
Product Description
Seal, Lower Sprayarm Specifications
This dishwasher lower spray arm seal, or under spray arm bearing ring, is designed with the split by the manufacturer. It is not damaged or defective, and is sourced directly from the original manufacturer. This part is approximately 2 inches in diameter, made of plastic, and is white in color. This part is mounted underneath the dishwasher spray arm and creates a seal between the lower spray arm and the sump housing. To access the seal, remove lower dish rack and unscrew the nut that secures lower spray arm to the remove cover. No tools are required to replace the lower seal on your dishwasher.
How Buying OEM Parts Can Save You Time and Money
Troubleshooting
This part fixes the following symptoms:
Not cleaning dishes properly | Leaking | Noisy | Not draining
This part works with the following products:
Dishwasher.
This part works with the following products:
Kenmore, Whirlpool, KitchenAid, Estate.
Part# WP3376846 replaces these:
AP6008201, 3376846
Questions and Answers
We're sorry, but our Q&A experts are temporarily unavailable.
Please check back later if you still haven't found the answer you need.
Sort by:
Search filter:
Clear Filter
Your search term must have 3 or more characters.
Keep searches simple. Use keywords, e.g. "leaking", "pump", "broken" or "fit".
Sorry, we couldn't find any existing answers that matched.Try using some different or simpler keywords, or submit your new question by using the "Ask a Question" button above!
ROGELIO
January 8, 2018
Need to know how to replace the spray arm mounting bracket we are ordering part ps11741381. Thanks
For model number DU915PWPSO

Hello Rogelio, Thank you for your inquiry. Open up the dishwasher and pull the upper rack out. Remove the lower screw that attaches this part to the spray arm using a Philips screwdriver, and lower the spray arm. Press in the locking tabs on both sides with a flat head screw driver. Remove the white screw cover from the top of old mounting bracket with a flat head screwdriver and transfer it to the new bracket. To put the new mounting bracket in place, line it up in the same spot where you took out and hook the top side over and press down on it to lock it in place. Lift up on the other side to push it into place, then once you have it above the rack, pull it back down to lock it in place. Then re-attach the spray arm. Hope this helps!
7 people found this helpful.
Was this helpful?
Thank you for voting!
Rod
February 3, 2018
I want to replace the seal, lower spray arm, partselect number: Ps11741334. The instructions say to unscrew the thumb nut and lift the spray arm off. But i have a rubberized baffle with nothing that feels familiar inside; no thumb nut. How do i get the spray arm off? Thanks.
For model number DU920PFGQ3

Hello Rod, Thank you for your inquiry. You would have to remove the tower WP304170-if you haven't already done so, then unscrew the cap and connector assembly underneath it counter clockwise. Take out the plastic bearing underneath that. Then the lower spray arm should just twist off. Hope this helps!
4 people found this helpful.
Was this helpful?
Thank you for voting!
Paula
November 5, 2019
Dishwasher is leaking during wash and rinse cycles at the bottom of the door?
For model number DU940PWKB0

Hi Paula,
Thank you for your question. If there is leaking coming from the bottom of the door, the issue may be that the seal on the inner door may be worn and you may need to replace it. There may be some other parts that are causing this issue. Here is a link from our website that you may reference on what parts to check, https://www.partselect.com/AdvancedModelSymptoms.aspx?ModelNum=DU940PWKB0&mfgModelNum=&fkMfgID=3&ModelMasterID=147797&PID=13. I hope this helps. Thank you and have a great day!
Was this helpful?
Thank you for voting!
William
November 6, 2019
I replaced the door seal that was allowing water to come through and drip on each side of the dishwasher. But the same areas are leaking? What other seals are there? The unit works great and just started leaking. Really would like to fix and not just junk. Please give me some ideas.
For model number DU945PWPQO

Hello William,
Thank you for your question. If the door seal wasn't the source of the leaking, it is likely that it is coming from one of the common water sources in the dishwasher, and it is only appearing to be leaking from the door. We suggest looking at the water inlet valve under part PS11730996 for your model for any leaks, and the drain and wash impeller parts in the kit for your model under part PS382822. Hope this helps!
Was this helpful?
Thank you for voting!
Related Parts:
Part Videos
Replacing your Kenmore Dishwasher Seal, Lower Sprayarm
Customer Repair Stories
Average Repair Rating: 4.6 / 5.0, 70 reviews.
What's this?
Search filter:
Clear Filter
Your search term must have 3 or more characters.
Keep searches simple. Use keywords, e.g. "leaking", "pump", "broken" or "fit".
Sorry, we couldn't find any existing installation instruction that matched.
Dishes not clean and lower wash arm wobbled.
Completely removed lower wash arm and replaced bearing ring and seal.
-
James from Jacksonville, FL
-
Difficulty Level:Easy
-
Total Repair Time:Less than 15 mins
-
Tools:Pliers
-
575 of 586 people
found this instruction helpful.
Was this instruction helpful to you?
Thank you for voting!
Not Cleaning lightly soiled items.
Removed spray arm thumb nut. Removed spray arm. replaced worn and broken earings and re-assembled in reverse order. Would have done the repair a lot sooner if I had known that PartsSelect was just a few miles up the highway.
-
Dennis from Cromwell, CT
-
Difficulty Level:Really Easy
-
Total Repair Time:Less than 15 mins
-
Tools:
-
378 of 381 people
found this instruction helpful.
Was this instruction helpful to you?
Thank you for voting!
Water washing out under front door onto floor
The plastic parts on this spray arm assembly wear with time and the rotation wobble effect creates a wave action in the pool of water at the bottom of the dishwasher. This waves the water onto the front door and forces a leak outside the unit. Replace the lower arm assembly, washer, bearing and nut. They all wear. Also remember to tighten the screws on top of the pump assembly. They loosen and aid in the wobble. Good Luck!
-
Kent from Matthews, NC
-
Difficulty Level:Easy
-
Total Repair Time:Less than 15 mins
-
Tools:Screw drivers
-
192 of 266 people
found this instruction helpful.
Was this instruction helpful to you?
Thank you for voting!
Lower spray arm was not turing properly and causing poor wash results
I noticed the upper bushing washer was worn thin. this caused the lower spray arm to rise too high and wobble during all the wash cycles. Also the rotation of the lower spray arm was wearing grooves in the lower bushing.
I removed the retaining nut and simply replaced teh defective parts. While I was at it I figured equal wear might be evident on the upper spray arm so I bought a complete rebuild kit to bring all rotational parts back to new and equal preformance that was achieved by removing the ss screw and removing the upper spray arm, bushing and clip then replacing them in the order of removal. Noticed a huge difference in the quality of the washed dishes!! Thanks Parts Select 100% to yoru company!!
-
Robert from York, PA
-
Difficulty Level:Really Easy
-
Total Repair Time:Less than 15 mins
-
Tools:Screw drivers
-
155 of 231 people
found this instruction helpful.
Was this instruction helpful to you?
Thank you for voting!
motor noise over a six month period suddenly stop running.
Removed washer from the cabinet by unscrewing anchor screws at the top of washer. But first I removed both dish racks. Shut off power and water to washer. Unhooked water line to washer. Lowered front adjustable feet so I could easily pull washer free from the cabinet. Disconnected wiring from the wall box to allow room to allow for more working room. Drain hose was plenty long on my washer so didn't have to disconnect. Before laying on side, I disconnected the lower and upper spray units. Lower spinner is attached with a hand tightened screw in the middle of spayer. This is a left hand thred. So I had to turn it to the right to loosen. The upper spray unit is simply removed by uncliping the clips from the long flat tube that runs from the lower unit to the top. There is a set of clips in the back of the tub and a set on top. After the clips are free, turn the flat tube to your right to unlock from the bottom spinning unit. Remove and lay the washer on its side. Also before I did that I unhooked the springs at the bottow of the door so to free the door from springing back up after opening the door while on side. Good idea too to have some towels handy to absorb spilled water from the washer. I used one under the open door while on side to protect the door and floor. There are three wire disconnects under the washer that hooks to the motor, etc. There are three vinal wedges that secure the motor and punp into the bottom of the tub. Remove them, disconnect the outer pump from the motor (made it easier for me to remove the unit through the hole in the bottom of the tub. This is a little tricky. Disconnect by turning the small pump to the end of the motor to your left to unlock. The small pump is a little stubborn to losen, but will break loose with presure persistence. After removing, simply push the whole unit up through the bottom of the tub to remove. Now you are ready to reinstall everything in reverse order. It is a good idea to have someone to assist with installing the motor and punp in the tub. I securely pressed it into the hole and the second person press the vinal wedges back into the bottom of the tub to secure the unit. Putting it all back together from there was a snap.
A big plus is the quick delivery. Regular delivery 3 - 5 days will do. I ordered my parts one day and received them the next by Fedx. Didn't even pay the extra for next day delivery. Everything worked perfectly. Just like a new one again. Very happy with the helps posted and service and parts provided by PartSelect.
-
William from Tucumseh, MO
-
Difficulty Level:Easy
-
Total Repair Time:1- 2 hours
-
Tools:Pliers, Screw drivers, Socket set, Wrench (Adjustable)
-
94 of 155 people
found this instruction helpful.
Was this instruction helpful to you?
Thank you for voting!
Dishwasher wouldn't clean dishes, left white film
After reading the diagrams and other readers' repair stories, I found that the plastic nuts and rings had worn out. The arm-spray wobbled excessively.
I simply twisted off the spray arm bearing ring and removed the other parts. The arm-spray was covered with mineral deposits that cleaning did not remove.
I received my parts overnight and replaced them according to the diagram. It's like having a new dishwasher!
I simply twisted off the spray arm bearing ring and removed the other parts. The arm-spray was covered with mineral deposits that cleaning did not remove.
I received my parts overnight and replaced them according to the diagram. It's like having a new dishwasher!
-
Greg from Indianapolis, IN
-
Difficulty Level:Really Easy
-
Total Repair Time:Less than 15 mins
-
Tools:
-
85 of 147 people
found this instruction helpful.
Was this instruction helpful to you?
Thank you for voting!
lower wash arm was not moving freely
I first removed the wash arm retainer nut then lifted the arm assembly out and replaced the spray arm bearing ring and then set the spray arm back in place and put the wash arm bearing ring in the hole and screwed the wash arm retainer nut back in place. I couldn't believe how much the 2 had worn down. It is working fine. Saved me about a $125.00 service call out here as I live 50 miles from the nearest big town. Not bad for a 68 year old female!!
-
Beverly from Bly, OR
-
Difficulty Level:Really Easy
-
Total Repair Time:Less than 15 mins
-
Tools:
-
79 of 79 people
found this instruction helpful.
Was this instruction helpful to you?
Thank you for voting!
Dishwasher not cleaning well... then leaking
This gets a little lengthy... but it explains where Cascade Dishwashing Powder came up with its brand name - it's been a cascade project.
I started by replacing the Middle Wash Arm Tube as the old tube developed leaks. As others have stated this is a new design but directly replaceable and easy to do.
This didn't solve the cleaning issue so reading the experiences of others on this site realized I also had broken parts in the Upper Spray Arm Assembly and the Upper Wash assembly. I replaced these and the dishes were suddenly much, much cleaner. These were very easily replaced.
I did find that I did not need the Mount for the upper spray arm (PS402277) as a redesign of the Upper Spray Arm Mounting bracket no longer required it - the bracket simply clipped in -the diagram was out of date.
Everything seemed to go well for about 3 loads when the dishwasher started leaking heavily out of the bottom of the door. I then noticed that the lower Wash Arm Bearing Ring and the Seal, Lower Spray Arm had disintegrated so I replaced those but this didn't affect the leaking. Someone had stated that if the lower wash arm assembly had too much 'wobble' that it cause 'waves' that would leak out the front door... mine had some wobble so I added a nylon washer from Ace Hardware that reduced wobble but still leaked.
I then replaced the Door Seal Kit - this was by far the most difficult part as the door needed to be removed and it was somewhat difficult - and it seemed apparent after we had removed the door that these parts weren't the problem but we replaced them anyway.
Also, someone else had noted that they had to attach the door seal (this is NOT the gasket that goes around the door opening) with a sealant - I had the same problem; the original seal fit tightly with friction but the new replacement required an adhesive - I used silicone. Still leaked.
From here on I can't guaratee any useful information: I took the strainer screen out of the bottom of the dishwasher and found one slightly loose screw holding what I believe is the 'pump outlet' according to the diagram. I had also read that the water fill is controlled not by the float at the bottom of the washer but by the electronics and it was suggested that I disconnect the DW from the power to 'reset' the timer, this I did and hit the 'Cancel' cycle a couple of times to make sure that all programs were cancelled. Whether any of this made a difference I have no idea - except that the dishwasher suddenly stopped leaking and hasn't leaked a drop for at least 20 washes. So I don't know, for sure, why it leaked or how I fixed it, but it's working and washing great now - except the tines on the lower rack are beginning to rust out and breaking off. The rack is pretty expensive but so far I've saved a lot of money and my family thinks I'm a dishwasher genius.
-
Wesley from Lake Elmo, MN
-
Difficulty Level:A Bit Difficult
-
Total Repair Time:1- 2 hours
-
Tools:Screw drivers
-
28 of 37 people
found this instruction helpful.
Was this instruction helpful to you?
Thank you for voting!
Water leaking out side where water enters
AIR INLET GASKET Had to pull dishwaher out, using instructions sent with part, turn it 1/4 turn counter clockwise, tap with screwdriver and hammer and it came right off. Put the new one on. It was kinda hard to get it to turn the last little bit, I had to use a screw driver and hammer to make it twist that last little bit.
-
David from Deridder, LA
-
Difficulty Level:A Bit Difficult
-
Total Repair Time:15 - 30 mins
-
Tools:Screw drivers
-
13 of 16 people
found this instruction helpful.
Was this instruction helpful to you?
Thank you for voting!
Flopping Wash Arm due to broken retainer nut spelt disaster three days before Thanksgiving.
Once I removed the wash arm from its base and figured out what had happened I ordered the repairs I needed from PartsSelect.com. It was extremely easy to see what was needed.
I had to have them sent overnight, because it was three days before Thanksgiving and the arrival of 7 extra people on Wednesday evening.
The package arrived Tuesday afternoon, I opened it, removed the old spray arm bearing ring, put the new one in place, placed the wash arm bearing ring on the bottom of the wash arm, set it in place, and tightened all of it in place with the new wash arm retainer nut. Started the dishwasher and I was in business!! It took longer to open the package and unpackage everything than it did to make the repair AND no chapped and cracked hands doing Thanksgiving & weekend dishes.
-
Susan from Burlington, CO
-
Difficulty Level:Really Easy
-
Total Repair Time:Less than 15 mins
-
Tools:
-
9 of 10 people
found this instruction helpful.
Was this instruction helpful to you?
Thank you for voting!
Customer Reviews
Filter By Rating:
Search filter:
Clear Filter
Your search term must have 3 or more characters.
Keep searches simple. Use keywords, e.g. "leaking", "pump", "broken" or "fit".
Sorry, we couldn't find any existing reviews that matched. Try using some different or simpler keywords.
Margaraet D - April 11, 2019

Extremely easy to replace old part
Received the part promptly, repaired quickly, machine was up in running within fifteen minutes
Gregory S - January 22, 2019

repair of lower seal
Easy repair the part solved the problem very pleased with the procedure
Connie W - January 21, 2019

Just what I needed
The upper arm sprayer was crooked, was hitting dishes when spinning. Replaced this seal and worked perfectly! Wasn't broken, but I guess it had worn down so wasn't fitting tightly enough.
Susan F - November 5, 2018

It did thevtrick
Got here pretty quickly and fixed the problem. Your videos were helpful too
Valerie L - October 22, 2018

Correct part took long to ship.
The part was what I ordered, but it took 4 days to mail then another week to get here. But my disher is now up and running. Ordering was easy.
David M - September 3, 2018

Lower spray arm sea
Just installed today. Easy to install. I haven't run the dishwasher yet to determine if it works better with the new seal. Old seal was a bit distorted.
Laura L - August 5, 2018

Easy Fix
Very easy to install.
Donna G - July 13, 2018

Actually didn't need
I actually didn't need this part. I thought my part was broke. The ring is supposed to be separated and I thought it was broke. When I ordered online I could not see the separation on the order page.
Roy R - July 10, 2018

Easy repair. Part worked well.
The seal solved the leaking and restored the dishwasher to good working order.
Brent P - July 10, 2018

Easy
.
Model Cross Reference
This part works with the following models:
PartSelect Number: PS11741334
Manufacturer Part Number: WP3376846
Brand
Model Number
Description
Kenmore
65715755791
Dishwasher
- Kenmore Dishwasher Model 657.15755791 (65715755791, 657 15755791) Parts