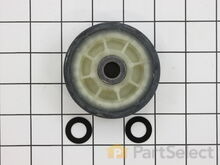
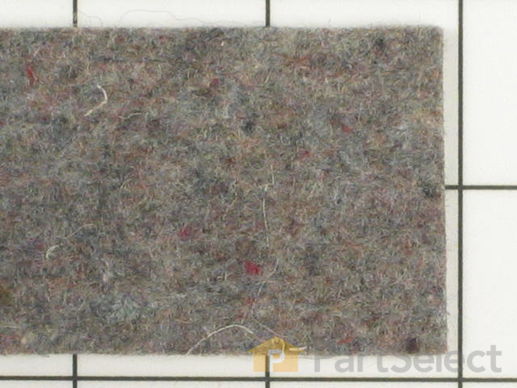
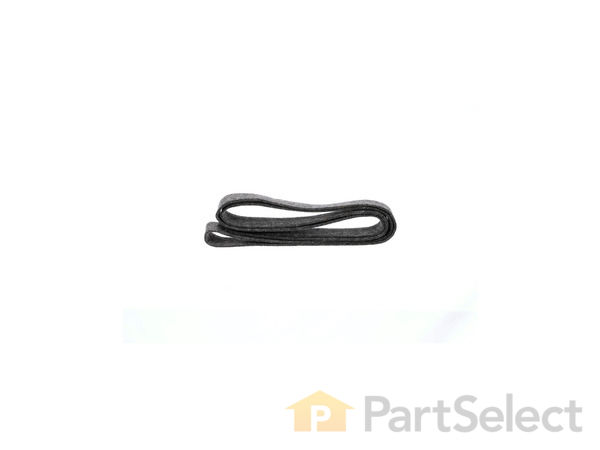
Part Location Diagram of WP314820 Whirlpool Front or Rear Drum Felt Seal
See part 029 in the diagram
Replacing your Maytag Dryer Front or Rear Drum Felt Seal
( Grid squares measure 1x1 inch )
Customer Service Representative

Get in touch, we're here to help!

Daily 8am - 9pm EST

customerservice@partselect.com

Front or Rear Drum Felt Seal WP314820

★★★★★
★★★★★
2 Reviews

Rated by 18 customers 

Easy 

1- 2 hours 

Ratings submitted by customers like you who bought this part.

$ 29.00
  In Stock
Get FREE EconoShip on orders over $100! T&C apply

Get this part fast! Average delivery time for in-stock parts via standard shipping: 1.8 days.

PartSelect Number PS11740771
Manufacturer Part Number WP314820
Manufactured by Whirlpool
Product Description

Front or Rear Drum Felt Seal Specifications

This front or rear dryer drum felt seal is seventy-nine and a half inches long.
How Buying OEM Parts Can Save You Time and Money

How Buying OEM Parts Can Save You Time and Money

Part Videos

Replacing your Maytag Dryer Front or Rear Drum Felt Seal

Replacing your Maytag Dryer Front or Rear Drum Felt Seal
Troubleshooting
This part fixes the following symptoms:
Noisy | Marks left on clothes
This part works with the following products:
Dryer, Washer Dryer Combo.
This part works with the following products:
Maytag, Jenn-Air, International.
Part# WP314820 replaces these:
AP6007654, 3-14820, 314820
Back to Top
Customer Reviews
Average Rating:
★★★★★
★★★★★
2 Reviews
5.0
Filter By Rating:
  • 5 Stars
    2
  • 4 Stars
    0
  • 3 Stars
    0
  • 2 Stars
    0
  • 1 Star
    0
Sort by:
  • 1
Sorry, we couldn't find any existing reviews that matched. Try using some different or simpler keywords.
  • 1
Customer Repair Stories
 Average Repair Rating: 2.9 / 5.0, 18 reviews. What's this?
Sort by:
  • 1
  • 2
Sorry, we couldn't find any existing installation instruction that matched.
Dryer running but not heating
Pull the front off of the dryer found the front Found the drum front glides, worn out and rubbing metal to metal also tested the cycling thermostat found that it was faulty, causing the no heat problem. Ordered the cycling thermostat and new glide kits to prevent any further problems.
Other Parts Used:
Cycling Thermostat (Limit: 140-20) Front or Rear Drum Felt Seal Front Glide Kit
  • Bruce from FAIRMONT, WV
  • Difficulty Level:
    Easy
  • Total Repair Time:
    30 - 60 mins
  • Tools:
    Nutdriver, Screw drivers
1 person found this instruction helpful.
Was this instruction helpful to you?
Thank you for voting!
Replace motor,Idler pulley, and belt.
Fairly easy, with lots of disassembly easy replacement, and lots of reassembly.
Other Parts Used:
Front or Rear Drum Felt Seal Front Glide Kit
  • Peter from PEABODY, MA
  • Difficulty Level:
    Easy
  • Total Repair Time:
    1- 2 hours
  • Tools:
    Nutdriver, Screw drivers
1 person found this instruction helpful.
Was this instruction helpful to you?
Thank you for voting!
My Blower wheel had broken at the center where it attached to the axle. It made a rattling sound and no air was being blown into the drum to dry the clothes. There was also a loud skidding sound that turned out to be due to a worn felt seal.
I took off the front of the dryer with the screws at the bottom. I removed what wires would easily come off and took a picture to remember where they go. Then I took of the front panel and had to take off the cover for the blower wheel. Some screws were difficult to reach because they were in a very tight space. I used a combination of needle nose pliers and a hex screw bit to loose hared to reach hex screws.
For the felt seal on the front panel, I used a flathead screwdriver to remove the old seal and replace the new seal. The most tricky thing was making sure the seal was laying right along the drum when putting the front panel back on. Once back together, the skidding sound disappeared.
Replacing the blower wheel is pretty easy once I got past the difficult screws holding the cover down. I used snap ring pliers to remove the snap ring then put the new blower wheel on and put it all back together. I found that the tip diameter of the snap ring pliers needed to be less than 0.05'' to fit into the snap ring holes of both the snap rings for the roller wheels and the blower wheel.
Other Parts Used:
Front or Rear Drum Felt Seal Blower Wheel with Clamp
  • Spencer from COLUMBIA, SC
  • Difficulty Level:
    Easy
  • Total Repair Time:
    30 - 60 mins
  • Tools:
    Pliers, Screw drivers, Socket set
2 of 2 people found this instruction helpful.
Was this instruction helpful to you?
Thank you for voting!
Dryer running no heat
My Maytag w/d are 33 yrs old. They’ve gone through 5 kids. My dryer had never required repair, I repaired my washer several yrs ago. (Water pump). My dryer stopped heating up. I first started with cleaning and replacing exhaust system. That didn’t correct the problem, so I went to the thermal fuse, which was easy to change but still wasn’t the problem. I then removed the drum to get at the heating element. When I removed the drum I found out that all the felt seals were falling apart. I didn’t think that was the problem but figured I might as well change them while I was in there. I ordered the seals and the heating element. Removing and replacing the heating element was very easy. Removing the old felt seals was a little harder. My dryer does not have the clips, it was glued on. It took some time to remove most of the glue and install the new seals. After putting it all back together it worked great. Hopefully I’ll get another 30 yrs!!!
Other Parts Used:
Dryer Blower Housing Seal Front or Rear Drum Felt Seal
  • Judith from ACCORD, NY
  • Difficulty Level:
    Easy
  • Total Repair Time:
    More than 2 hours
1 person found this instruction helpful.
Was this instruction helpful to you?
Thank you for voting!
The drum guides and roller wheels worn. Also the felt seal front and back worn out.
Removed the front panel and top of dryer. Removed the drum front support and drum from dryer then removed the rear drum support.
Remove the old felt seal both front and back. Vacuumed and cleaned the interior of the dryer blowing out the heat coils and controls on the front panel. Removed and replaced the front guides and installed new rollers. Removing the old glue holding the felt required a heat gun and scraper. New felt was installed with the proper glue and clamped in place for 12 hours. Assemble the the dryer in reverse order.
Other Parts Used:
Front or Rear Drum Felt Seal Front Glide Kit
  • Gary from BOTHELL, WA
  • Difficulty Level:
    A Bit Difficult
  • Total Repair Time:
    More than 2 hours
  • Tools:
    Nutdriver, Pliers, Screw drivers
1 person found this instruction helpful.
Was this instruction helpful to you?
Thank you for voting!
Excessive air leakage around tumbler.
1)Unplug dryer, 2)remove front door assembly, 3)remove the blower tumbler front, 4)disconnect belt, 5)eased out tumbler, 6) replace parts, 7)assembled in reverse order, 8) finally test operative. Wife rewarded me with peanut butter an jelly sandwich.
Other Parts Used:
Tumbler and Motor Belt Lint Filter Front or Rear Drum Felt Seal Front Glide Kit Drum Support Roller Kit
  • Rita from SAN DIEGO, CA
  • Difficulty Level:
    Very Easy
  • Total Repair Time:
    30 - 60 mins
  • Tools:
    Nutdriver, Screw drivers
1 person found this instruction helpful.
Was this instruction helpful to you?
Thank you for voting!
Squeaky when in use, after replacing the drum pads.
I followed the videos provided, the only think I would added is cleaning the riding surface of the drum. In my case the drum had gunk on it from the old pads, witch got on the new pads causing it to continued to make noise.

It would be wise to also get the felt and belt, to replace them all the first time.
Other Parts Used:
Tumbler and Motor Belt Front or Rear Drum Felt Seal
  • Greg from CAVE CREEK, AZ
  • Difficulty Level:
    Very Easy
  • Total Repair Time:
    1- 2 hours
  • Tools:
    Screw drivers
2 of 2 people found this instruction helpful.
Was this instruction helpful to you?
Thank you for voting!
Dryer would not start
This website is awesome. After imputing my dryer model I was able to select from the list if symptoms my issue...Dryer will not start. From there was percentage of issues that would cause my issue. After determining it was the motor (after 25 years who would have thought that!!!). In this process I discovered other non related issues that i should attend to. So I basically rebuilt the dryer and it worked right away. I am retired military and in the tax preparation/representation business now, so a lot of this was new to me. The detailed instruction and especially the videos provided foolproof methods to complete each of the repairs. It was a little time consuming but very easy to complete. I did gain some new tools and diagnostic equipment that will come in handy in the future. Now I am going to tackle my daughters dishwasher. Thank you Parts Select and Steve (on the videos). John Beazle
Other Parts Used:
Roller Shaft Motor Pulley Front or Rear Drum Felt Seal Drum Roller Shaft Washer Drive Motor - 60Hz 115V Front Glide Kit Drum Support Roller Kit
  • John from COHUTTA, GA
  • Difficulty Level:
    Easy
  • Total Repair Time:
    More than 2 hours
  • Tools:
    Nutdriver, Pliers, Screw drivers, Socket set, Wrench set
6 of 12 people found this instruction helpful.
Was this instruction helpful to you?
Thank you for voting!
Drum didn't want to turn, bad felt seal
The repair was easy. New felt fit after the tabs were bent out some. Then just tape tabs back into place. Drum turns fine now, but ran it too long with tight drum. Motor is toast.
  • Rick from COPAN, OK
  • Difficulty Level:
    Easy
  • Total Repair Time:
    30 - 60 mins
  • Tools:
    Screw drivers, Socket set
1 of 2 people found this instruction helpful.
Was this instruction helpful to you?
Thank you for voting!
When the dryer grumbles check the blower wheel too.
If your dryer is making a rumbling noise, change the blower wheel. It's plastic and the heating and cooling cycles causes the keyway in the plastic to give out and the wheel just spins causing the noise and the slower dry time. The other parts I replaced see below. Like many other repairs, remove screws below dryer door. Mark all wires and locations for re-assembly. Next remove front tumbler/lint screen assembly (4 sheet metal screws 2/L 2/R. Work belt off back of tumbler and remove. Use flathead screw driver to release tabs that hold felts on both front and back tumble supports. Make sure you know rotation of tumbler and install new felts so the overlap goes in direction of spin. Use a drum stick or 3/8 ratchet extension, something dull and flat to press tabs back down on felts. A screwdriver could slip off and tear cloth. Next drill out heads of the rivets on the glides and remove teflon glide and cork backer. Make sure all rivet material is removed front and back. Install new cork and glide. Rivet one side back in, then the other. Repeat on 2nd glide. Re-assemble dryer. Super smooth, super quiet.
Other Parts Used:
Tumbler and Motor Belt Front or Rear Drum Felt Seal Front Glide Kit
  • Chris from MArietta, GA
  • Difficulty Level:
    Easy
  • Total Repair Time:
    30 - 60 mins
  • Tools:
    Nutdriver, Screw drivers
3 of 4 people found this instruction helpful.
Was this instruction helpful to you?
Thank you for voting!
  • 1
  • 2
Questions and Answers

Ask our experts a question about this part and we'll get back to you as soon as possible!

6 questions answered by our experts.
Sort by:
  • 1
Sorry, we couldn't find any existing answers that matched.Try using some different or simpler keywords, or submit your new question by using the "Ask a Question" button above!
Janet
December 11, 2017
Does the rear drum seal on my model require adhesive? Thanks, Janet. P.s you guys rock! Your videos help me keep my 28 year old dryer running!
For model number de482
PartSelect logo
Hi Janet, Thank you for the question. No you should not need adhesive. There should be small tabs that hold the felt seal in place. Happy to hear the videos are coming in handy! Good luck with the repair!

6 people found this helpful.

Was this helpful?
Thank you for voting!
Gina
April 16, 2018
In addition to the marks on my clothes, i'm also getting small holes in my clothes. Went to take out clothes and the waistband of a pair of jeans was stuck at the rear of the drum in between two pieces of the metal. Could it also be something else that has to be replaced along with the felt?
For model number DE482
PartSelect logo
Hi Gina, Thank you for your question. If the dryer is leaving holes in your clothing, there are a few parts that you will need to check. A worn, torn, or missing front or rear seal could be the reason your clothes are coming out of the dryer torn. The seal is designed to keep clothes from getting between the drum and the front or rear wall of the dryer. If this seal becomes worn or torn, your clothing may become lodged between the two parts. Because the dryer drum keeps turning, the clothes get ripped. Before you can examine and replace a dryer drum's seals, you have to remove the drum. Dryer Drum Glides Torn clothing could mean that the glides in your dryer have become defective. The glides support the drum towards the front of the dryer. They can wear over time, causing the drum to slump or sag toward the front of the dryer. When this happens, a pinch point is created at the top of the drum. It is this pinch point that can tear clothing. If this happens in your dryer, you will have to open it up and replace the entire set of glides. Another possibility for torn clothing could be defective drum support rollers. The rollers support the drum in the back of the dryer. These too can wear over time, causing the drum to slump or sag in the back. Again, a pinch point is created, causing clothing to tear. If it is the drum support rollers in your dryer that have become defective, you will have to replace the entire set of rollers. You will have to open up your dryer's cabinet and remove the drum before you can replace your drum support rollers. I hope this helps. Thank you and have a great day!

4 people found this helpful.

Was this helpful?
Thank you for voting!
Robert
July 1, 2019
I submitted a question 11 days ago. I replaced the drum rollers and axles, a new belt, a new blower, new front tumbler glides (pads/bearings), and I put in a new heating element. Then I got a slight rubbing/faint scraping sound from the front. I then did replace both front and rear felt seals as suggested and still got the noise. Finally, I remembered reading somewhere, but not in the Maytag dryer service manual which I got online that the drum rollers could be misaligned, but I wondered how could they be; they just fit right in on the axles. Well, each axle is held in with a nut and by loosening it, I found there was a little play, probably not more than 1/16 of an inch, so I moved the axles to the right and up, which allowed the rotating drum to move over slightly to the right and slightly up. The gap between the rotating and stationary drum was too close on one side causing the scrapping noise. This is valuable information for other DIY people, so I hope you'll publish it!
For model number LDE9606ACE
PartSelect logo
Hi Robert, Thank you for contacting us back. We appreciate you providing this information to us and we will post it on our website. Thank you.

2 people found this helpful.

Was this helpful?
Thank you for voting!
Bob
December 17, 2019
Just confirming that this seal (made by Whirlpool) i the correct one for my Maytag dryer Thanks!
For model number maytag LDG713
PartSelect logo
Hello Bob and thanks for writing. Yes, it is. Part Number: PS 11740771 is in the list of compatible items for your model. We hope this helps. Please contact us anytime.

1 person found this helpful.

Was this helpful?
Thank you for voting!
Charles
January 21, 2018
Dryer buzzes at startup. Sometimes does not tumble. Could bad felt seal cause this?
For model number LDE7400
PartSelect logo
Hi Charles, Thank you for your question. If the dryer is not tumbling, you will need to check the tumbler and motor belt, the drum support roller, the idler pulley, the idler pulley shaft washer and the front glides. I hope this helps. Thank you and have a great day!

1 person found this helpful.

Was this helpful?
Thank you for voting!
Robert
June 19, 2019
I replaced the drum rollers and axles, a new belt, a new blower, new front tumbler glides (pads/bearings), put in new heater. I get a slight rubbing/faint scraping sound from the front. If i put in a load of towels, the noise gets worse. If i open the dryer door and press the button at the top that keeps the dryer on, turn the dryer on, and then take my hand by the lint filter and pull the bulkhead piece forward, the rubbing/scraping sound stops. The felt seems to be o.K. Not sure if i should replaced the felt and run the dryer to see if it gets better. It also seems that if i take the front panel off and leave the bulkhead on and turn the dryer on this way, i don't get a rubbing/scaping sound. It's like when i put the front panel on, then i get the noise.
For model number LDE9606ACE
PartSelect logo
Hello Robert, thank you for inquiring. This Front or Rear Drum Felt Seal part PS11740771 for your model may fix the issue. You may also want to consider either the Spring Retaining Clip part PS11739294 or the Drive Motor part PS3500893. It sounds more like the Spring Retaining Clip with the description you give about the front panel. We hope this helps.

Was this helpful?
Thank you for voting!
  • 1
You May Also Need ?
Model Cross Reference
This part works with the following models:
PartSelect Number: PS11740771
Manufacturer Part Number: WP314820
Brand
Model Number
Description
Maytag
DE19CA
Dryer - Electric
Maytag
DE19CS
Dryer - Electric
Maytag
DE19CT
Dryer - Electric
Maytag
DE212
Dryer - Residential
Maytag
DE24CA
Dryer - Electric
Maytag
DE24CM
Dryer - Electric
Maytag
DE24CS
Dryer - Electric
Maytag
DE24CT
Dryer - Electric
Maytag
DE25CS
Dryer - Electric
Maytag
DE26CA
Dryer - Commercial
Maytag
DE26CD
Dryer - Commercial
Maytag
DE26CS
Dryer - Electric
Maytag
DE26CT
Dryer - Commercial
Maytag
DE27CA
Dryer - Electric
Maytag
DE27CS
Dryer - Electric
Maytag
DE27CT
Dryer - Electric
Maytag
DE303
Dryer - Residential
Maytag
DE312
Dryer - Residential
Maytag
DE313
Dryer - Residential
Maytag
DE4000
Dryer - Residential
Maytag
DE412
Dryer - Residential
Maytag
DE482
Dryer - Residential
Maytag
DE490
Dryer - Residential
Maytag
DE4910
Dryer - Residential
Maytag
DE512
Dryer - Residential
Maytag
DE590
Dryer - Residential
Maytag
DE5910
Dryer - Residential
Maytag
DE612
Dryer - Residential
Maytag
DE712
Dryer - Residential
Maytag
DE713
Dryer - Residential
Customer Service Representative

Get in touch, we're here to help!

Daily 8am - 9pm EST

Contact Customer Service