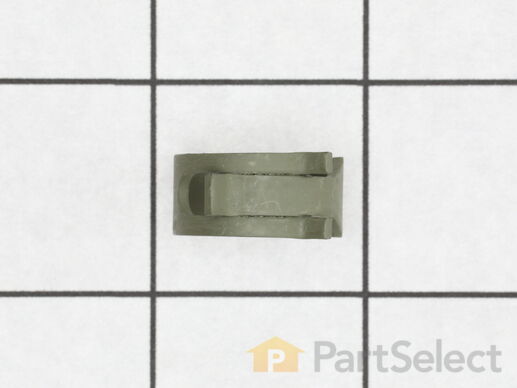
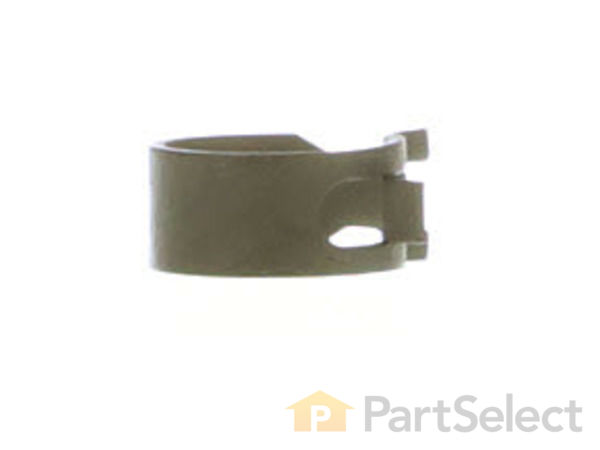
Part Location Diagram of WP312967 Whirlpool Blower Wheel Clamp
See part 20 in the diagram
( Grid squares measure 1x1 inch )
Customer Service Representative

Get in touch, we're here to help!

Daily 8am - 9pm EST

customerservice@partselect.com

Blower Wheel Clamp WP312967

 Fits your JDE2000WC!
★★★★★
★★★★★
3 Reviews

Rated by 10 customers 

Easy 

30 - 60 mins 

Ratings submitted by customers like you who bought this part.

$ 13.61
  In Stock
Get FREE EconoShip on orders over $100! T&C apply

Get this part fast! Average delivery time for in-stock parts via standard shipping: 1.8 days.

 Fits your JDE2000WC!
PartSelect Number PS11740752
Manufacturer Part Number WP312967
Manufactured by Whirlpool
Product Description

Blower Wheel Clamp Specifications

This blower wheel clamp, used in a clothes dryer, is a clamp that holds the blower wheel to the motor shaft. This part helps hold the blower wheel in place to function easily and properly. If your clothes dryer has any of the following symptoms then replacing the clamp can be a solution: making loud noises, not producing enough heat or no heat at all, and/or clothes are taking too long to dry. Make sure to unplug thedryer from power source before installing this part and refer to the installation instructions provided by the manufacturer for further guidance.
How Buying OEM Parts Can Save You Time and Money

How Buying OEM Parts Can Save You Time and Money

Troubleshooting
This part fixes the following symptoms:
Noisy
This part works with the following products:
Dryer, Washer Dryer Combo, Range, Wall Oven.
This part works with the following products:
Maytag, Norge, Magic Chef, Crosley.
Part# WP312967 replaces these:
AP6007635, 02500089, 14209065, 25-7823, 3-12967, 312967, Y02500089
Back to Top
Customer Reviews
Average Rating:
★★★★★
★★★★★
3 Reviews
5.0
Filter By Rating:
  • 5 Stars
    3
  • 4 Stars
    0
  • 3 Stars
    0
  • 2 Stars
    0
  • 1 Star
    0
Sort by:
  • 1
Sorry, we couldn't find any existing reviews that matched. Try using some different or simpler keywords.
  • 1
Customer Repair Stories
 Average Repair Rating: 3.3 / 5.0, 10 reviews. What's this?
Sort by:
  • 1
Sorry, we couldn't find any existing installation instruction that matched.
Blower wheel was wobbly about the shaft, producing a lot of vibration and noise.
Tools required: Stubby socket wrench, 5/16" socket, 1/2" socket, 1/4" socket, #3 Phillips screwdriver, external circlip pliers, straight slip joint pliers. A decently strong electric screwdriver is highly recommended - Milwaukee 2401-20 M12 cordless 1/4" Hex Screwdriver, for example.

Unplug the dryer. Turn off the gas supply.
Other Parts Used:
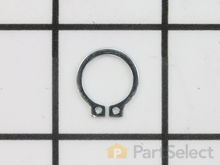
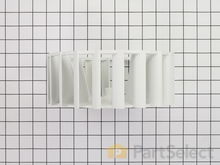
Retaining Ring Blower Wheel Clamp Blower Wheel
  • Christopher from SAN DIEGO, CA
  • Difficulty Level:
    A Bit Difficult
  • Total Repair Time:
    30 - 60 mins
  • Tools:
    Pliers, Screw drivers, Socket set
3 of 3 people found this instruction helpful.
Was this instruction helpful to you?
Thank you for voting!
Dryer making noise
Our Maytag dryer was making a lot of noise..a rumbling that would continue for a few seconds after dryer would stop. Thanks to this web site, I determined it was the blower wheel. The plastic wheel "rounds out" over time, and slips on the shaft. Replacement was very easy...just keep track off all the screws and bolts you take off to access blower wheel...and make sure none of the wires from the front panel come undone. I saved myself a ton of money doing it myself...parts were abount 25$.
Other Parts Used:
Blower Wheel with Clamp Blower Wheel Clamp Retaining Ring
  • Bill from East Greenville, PA
  • Difficulty Level:
    Easy
  • Total Repair Time:
    30 - 60 mins
  • Tools:
    Nutdriver, Pliers, Screw drivers
1 of 2 people found this instruction helpful.
Was this instruction helpful to you?
Thank you for voting!
Need new blower wheel so I changed belt also
The service from PartsSlect was outstanding.
Parts arrived next day and where OEM. I had the
dryer cleaned and operational in 1.5 Hr's
Keep up the great service.


Thank You
Other Parts Used:
Tumbler and Motor Belt Blower Wheel with Clamp Blower Wheel Clamp
  • JAMES from WYNANTSKILL, NY
  • Difficulty Level:
    Really Easy
  • Total Repair Time:
    15 - 30 mins
  • Tools:
    Nutdriver, Pliers, Screw drivers, Socket set
1 of 2 people found this instruction helpful.
Was this instruction helpful to you?
Thank you for voting!
Clunking noise when first turned on
I took the access panel off the back, realized that belt was in very bad shape. Ordered a belt when I got that changed I put it back together and it still had a clunking noise. Found out that the blower wheel was rounded off where it goes over the shaft. So to change that I took the two front screws off, then the four hex screws off of the tumbler guide. There were eight or so screws over the blower wheel, took those out and the clamp on the blower wheel then used the snap ring pliers for the snap ring, then changed the wheel. Problem solved. This website is very helpful I would not have attempted to fix my dryer without this website.
Other Parts Used:
Blower Wheel with Clamp Blower Wheel Clamp
  • Cody from Nebraska City, NE
  • Difficulty Level:
    Easy
  • Total Repair Time:
    1- 2 hours
  • Tools:
    Nutdriver, Pliers, Screw drivers
1 person found this instruction helpful.
Was this instruction helpful to you?
Thank you for voting!
Sounded like rocks tubling in dryer and kept getting louder
Lifted the top, then removed two screws holding on front panel, then removed cover holding this part in place, then used retaing ring plyers to remove the ring, then plyers to remove wheel clamp, took off the blower wheel. After that did everything in reverse to put it back together. And now the dryer is quite.
Other Parts Used:
Blower Wheel - B/10 Models Retaining Ring Blower Wheel Clamp
  • Jerrel from Houston, TX
  • Difficulty Level:
    Really Easy
  • Total Repair Time:
    15 - 30 mins
  • Tools:
    Nutdriver, Pliers
2 of 4 people found this instruction helpful.
Was this instruction helpful to you?
Thank you for voting!
Dryer was making horrible noise,
First I removed the 2 screws behind the door just below the slot for the lint trap(t-15 torx screws). I then popped the top of the dryer off using a flat tipped screw driver and using a 8mm. socket and extension I removed the 2 sheet metal screws from inside of the top corners of the front panel which attach it to the side panels. After that I could lean the front panel away from the unit and unplug the door switch being careful to mark the wires so I wouldn't have to take it apart again in the instance that I hooked them up wrong. I then leaned the front panel out a little more and lifted it off of the pins that lock the bottom of the front panel in. After that, I removed the sheet metal screws(8 mm.) that secure the fan housing cover and removed the old fan which was easy as it had spun the center out of itself and basically fell off, this is what was making all the racket. I removed the c-clip which rides in the groove at the end of the shaft with a flat tip and a pair of pliers, slid the new fan blade over the shaft, gave it a few light taps with the end of a hammer handle to seat it properly and installed the tension clamp with some pliers and popped the c-clip back on. I reversed the tear down procedures and reassembled the drier. Thanks to a little no-how, mechanical inclination, and the right parts, I was able to restore my drier to like new, virtually silent operation for about $40 as opposed to buying a new unit or paying a repairman $80 to $100 per hour plus parts to do the job. PartSelect.com made specifying and ordering the correct parts the first time a breeze and their prices are a bargain to boot.
Thanks,
Other Parts Used:
Blower Wheel - B/10 Models Blower Wheel Clamp
  • Tim from Jacobus, PA
  • Difficulty Level:
    A Bit Difficult
  • Total Repair Time:
    30 - 60 mins
  • Tools:
    Nutdriver, Pliers, Screw drivers
29 of 31 people found this instruction helpful.
Was this instruction helpful to you?
Thank you for voting!
Loud rumbling noise when dryer operates
Frist I removed the front cover panel via removing 2 screws. Second I disconnected the door switch wires. Third I removed the 4 screws that hold the drum onto the rollers and guides that allows access to the blower wheel assembly cover. Fourth I remover the blower wheel assembly cover to gain access to the blower wheel. Fifth using the retaining removal tool removed the retaining ring from the shaft then removed the blower wheel using plyers. Then reassembled all of the parts and enjoy a quiet dryer again.

Thank you parts select!!!
Other Parts Used:
Blower Wheel with Clamp Retaining Ring Blower Wheel Clamp
  • Bruce from Cromwell, CT
  • Difficulty Level:
    Really Easy
  • Total Repair Time:
    15 - 30 mins
  • Tools:
    Pliers, Screw drivers, Socket set
10 of 10 people found this instruction helpful.
Was this instruction helpful to you?
Thank you for voting!
Blower wheel stripped
opened the front with 2 screws, removed 4 screws to access blower, removed spring clamp and split ring, pulled off old part and replaced with new and put back together.
Other Parts Used:
Blower Wheel with Clamp Blower Wheel Clamp
  • john from North Liberty, IA
  • Difficulty Level:
    Easy
  • Total Repair Time:
    1- 2 hours
  • Tools:
    Nutdriver, Pliers, Screw drivers
1 person found this instruction helpful.
Was this instruction helpful to you?
Thank you for voting!
Dryer was too hot. Not enough air flow. Worn wheel hub.
I removed two screws holding the front panel. Then, the front dryer bearing was removed by taking out four screws. With the blower wheel exposed, I removed the snap ring and wheel clamp and removed the wheel. The new wheel was an exact replacement and was easily installed.
Other Parts Used:
Blower Wheel with Clamp Blower Wheel Clamp
  • Charles from Hoffman Estates, IL
  • Difficulty Level:
    Easy
  • Total Repair Time:
    15 - 30 mins
  • Tools:
    Nutdriver, Pliers, Screw drivers
1 of 3 people found this instruction helpful.
Was this instruction helpful to you?
Thank you for voting!
Dryer had been noisy, then stopped heating.
Opened dryer and removed drum. Replaced old blower wheel with new wheel, clamp and clipwhich was worn and was responsible for the noisy operation. Plugged in new ignition coils then replaced drum. Dryer works great now.
Other Parts Used:
Blower Wheel Blower Wheel Clamp Retaining Ring M Series New Style Coil Kit
  • Roberta from St. Louis, MO
  • Difficulty Level:
    Easy
  • Total Repair Time:
    30 - 60 mins
  • Tools:
    Pliers
18 of 25 people found this instruction helpful.
Was this instruction helpful to you?
Thank you for voting!
  • 1
Questions and Answers

Be the first to ask our experts a question about this part!

You May Also Need ?
Model Cross Reference
This part works with the following models:
PartSelect Number: PS11740752
Manufacturer Part Number: WP312967
Brand
Model Number
Description
Roper
2045B0A
Range - Electric
Roper
2045B1A
Range - Electric
Roper
2055B0A
Range - Electric
Roper
2055B1A
Range - Electric
Roper
2055B2A
Range - Electric
Roper
2065B0A
Range - Electric
Roper
2065B1A
Range - Electric
Roper
2065B2A
Range - Electric
Roper
2075B0A
Range - Electric
Roper
2075B1A
Range - Electric
Roper
2075B2A
Range - Electric
Roper
2092B0A
Range - Electric
Roper
2095B0A
Range - Electric
Roper
2095B1A
Range - Electric
Roper
2095B2A
Range - Electric
Norge
7002A
Dryer - DRYER
Norge
7215A
Dryer - ELECTRIC DRYER
Norge
7215A REV A
Dryer - Norge Dryer Model 7215A REV A (7215AREVA) Parts
Norge
7215A REV B
Dryer - Norge Dryer Model 7215A REV B (7215AREVB) Parts
Norge
7215A REV C
Dryer - Norge Dryer Model 7215A REV C (7215AREVC) Parts
Norge
7215A REV D
Dryer - Norge Dryer Model 7215A REV D (7215AREVD) Parts
Norge
7215A REV E
Dryer - Norge Dryer Model 7215A REV E (7215AREVE) Parts
Norge
7215A REV F
Dryer - Norge Dryer Model 7215A REV F (7215AREVF) Parts
Norge
7215A REV G
Dryer - Norge Dryer Model 7215A REV G (7215AREVG) Parts
Norge
7216A
Dryer - ELECTRIC DRYER
Norge
7216A REV A
Dryer - Norge Dryer Model 7216A REV A (7216AREVA) Parts
Norge
7216A REV B
Dryer - Norge Dryer Model 7216A REV B (7216AREVB) Parts
Norge
7216A REV D
Dryer - Norge Dryer Model 7216A REV D (7216AREVD) Parts
Norge
7216A REV E
Dryer - Norge Dryer Model 7216A REV E (7216AREVE) Parts
Norge
7216A REV F
Dryer - Norge Dryer Model 7216A REV F (7216AREVF) Parts
Customer Service Representative

Get in touch, we're here to help!

Daily 8am - 9pm EST

Contact Customer Service