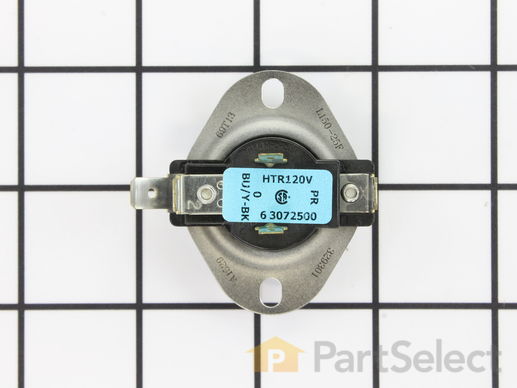
Part Location Diagram of WP307250 Whirlpool Multi-Temperature Gas Thermostat
See part 8 in the diagram
( Grid squares measure 1x1 inch )
Customer Service Representative

Get in touch, we're here to help!

Daily 8am - 9pm EST

customerservice@partselect.com

Multi-Temperature Gas Thermostat WP307250

★★★★★
★★★★★
5 Reviews

Rated by 6 customers 

Really Easy 

15 - 30 mins 

Ratings submitted by customers like you who bought this part.

$ 72.15
  In Stock
Get FREE EconoShip on orders over $100! T&C apply

Get this part fast! Average delivery time for in-stock parts via standard shipping: 1.8 days.

PartSelect Number PS11740685
Manufacturer Part Number WP307250
Manufactured by Whirlpool
Product Description

Multi-Temperature Gas Thermostat Specifications

Also known as cycling thermostat with internal bias heater - L150-25 - 5 terminal.
How Buying OEM Parts Can Save You Time and Money

How Buying OEM Parts Can Save You Time and Money

Troubleshooting
This part works with the following products:
Dryer.
This part works with the following products:
Maytag.
Part# WP307250 replaces these:
3-7250, 307250
Back to Top
Customer Reviews
Average Rating:
★★★★★
★★★★★
5 Reviews
5.0
Filter By Rating:
  • 5 Stars
    5
  • 4 Stars
    0
  • 3 Stars
    0
  • 2 Stars
    0
  • 1 Star
    0
Sort by:
  • 1
Sorry, we couldn't find any existing reviews that matched. Try using some different or simpler keywords.
  • 1
Customer Repair Stories
 Average Repair Rating: 3.9 / 5.0, 6 reviews. What's this?
Sort by:
  • 1
Sorry, we couldn't find any existing installation instruction that matched.
Auto Dry not working (would not advance)
Once you take off the front panel of the dryer (easy to do by removing the 2 screws in front, pivoting the panel up & lifting off), the thermostat is right there in front and very easy to replace. Once you transfer the wires to the new thermostat (I did it one-by-one), the 2 screws holding the thermostat are easily removed using a nutdriver. Once the new thermostat was installed, the Auto Dry worked again.

Note: I changed the timer first, which didn't fix the problem. If I were to do it again, I'd replace the thermostat first (it's less expensive), and then change the timer (very easy to do also) if replacing the thermostat doesn't do the trick. But I am ok with changing both the thermostat and timer, since I plan to keep this dryer going as long as I can. This Maytag dryer is very high quality, and has served me well.
  • Steven from SEWELL, NJ
  • Difficulty Level:
    Easy
  • Total Repair Time:
    30 - 60 mins
  • Tools:
    Nutdriver, Screw drivers
1 person found this instruction helpful.
Was this instruction helpful to you?
Thank you for voting!
dryer wouldn't dry
a lady from church couldn't get her dry to dry. older maytag gas dryer. built really good. took off the front panel, tested the different thermostats and found the one that was broken. replaced the igniterwhile I was at it. hooked up the exhaust and fired her up. Make sure all of the lint is vac'ed out of the system. thats what built up and cooked the thermostat.
Other Parts Used:
Multi-Temperature Gas Thermostat Flat Style Igniter
  • douglas from phillipsburg, NJ
  • Difficulty Level:
    Easy
  • Total Repair Time:
    15 - 30 mins
  • Tools:
    Nutdriver, Screw drivers
10 of 12 people found this instruction helpful.
Was this instruction helpful to you?
Thank you for voting!
Maytag Dyer stopped heating
My 20 yr old Maytag dryer had experienced this problem about 10 years ago. At that time I replace the Gas Dyer Radiant Flame sensor and it fixed the problem. I figured a sensor went bad again however I opted to replace all of the sensors at once thinking I'm avoiding potential future issues and the dryer will out live me. Replacing the sensors is a piece of cake on my Maytag. A nutdriver and srewdriver was all that I needed. PartSelect was great to deal with and the parts did the trick.
Other Parts Used:
Multi-Temperature Gas Thermostat Thermal Fuse (Limit: 183) High Limit Thermostat Dryer Radiant Flame Sensor
  • Doug from Walden, NY
  • Difficulty Level:
    Really Easy
  • Total Repair Time:
    15 - 30 mins
  • Tools:
    Nutdriver, Screw drivers
71 of 99 people found this instruction helpful.
Was this instruction helpful to you?
Thank you for voting!
Dryer was getting really hot in normal drying mode
This is a gas dryer. I was able to access the thermostat through the small front access panel. Not easy to see but with a short nut driver I could take out the two screws. I was able to pull the thermostat to the front panel hole and switch the wires. Putting it back in was a challange since I had to do it by feel since I could not look and get my arm in at the same time. Suggest anyone that does this put a small piece of paper around the screw to hold it in the driver
  • Green from Germantown, TN
  • Difficulty Level:
    Really Easy
  • Total Repair Time:
    30 - 60 mins
  • Tools:
    Nutdriver
7 of 10 people found this instruction helpful.
Was this instruction helpful to you?
Thank you for voting!
No flame
Firts replaced a thermostate - did not fix the proble. ( had a glow from the starter but no flame.)

checked igniter sensor OK (got no resistance) so replaced the two coils that sit on top of the gas burner. With new coils noticed a much brighter glow from the igniter and the gas line opened up to produce a flame

Dryer has workd successfully for the last 5 loads.

Able to run dryer with the front removed by holding in the microswitch activated when door is closed.
  • Christopher from Toms River, NJ
  • Difficulty Level:
    Easy
  • Total Repair Time:
    15 - 30 mins
  • Tools:
    Screw drivers
5 of 6 people found this instruction helpful.
Was this instruction helpful to you?
Thank you for voting!
The dryer would run continuously when in auto
I removed the two screws on the front of the dryer and pulled out the bottom of the dryer front until the clips on the top came loose. Next I removed the two screws that hold the thermostat in place and then switched the wires from the old one to the new one. I did them one at a time to ensure that they didn't get mixed up. After that I reinstalled the thermostat and then replaced the front of the dryer. The timer now advances when it is in auto mode.
  • Patrick from Marysville, WA
  • Difficulty Level:
    Really Easy
  • Total Repair Time:
    15 - 30 mins
  • Tools:
    Nutdriver, Pliers
18 of 18 people found this instruction helpful.
Was this instruction helpful to you?
Thank you for voting!
  • 1
Questions and Answers

Ask our experts a question about this part and we'll get back to you as soon as possible!

6 questions answered by our experts.
Sort by:
  • 1
Sorry, we couldn't find any existing answers that matched.Try using some different or simpler keywords, or submit your new question by using the "Ask a Question" button above!
Gary
February 5, 2018
The timer works when set to a dry time such as 60 mins etc. The timer advances and shuts off the dryer in this case. However, when it is set on auto dry such as "more dry" or "less dry" it does not shut off or move. Could this be a thermostat issue or a timer issue? Which is more likely? Thank you!
For model number mdg2600bww
PartSelect logo
Hi Gary, Thank you for the question. It is most likely a timer issue. You can verify by testing the thermostat, it should read closed. Hope this helps!

1 person found this helpful.

Was this helpful?
Thank you for voting!
Celeana
August 31, 2017
My apologies, i'm not sure if this changes your response; but the timer works during timed /air fluff - just not during auto dry.
For model number MDG2500BWW
PartSelect logo
Hi Celeana, Thank you for getting back to us. If you timer is not advancing I would check the timer, the timer dial skirt, the timer knob, the m series new style coil kit, the thermostat and the radiant flame sensor. I hope this helps. Thank you and have a great day!

Was this helpful?
Thank you for voting!
Celeana
August 31, 2017
The dryer (which is about 10+ years old) is heating up during the auto dry and timed dry/air fluff; however, the timer does not advance when using auto dry. In auto dry mode, the dryer will just continue to run unless manually stopped. The lint trap and filter are both clear/cleaned. Would replacing this part cause the timer to "re-activate" during auto dry?
For model number MDG2500BWW
PartSelect logo
Hi Celeana, Thank you for the question. Looking through the symptoms it sounds like you will need to replace the timer. This dryer timer is used to control the unit's cycles by regulating the length of time that power is directed to each setting. Hope this helps!

Was this helpful?
Thank you for voting!
Related Parts:
Dean
December 8, 2019
Timer keeps advancing through cycles will not shut off replaced timer does not do this all the time
For model number LDG7304AAE
PartSelect logo
Hello Dean, thank you for your question. We would recommend testing the thermostats, gas coils, flame sensor and igniter. I hope this helps.

Was this helpful?
Thank you for voting!
Frank
September 9, 2021
Buzzer goes off when trying to start dryer
For model number Mdg9206aww
PartSelect logo
Hi Frank, Thank you for your question. If your dryer is making a buzzing sound when you press the start button, there are some parts that you will need to check to see which one is causing the issue. You will need to check the motor, the timer, the start switch and the buzzer. You will find the information on how to test these parts under Free Repair Help and Instant Repairman on our website. We hope this helps! Good luck with the repair!

Was this helpful?
Thank you for voting!
Related Parts:
Bob
September 21, 2023
WP307250 has 5 terminals, I have no heat, not sure which two to test. Igniter is good (new), terminal fuse is good (new), limit switch WP303395 has continuity, WP307250 is pulled on the bench.
For model number DG7600
PartSelect logo
Hello Bob, thank you for reaching out to PartSelect. You may need to follow the simple steps to test the continuity of the cycling thermostat. First remove all the wires and then place the probes of the multimeter on inner two terminals, those are on 90 degree. And then test the outer two terminals, those are on 90 degree. If the resistance is 0 ohms, on both the inner and outer terminal, it means that the part is not faulty. Next, you may need to replace the flame sensor, part number PS11741429, to fix the issue. Let us know if you have further questions!

Was this helpful?
Thank you for voting!
Related Parts:
  • 1
You May Also Need ?
Model Cross Reference
This part works with the following models:
PartSelect Number: PS11740685
Manufacturer Part Number: WP307250
Brand
Model Number
Description
Maytag
BDG7600
Dryer - Gas
Maytag
BDG7800
Dryer - Gas
Maytag
DG4910
Dryer - Residential
Maytag
DG5910
Dryer - Residential
Maytag
DG7500
Dryer - Residential
Maytag
DG7600
Dryer - Residential
Maytag
DG7800
Dryer - Residential
Maytag
DG8200
Dryer - Residential
Maytag
DG8300
Dryer - Residential
Maytag
DG8420
Dryer - Residential
Maytag
DG8500
Dryer - Residential
Maytag
DG8600
Dryer - Residential
Maytag
GDG4910
Dryer - Residential
Maytag
GDG5910
Dryer - Residential
Maytag
GDG7500
Dryer - Residential
Maytag
GDG7600
Dryer - Residential
Maytag
GDG7800
Dryer - Residential
Maytag
GDG8200
Dryer - Residential
Maytag
GDG8300
Dryer - Residential
Maytag
GDG8420
Dryer - Residential
Maytag
GDG8500
Dryer - Residential
Maytag
GDG8600
Dryer - Residential
Maytag
LDE4000ACL
Dryer - Residential
Maytag
LDE4000ACW
Dryer - Residential
Maytag
LDE4000ADL
Dryer - Residential
Maytag
LDE4000ADW
Dryer - Residential
Maytag
LDE7400ACL
Dryer - Residential
Maytag
LDE7400ACW
Dryer - Residential
Maytag
LDE7400ADL
Dryer - Residential
Maytag
LDE7400ADW
Dryer - Residential
Customer Service Representative

Get in touch, we're here to help!

Daily 8am - 9pm EST

Contact Customer Service